The e-learning industry keeps growing at a rapid pace. By 2025, it is expected to reach $325 billion, up from the estimated $107 billion last year. What’s even more interesting is that online courses specifically comprise $46 billion of the total e-learning market.
These numbers should come as no surprise as teaching online has become easier than ever. Anyone can now sign up with an e-Learning platform and publish an online course, and the great availability of learning management systems (LMS), many of which support SCORM standards, allows you to host an e-course on your own website.
Among students, online courses have gained major popularity due to the fact that the work fields are changing rapidly. New technologies emerge, innovative tools enter the mainstream, and new skill sets are rapidly becoming in demand. Traditional educational institutions are slower to move when it comes to offering “hot” curriculums based on the industry’s latest best practices. Also, traditional degrees still come with a high price tag and a lot of time commitment. That’s why many people are now opting for e-learning – a simple way to gain hands-on skills for an affordable price from top-notch experts. Moreover, SCORM-compliant courses enhance the learning experience by providing consistency and interoperability, ensuring that learners can access content smoothly regardless of the LMS being used.
For experts in their fields, it’s no longer that challenging to create an online course as this post illustrates.
Creating Online Courses: a Step-by-Step Guide
The first essential step to develop online training courses is to define a working framework. Typically, most creators stick with the following process:
- Topic Ideation. Popular and profitable e-courses teach students how to solve a very specific problem – master Pinterest marketing; learn how to sew a dress or understand the basic of Python coding. They lean towards the practical side of things with most learning materials illustrating how to get something done, rather than explain the theoretical basis.
- Course outline. Mold your topic into a detailed outline. This would be the most challenging and research-heavy part of your online course creation. More on this in the next section.
- Content preparation and gathering. Once you have the outline ready, review once again all your notes, research and the existing content you already have. Define the learning blocks you will need to create and start writing out the information.
- Create slides. Microsoft PowerPoint can be used for instructional design. There’s already a lot of pre-made PPT templates out there so you will not have to sweat too much over the design nuances. Though recently, Google Slides became a good alternative to PowerPoint for education professionals as well.
- Work on Video. Script and storyboard several videos that will serve as means to demonstrate, emphasize and summarize important points you have made in each unit. You can also replace videos with animated, interactive PowerPoint presentations and screencasts (more on this in the last section).
- Brush-up your modules and course plan. When most of your content and educational slides are ready, shape those into dedicated e-modules (based on your outline) and scrutinize your final course plan. Make sure that there are no obvious gaps and each section offers a clear learning outcome.
- Test. Recruit a small group of “beta” students to review your course and share their detailed feedback. You can offer them a discounted price as an insensitive to participate.
These are the essential steps to creating an online course. However, each stage assumes a lot of work and additional sub-steps. Below, you will find tips addressing the most challenging aspects of how to create an online course.
How to Create an Online Course Outline
Writing an online course outline can get overwhelming pretty quick – you have so many ideas and so much information to share! But you don’t need to try and squeeze every bit of knowledge you have into a single course. In fact, most learners prefer bite-sized information that offers clear guidance and instructions. Hence, aim to create 3-10 minutes lessons that are easy-to-skim, if possible, SCORM-compatible to ensure broad accessibility.
Here’s one quick trick to help you come up with a great course outline.
Define the course problem. Before you writing anything down, ask yourself the following questions:
- Who is this course for?
- What are they struggling with?
To create online courses you will need to deeply understand your audiences’ struggles and pain points. Ultimately, your course should teach how to solve a problem as much as it may be about teaching people how to use XYZ (e.g. a certain tool).
There are five good ways to learn what your students want:
- Be them
- Hang out
- Observe
- Interview
- Co-create
Bonus: You can also rely on an empathy map template to understand your audience better.
When you do your research on social media and in online communities, jot down the exact words they are using to describe a certain problem. For instance, if someone’s trying to improve their lead generation strategy, they are probably struggling with the following:
- How do I optimize Facebook ad targeting to improve ROI?
- What’s a good lead magnet for my B2B company?
Once you’ve identified at least 8 particular pain points, you can move on to the next research stage – proposing a solution.
Think what offerings, resources and content you can provide to help the person deal with their issue. Again, there’s a bunch of options to choose among:
- Offer a weekly webinar master class for topic X.
- Video walkthroughs explaining how something is done.
- Software discount or credit related to your course.
- 1:1 Skype Coaching Session
- Educational slides outlining the general framework
- Worksheets, templates, checklists and other materials that will help the person accomplish their task.
Once you have everything ready, you can start outlining your course – the process will go simple from here:
| Pain Point | Solution | Outline |
|---|---|---|
| How do I approach cold emailing on LinkedIn? Do I need a premium account? What should I write to people? | A presentation providing the general framework for cold emailing on LinkedIn + downloadable templates for writing cold emails | How to Cold Email on LinkedIn (Module 2) – framework + email templates |
| What hooks should I include to my email to increase responses/open rates? | Copywriting presentation + downloadable cheat sheet + group copy teardown session once a week | Copywriting Mastery: How to Write Killer Cold Emails (Module 3).Tricks, formulas and examples for improving open rates, CTRs and ROI |
Once you have a rough draft of your e-course outline, test it against one of the popular instructional design models.
Merrill’s Principles of Instruction (MPI)
Developed by David Merril in 2002, this model integrates the five principles of learning:
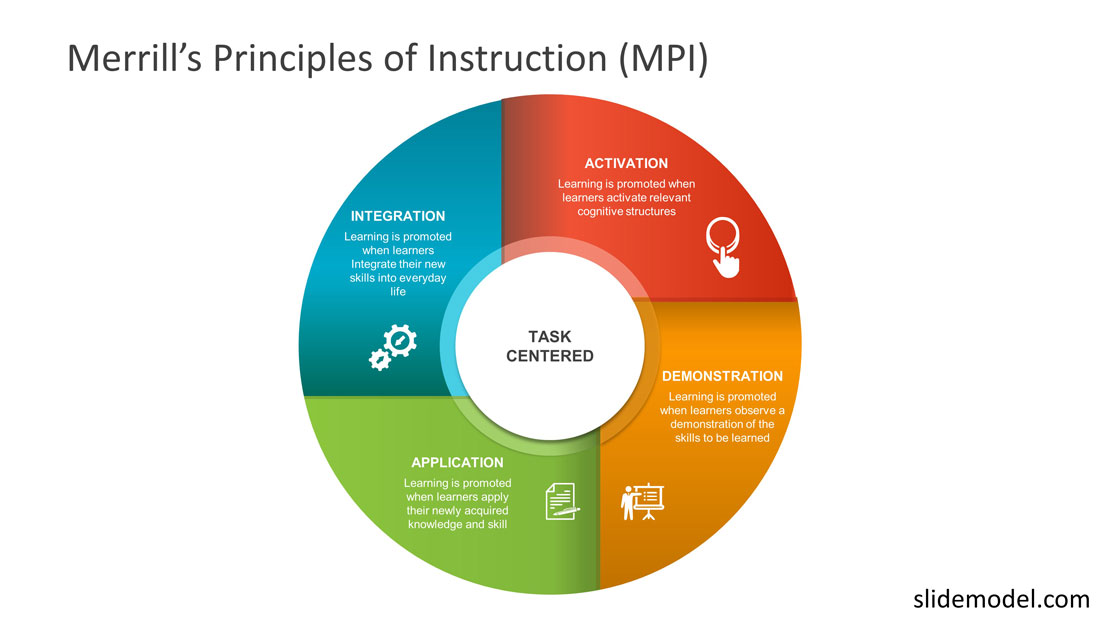
- Task-centered: Every student should be able to relate to the problems and tasks described in the course.
- Activation: The course must activate the current knowledge of the user, and help them connect what they already know with the new concepts.
- Demonstration: Successful courses demonstrate the knowledge both visually and through storytelling. That’s why presentations have such a captivating power – by combining both methods, they activate different regions of the brain and assist information retention.
- Application: Students should be given a chance to apply the new knowledge, practice and learn from mistakes. Quizzes, worksheets and checklists serve great for this purpose.
- Integration: The course has to allow for integration of the acquired knowledge into the learner’s day-to-day through discussion, reflection, and/or presentation of new knowledge.
Gagne’s Nine Events of Instruction
Robert Gagne’s framework is based on the behaviorist approach to learning and encourages authors to follow the next 9 steps when designing online courses:
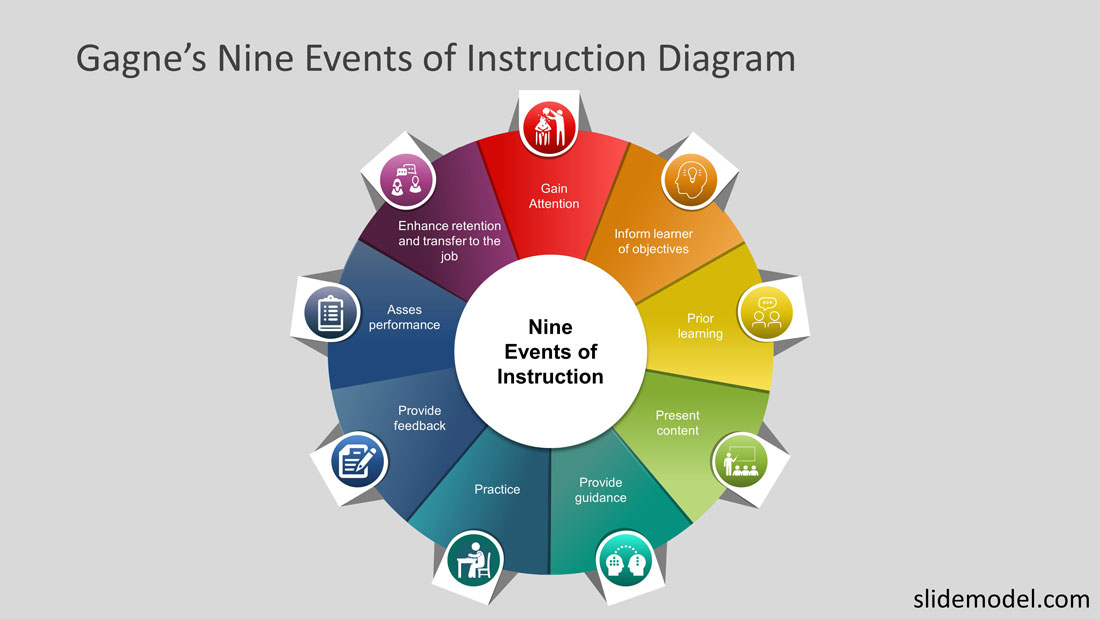
- Gain attention – apply stimuli to instantly catch or engage the audience e.g. ask a thought-provoking question, share an unexpected idea. Check our previous post for more ideas on starting a presentation with a unique twist.
- State objectives – summarize the expected outcomes and criteria for measuring achievement in your course.
- Prior learning – appeal to existing knowledge before introducing new concepts and build on it.
- Present Content – deliver the information in bite-sized chunks (e.g. one big idea/concept per slide).
- Provide Guidance – backup your deliver with examples, case studies, and other instructional materials to supplement your main narrative.
- Practice – add various activities to facilitate recall, utilization, and evaluation of knowledge.
- Provide Feedback – reinforce learning with quick feedback.
- Assess Performance – Test the student’s knowledge with established criteria.
- Enhance Retention and Transfer To The Job – don’t forget about incorporating content retention strategies for further usage (downloadable materials).
Now keeping all those principles in mind, let’s move on to educational presentation design.
How to Create Educational Slides for Your Online Course
Before you design your first slide in PowerPoint, make sure that your storyboard in ready. A storyboard is a master document where you outline the course objectives and line up all the course content (based on the tips we have provided in the previous section).
Only when you have a good chunk of information ready for a module, start relaying it to PowerPoint. Your authoring process should look as follows:
- Plan – have your course outline and storyboard ready.
- Make your presentation.
- Record your slide deck with audio.
- Delivery – host your presentation in an LMS system and make some final adjustments.
Below you’ll find format and layout tips, advice on fonts and navigation, plus some great educational PowerPoint templates you can swipe.
Slide Format and Layout: General Tips
Mind the platform where you will host your course. Most LMS are PowerPoint-friendly, meaning that you won’t need to adjust your slides size. If you plan to animate your PowerPoint presentation and host it on YouTube, use the 16 by 9 aspect ratio. Other LMS may use a different format but the aspect ratio and slide format is something to keep in mind before you publish an online course.
Follow the Bullet Rule of 6. Don’t add more than 6 bullets per slide, and more than 6 words per bullet. Otherwise, the students may experience cognitive overload and lose focus. Instead of listening to your instructions, their attention will dwell on reading the texts.
Limit yourself to 20 to 30 seconds on each slide. You want the eLearning presentation to progress at a steady pace, rather than remain stagnant on a specific screen and rush through another one. Maintain a steady pace to ensure high learner engagement.
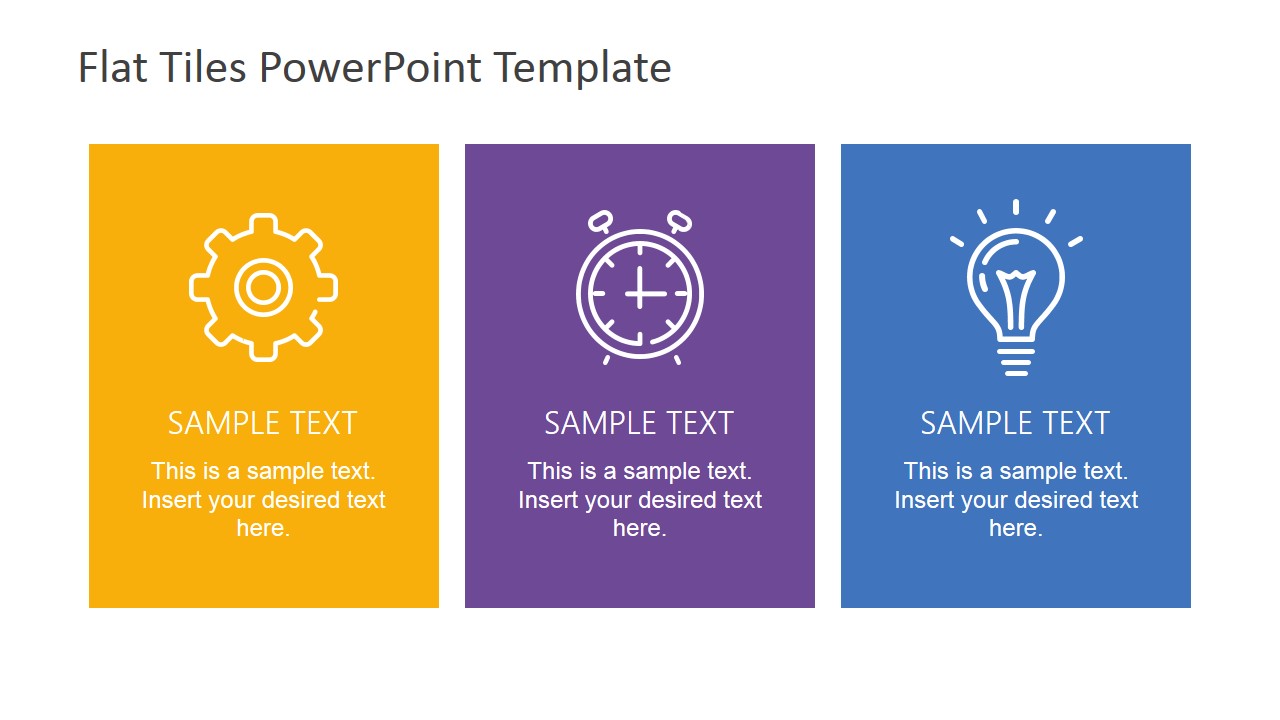
The “Rule of Three”: split your slide into three sections of equal size. Such layouts always look more memorable and engaging, without cramping the slide space. “How It Works” slides in particular benefit from this trick:
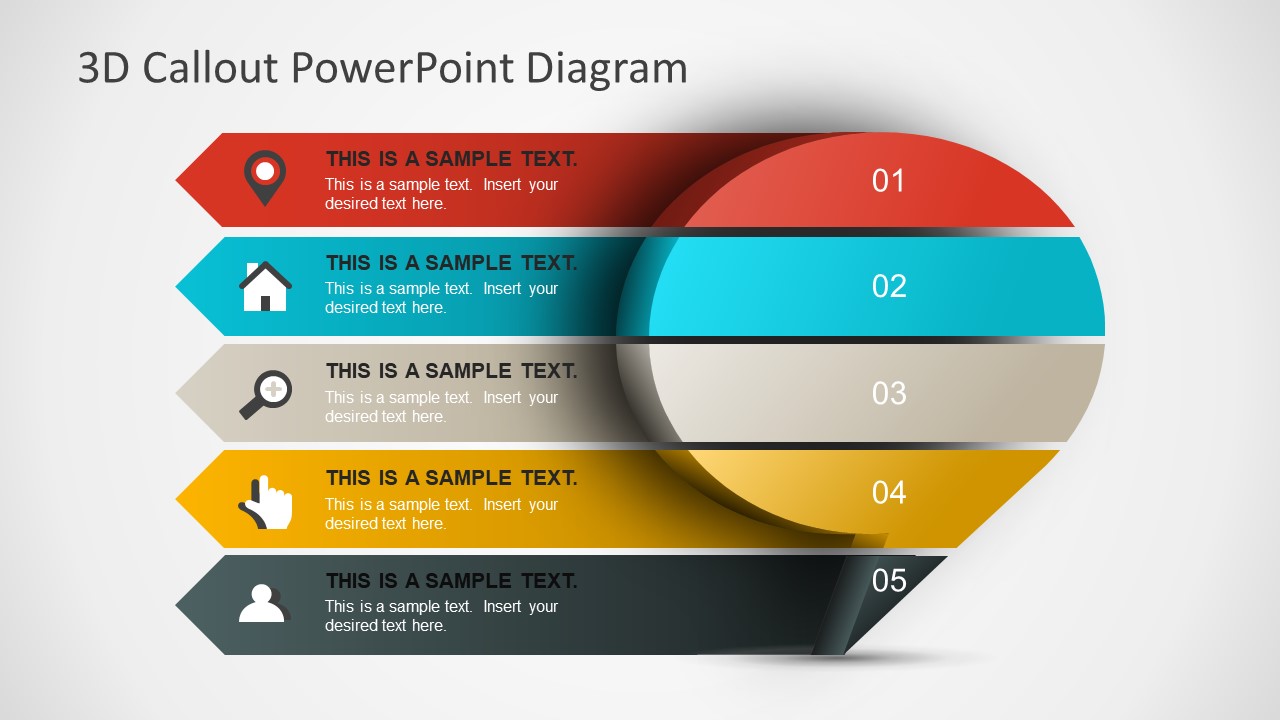
Use big pointers. When presenting the reader with a lot of facts/stats at once, it can be challenging to make your slide look good. Opt for using charts or icons to visualize certain points, and include the explanations below those.
Instructional Design Essentials for eLearning Presentations
Maintain a strong focus on the learning goals. Every element of your eLearning presentation should help learners get closer toward their primary goal. For every concept explained within a specific slide ask if the student will be able to:
- Recall and remember the key information?
- Explain the ideas or concepts in their own words?
- Use the provided information in some way?
- Distinguish between the different concepts mentioned?
- Create something new based on acquired knowledge/skills?
Introduce non-linear navigation. Traditional presentations typically have a linear flow that may not always be effective for eLearning, when more repetition might be necessary. Did you know that PowerPoint allows you to create content groups and branched menus to add more interactivity to your slides?
Here’s how to make an interactive PowerPoint presentation. Break a few presentation sections down into specific groups. For each group, you will need to build the main menu. Use PowerPoint’s hyperlinks to accomplish that. They’ll allow you to branch to the slide of your choice.
Now your students can navigate around your presentation with ease. They also have more freedom to click where they want and interact with specific elements/information, which adds some extra engagement. The learners can also choose between reviewing all the sections one after another or choosing to engage with a specific one.
Add audio commentary. Alternatively, you can make your presentation more interactive using voice. Record your commentary to a slide and save it in either of the following formats: MP3, WMA, WAV. Drag & drop the audio file to PowerPoint. Next, you will need to click on the sound icon, and then open “Playback” tab in the tool panel to adjust audio settings. If you do not want the sound to overlap on all slides, uncheck the “Play Across Slides” and “Loop Until Stopped” boxes. You can also sync the audio to the animations on your presentation by adjusting the slide and timer behind the sound icon.
P.S. Also instead of using the standard PowerPoint animation and clip art (which frankly, looks too 90s), opt for a more modern pre-animated template:
Add “Easter Eggs” to your presentation. Gamification is a well-known method of increasing students’ engagement and retainment. Here’s one simple gamification hack for PowerPoint presentation that does not require you to purchase any additional software.
Add secret navigation to your online course. Whenever a learner clicks on some wrong element, show up a witty comment or encouragement to check another section – your course Easter Egg.
Add a slide rewind button. Learners should always have an easy way of playing the same information once again. Instead of asking them to click back, add a rewind button to your PowerPoint presentation. Here’s how it’s done:
- Find a replay icon to use.
- Add it to PowerPoint and add a link to the icon so that it directs to the slide it’s placed on.
- Test how all the buttons work on your presentation and ensure that they don’t mess up your other navigation.
Create a glossary to define new terms. When you need to quickly define a term or two, use the notes section as a quick glossary.
Create a SCORM compatible course. SCORM standards alongside these instructional design models enhances the delivery and effectiveness of your course by ensuring that content is well-structured, trackable, and easily transferable between different LMS platforms. You can convert your PPT presentations to SCORM format using 3rd. party PPT to SCORM tools, add-ins or even manually.
Fonts and Font Pairings
Avoid using overly decorative or script fonts as those will be harder to comprehend, especially on smaller screens. Go classy with a sans serif or a serif font for your main texts.
Some of the trending fonts were Lydian, Euclid, Tiempos and Supria Sans. They are more creative and can add a unique flair to your presentation. However, mind that these newer fonts are not commonly found on all computers. You can also refer to our article about best fonts for PowerPoint presentations for an updated list of font pairings to use in your courses or slide decks.
So if you are sharing your presentation with someone else, you will need to also give them a zip file for downloading the font. Otherwise, your presentation may look awkward on their computer. But this isn’t a problem if you chose to host your presentation online.
Finally, if you need more presentation design tips, check out the following posts we’ve published:
- 23 PowerPoint Presentation Tips for Creating Engaging and Interactive Presentations
- How to Start a Presentation: 5 Strong Opening Slides and 9 Tricks To Test
- How to Effectively use the 20/60/20 Rule for Your Audience
- Turning Your Data into Eye-opening Stories
Now you have all the resources you need to create online courses. And if you want to speed up the development of your online course, check out our pre-made PowerPoint templates that can be easily customized for your needs!