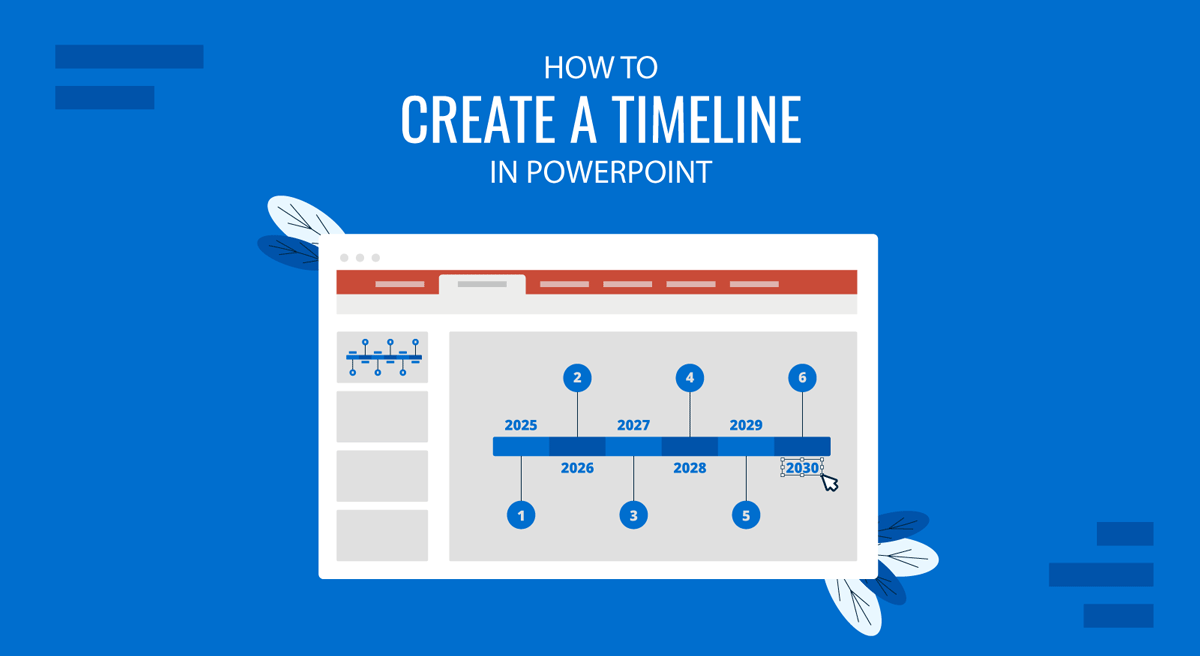
Knowing how to make a timeline in PowerPoint is a handy skill even advanced PowerPoint users might find elusive. This is because unless you are using PowerPoint templates or Google Slides templates in PowerPoint with relevant layouts, making a PowerPoint timeline requires a few careful considerations and some effort to arrange slide elements in the right order. In what follows, we will show you the various methods you can use to create a timeline in PowerPoint. We also recommend that you see our comprehensive article on how to present a timeline for additional information regarding everything from how to start a presentation to how to end a presentation using timelines.
Method 1 – How to Create a Timeline in PowerPoint using SmartArt Graphics
One of the easiest methods to create a PowerPoint timeline is to use SmartArt Graphics. In the example below, we will demonstrate how to make a project timeline using SmartArt Graphics.
Example: How to Make a Project Timeline in PowerPoint using SmartArt Graphics
Step 1: Open SmartArt Graphics in PowerPoint
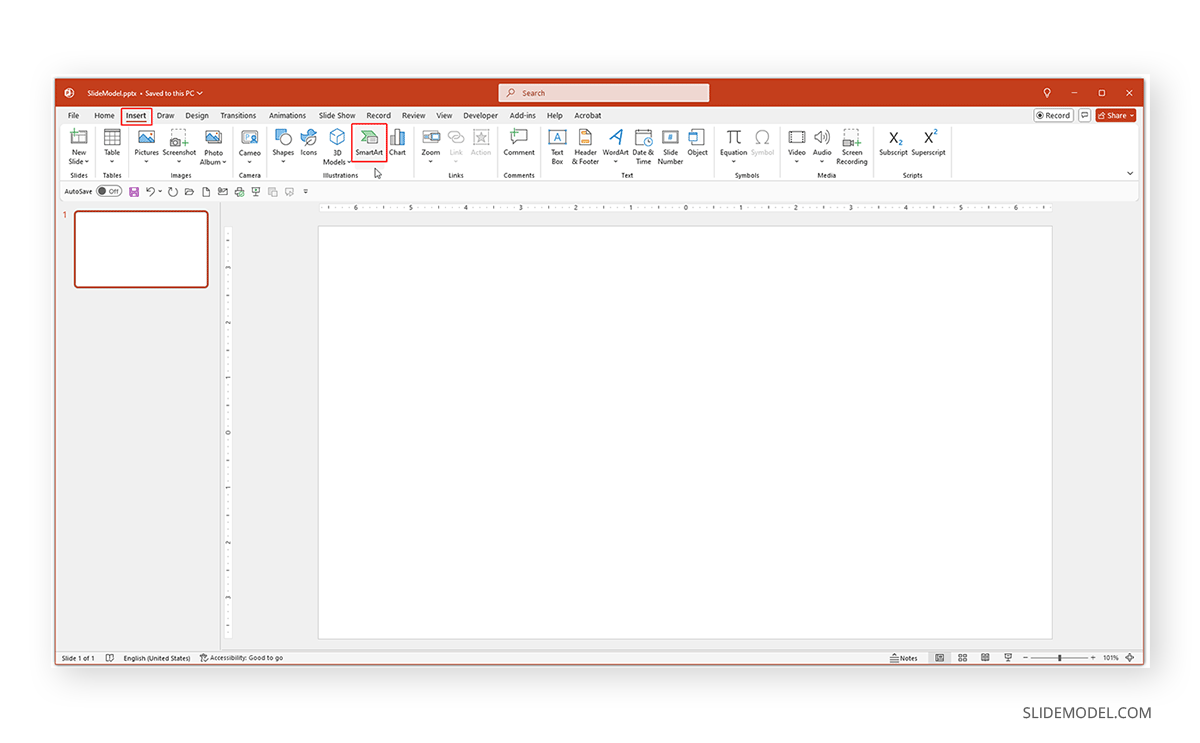
To use SmartArt to create a timeline, go to Insert -> SmartArt to select from the designs available for SmartArt Graphics in PowerPoint.
Step 2: Insert Timeline in PowerPoint using a Process Diagram
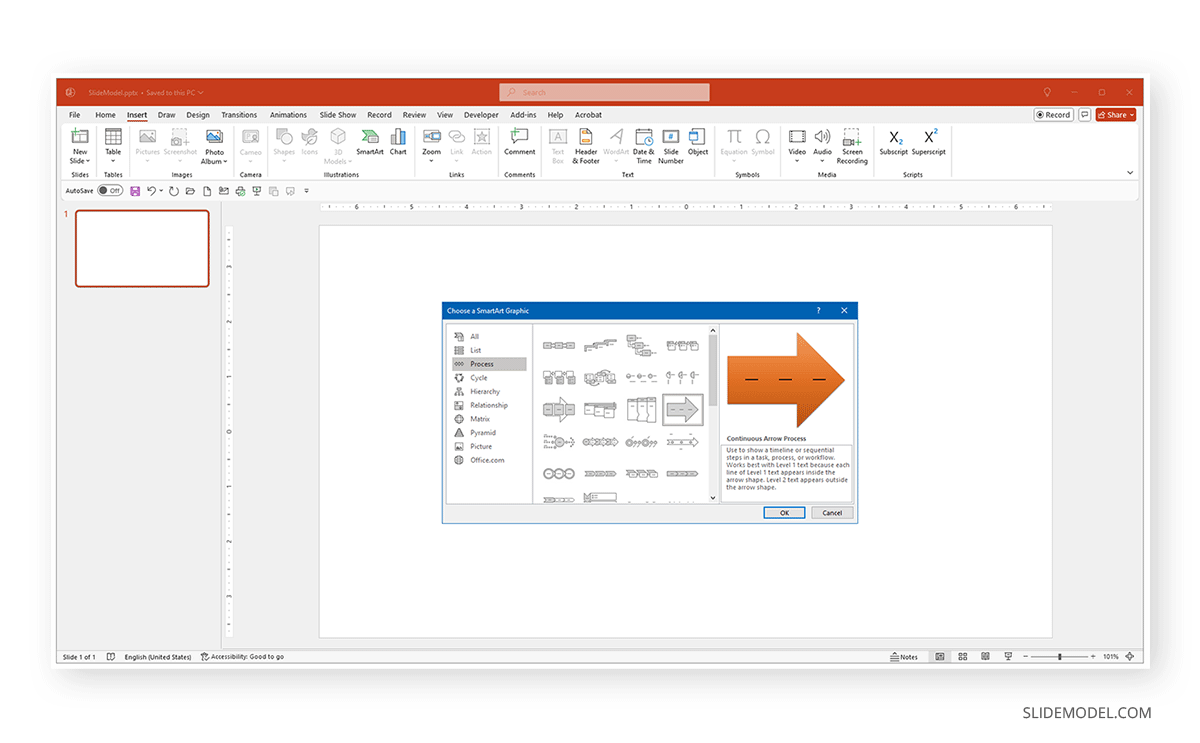
Some of the most commonly used designs relevant to a timeline include the Process diagrams in SmartArt. You can select a design best suited to your needs. In this example, we will use the Continuous Arrow Process diagram.
Step 3: Add Dates to the Timeline
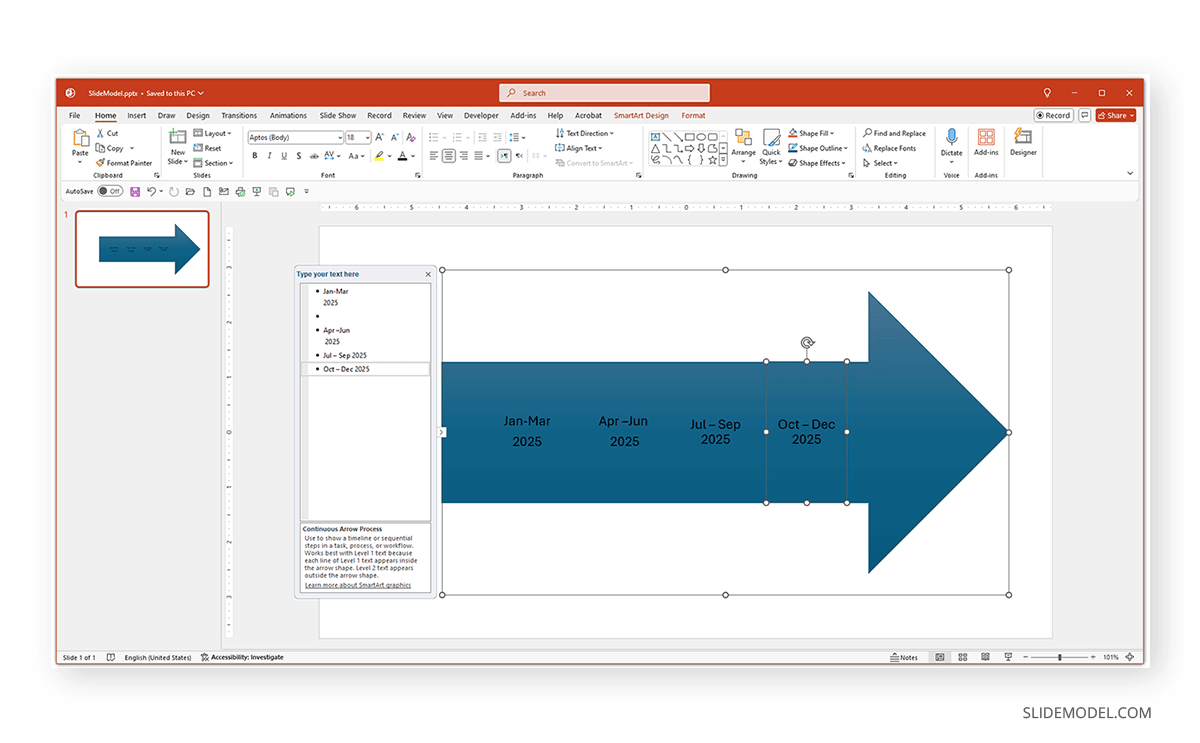
Once added, you can add text to create a timeline using the arrow theme design by listing dates that show the key events on the timeline.
Step 4: Modify the Diagram Design
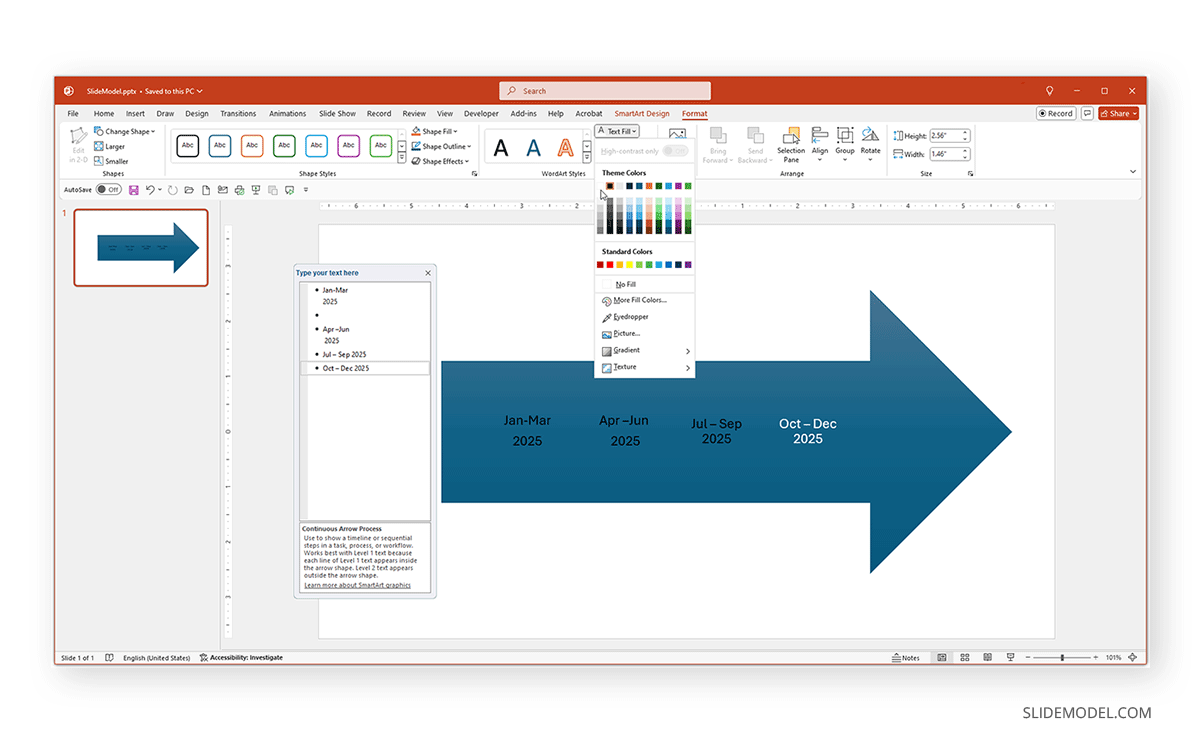
Using the SmartArt Design and Format tabs, you can make changes to the default design, including the color of the arrow and text, as well as align and add effects to the added text.
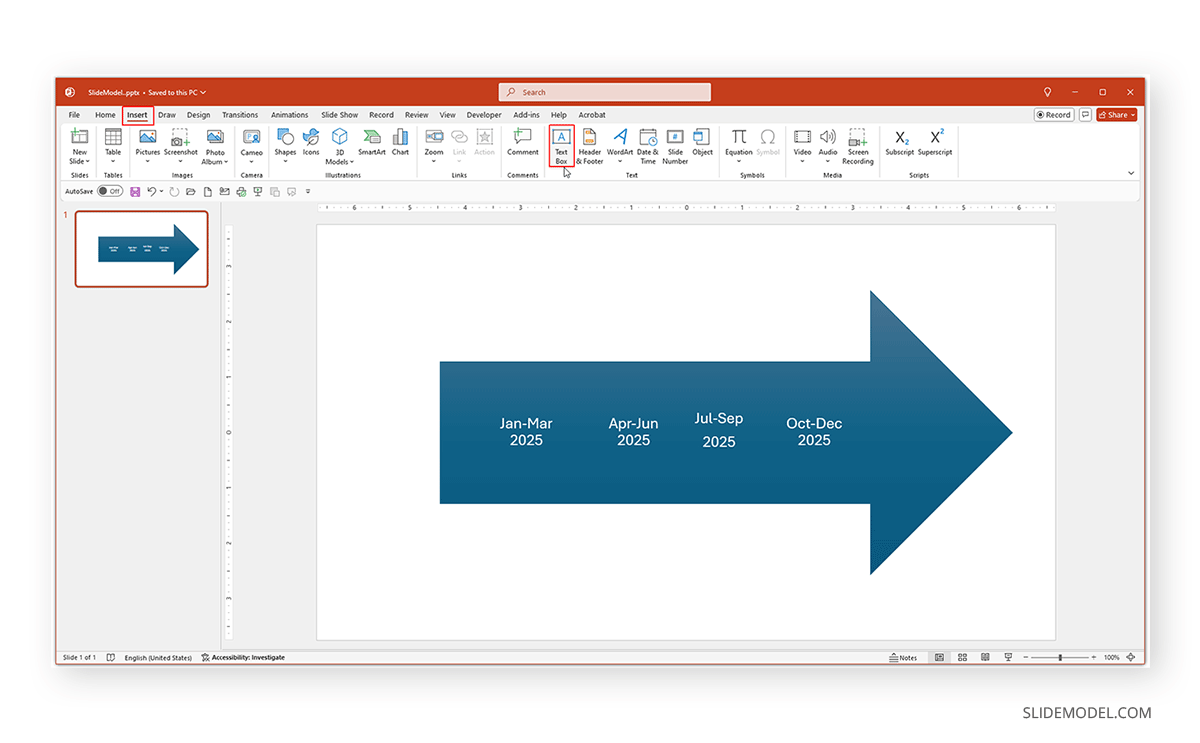
The below image shows an example of a simple timeline design created with a few dates. We will modify the design by adding text boxes via Insert -> Text Box to add additional details to make the timeline.
Step 5: Add Text to Explain the Timeline
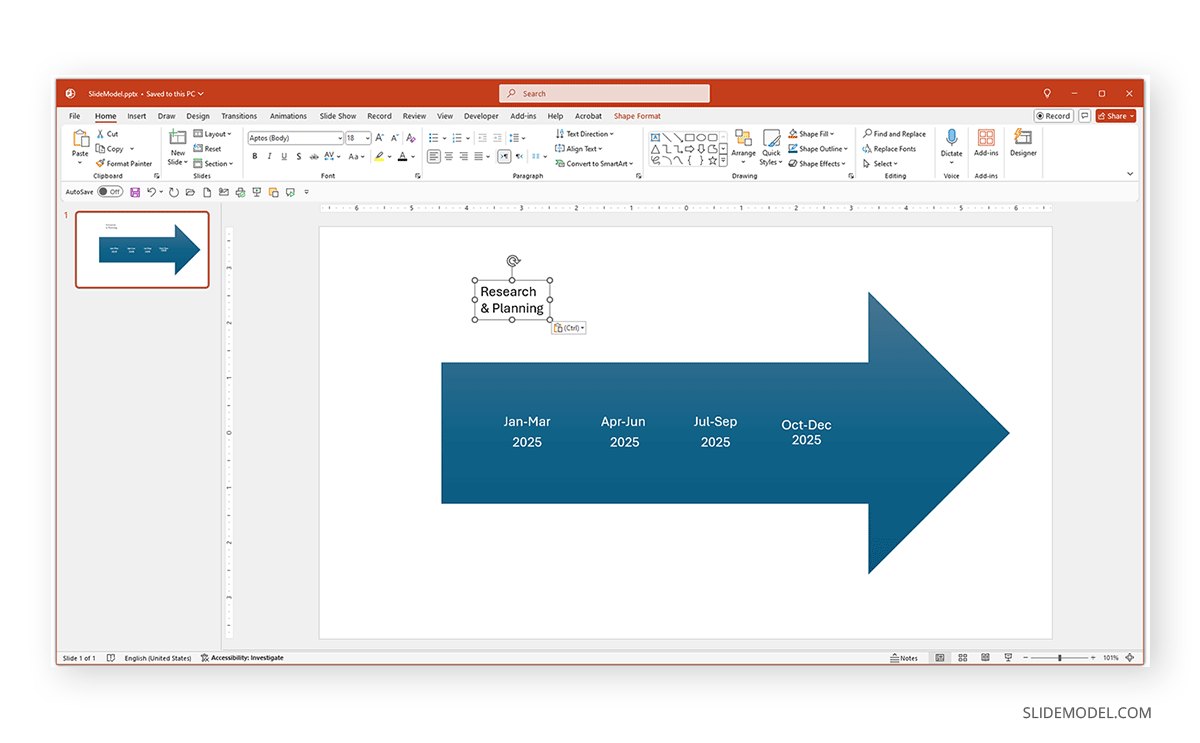
By adding text boxes, you can highlight the key information tied to each date, month, year, quarter, etc. In our timeline, we added four quarters for the year 2025 and added text boxes to describe the activities for each quarter.
Step 6: Add Connectors to the Timeline
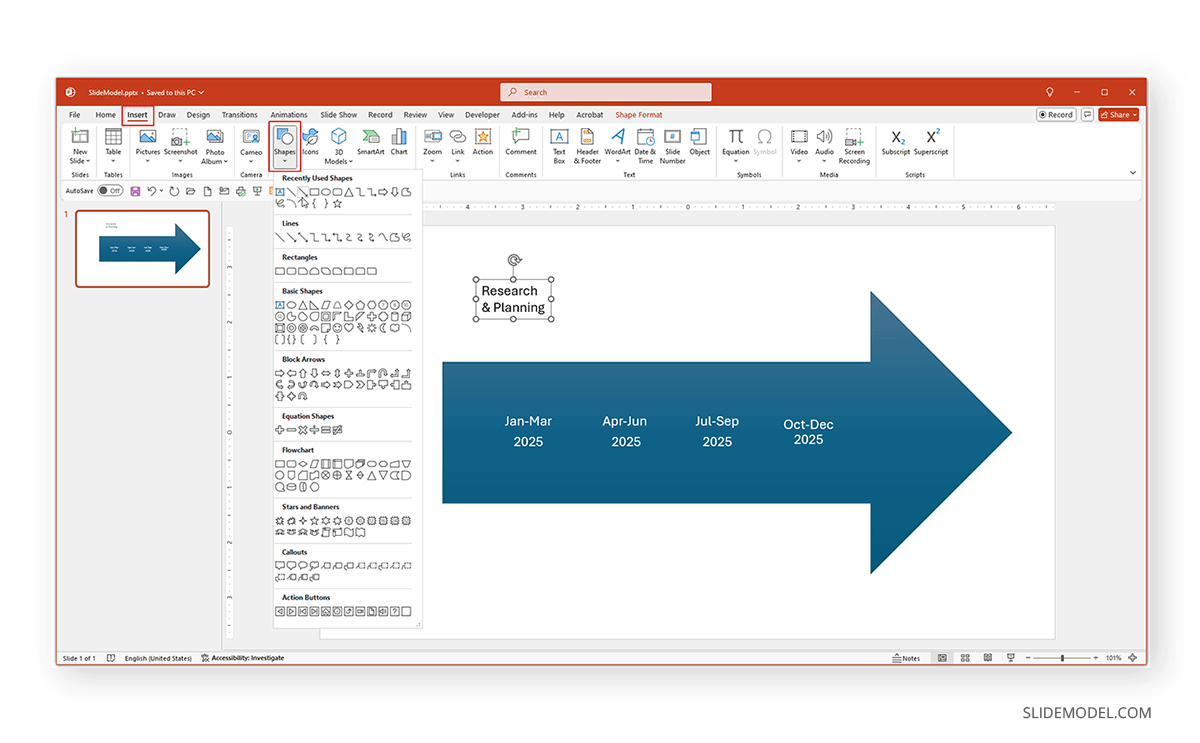
You can use connectors to further emphasize the connection between the text and the time duration mentioned on the timeline. In this example, we added arrows via Insert -> Shapes to connect the text with the timeline.
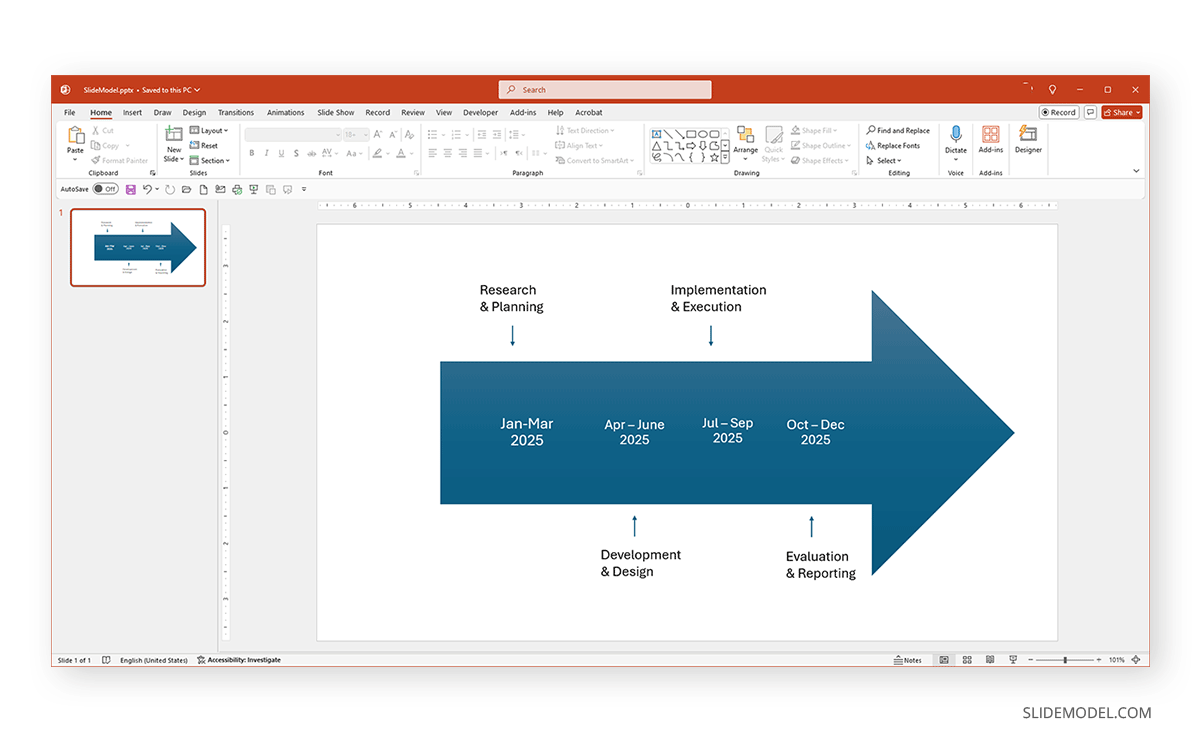
Below is an example of a simple project timeline created in PowerPoint using SmartArt Graphics.
Change Timeline Diagram Anytime to Create New Designs
You can also try out different SmartArt diagrams by changing the diagram type anytime via the SmartArt Design tab. By switching the timeline design from the Continuous Arrow Process diagram to the Closed Chevron Process design, we modified its look entirely using a different design.
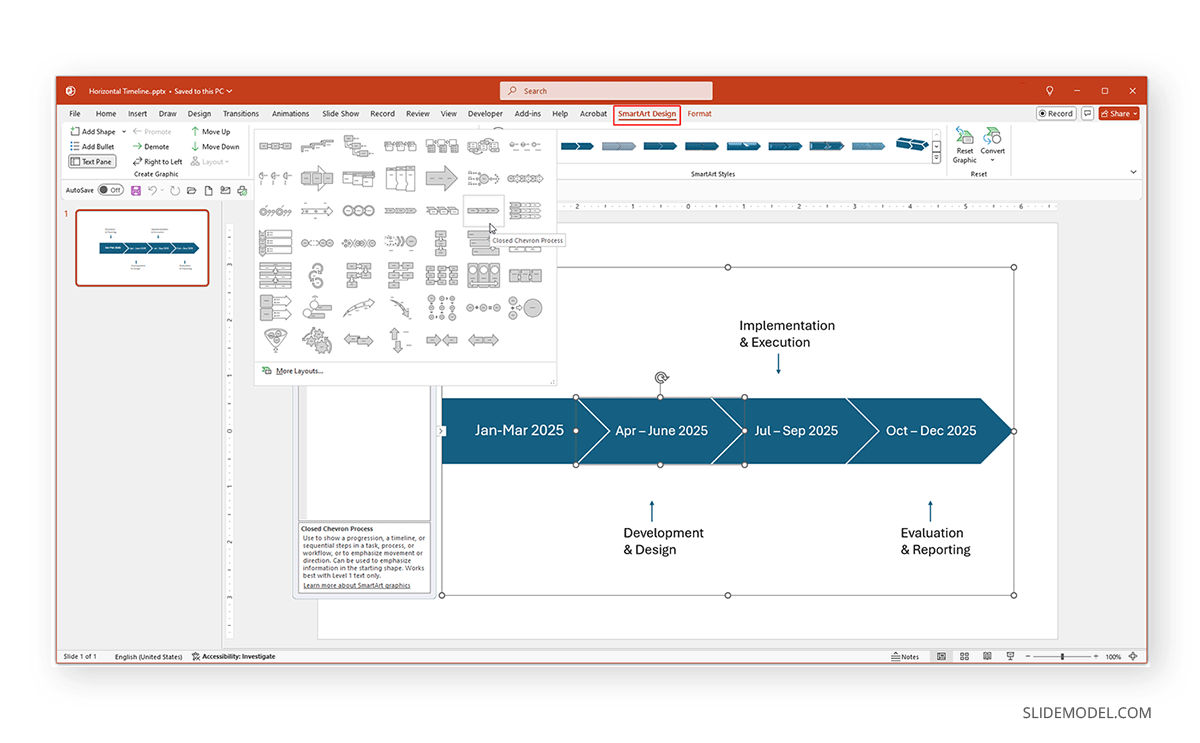
You can also consider changing these designs by adding or removing parts of the timeline or modifying its overall look and feel to create new timelines from old PowerPoint presentations you might have created for a different audience. This can help save time and enable you to generate new timeline designs quickly on the fly.
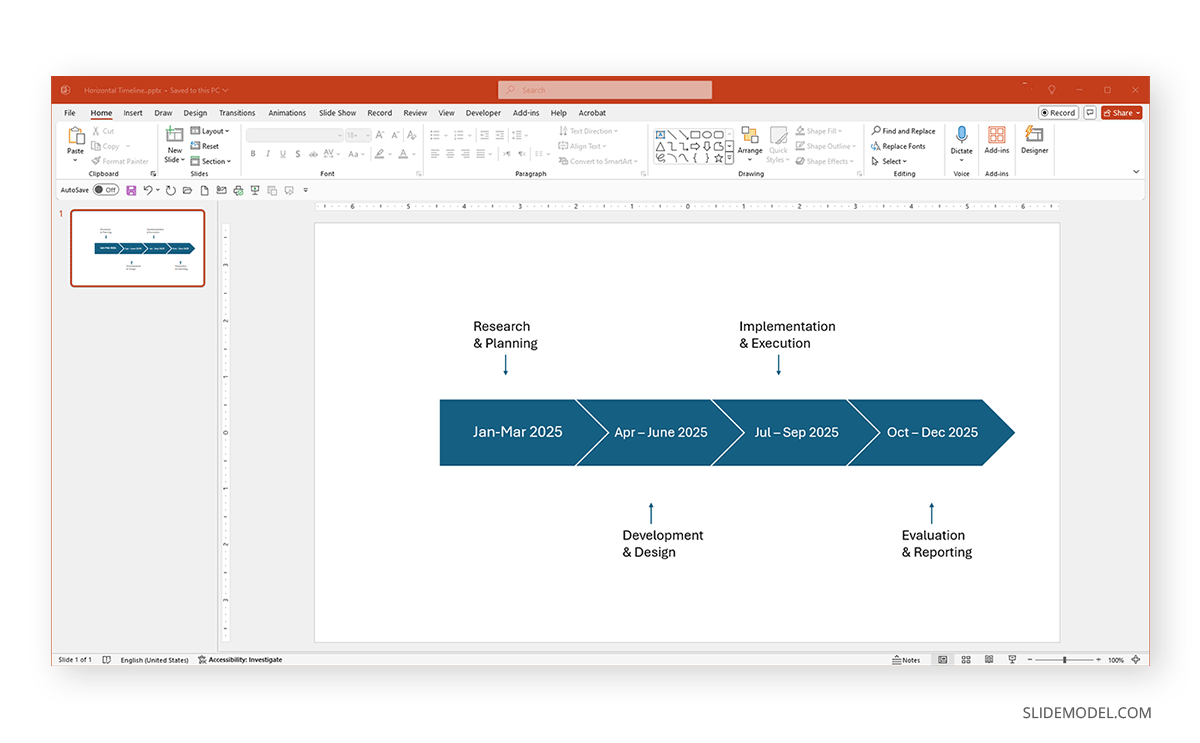
Method 2: How to Create a Timeline in PowerPoint using Shapes
Another method for creating timelines in PowerPoint is using shapes. This might include a square, rectangle, circle, or arrow shape or even adding a few lines to a PowerPoint slide. To demonstrate the use of the Line shape in PowerPoint, we will create a horizontal timeline. You can also use other shapes, such as the arrow shape, to make timeline designs similar to the process diagram example mentioned above.
Example: How to Make a Horizontal Timeline in PowerPoint using Shapes
Step 1: Insert a Shape
Insert a shape in PowerPoint via Insert -> Shapes to start creating a timeline. In this example, we will use the line shape to create a horizontal timeline.
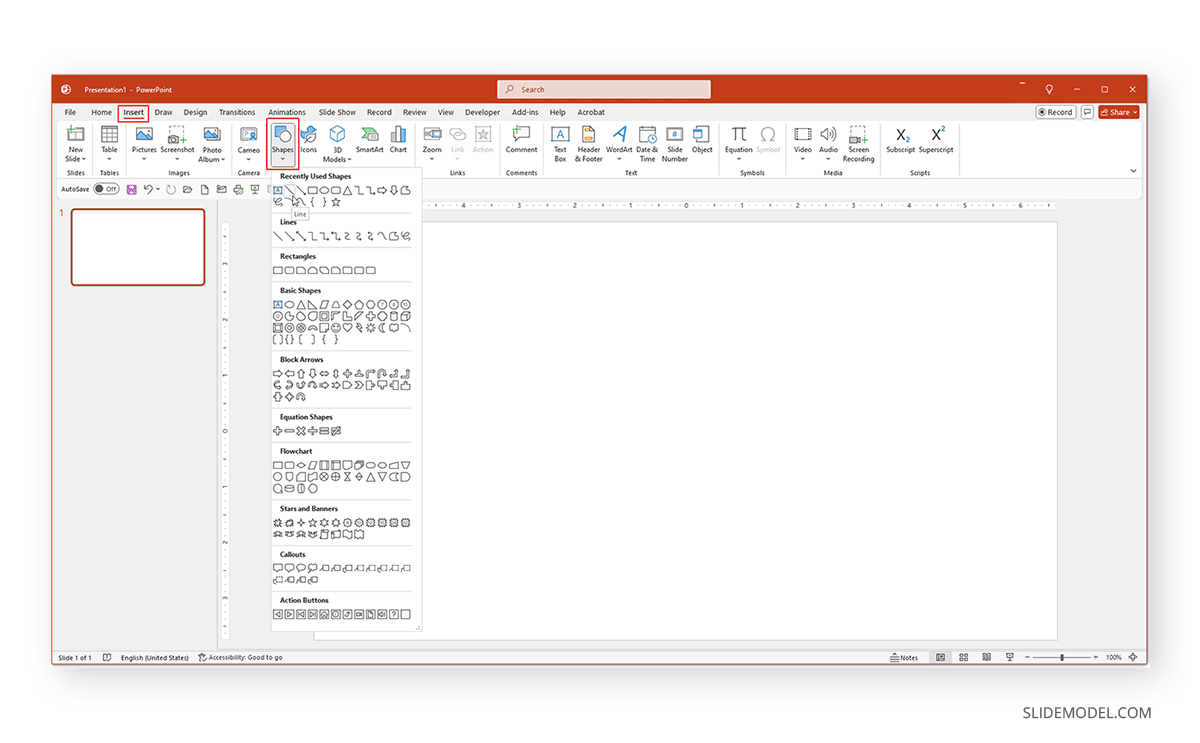
Step 2: Add Text to the Timeline
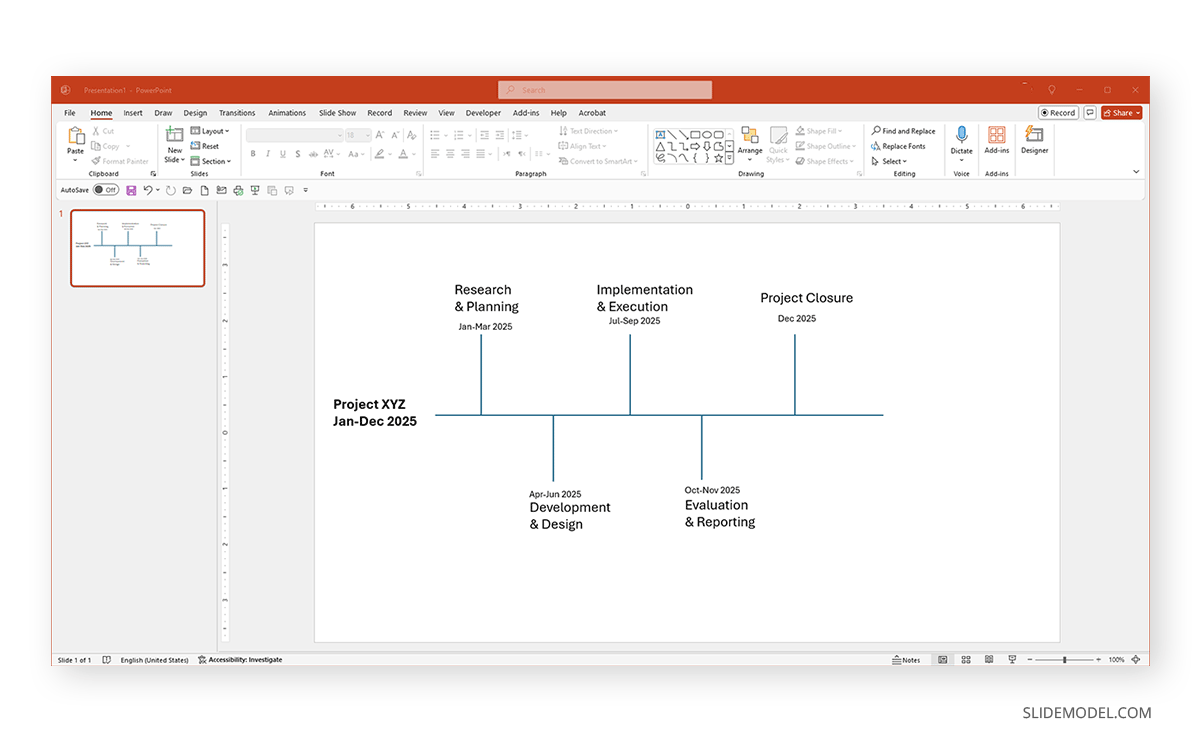
By adding straight and a few vertical lines (as shown below), you can create a timeline design with dates, milestones, and related information. To add information, go to Insert -> Text Box to add text.
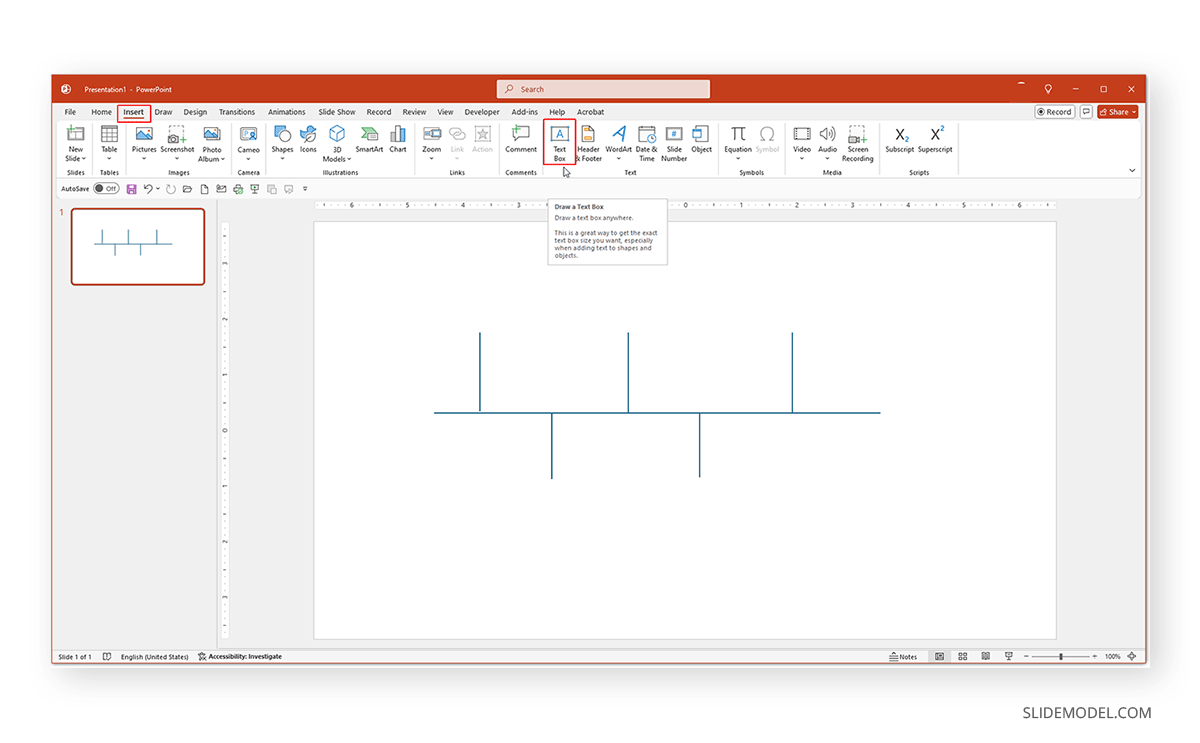
By adding the project title, milestones, and dates, you can create a path for your timeline to reveal the different details related to the information you intend to show on your slide.
Step 3: Color Code the Timeline
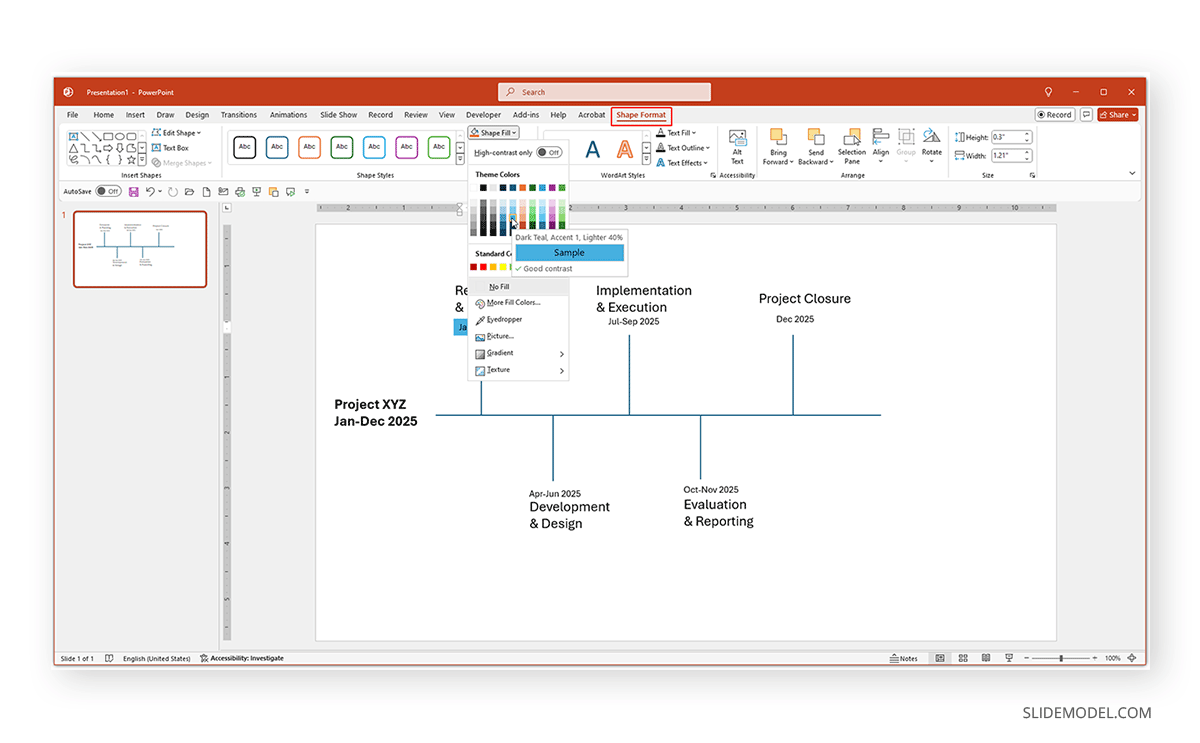
By using the options in the Shape Format tab, you can add colors to the text and other design elements as needed. You can also use specific colors suitable for the timeline according to brand guidelines.
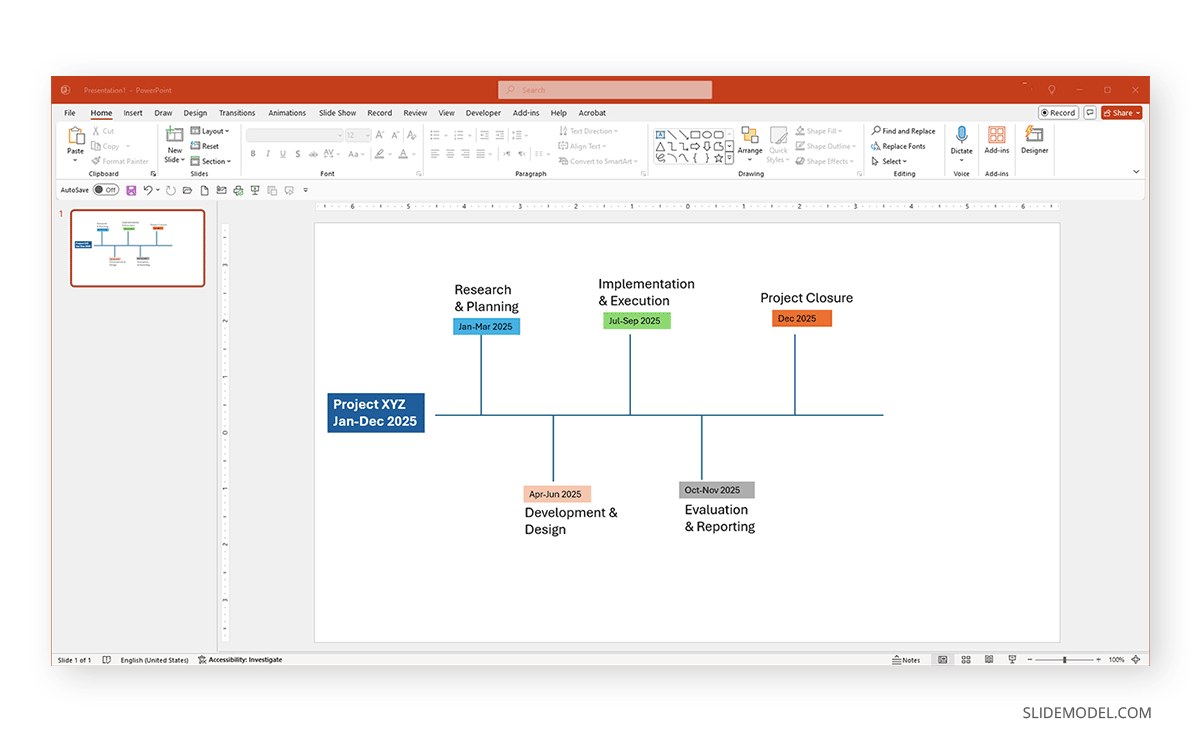
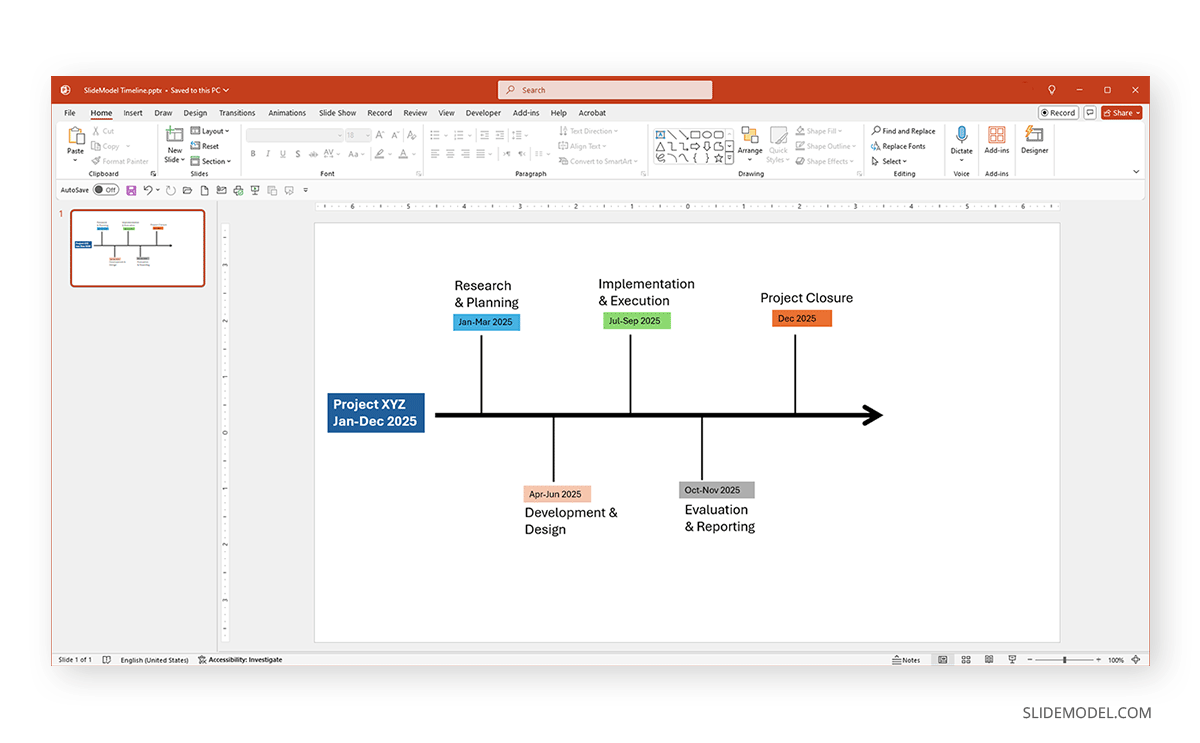
The example below shows a simple timeline created using PowerPoint shapes, with color-coded monthly quarters.
Modifying the Timeline Design using PowerPoint Shapes
Added shapes can be modified using colors and Shape Styles via the Shape Format tab, or you can change the shape to create different designs anytime.
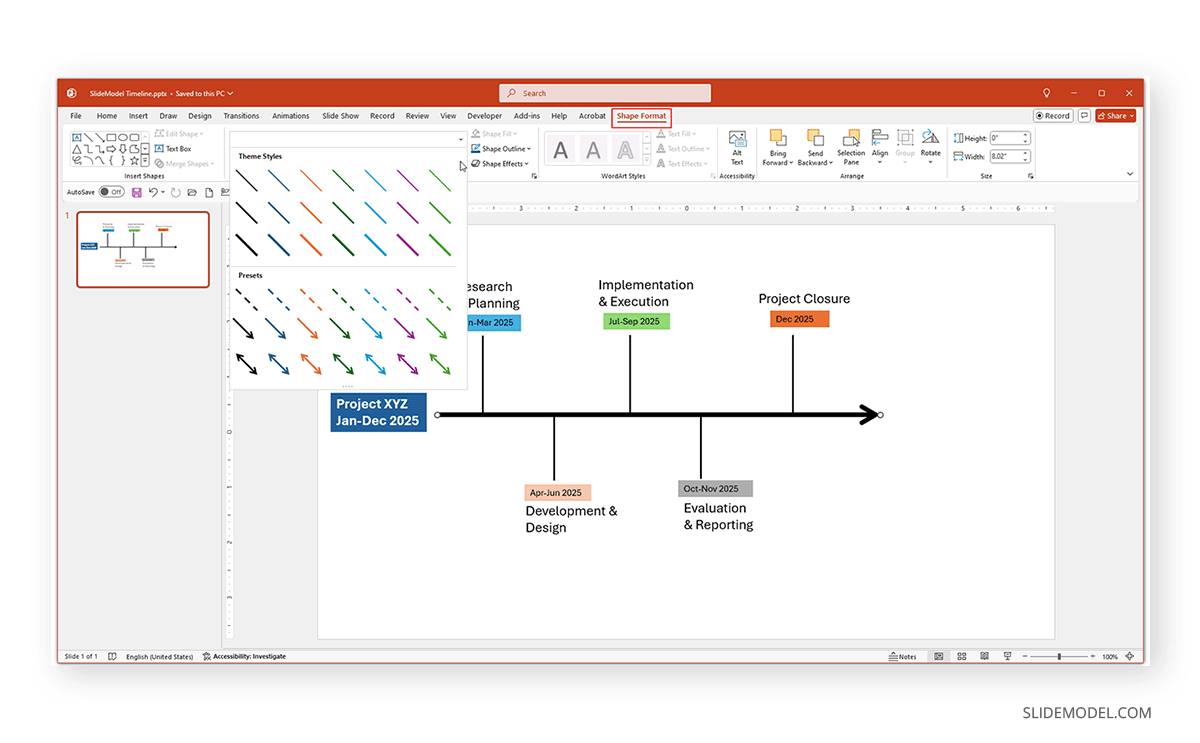
The example below shows a slightly modified version of the design with an arrow shape instead of a line in the middle of the timeline.
Method 3: How to Create a Timeline in PowerPoint using a Table
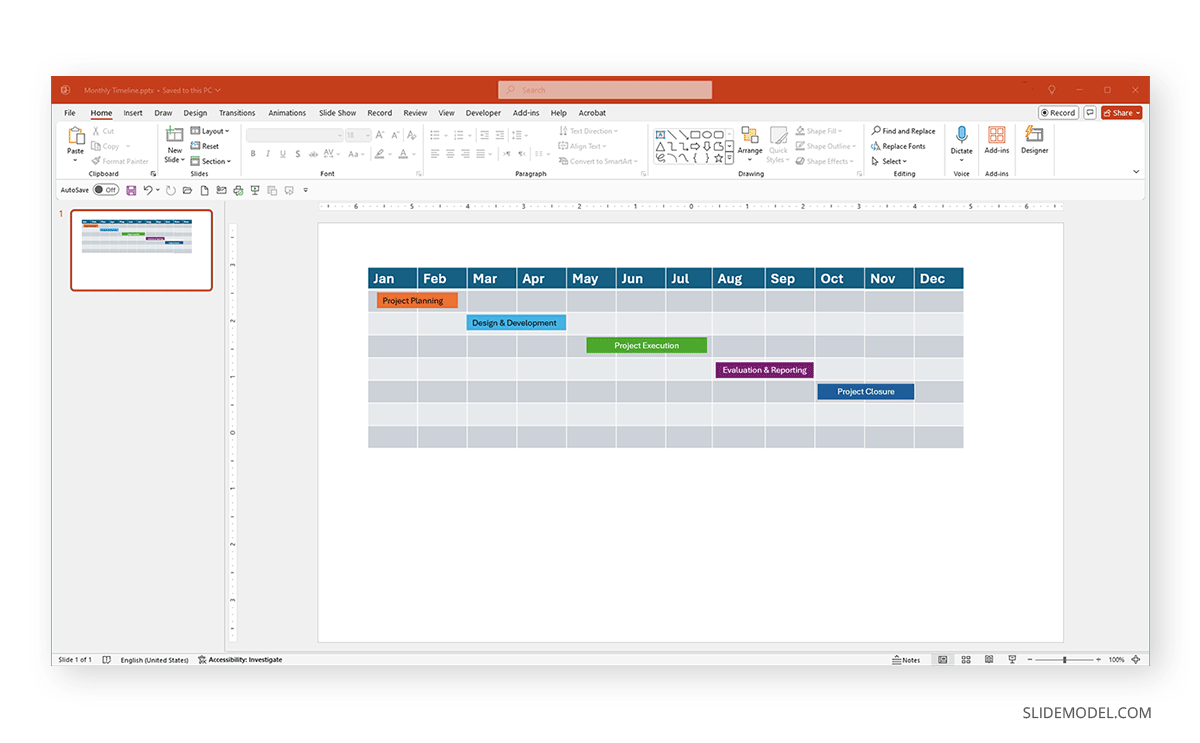
Tables are one of the many methods you can use to make PowerPoint timelines. A table can help create timelines and Gantt charts using easy-to-create timeline layouts. Let’s look at how to make a monthly timeline in PowerPoint using a table design.
Example: How to Make a Monthly Timeline in PowerPoint using a Table
Step 1: Add a Table in PowerPoint
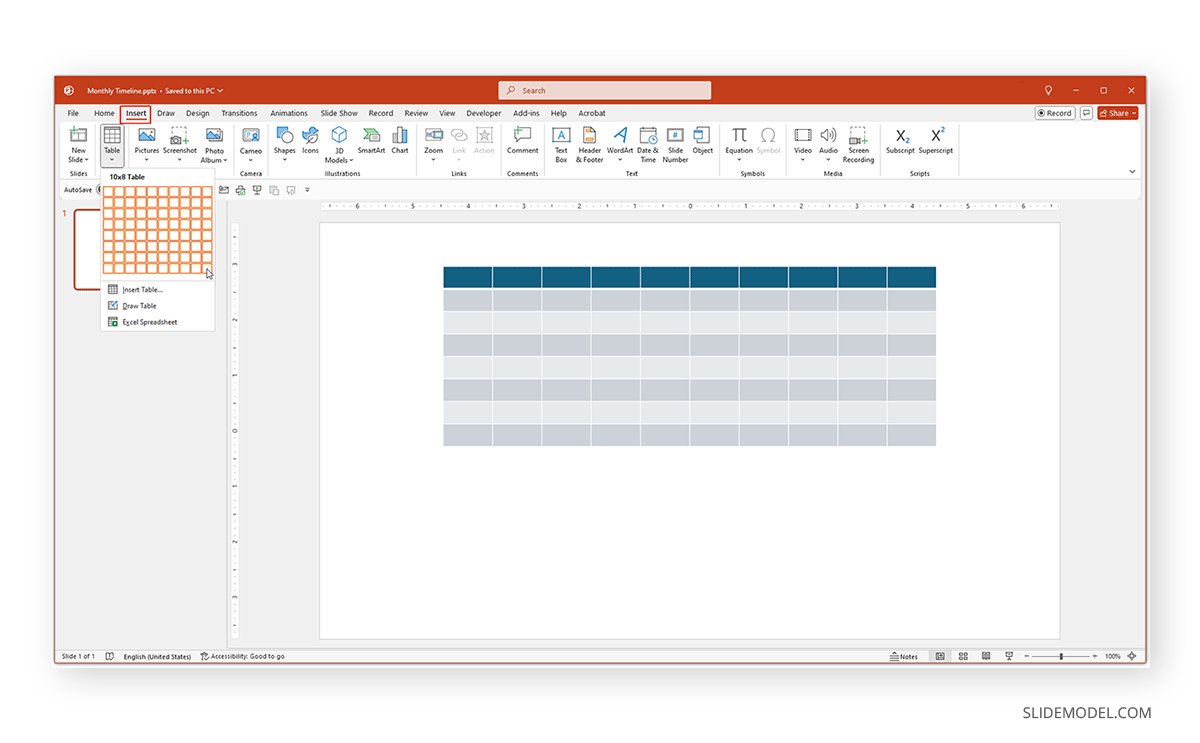
Go to Insert -> Table and add a table according to your timeline’s required months or dates. You can insert rows and columns according to the details you must show on your timeline, e.g., months and milestones.
Step 2: Insert Text to Table
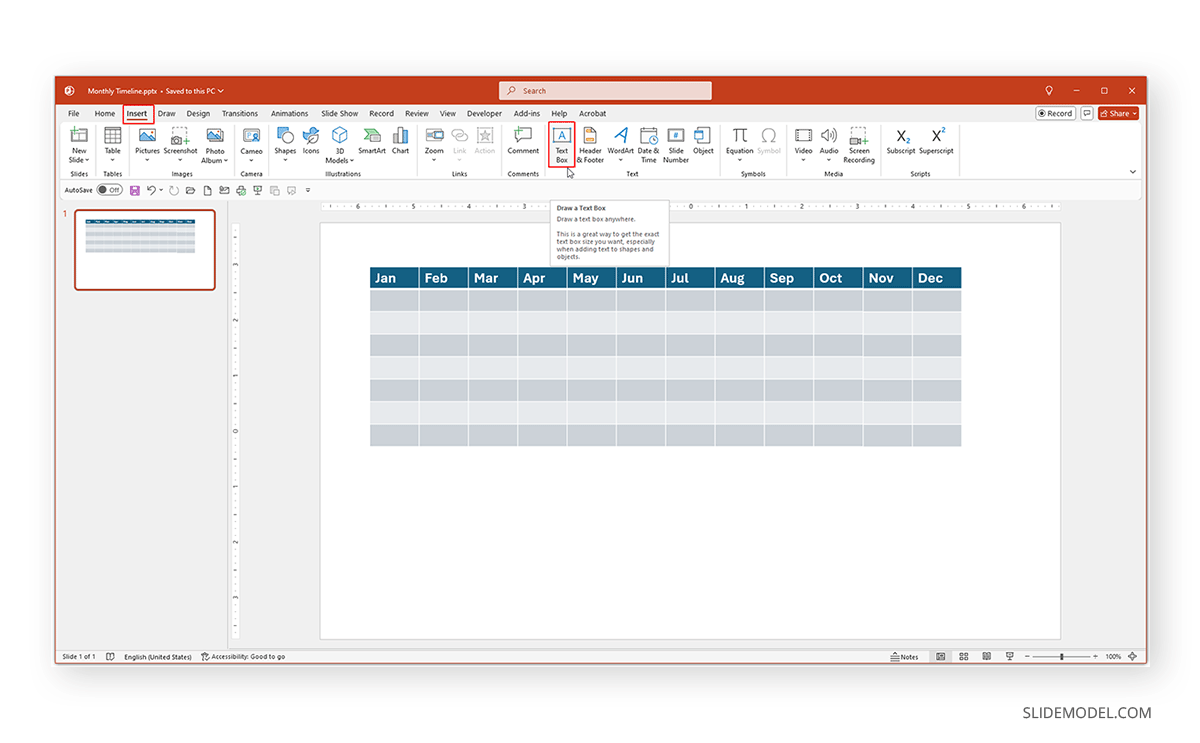
Populate the table by adding text via the Insert tab to add the milestones and time duration you need to show on the timeline.
Step 3: Color Code the Timeline
To make the timeline easy to understand, color code the information on the timeline using options such as Shape Fill from the Shape Format tab.
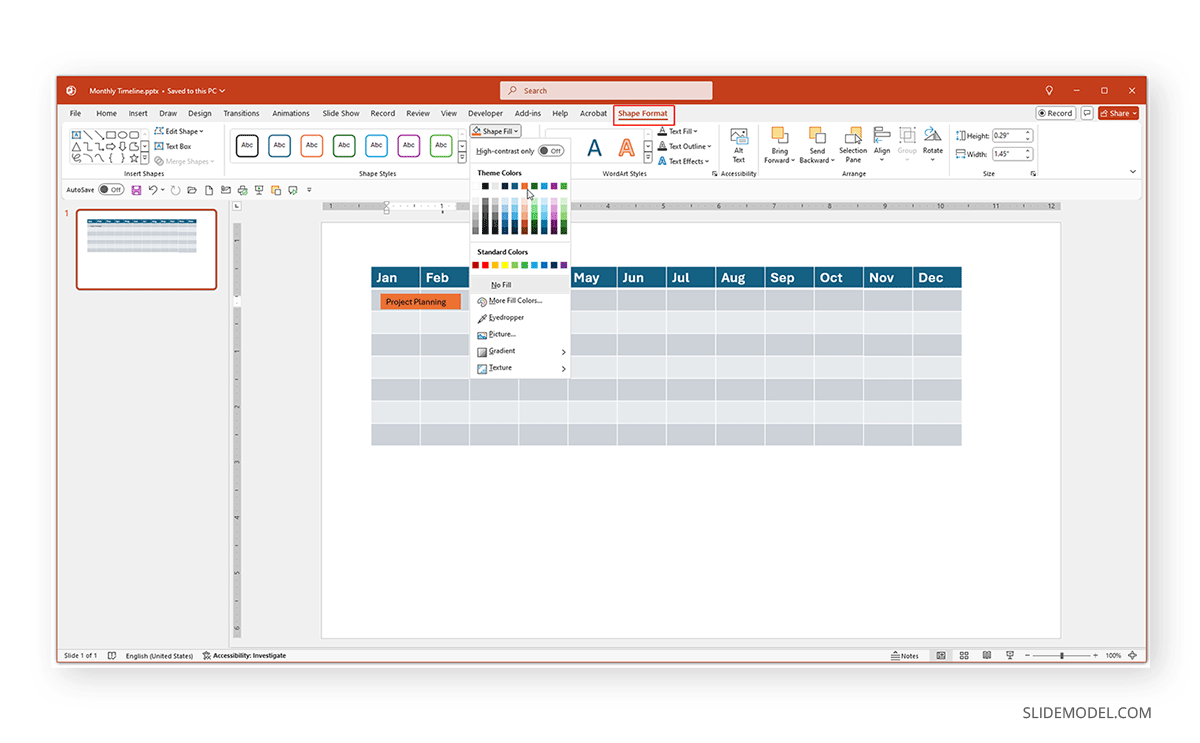
Using this simple method, you can add milestones and a specific time duration with key highlights to create a timeline in PowerPoint. When answering the question about how to make a timeline in PowerPoint with dates, this is the most convenient method since it can help accommodate more detailed information with dates compared to other design options.
You can also find other design types and get ideas and templates from our collection of monthly timeline templates.
Method 4: How to Create a Timeline in PowerPoint using a PowerPoint Template
Some timelines can be pretty time-consuming and difficult to make using manual methods or diagrams. This is why using PowerPoint templates can be a valuable option to save time when creating such timelines. You can create any type of timeline quite conveniently if you have a good PowerPoint template. A career timeline can be made using a variety of career timeline templates, such as the ones listed below.
Example: How to Make a Career Timeline in PowerPoint
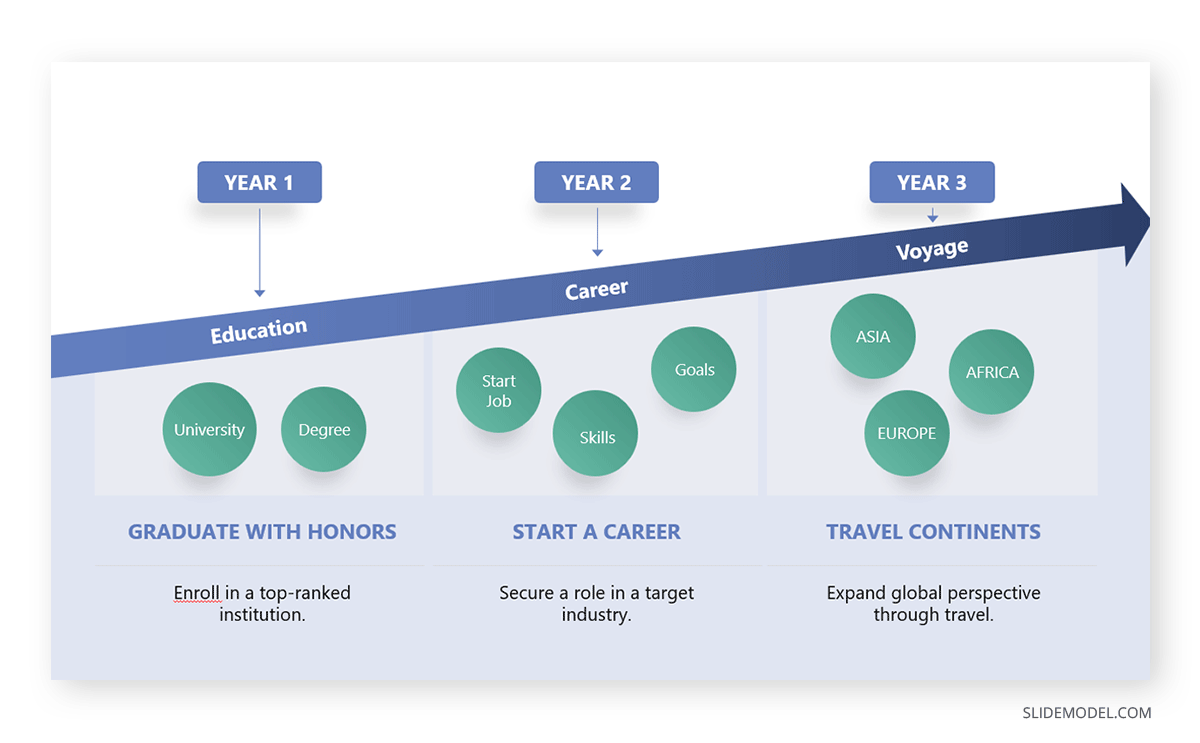
3 Year Career Planning Slide Template for PowerPoint
The 3-Year Career Planning Slide Template for PowerPoint can be used to make a career plan or career plan timeline or to show your professional experience as a timeline slide.
5 Year Basic Timeline Design for PowerPoint
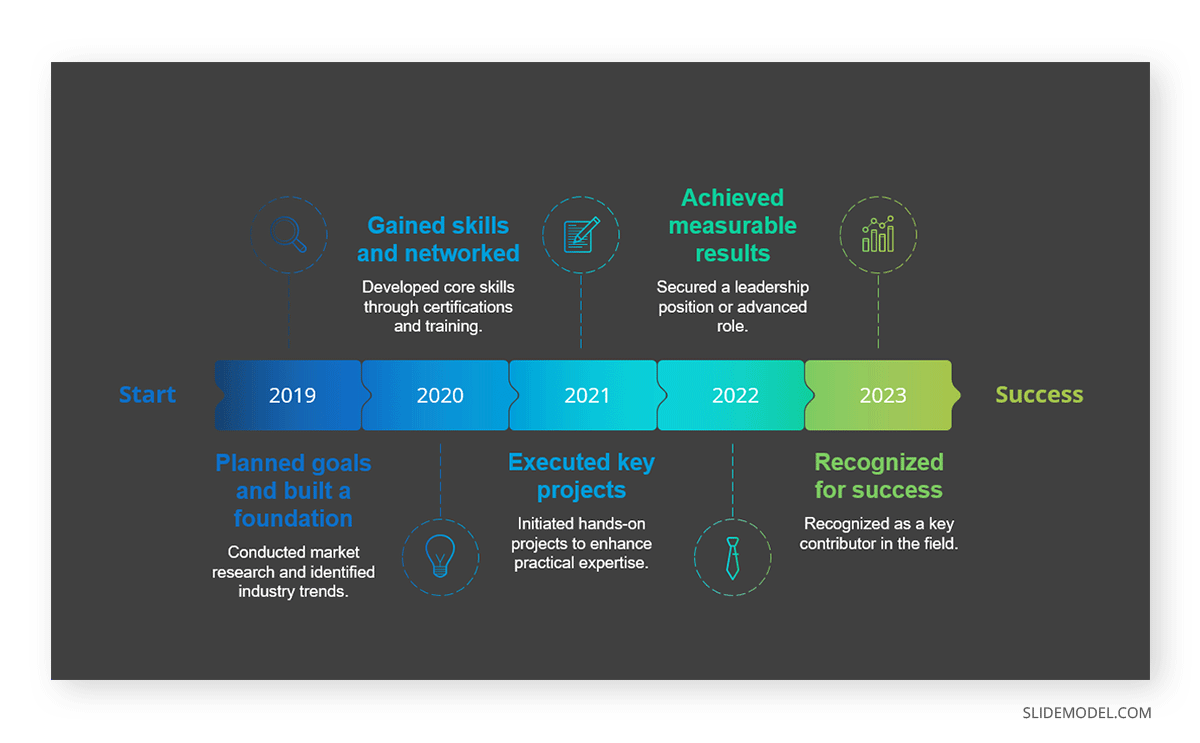
A career path requires showing the candidate’s years of experience. This is a 5 Year Basic Timeline Template for PowerPoint with a design that can also be modified to increase the number of years or to change the years into different jobs. This template is among the horizontal timeline templates at SlideModel with a flat design and replaceable slide elements.
Career Planning PowerPoint Template
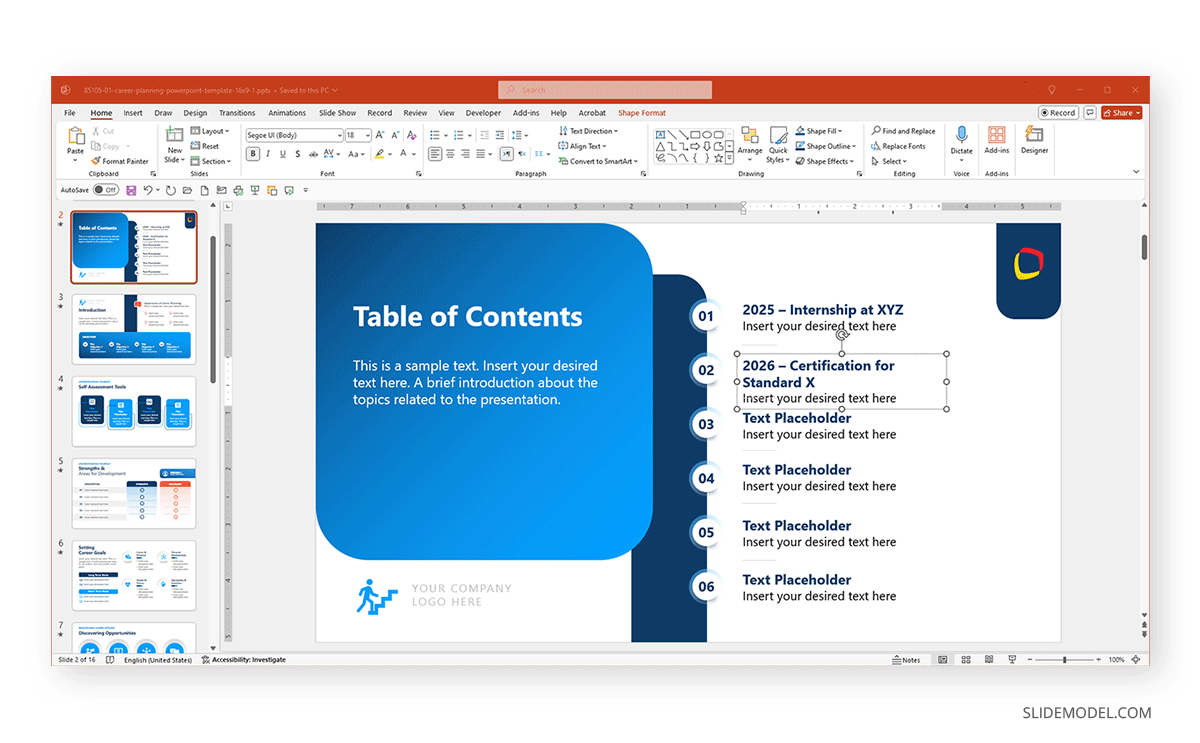
This is a comprehensive career-themed template with slides to create a complete portfolio or career path for yourself or to guide an audience during a career coaching session. The Career Planning PowerPoint template starts with a title slide, followed by a table of contents, introduction, self-assessment tools, slides for a SWOT analysis, skills, action plan, interview preparation, etc.
Timeline Road PowerPoint Template
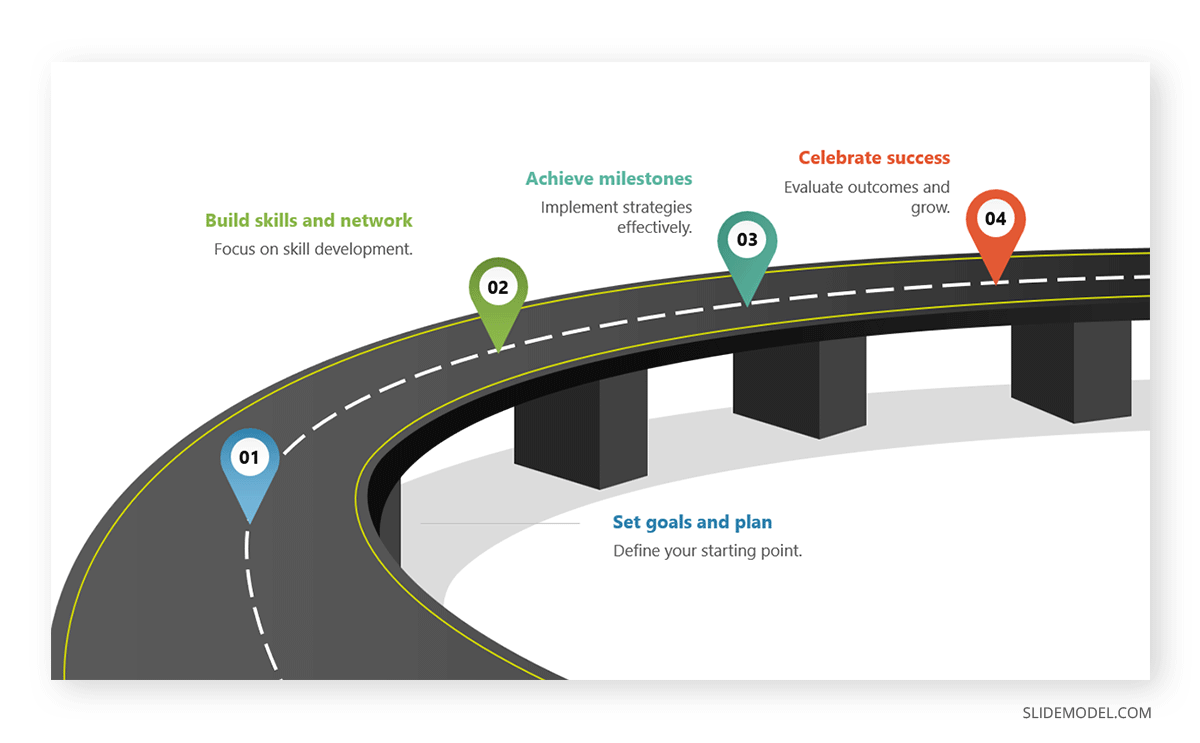
This road template is among the project timeline templates at SlideModel that can also be used for other topics such as for making a career timeline. Using the Timeline Road PowerPoint Template you can show your career path in a roadmap-like design. This timeline template can also be used to make other types of timelines, such as project timelines.
Bonus Tip: Using Different Methods to Create Timelines in Different Directions
Combining the abovementioned methods allows you to create different timelines for professional, personal, or educational use. This example will show you different vertical timeline designs created using other methods.
Example: How to Make a Vertical Timeline in PowerPoint using Various Methods
Vertical Chevron Timeline Design with SmartArt Graphics
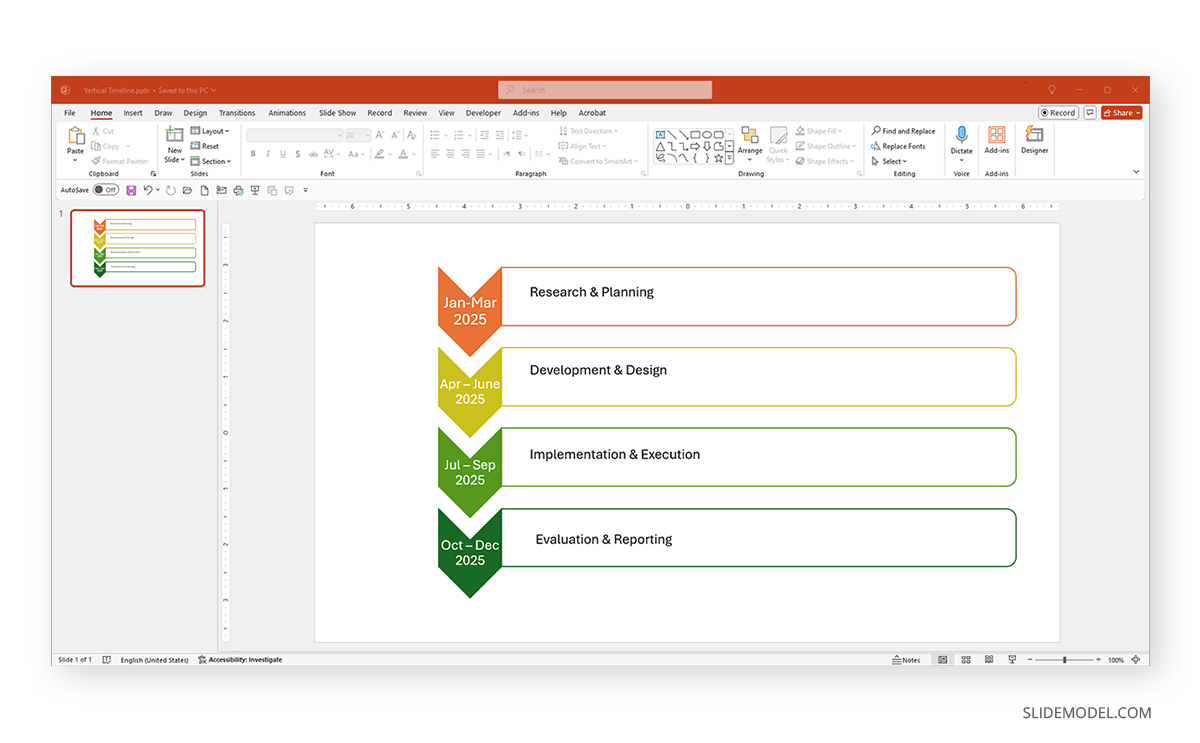
SmartArt Graphics has various list designs that can be useful for making vertical timelines, such as this Vertical Chevron List diagram. Besides the process diagrams mentioned earlier, you can find more vertical diagrams from the List menu in SmartArt Graphics for designs to create vertical timelines.
Simple Vertical Timeline Design with PowerPoint Shapes
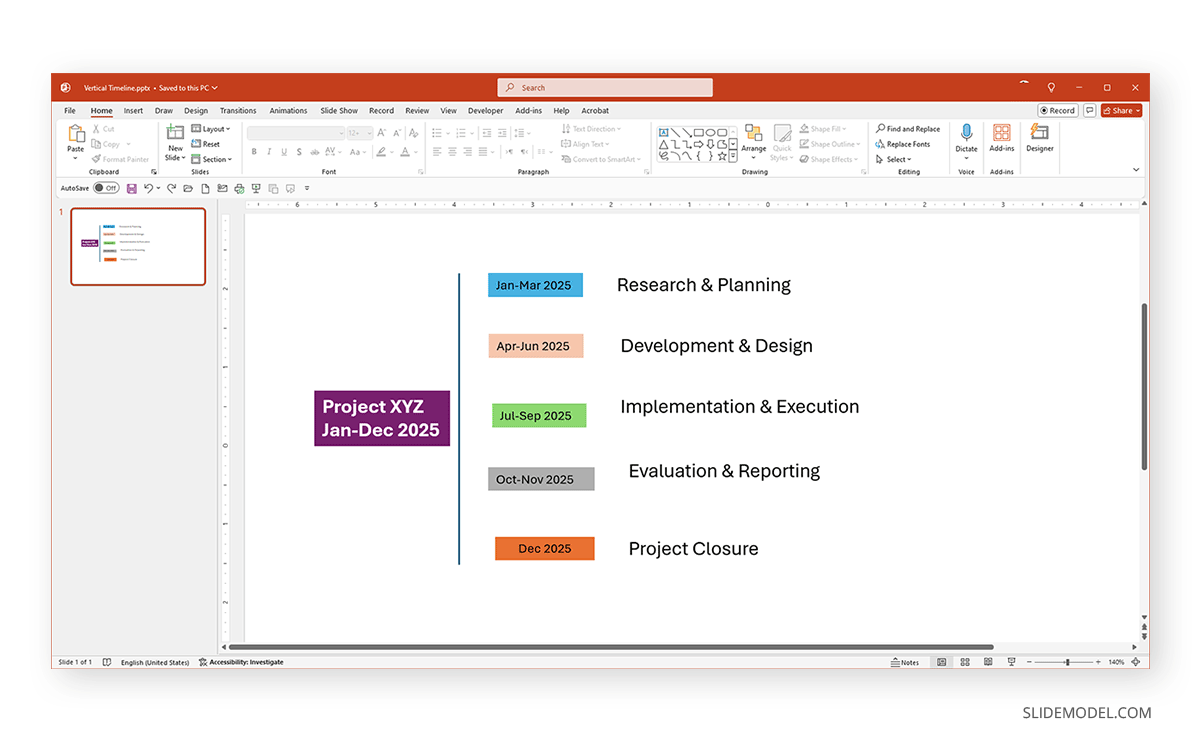
Using the shape-themed design, we showed you earlier; we move the slide elements vertically to create a vertical design using a Line shape, text boxes, and color fill. You can use these simple slide elements to vertically list your milestones and time duration to design simple yet easy-to-present vertical timelines.
Vertical Timeline Template Design for PowerPoint
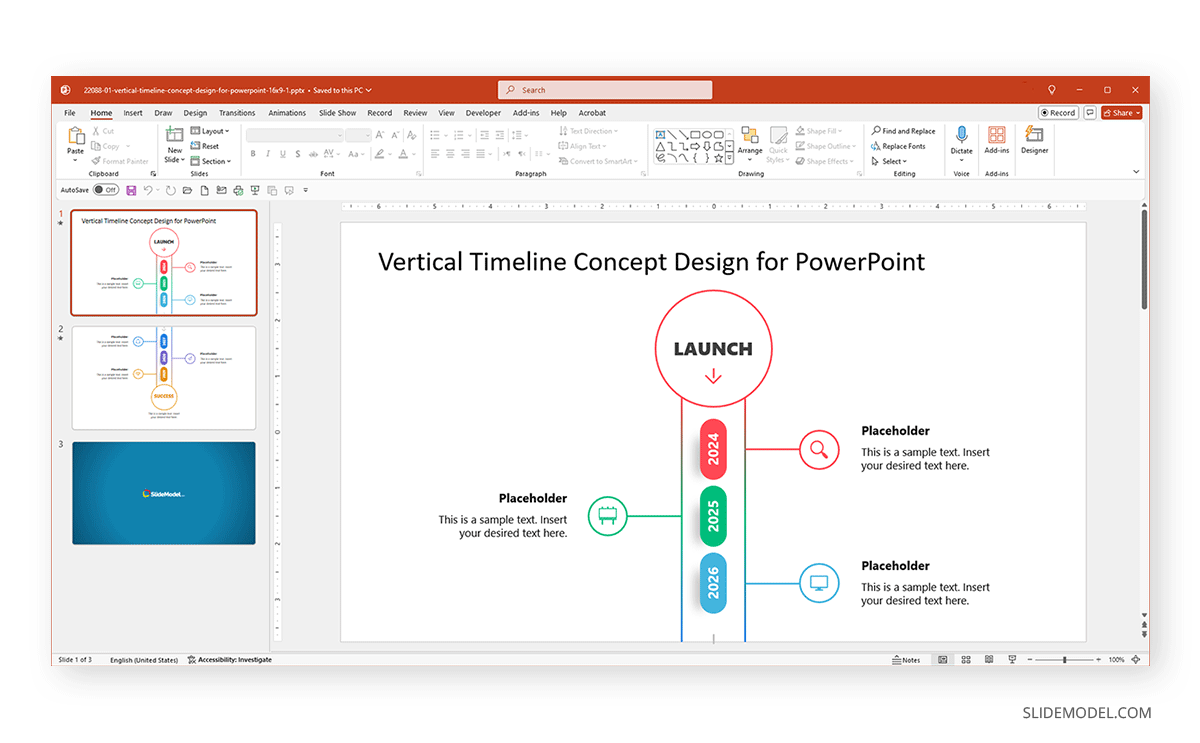
This is among the collection of Vertical Timeline Templates available at SlideModel. This Vertical Timeline Concept Design for PowerPoint and other timeline template designs can be edited to create a comprehensive timeline-themed slide or slide deck using a specific direction, which is a vertical timeline.
Vertical Picture Timeline PowerPoint Template
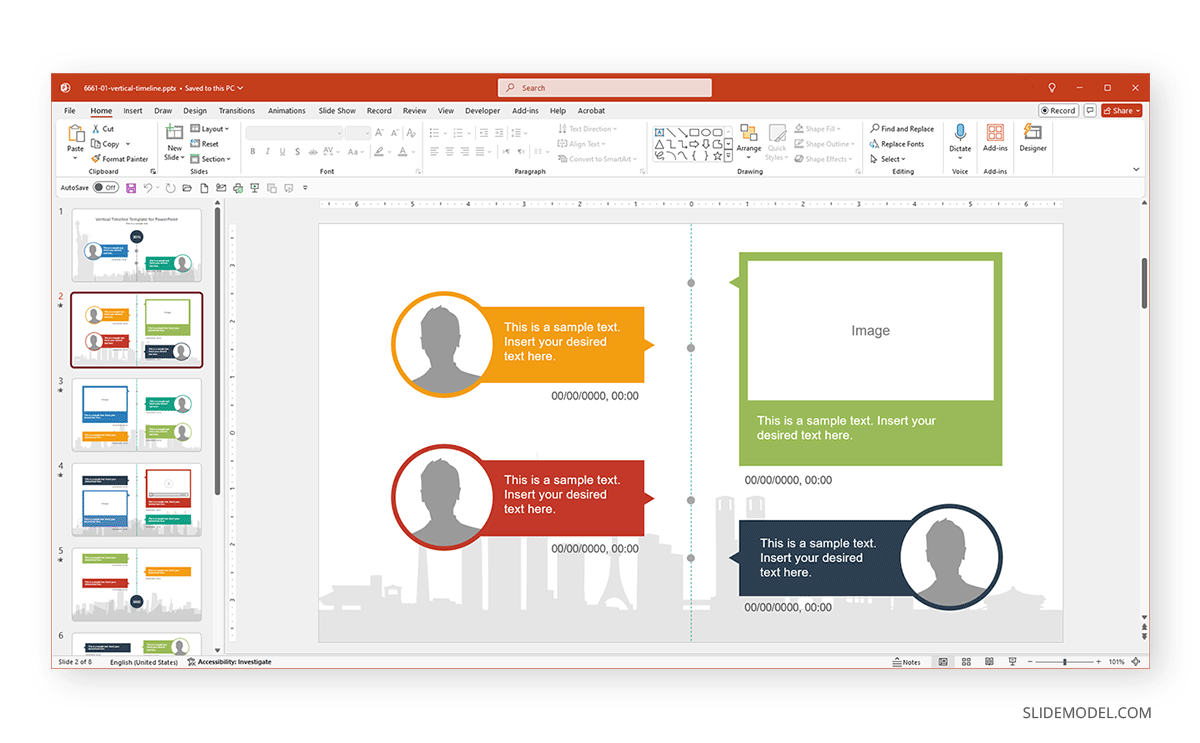
This is another Vertical Timeline PowerPoint Template design that comes with pictures. Suppose you’re wondering how to make a timeline in PowerPoint with pictures. In that case, you can either add placeholders like shapes and insert pictures within them or use templates like this one to easily create picture timelines.
FAQs
Which SmartArt layout is best for a timeline?
Commonly used SmartArt layouts for timelines include Basic Timeline, Circle Accent Timeline, and Process Diagrams. Choose one based on the complexity and visual preference of your timeline.
Can I customize the timeline after adding it?
Yes. Once you insert a SmartArt graphic, you can modify its layout, colors, text, and shapes. Use the SmartArt Design tab to make customizations.
How do I add events or milestones to the timeline?
Click on the text placeholders in the SmartArt or use the text pane on the left of the graphic. Each bullet point corresponds to an event or milestone on the timeline.
How can I adjust the spacing or position of timeline elements?
Select the timeline, then use drag-and-drop to reposition elements manually. Alternatively, use the Size & Position options under the Format tab for precise adjustments.
Can I use images or icons in my PowerPoint timeline?
Yes. Go to the Insert tab and select Pictures or Icons to add visuals to your timeline. You can drag and place them near relevant milestones.
Is it possible to animate my timeline in PowerPoint?
Yes. Use the Animations tab to add effects to each element of your timeline. Apply animations such as Fade or Wipe to make your presentation dynamic.
What’s the best way to align my timeline elements?
Use the Align tool under the Shape Format tab to ensure elements are properly aligned. Options like Align Center or Distribute Horizontally are helpful.
Final Thoughts
Timelines, whether created using SmartArt, PowerPoint Shapes, tables, or PowerPoint templates, can serve as visual aids for showcasing important information using fewer words and easy-to-grasp designs. Creating a timeline from scratch can be quite time-consuming; however, by using readymade timeline templates, you can make your job easy and focus on the content instead of design elements.
Now that you know how to create a timeline in PowerPoint, see our timeline tutorials to learn about how to present a timeline and how to make a timeline on Google Slides.
