As we presenters know, aiming for a flawless presentation experience involves not only top-notch presentation skills but also graphics, a well-thought-out presentation structure, and articulating both how to start a presentation and how to conclude a presentation. Yet, very little is said about presentation handouts and their role in large-scale meetings, or their value when securing business deals.
Seasoned presenters acknowledge the impact of a presentation handout, and today we’ll guide you in the process of creating these printed-format assets to make your presentation more memorable.
Table of Contents
- What is a Presentation Handout?
- The Role of Presentation Handouts
- Why Create Handouts for Large Scale Presentations?
- Examples of Effective Handouts for Presentations
- How to Create Presentation Handouts in PowerPoint
- How to Create Presentation Handouts in Google Slides
- Best Practices for Presentation Handouts
- Final Words
What is a Presentation Handout?
A presentation handout is a supplementary document provided to the audience by the presenter or the event’s organization during or before a presentation. The core purpose is to enhance the understanding and retention rate of the information shared or to provide contact points with the presenter via email, LinkedIn, website, or social media profiles.
The Role of Presentation Handouts
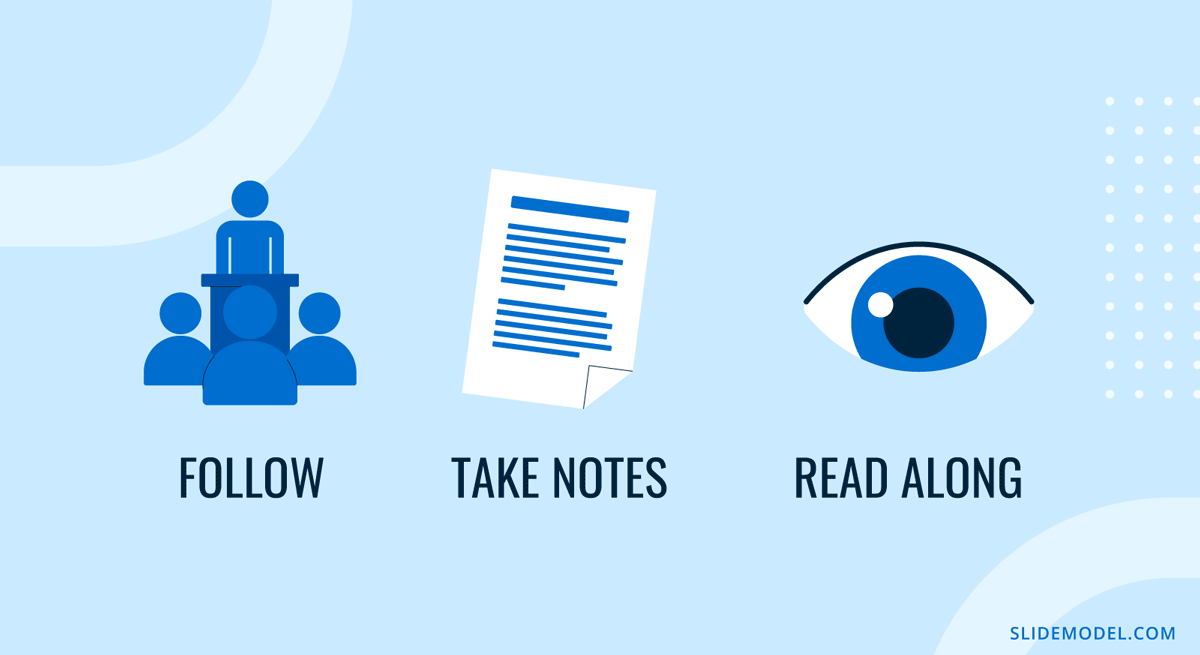
Handouts in presentations allow attendees to follow along more easily, take notes on specific parts, and have a further reference – ideal in large corporation events. The talk may not fully cover information, like detailed metrics, supplementary graphs, etc.; thus, they can be featured inside the handout to provide additional background on the presentation topic. In short, think of handouts as deliverable presentation aids.
Why Create Handouts for Large Scale Presentations?
Picture yourself attending a series of presentations at a large-scale event, like a medical conference. How many research presentations can you retain in your head? 3-4 top, whereas perhaps you attended over 12 in the past 8 hours. Handouts for presentations simplify attendees’ efforts, as they have a palpable reference about the presentations they attended, who delivered the talk, the conference presentation slides, etc.
Another interesting point of view for handouts is when we position ourselves in the shoes of an attendee with a physical impairment, like lessened hearing capacity. In this situation, we can picture a handout example, as the presenter integrates the audience, even those who cannot fully participate, by delivering information in a physical format.
Examples of Effective Handouts for Presentations
When covering examples of handouts for presentations, we can position ourselves in generalistic situations as follows.
Helping people with physical impairments
Handouts don’t necessarily have to be printed in text format. Braille handouts can be used to assist people with low visual acuity to understand the missing gaps between the speech and the visuals shown in the slides. Electronic devices with screen readers can assist, as well as an audible format of the handout.
For people with hearing impairments, printed handouts summarizing the presentation’s key points are valid, but another creative method is to insert a QR code in PowerPoint and link to a PDF document with the transcript of the presentation, plus the slides.
Illustrations and Diagrams
Think about hard-to-understand topics involving a series of charts or graphs to comprehend the disclosed information. Those same graphics can be given to the audience in the format of handouts, with callouts or visual aids that remind the attendees of the importance of those concepts.
Summarize Key Information
Suppose you attended a chef conference, where new technologies, methodologies, or recipes are shared in presentations. You can refer to the handouts for detailed instructions and focus on the training presentation in real time rather than taking notes.
Contact Data
Finally, we can consider a handout format for people who want to get in touch for business partnerships, academic collaborations, etc. Rather than delivering a business card, provide additional information about your work and deliver a handout.
How to Create Presentation Handouts in PowerPoint
Follow these steps to create handouts in PowerPoint.
Open your presentation in PowerPoint. Go to the View tab and find Handout Master.
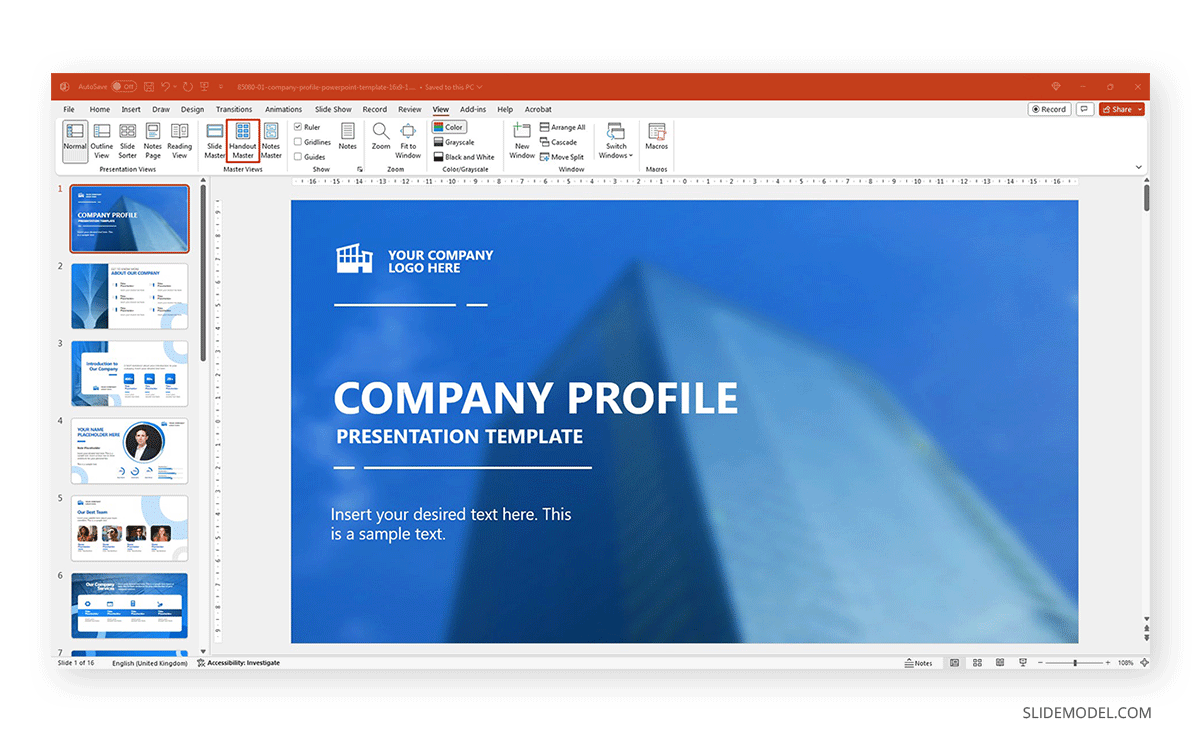
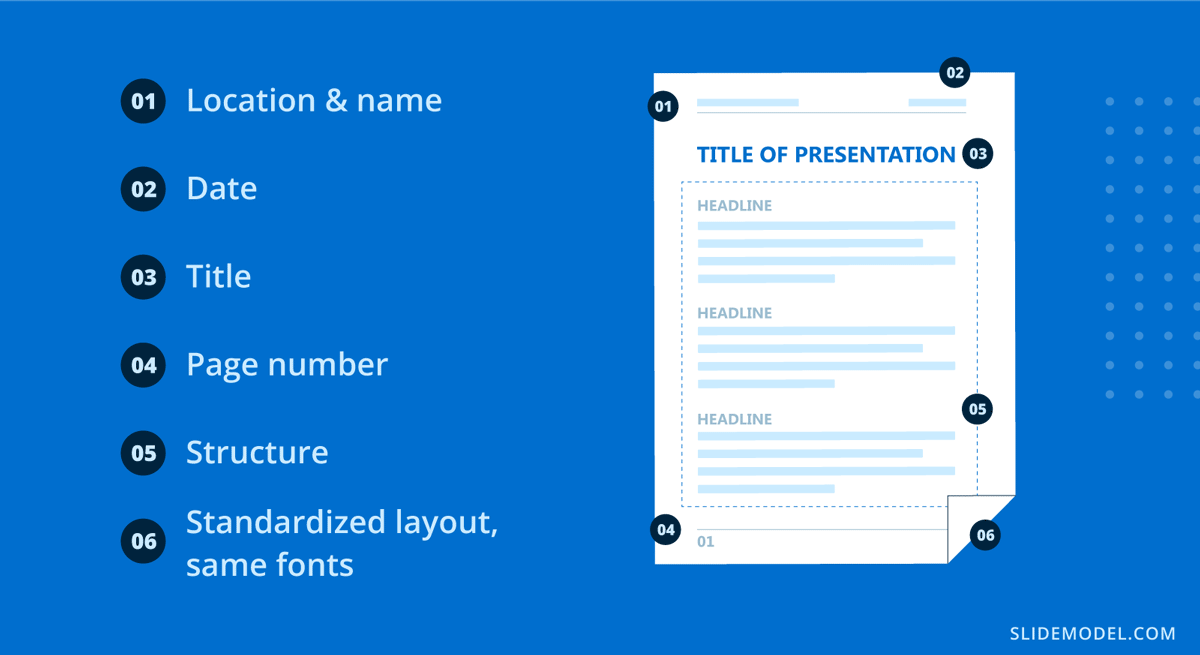
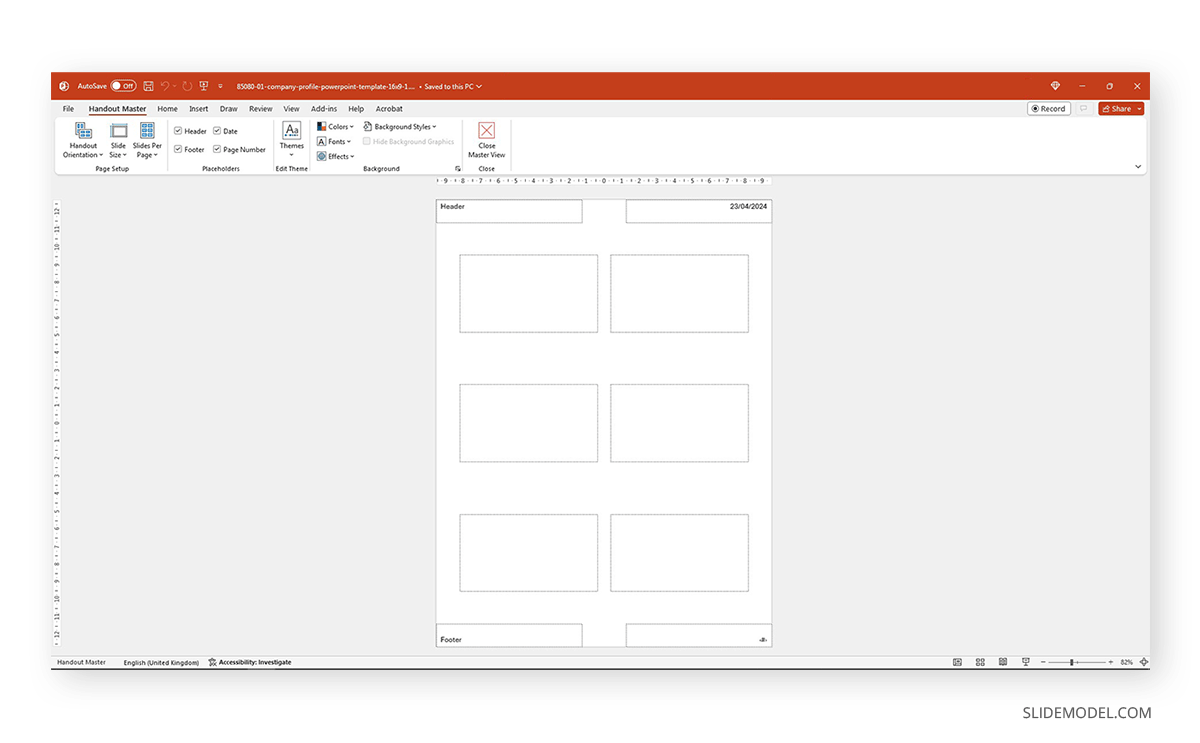
You can customize the appearance of your handout by adding a header, date, logo, contact details, etc. This works exactly the same as Slide Master in PowerPoint, so all changes will be reflected on all pages in your handout.
Now, go to File > Export and select Create Handouts.
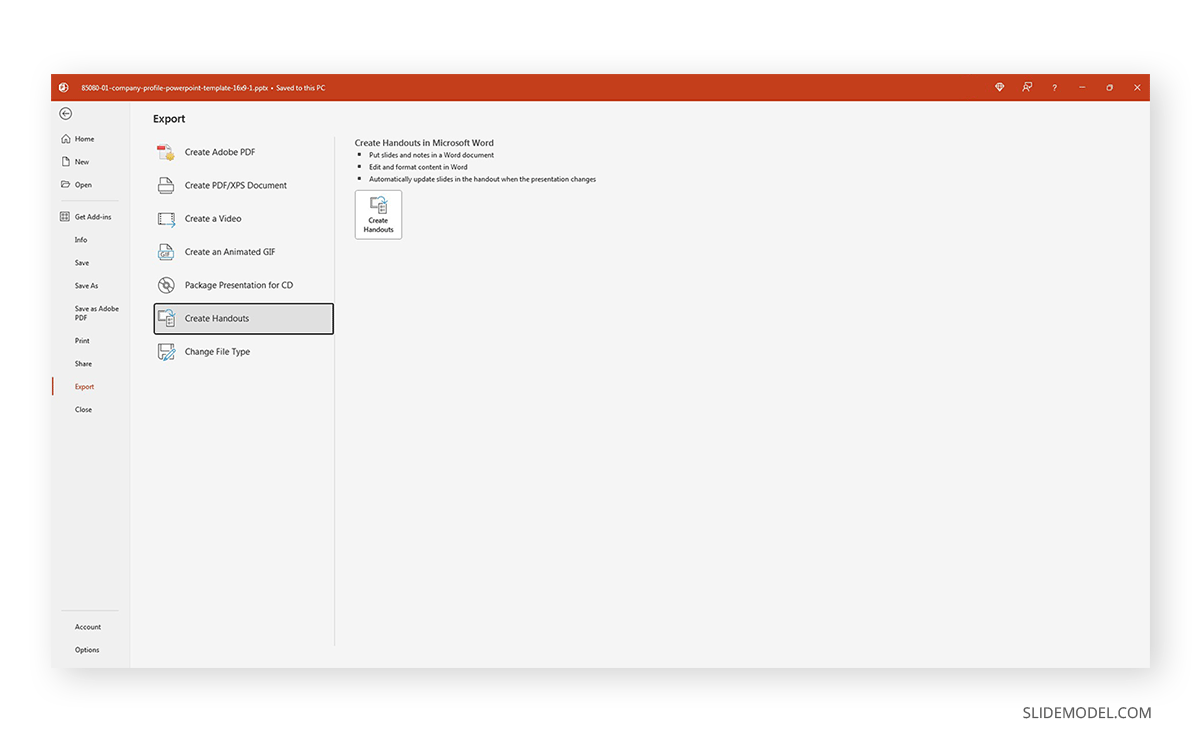
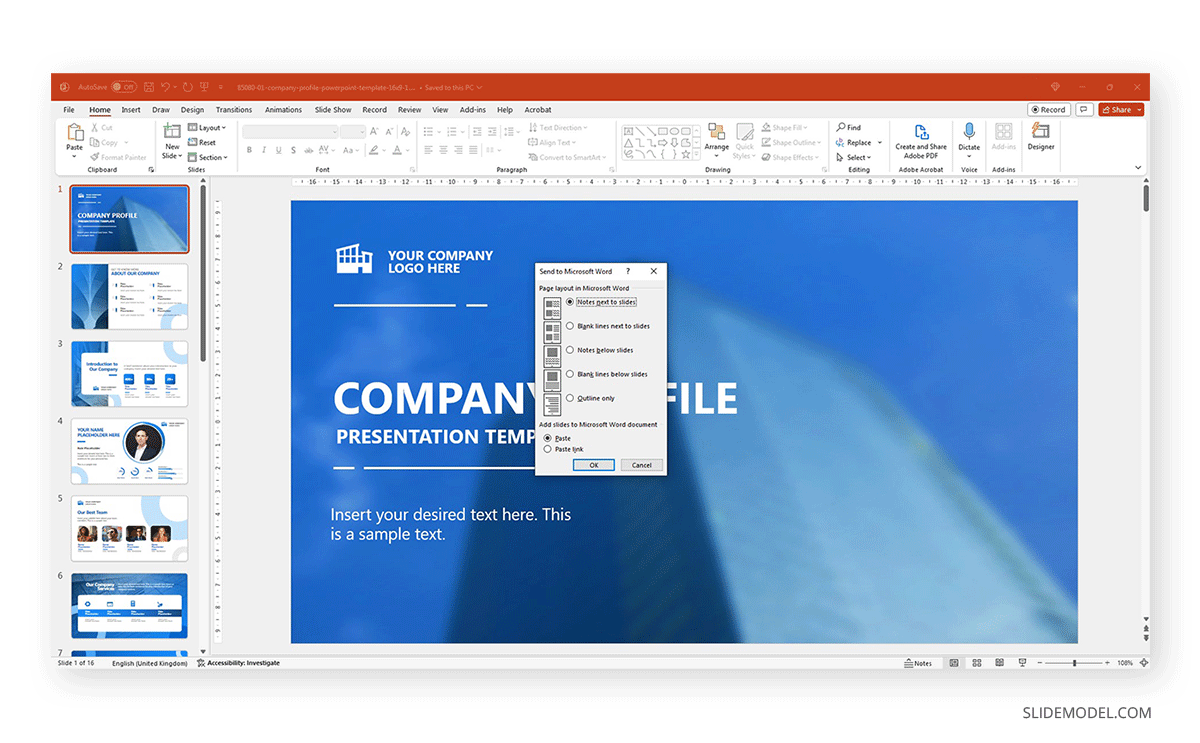
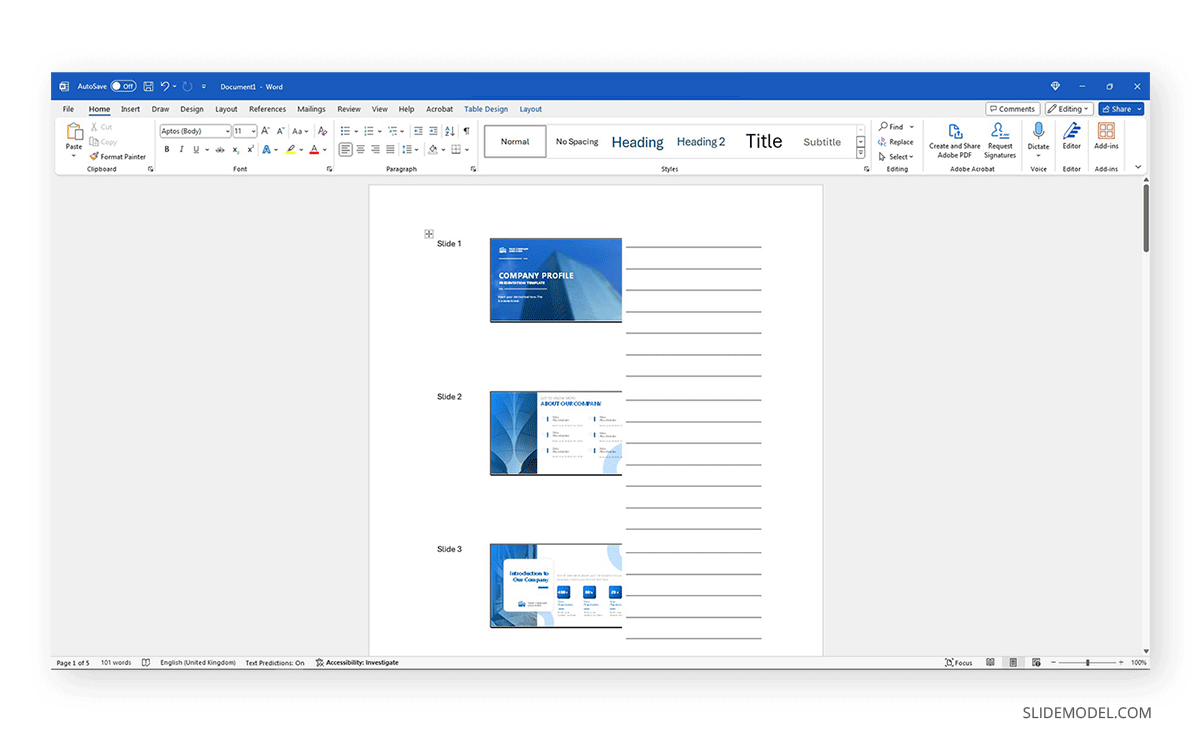
Click on the Create Handouts button, and you will be prompted with a context menu with the following options:
- Notes next to slides
- Blank lines next to slides
- Notes below slides
- Blank lines below slides
- Outline only
Select the option you prefer. We highly recommend selecting Paste to add a tiny version of the slides to your new handouts document.
Once that’s done, a new Microsoft Word document will open with your presentation handouts, which can also be customized from Word.
How to Create Presentation Handouts in Google Slides
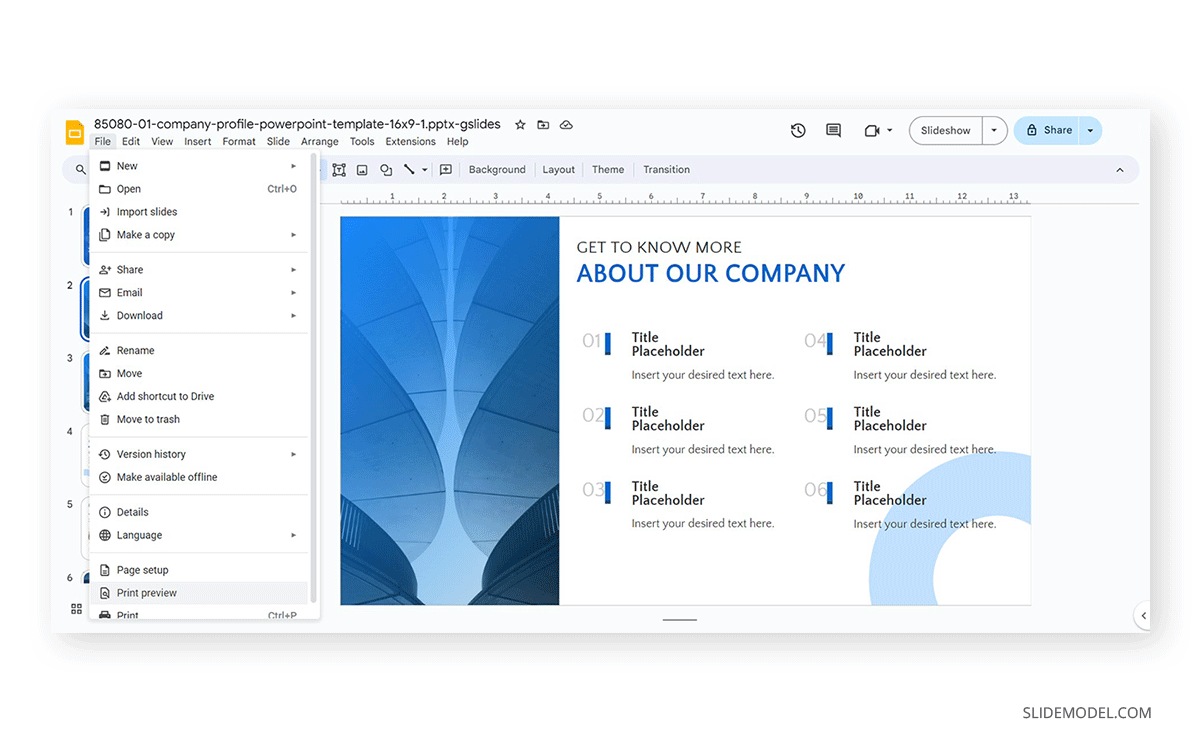
For Google Slides, the instructions are much simpler. Select your desired presentation in Google Slides and go to File > Print Preview. All options for how to print slides in Google Slides are now available.
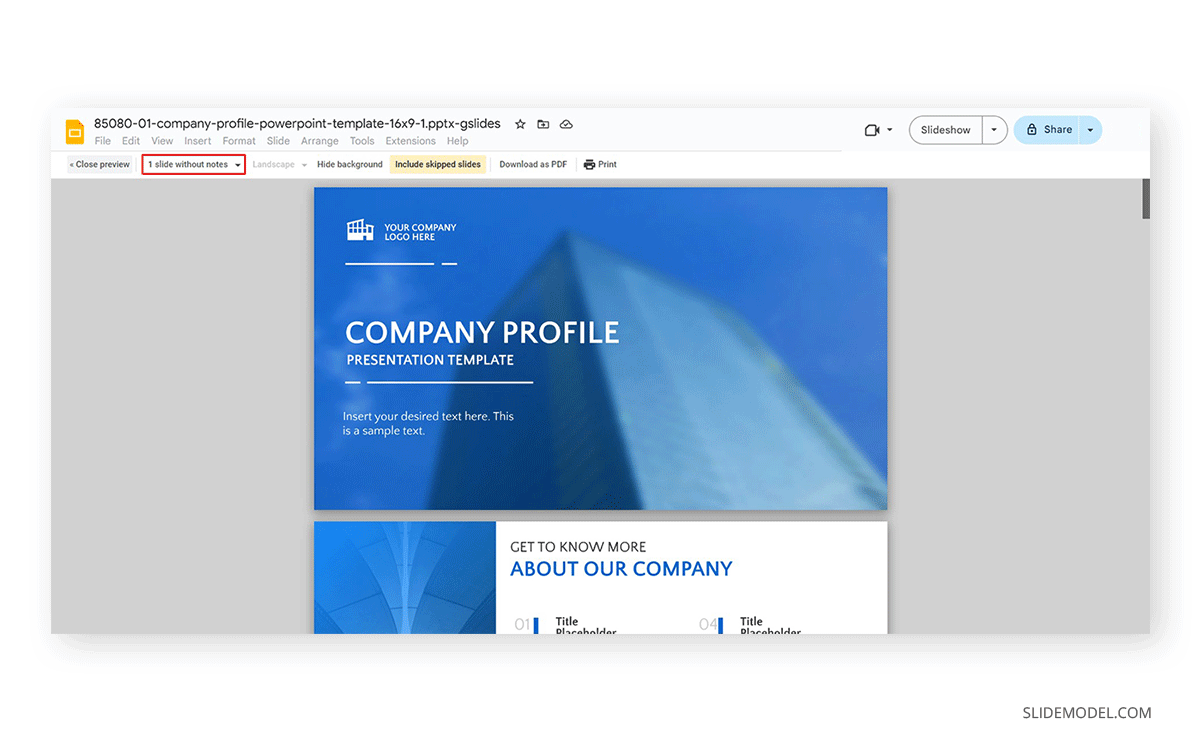
The option we’re interested in is the menu below the top bar that says 1 slide without notes.
Open that and select Handout, with the number of slides per page you prefer.
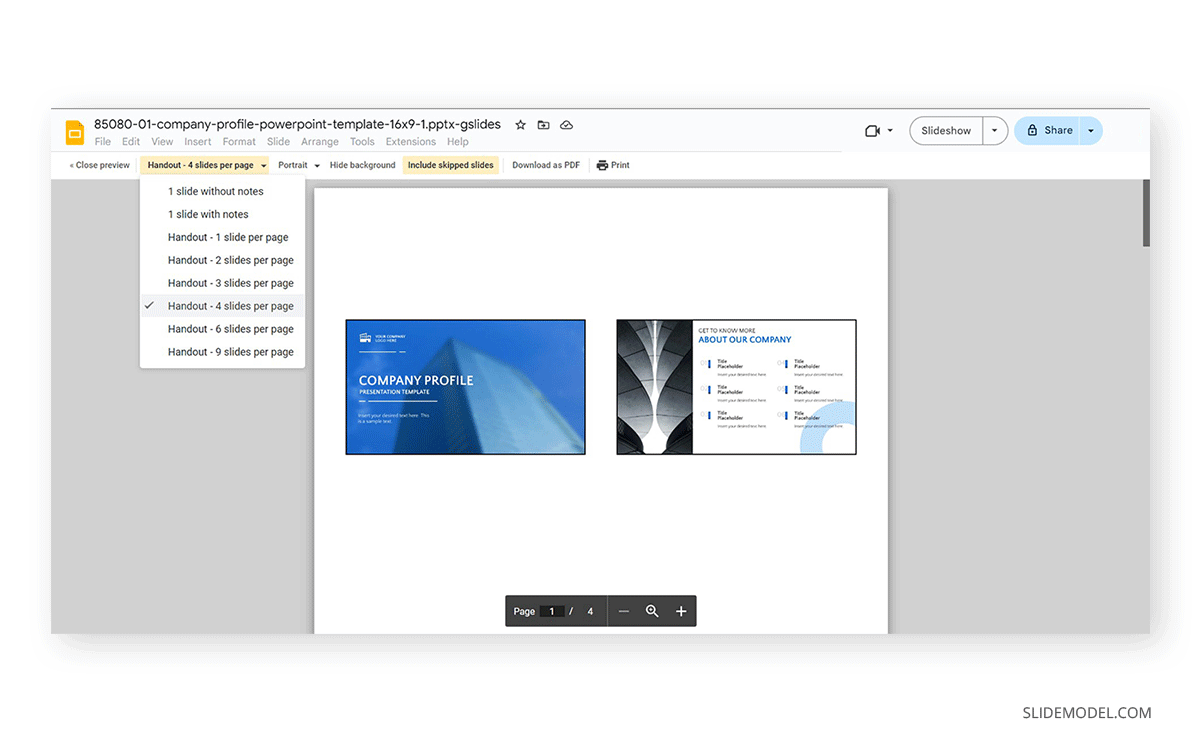
Then click on Print, and a new PDF document will be generated. Unlike PowerPoint, you have to edit everything beforehand or opt for a PDF editor like Adobe Acrobat.
Best Practices for Presentation Handouts
Handouts should be concise. The idea is to summarize information, not to confuse the audience with an overwhelming amount of data. Although these recommendations are valid for all handouts created with PowerPoint templates and Google Slides, the same rules apply to handouts created in Graphic Design Software (Adobe Illustrator, Corel Draw, etc.), as it’s tempting to keep adding unnecessary data or complex illustration effects.
Sharing your handout before the presentation starts is advisable, as it’s the moment most attendees will gather and where the expectation about what the talk will be about is at its highest. In our experience, the audience tends to grow restless toward the last 5 minutes of your presentation, with some attendees leaving if they have to attend another conference with a very limited timeframe between both. Distributing a handout during the presentation is distracting and will negatively impact your presentation’s performance.
Finally, as you would do with poster presentations, focus on readability. Avoid using heavily contrasting colors or text that looks too small to read for the sake of adding more data. The handout is a tool to complement your presentation, not to summarize countless words.
Final Words
Handouts for presentations are not an optional add-in. They are a vital element of effective academic and business presentations. By providing a clear structure to your handout or using digital mediums to help people with impairments, you are taking into account accessibility, one of the best practices you can engage early on in your path to becoming a professional presenter.
