Sometimes, a video recording for a presentation session can help disseminate the message. This might include a corporate presentation or perhaps even a class lecture. Unlike PowerPoint, Google Slides did not have a video recording feature until November 2023, when a Rec function was added for certain users, including Google Workspace users with educational, business, or enterprise plans. However, the feature comes with a few limitations compared to alternatives. Below is an overview of the various methods to record a presentation on Google Slides.
Record Video on Google Slides using Rec Feature
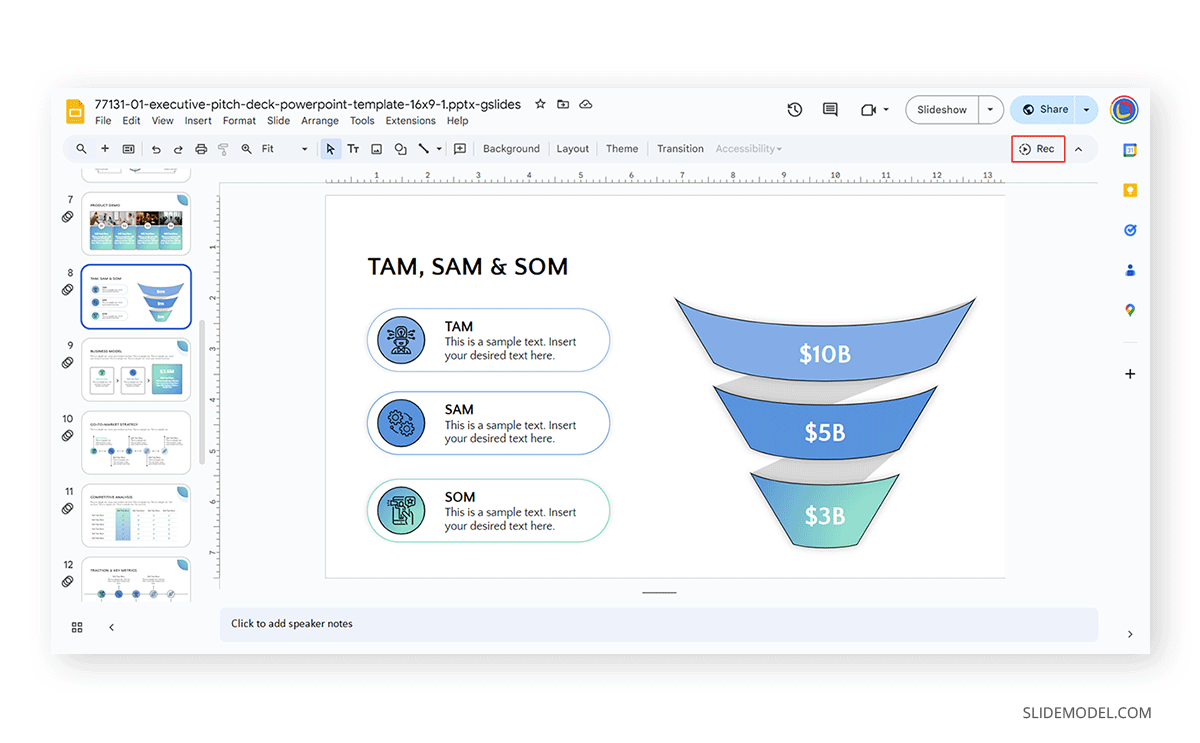
If you are a premium Google Workspace user who has editing privileges for a Google Slides presentation, you can use the Rec button at the top right corner of the screen. Video recording can be initiated via Rec -> Record new video.
Recording Controls: Regardless of whether you’re using Google Slides templates or PowerPoint templates with Google Slides, you can record a presentation using this option and also enable your microphone and camera to be included in the video.
Like any common video recording tool, you can pause, resume, stop, and re-record videos. This feature also offers additional options, such as hiding speaker notes and adjusting settings for picture-in-picture.
Download and Sharing: Once the video session is recorded, you can download or share the video. Videos recorded using this native Google Slides feature are saved to Google Drive.
Limitations: Unfortunately, the recording feature for Google Slides has several limitations, such as a 30-minute cap on video recording and the need to use either Chrome or Edge browser for the feature to work.
Related: How to Record a Presentation in PowerPoint
Record Video on Google Slides using an External Video Recording Tool
Add Screencastify Extension from Chrome Web Store
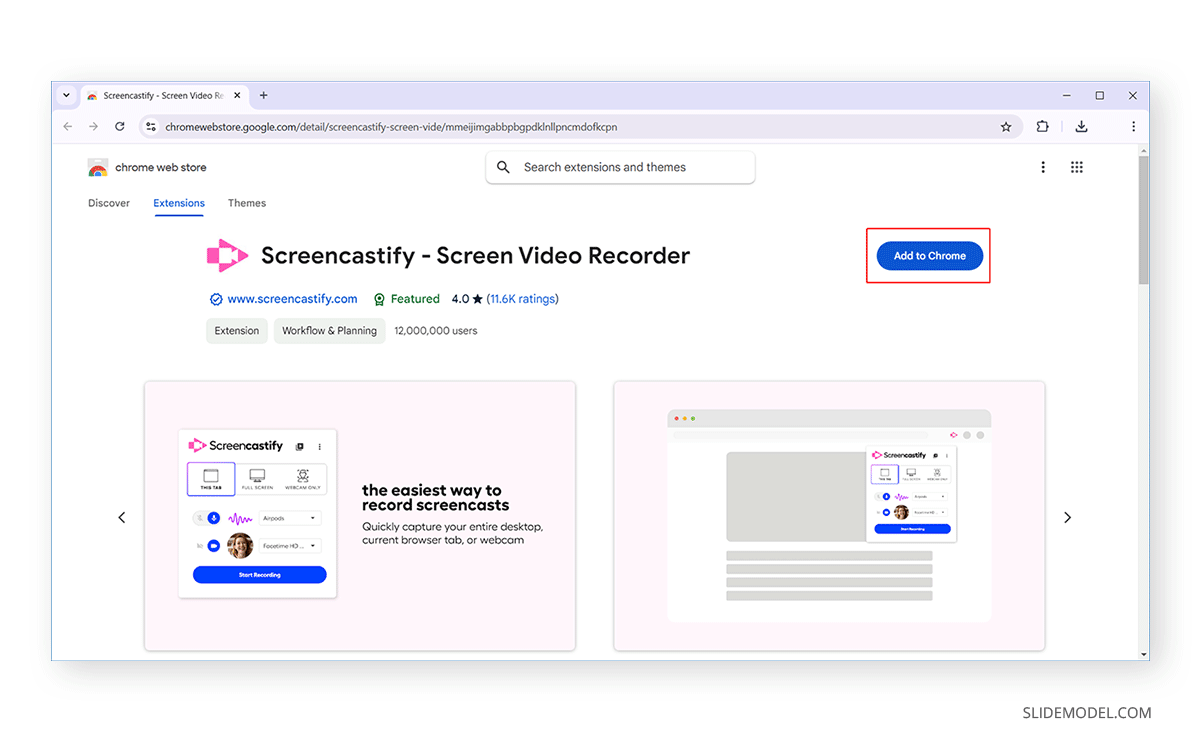
Various tools can be used to record videos on Google Slides. For this post, we will use the free version of Screencastify Screen Video Recorder. This is a video recording tool that also provides annotation options. You can use this tool to add the Screencastify extension from the Chrome Web Store.
Configure Screen Recording Settings
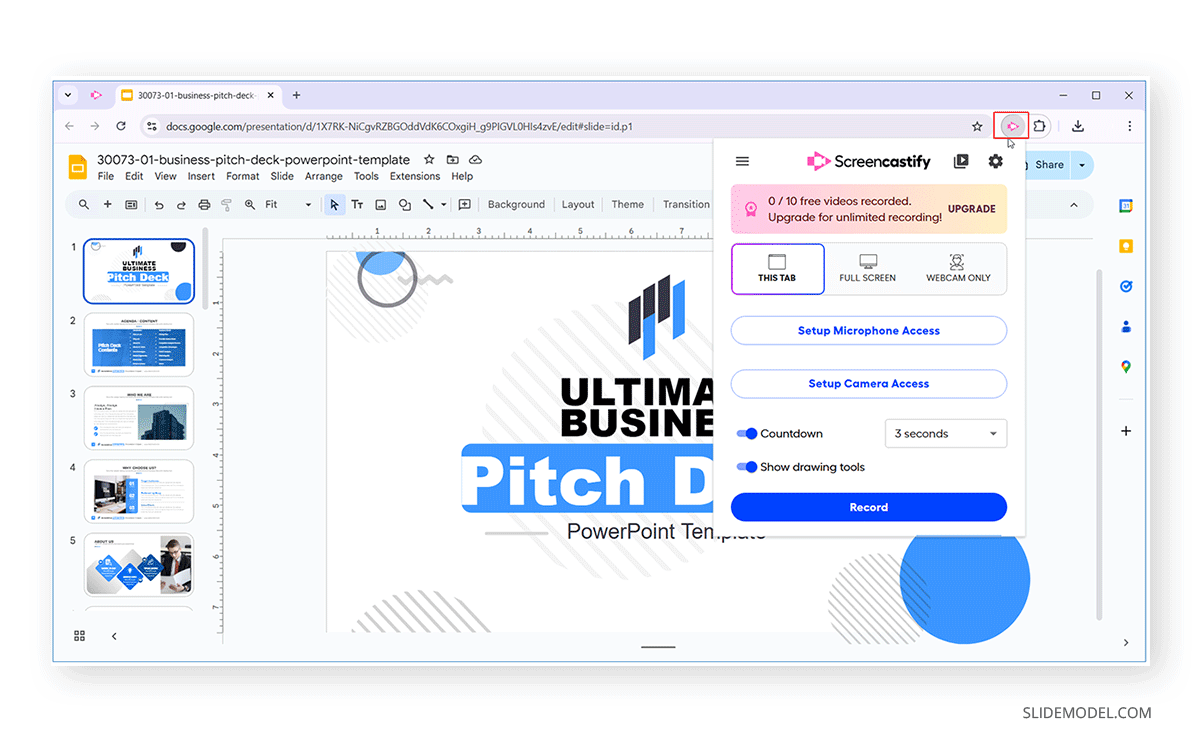
Once installed, the extension requires logging in with your Google account and enabling access to your device. Once done, you can begin recording your video by clicking the extension icon in Chrome. This will reveal various options, including optionally setting up access for your microphone and camera. You can also enable a countdown and drawing tools using the sliders at the bottom of the menu. When recording video, the extension will ask whether you want to record the current tab, fullscreen it, and enable the webcam.
Start Screen Recording
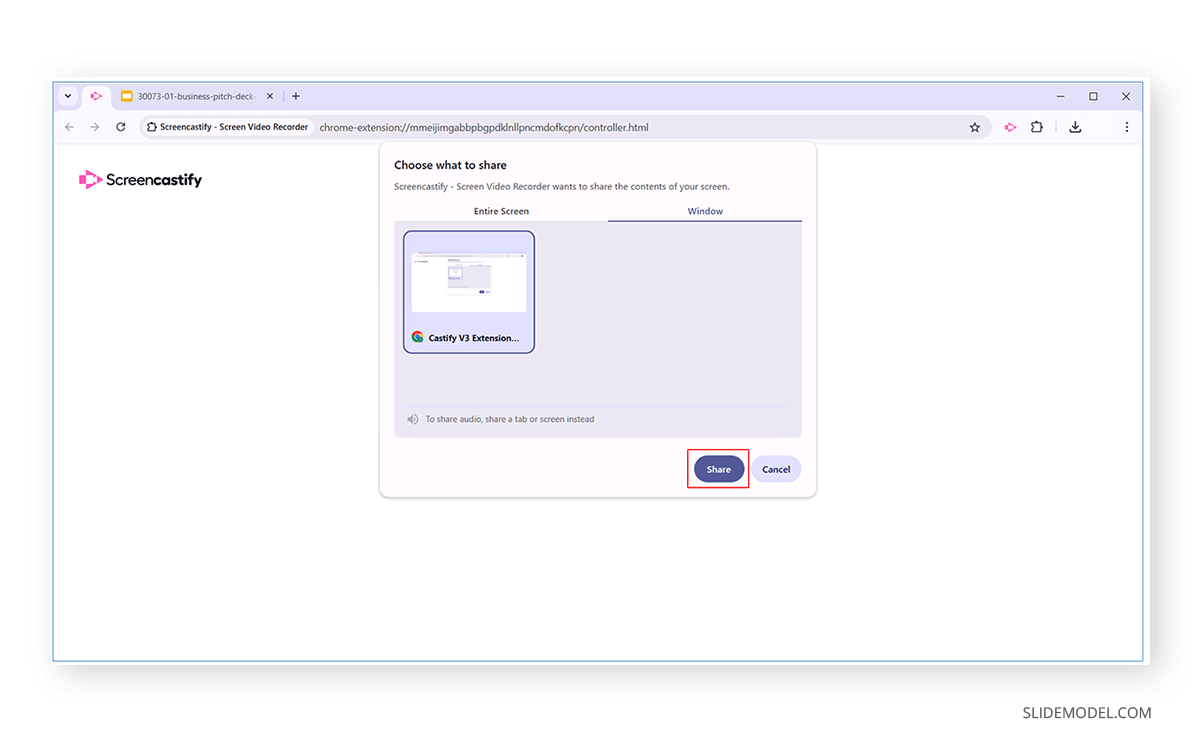
Select the window, switch to full-screen mode, and click Share to begin recording the screencast.
If you have enabled the countdown timer, a countdown will appear before the recording starts. It can also be helpful to know exactly when the video starts so you can begin presenting without worrying about bits of the video getting cut out before the recording is initiated. This is because most screen recording tools can take a few seconds after clicking the Rec button to begin capturing video and audio. You can do a voiceover to explain the slides by enabling audio, much like adding audio to a presentation. We explained the utility of this in various posts, such as in our tutorial on how to narrate a PowerPoint presentation ,which explained the benefits of adding audio to slides.
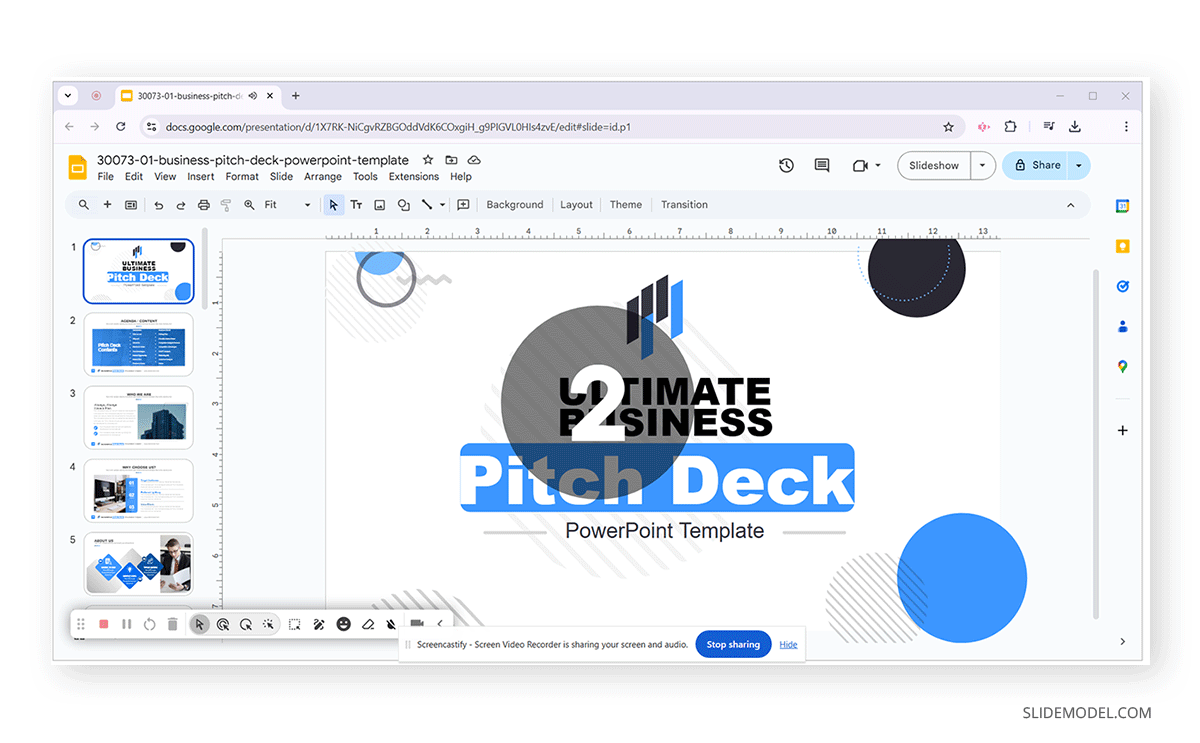
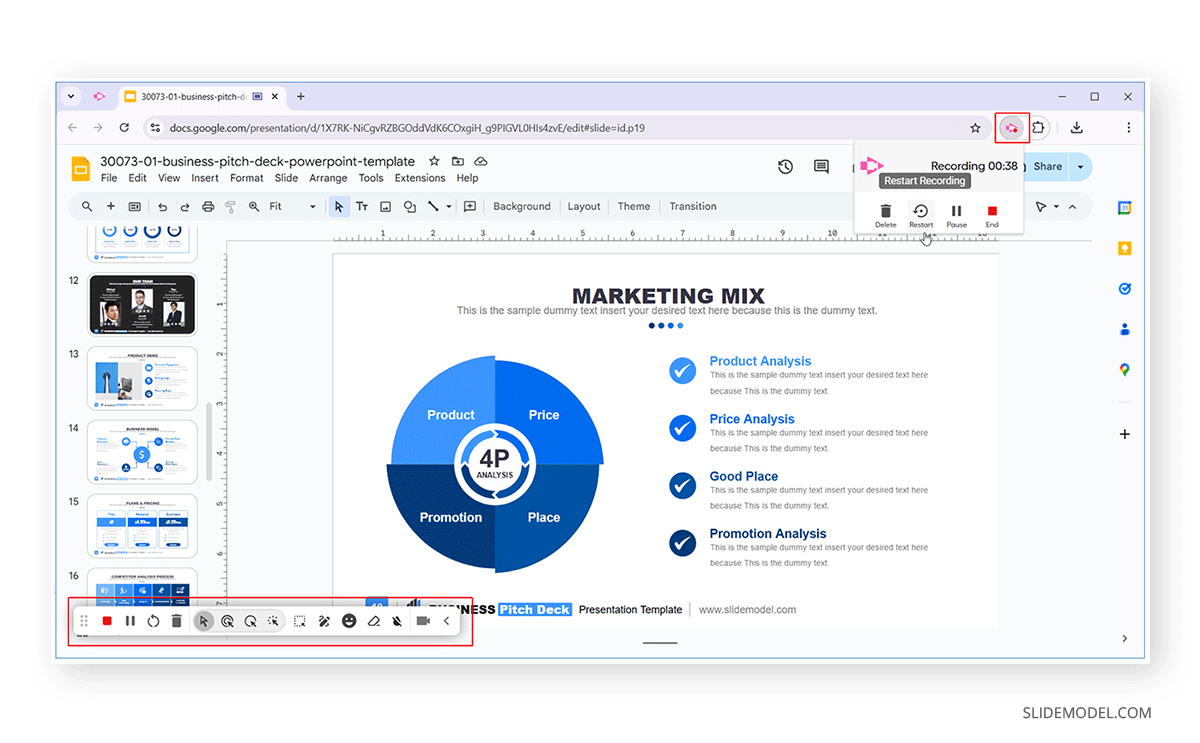
The toolbar at the bottom provides various options to manage recording and annotate your slides. The annotations are added to the screen temporarily and do not affect the slide content. You can also access some basic options to pause, restart, delete, and end the video by clicking the Screencastify icon next to the address bar or via the Extensions menu in Chrome.
Switch to Slideshow Mode
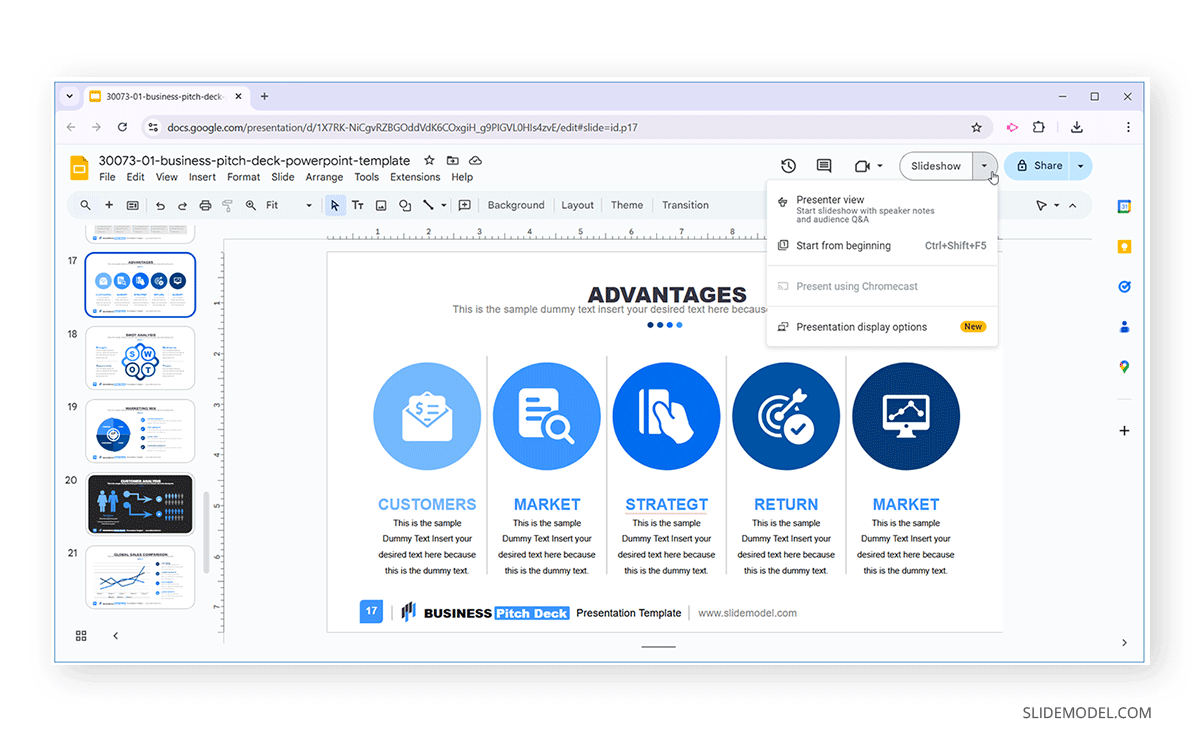
Once the recording is initiated, you can switch to Slideshow mode to record the presentation as a slideshow or opt for Normal view. In this case, how to start a presentation or end a presentation is entirely your choice, however, it is worth mentioning here that you will not be able to start recording if you are already in Slideshow mode. Therefore, you must start the recording and switch to Slideshow mode. If you wish to cut out any part of the recording, you can do so later via editing options provided by Screencastify. Basic editing options are also available for free users.
Use Spotlight to Highlight Important Information
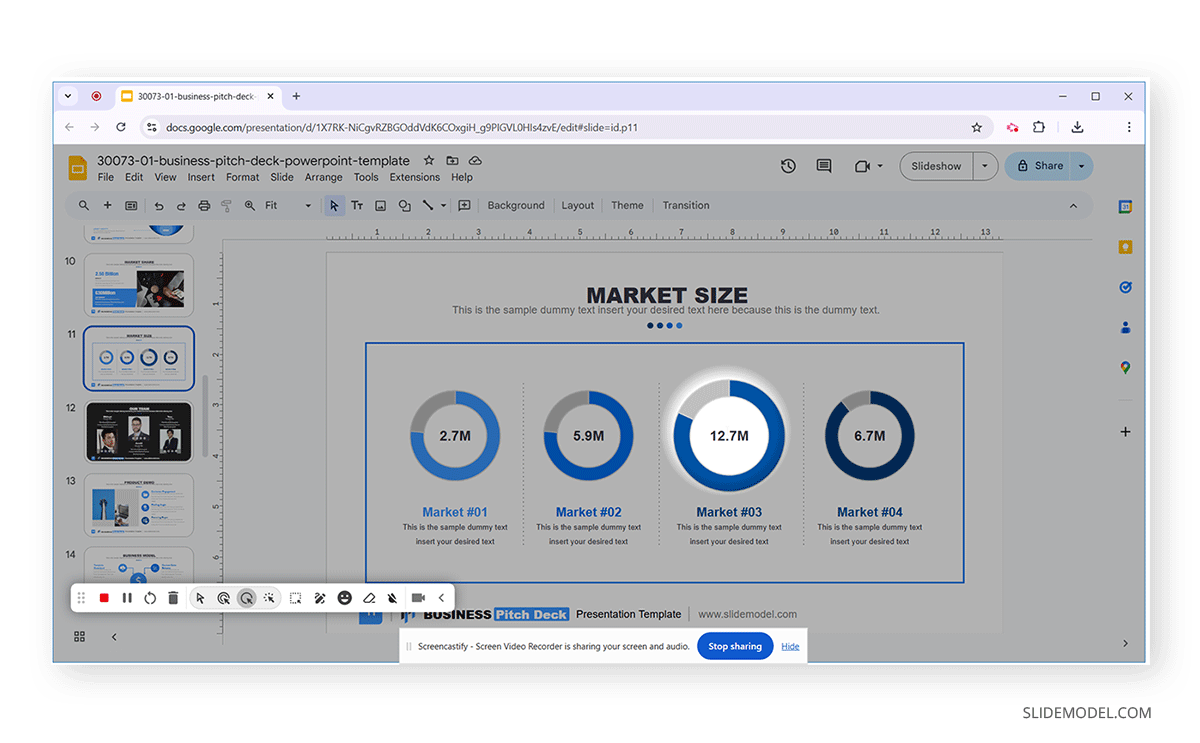
Screencastify provides a Spotlight tool that can enable you to highlight important information by focusing on it using a virtual spotlight.
Annotate Slides using Shape and Pen Tool
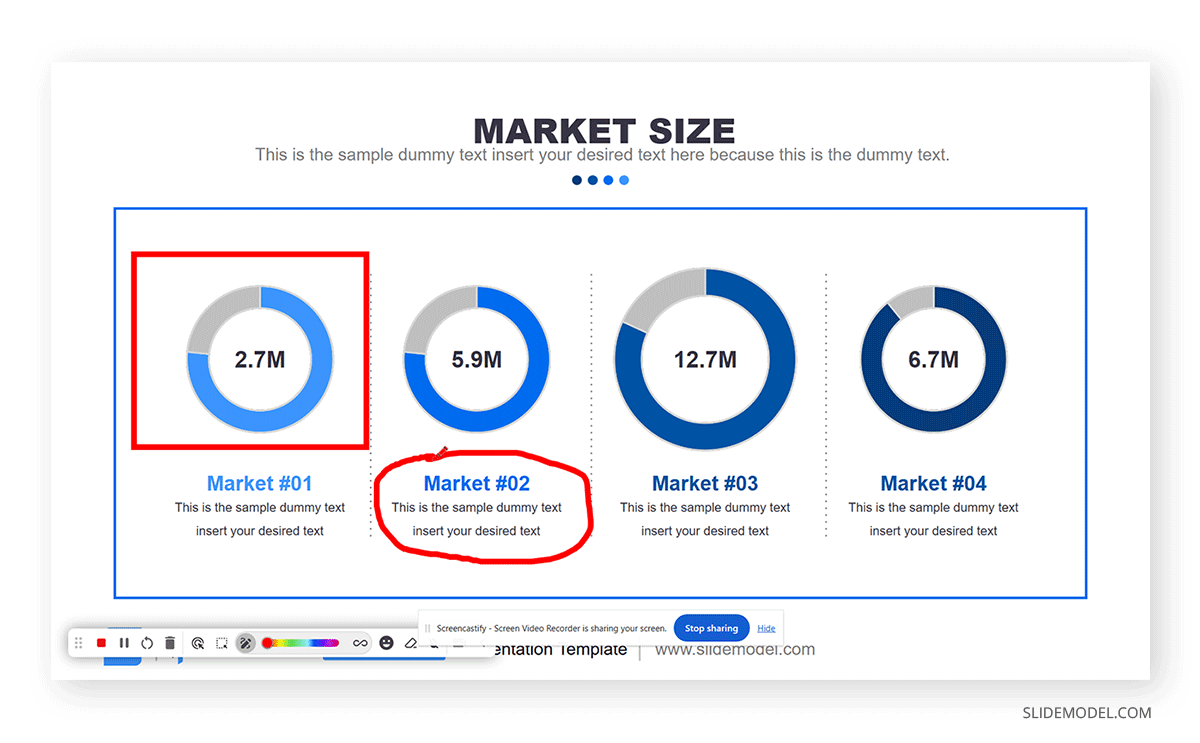
Screencastify provides multiple on-screen annotation options, including a shape and pen tool. You can also pick a custom color to highlight on-screen content.
Lighten the Mood with Emojis and Fireworks
Unlike conventional screen recording tools, Screencastify also comes with Emojis to lighten the mood and make your presentation more engaging. There is also a Fireworks button to initiate onscreen fireworks. This feature might be useful when you have something to celebrate, such as good sales, successful project closure, or perhaps when you are giving your last presentation before the Holiday Season.
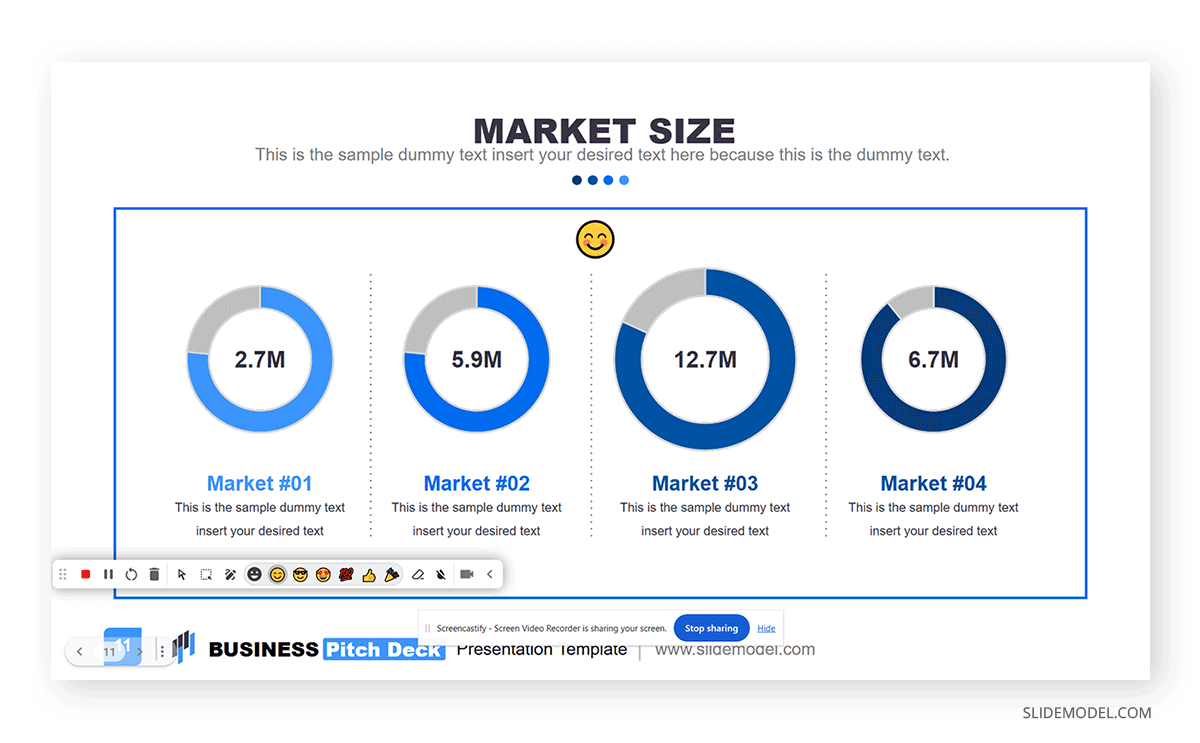
Save Recording to Google Drive
Once you finish the recording, click End Recording to save your recording to Google Drive.
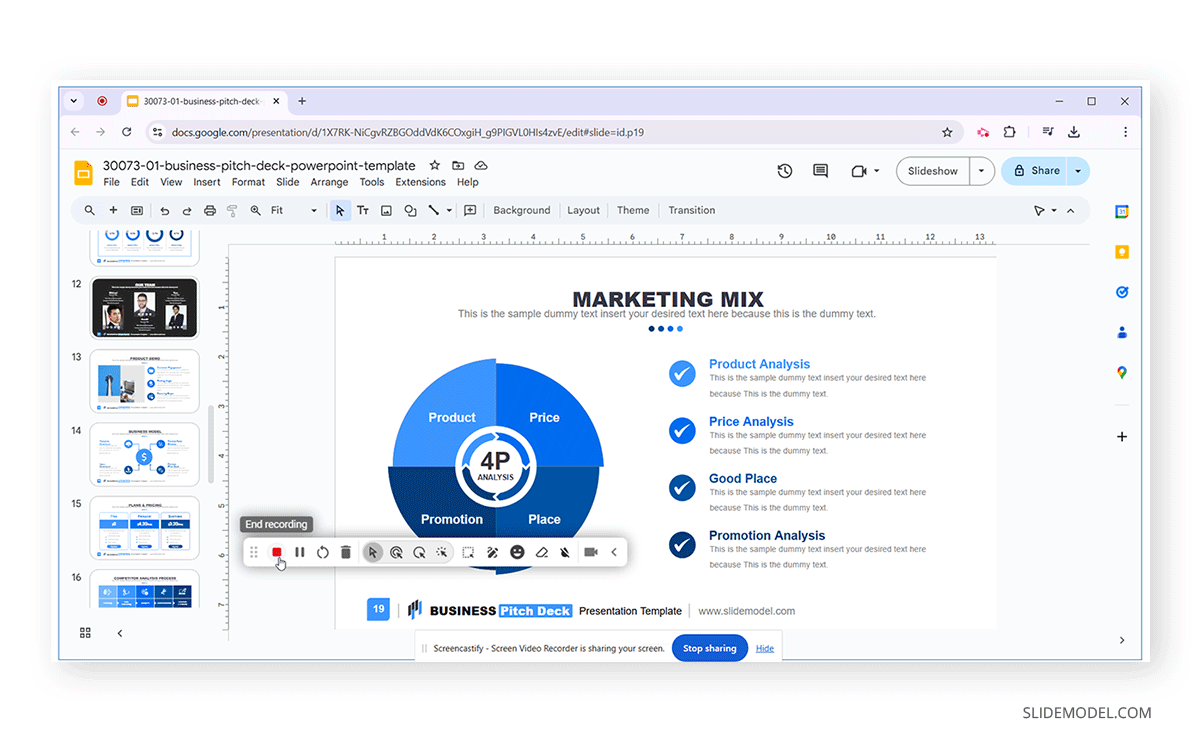
Edit Video Recording for Your Google Slides Presentation
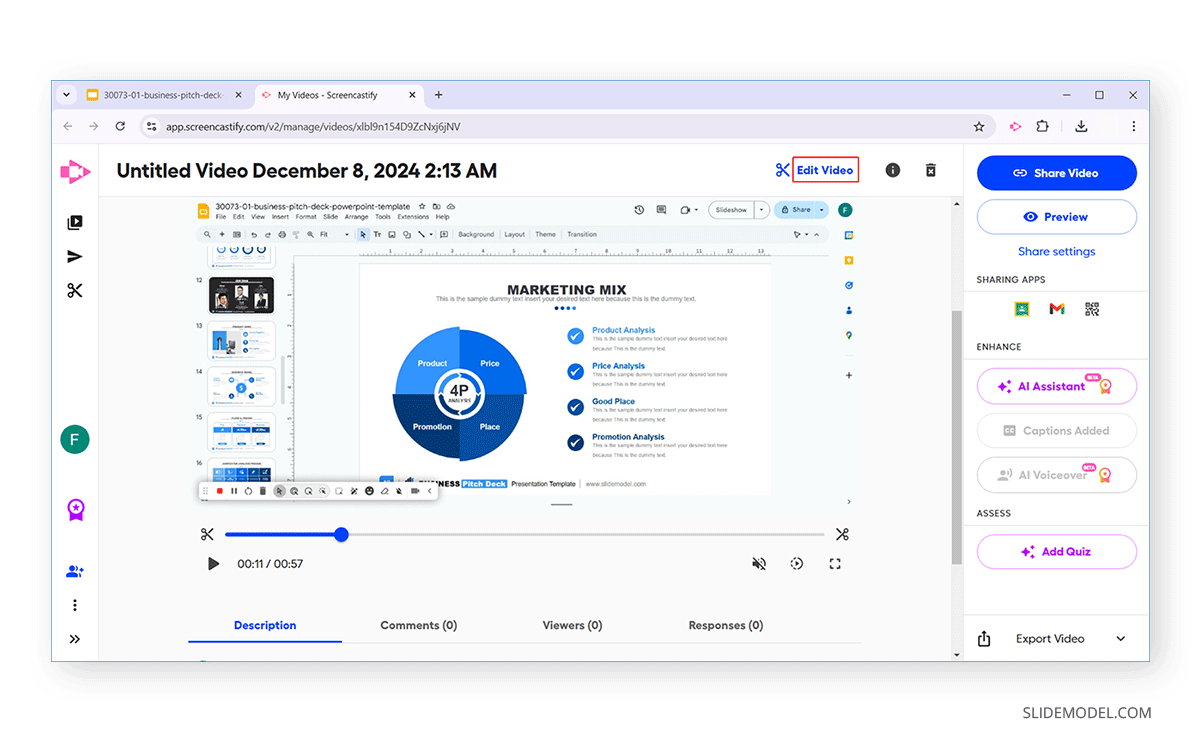
Once the recording concludes, you will be redirected to a dashboard where you can edit and share your video online. To edit the screen recording, click Edit Video.
Once the online video editor opens, you will be asked to add a video title to proceed further.
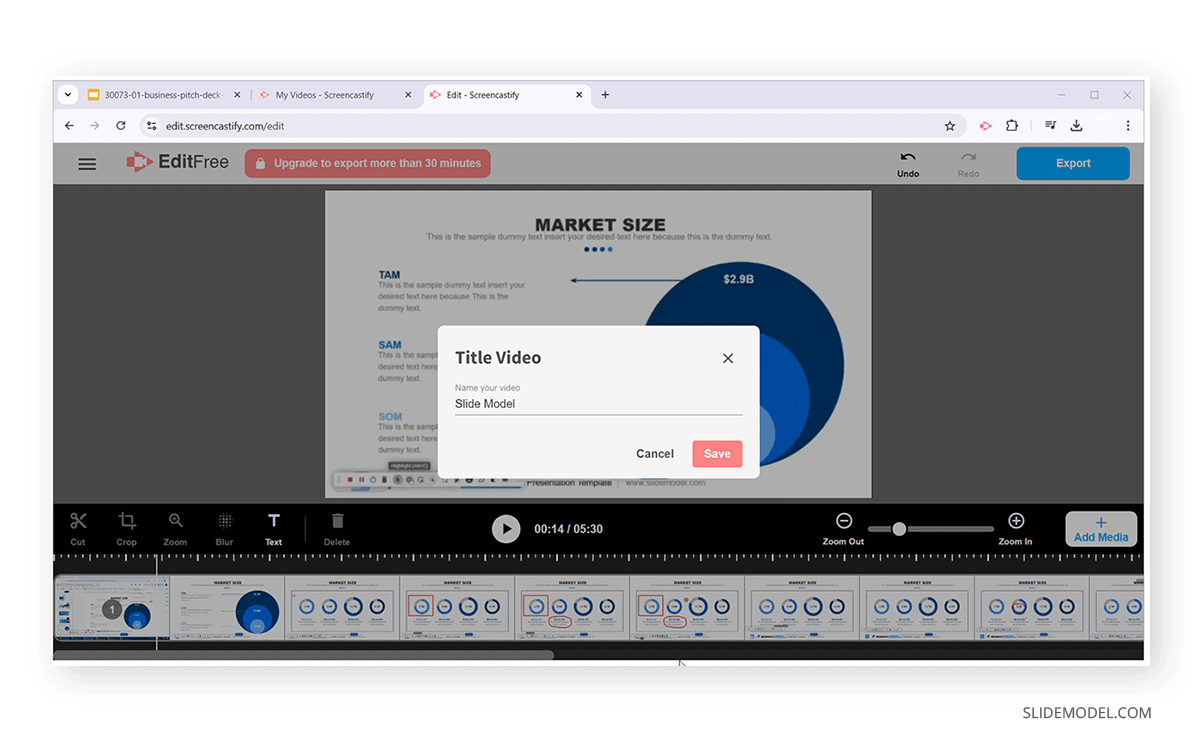
The Screencastify video editor comes with basic video editing features to add media and cut and crop the video. Some additional handy features include the ability to blur and zoom into parts of the video.
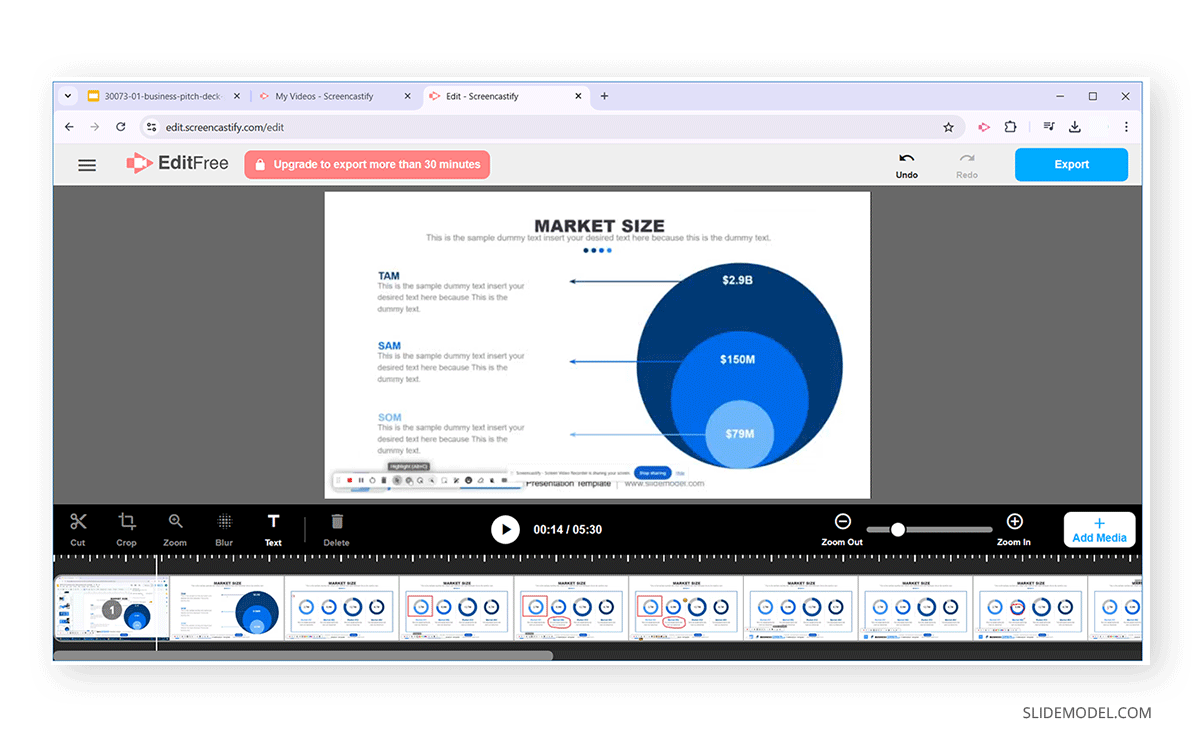
Cut Video to Customize Video Presentation
Suppose you want to shorten the video length to remove bits of the video recording, such as an initial or concluding part that appears less relevant or parts from within the presentation. In that case, you can use the Cut button to remove areas you don’t need.
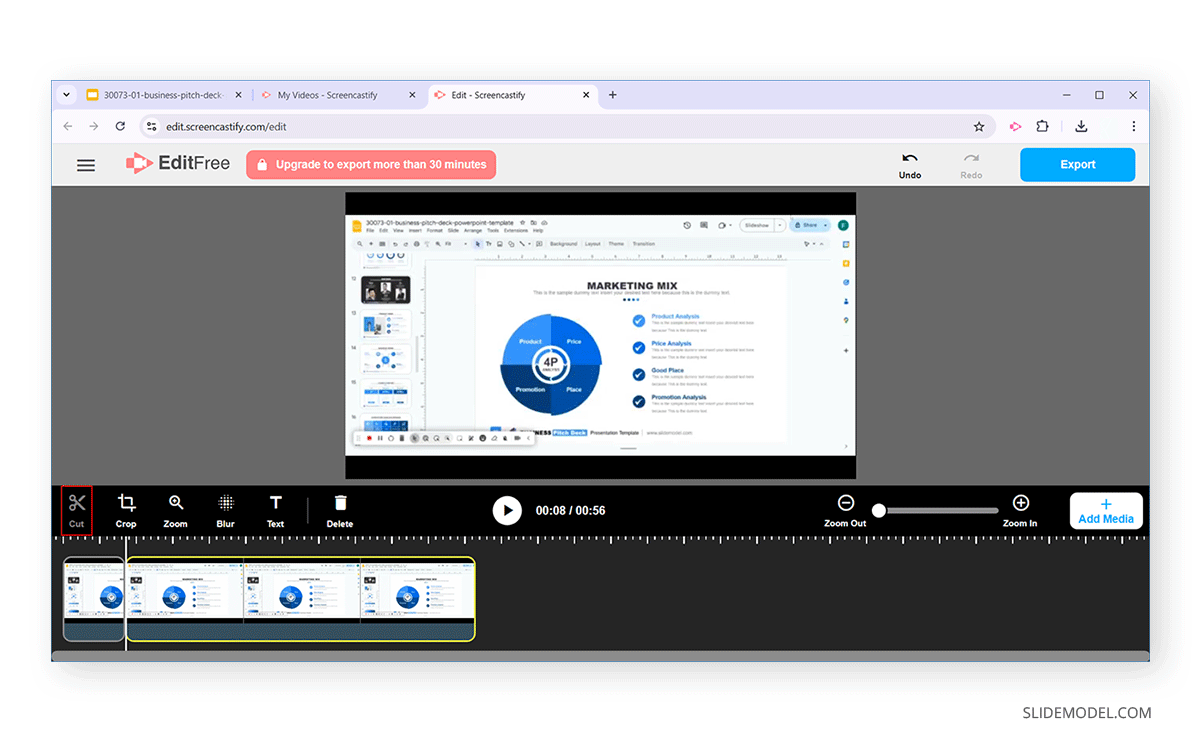
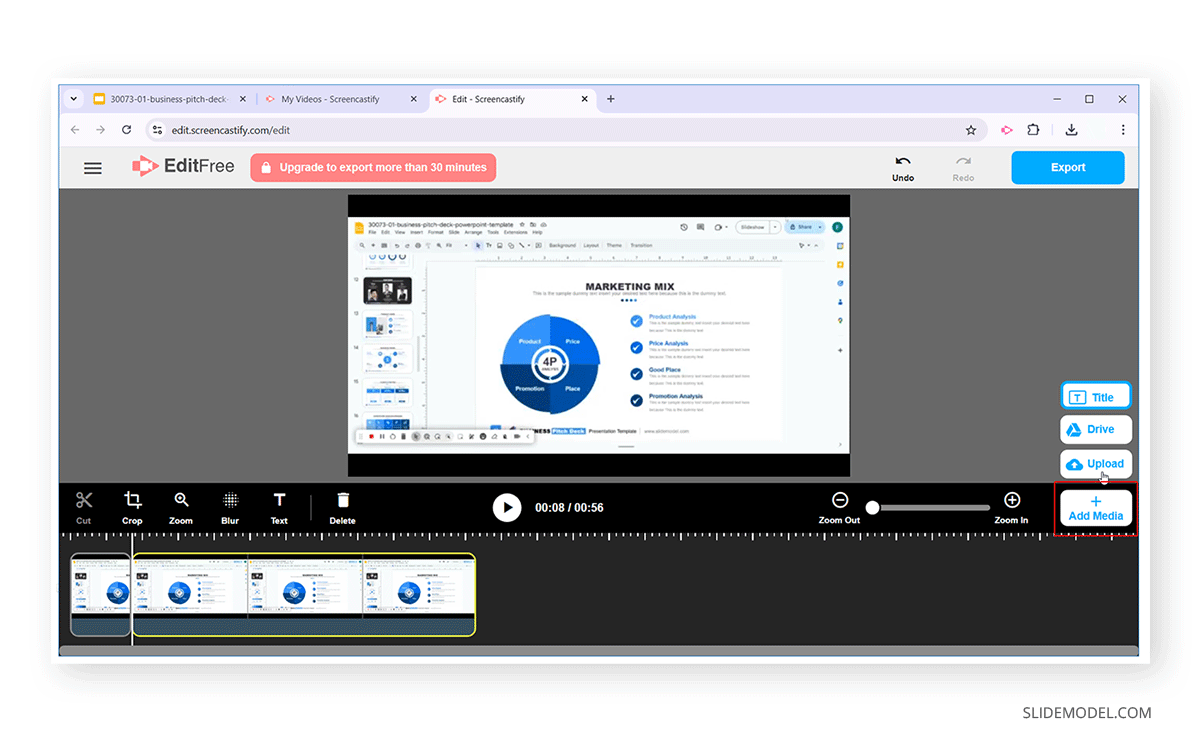
Add Media to Video
Other than cutting parts of your video, you can add additional video clips via the Add Media option. The options included in this menu include the ability to upload a video from supported formats, import a video from Google Drive, and an option to add a title.
Screencastify supports various video formats for importing videos into your project. These include MP4, WEBM, MKV, FLV, AVI, MOV, WMV, MPG, MPEG, M2V, M4V, and F4V.
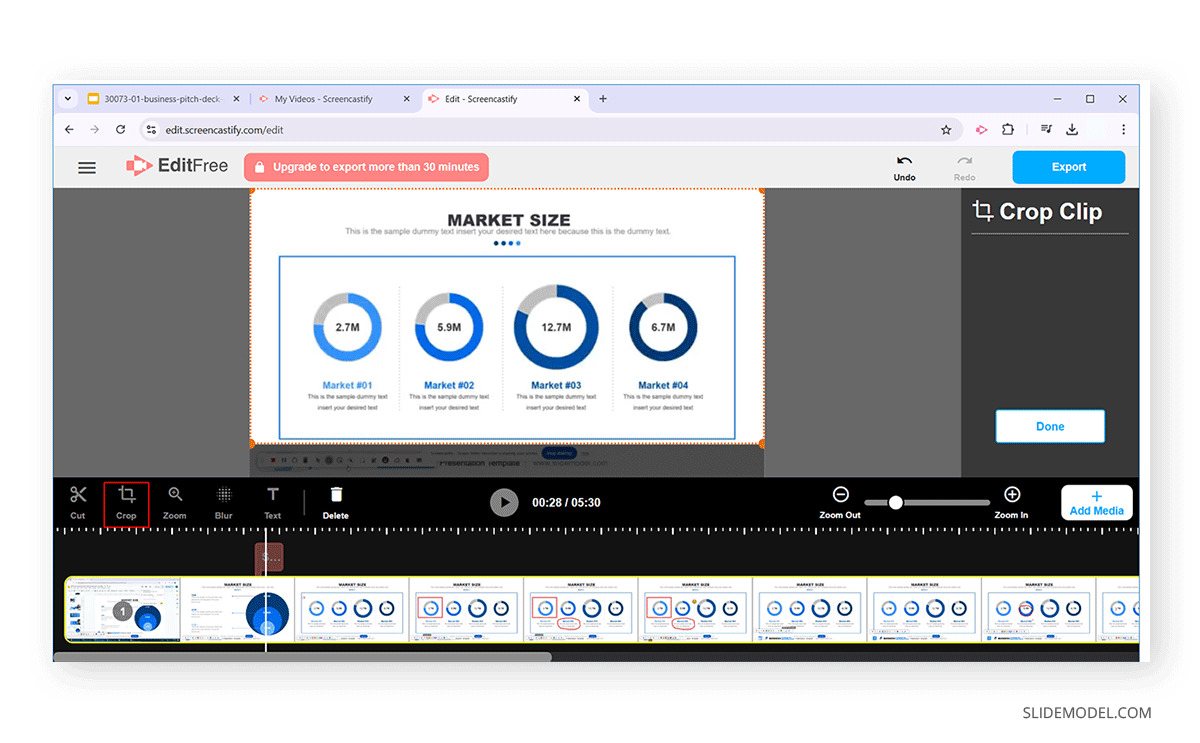
Crop Google Slides Video Presentation
Using the Crop feature, you can crop your video recording to exclude certain parts of the screen to suit your needs.
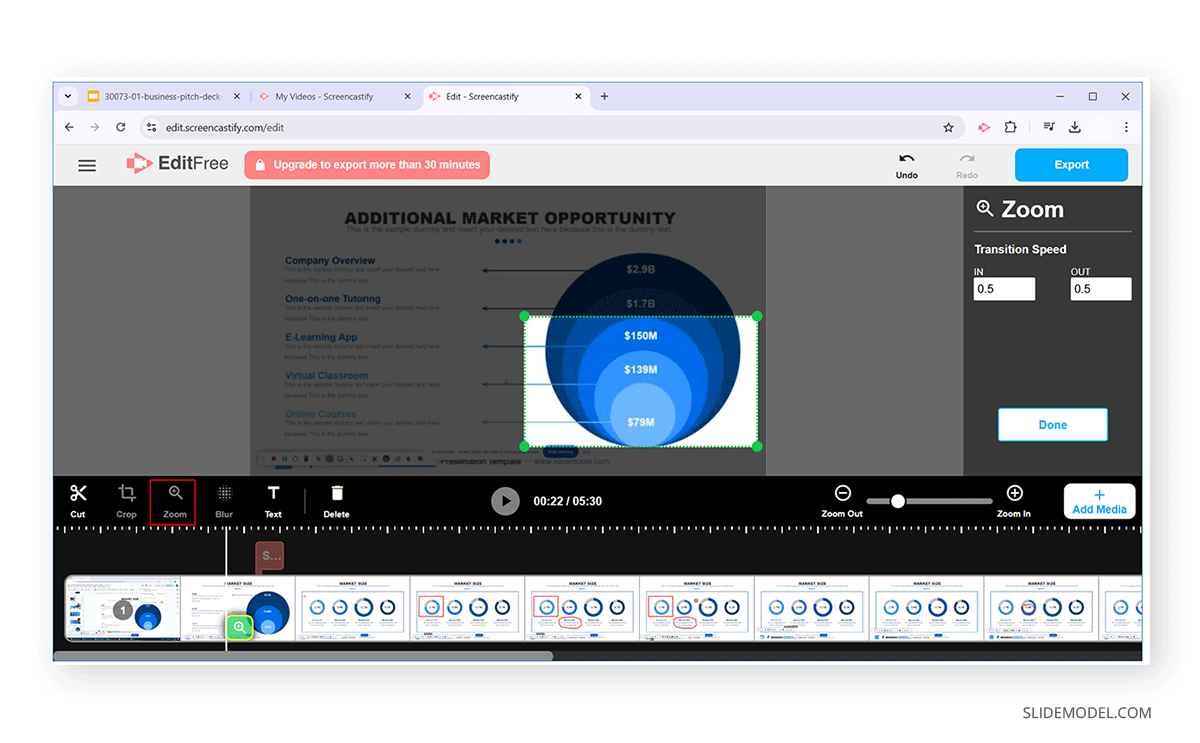
Zoom Transition for Google Slides Video Presentation
Screencastify provides the Zoom transition that can zoom into parts of a video clip to emphasize an important part of your video. This can be a good option if you’re wondering how to make a presentation interesting by highlighting key areas for emphasis.
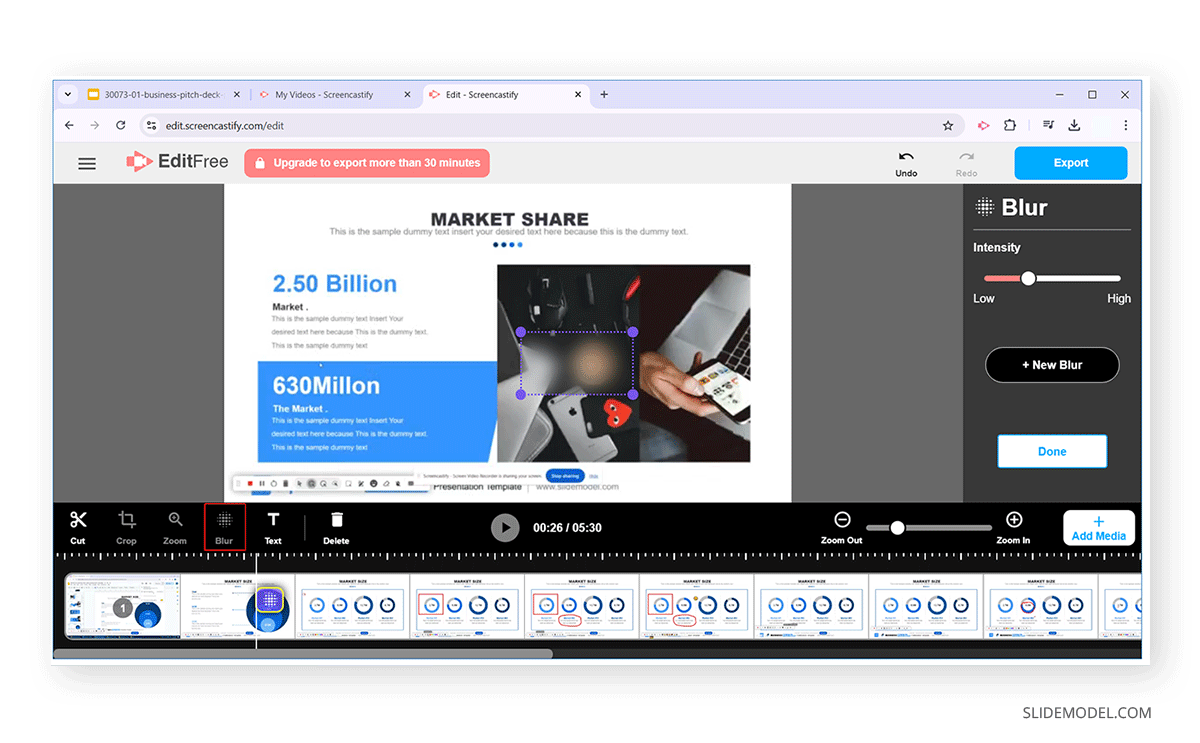
Blur an Area in the Video
Many people need to blur parts of their video presentation to hide a password or other sensitive information. You can use the Blur effect to select and hide parts of your video by picking a specific area with a custom blur effect intensity.
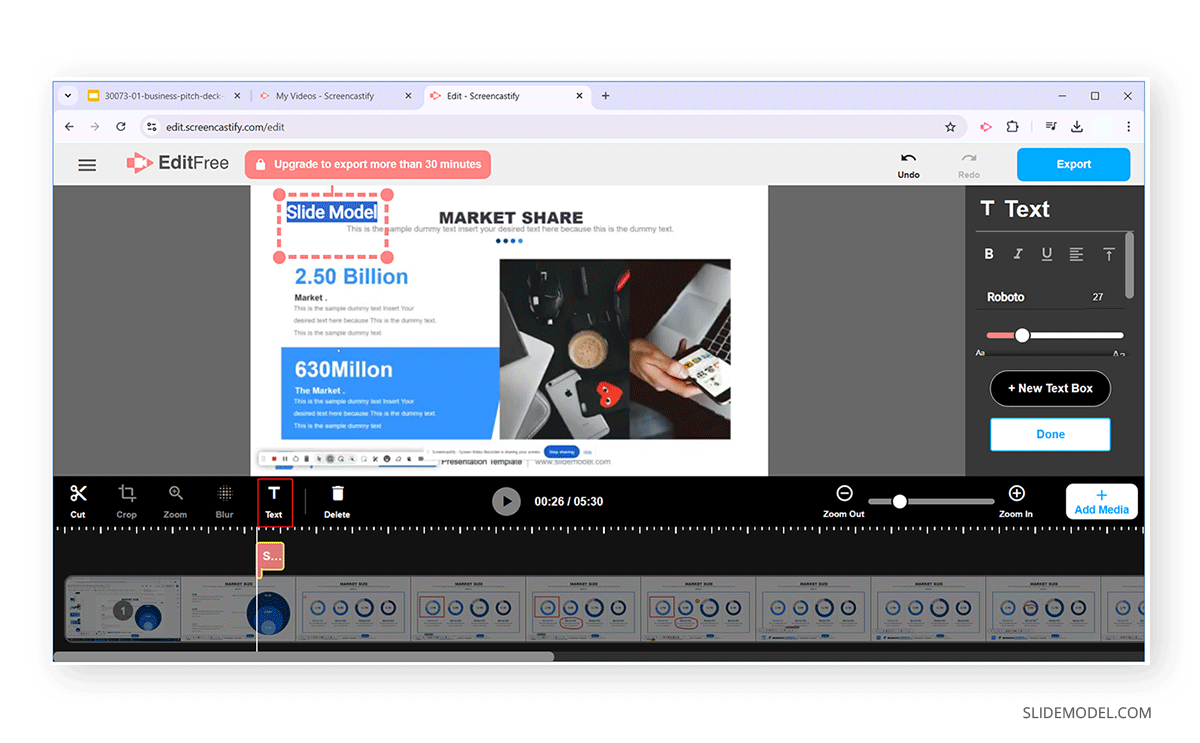
Add Text to Video
Overlay text can help the audience know when a new topic has started or add supporting information, such as the name of a project, author, or concept, to help them keep track of what’s being discussed ahead. You can use the Text button to add custom text to any part of your video during editing.
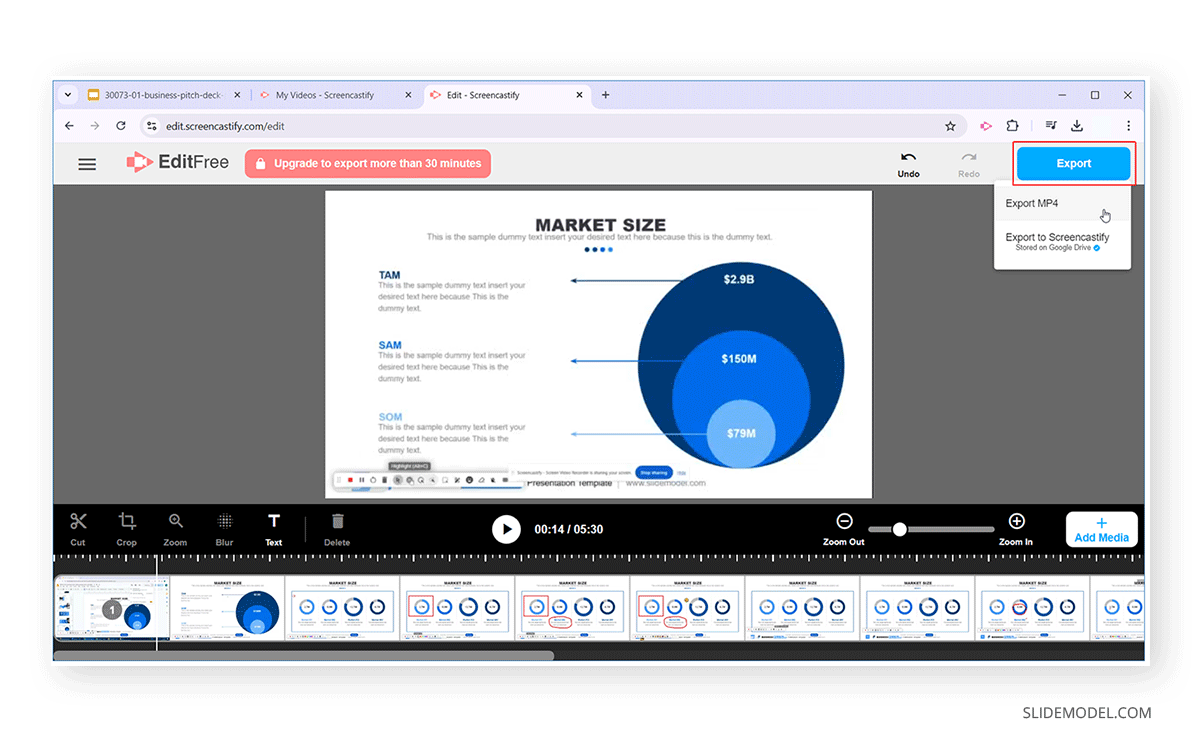
Export Video
Once edited, you can export the video to MP4 format to download it or save it online to Google Drive.
Share Video with Collaborators and to Google Classroom
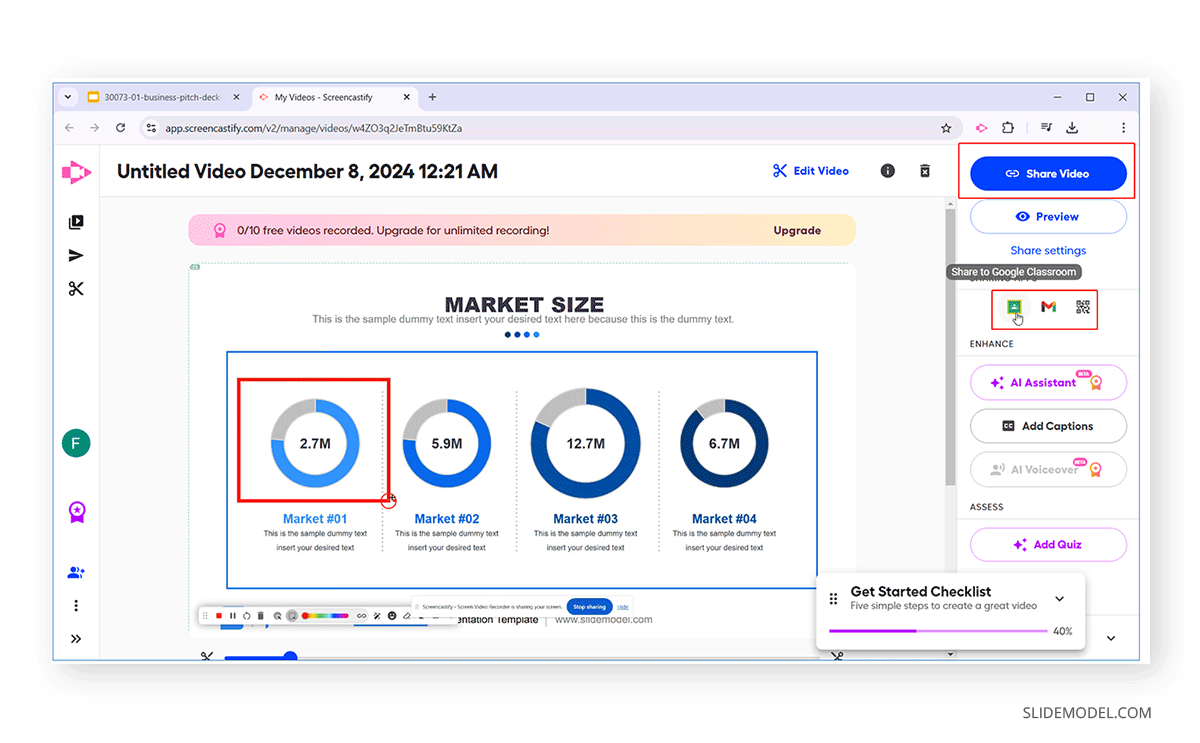
The video-sharing options include sharing it via direct link, using a QR code, or exporting it to Google Classroom.
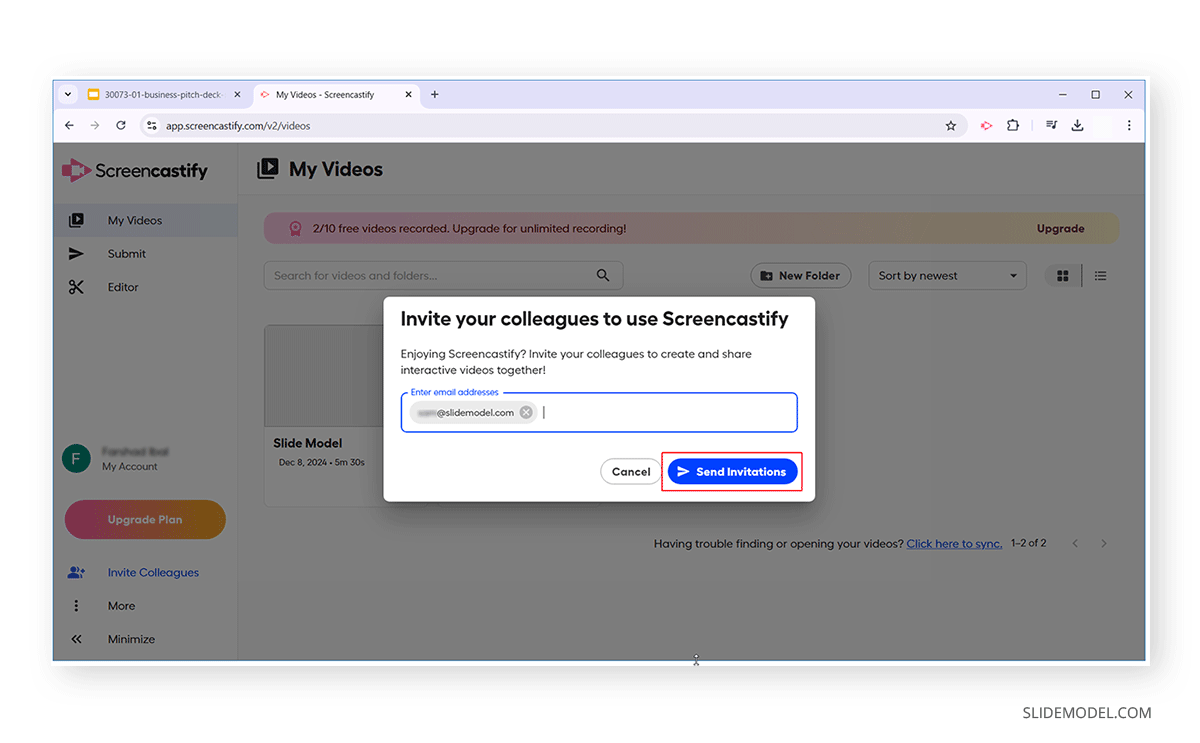
By inviting users via email, you can share the video by sending an invite. To invite multiple users, use a comma after each email address.
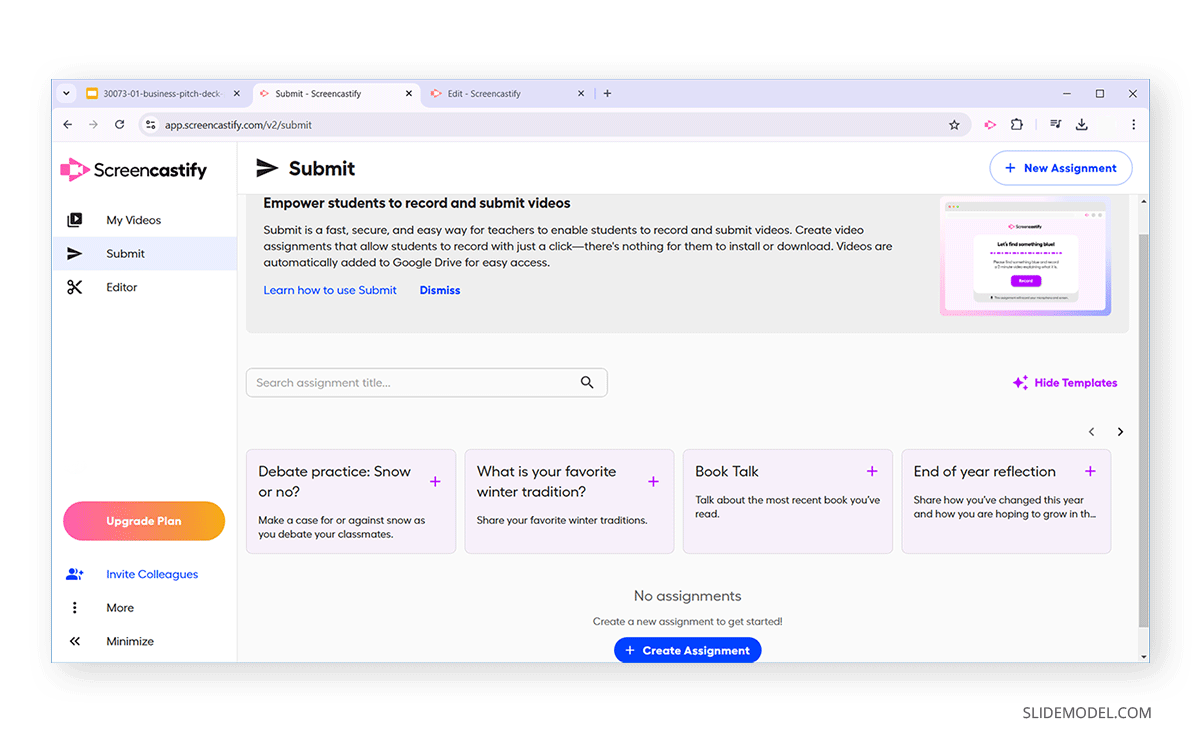
Create Assignments for Educational Use
If you are a teacher, you can also use Screencastify to create assignments, add quizzes to videos, and use other handy options, such as making the video available for Google Classroom.
Videos Available Anytime for Sharing and Editing
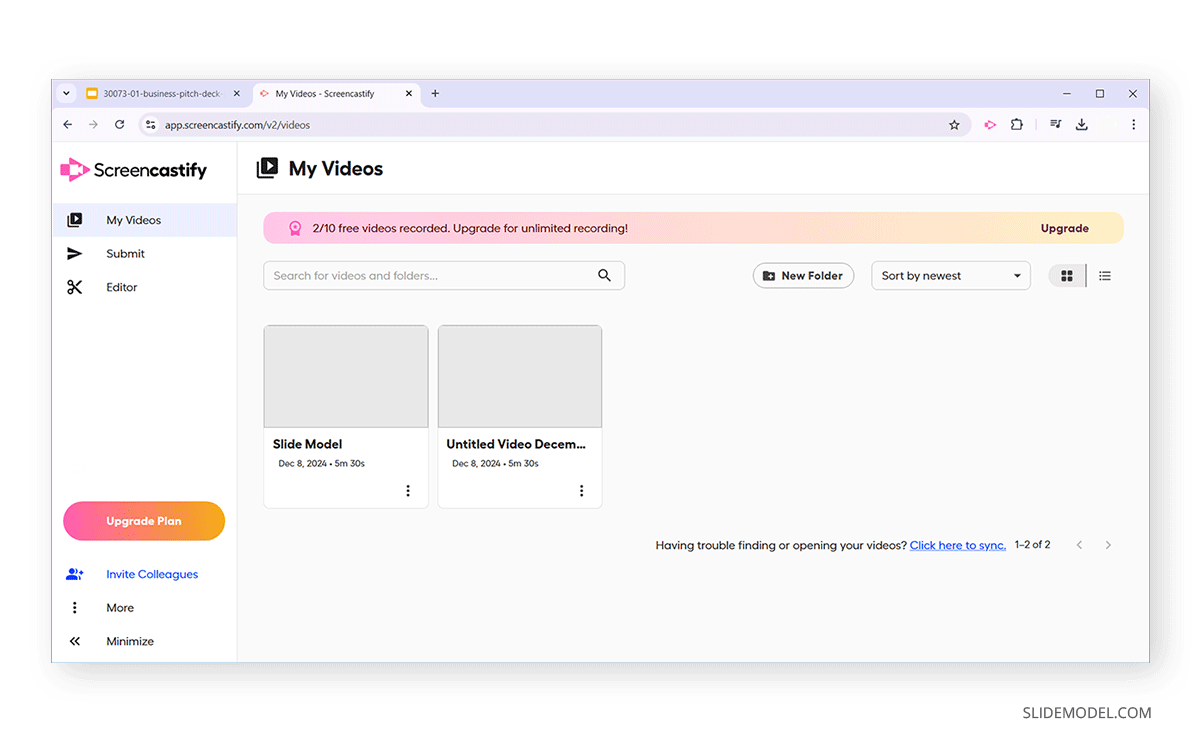
You can access your videos anytime via the My Videos tab to access, share, and edit videos. You can find your dashboard by logging in to Screencastify. The Chrome extension also provides a simple shortcut to open your dashboard.
Screen Record Google Slides using Teams, Zoom, or Other Remote Meeting App
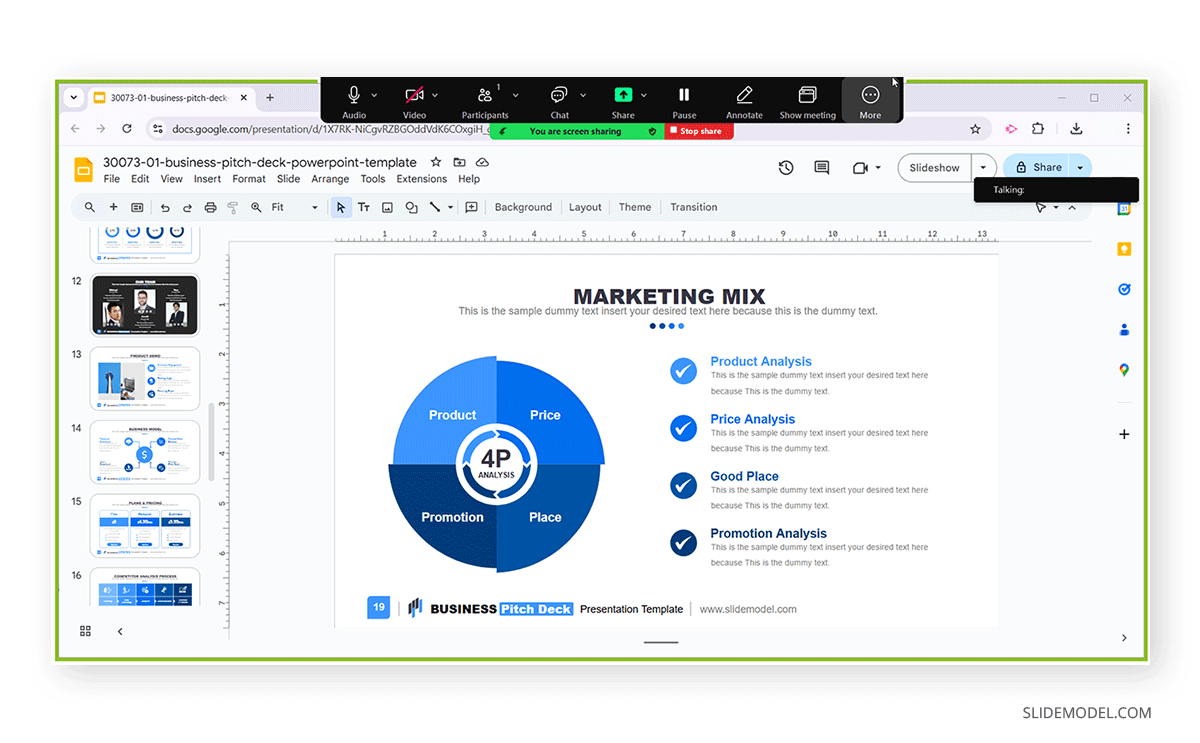
Another way to record Google Slides is to use the recording feature of a remote meeting app like Zoom or Microsoft Teams. Many organizations standardize using such tools to record meetings and presentation sessions for internal and external sharing.
FAQs
Can you record in Google Slides?
Yes, Google Slides has a native Rec feature that allows Google Workspace users to record videos for up to 30 minutes. You need to have editing privileges for the presentation to start screen recording.
How to record a presentation on Google Slides?
You can record presentations on Google Slides by using the native Rec feature if you have a premium account for Google Workspace and editing privileges for the presentation or by opting for third-party screen recording tools.
Can I turn a Google Slideshow into a Video?
Yes, you can convert your Google Slideshow into a video using either the native Rec feature in Google Slides or third-party screen recording tools.
What tools can be used to screen record Google Slides?
You can use Google Slides’ native Rec feature and various third-party tools, including Screencastify, Camtasia, Snagit, BB Flashback Express, and even PowerPoint’s native screen recording feature, to screen record Google Slides.
Final Words
Recording a video to convert a Google Slides presentation into a video is only part of engaging your audience. For making an engaging presentation you will need to find ways to make your content interesting. While the native recording feature in Google Slides is currently limited to premium users and also has limited recording features, using tools like Screencastify, Camtasia, BB Flashback Express, and others can enable you to make interesting videos by adding additional video clips, text, transitions, quizzes, and other content to your screen recordings.
