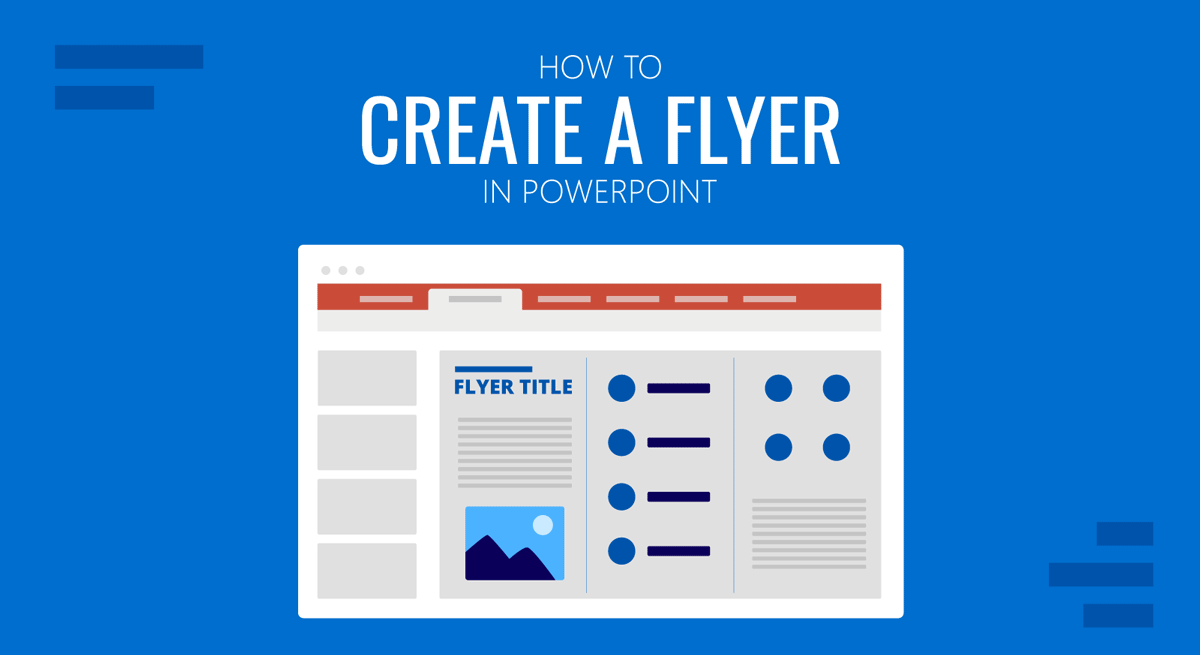
Creating advertising material in PowerPoint is a frequently asked question, given the quality of graphics we can retrieve out of it with little-to-no knowledge of graphic design skills. Instead of paying for third-party services, we’ll teach you step-by-step how to make a flyer in PowerPoint suitable for any marketing purpose or personal, like party flyers or similar. Let’s get started.
Determining the Size of a Flyer in PowerPoint
Flyers can be crafted in various sizes, and the standard for them depends mostly on the location of the target public. Here’s a list of the most commonly used sizes for flyers:
US Standard Sizes
- Letter: 8.5 x 11 inches (216 x 279 mm)
- Mini-flyer or Half Letter: 5.5 x 8.5 inches (140 x 216 mm)
- Legal: 8.5 x 14 inches (216 x 356 mm)
European/Asian Standard Sizes
- A4: 8.27 x 11.69 inches (210 x 297 mm)
- A5: 5.83 x 8.27 inches (148 x 210 mm)
- DL: Dimensions: 3.9 x 8.27 inches (99 x 210 mm)
How to Set the Size of a Flyer in PowerPoint
We begin our creative process by going to Design > Slide Size > Customize Slide Size.
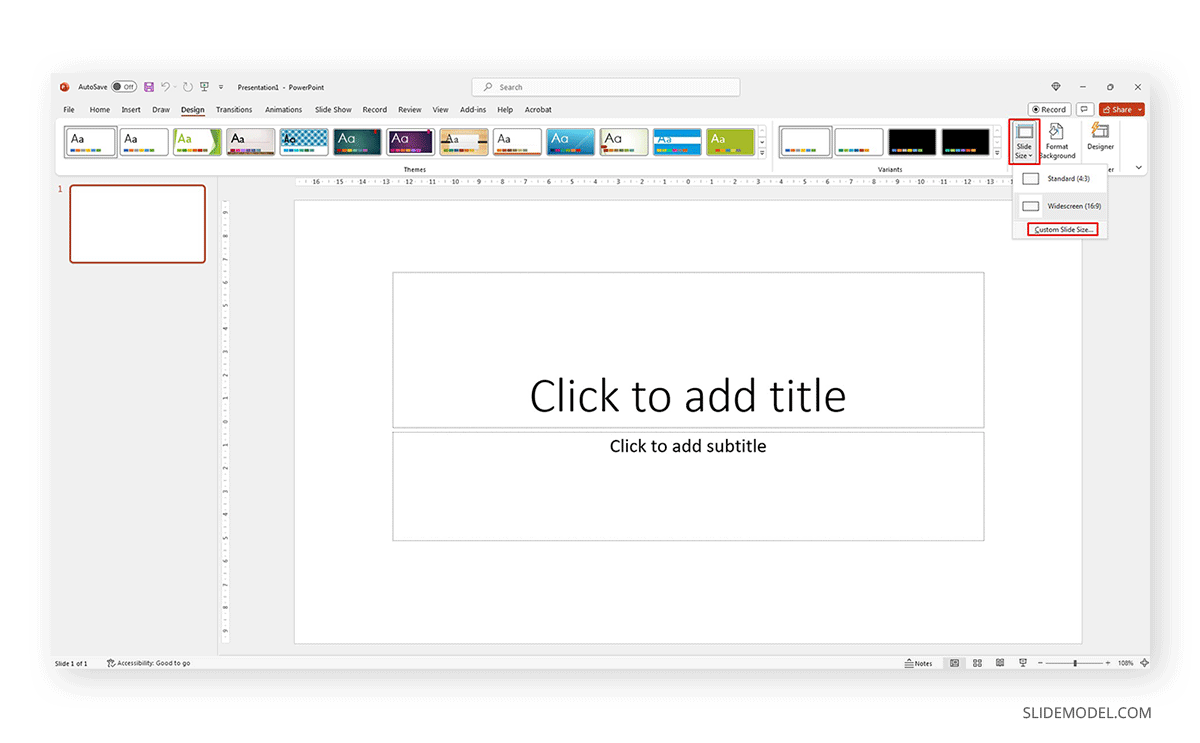
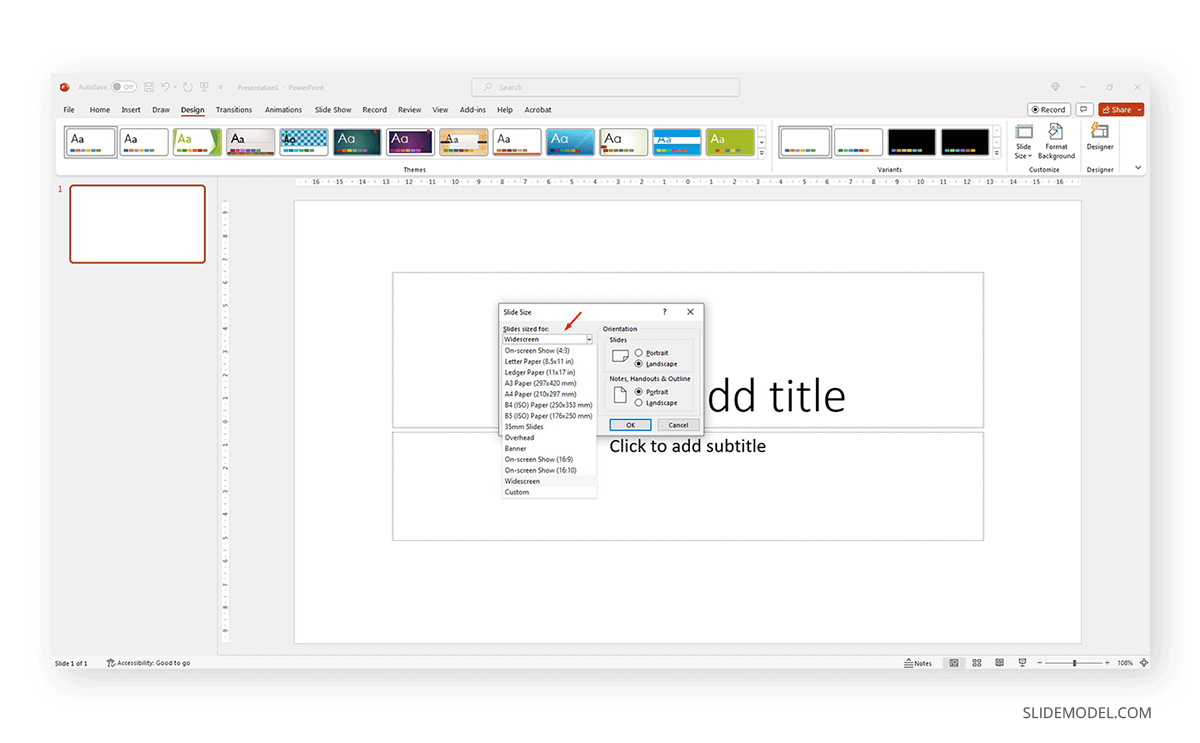
When clicking on Custom Slide Size, an emergent window will open, showing the options for our design. By default, it is set to Widescreen (16:9). We need to click the dropdown menu labeled Slides Sized For and select the preferred size. In this case, we’ll go for an A4 flyer. If you want to explore this further, you can learn how to change the slide size in PPT.
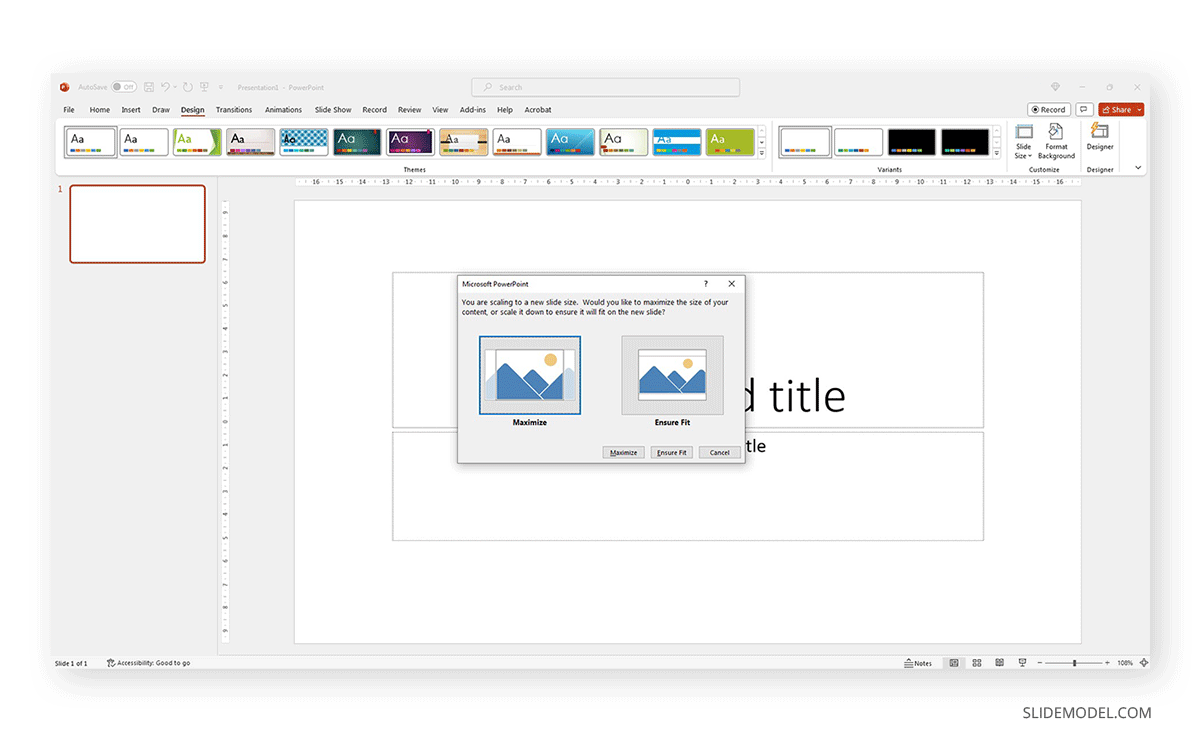
Select the orientation for the slides and optionally for the notes to include. After you click OK, a new window will pop up asking if you want to Maximize or Ensure Fit, an option intended for those who resize slides with existing content. In this case, we opt for Ensure Fit.
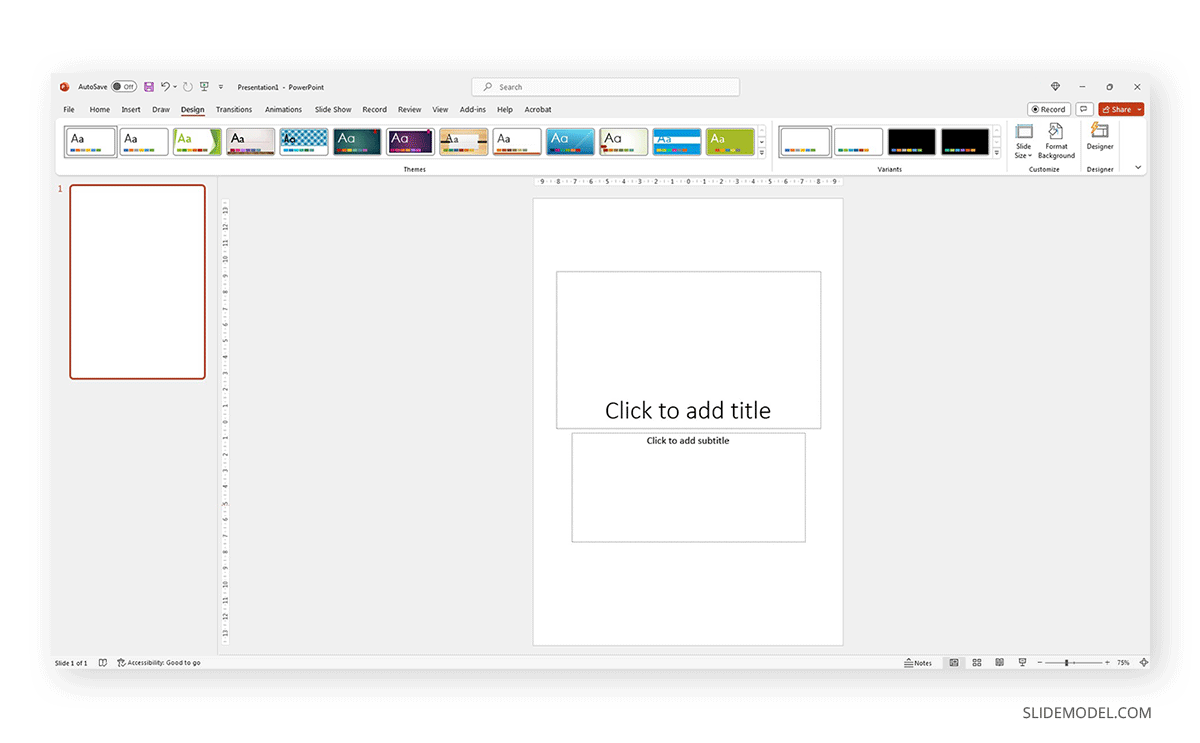
And this is how it should look like after the size is selected.
How to Apply a PowerPoint Theme to a Flyer
After the final step in the previous section, we ended up with a blank state flyer file. We can work with custom elements like importing photos to PowerPoint, inserting illustrations, change background color in PowerPoint, and plenty of other options. The easiest way? We change a PowerPoint theme by browsing at the arrow on the Design tab of the Ribbon.
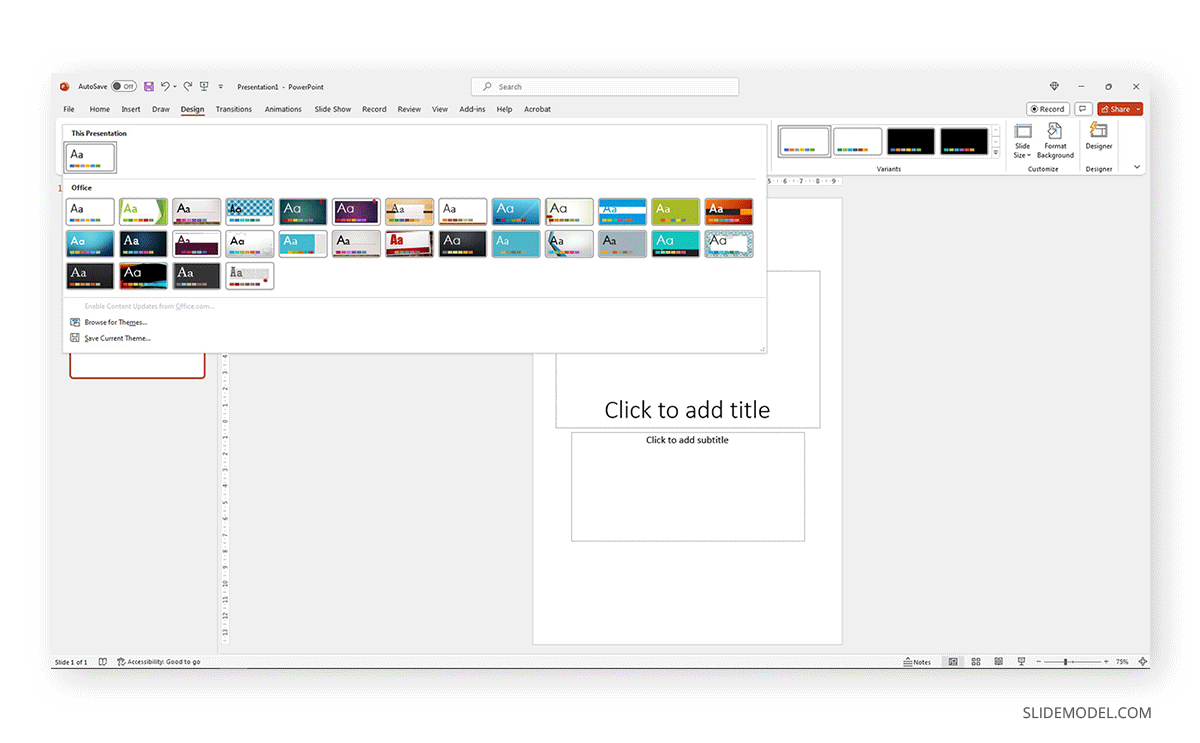
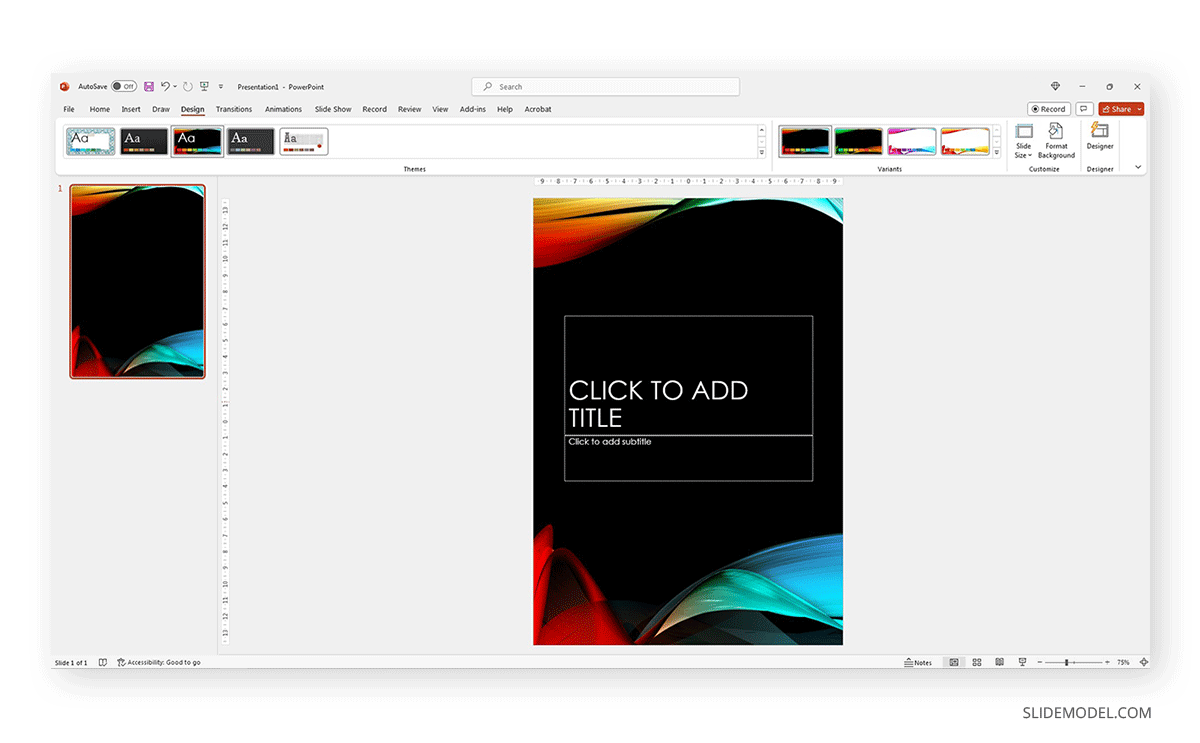
For the purpose of this tutorial, we will select this highly visual theme and start adding our content to it.
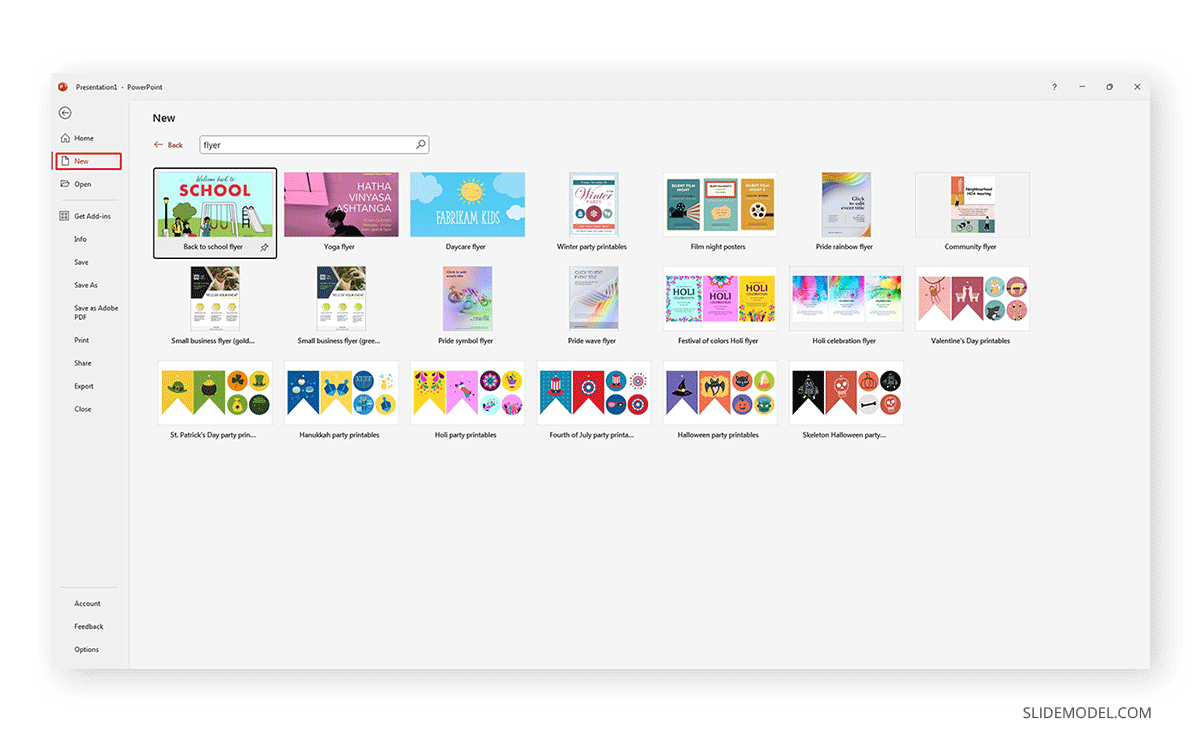
Alternatively, you can go to File > New and look out for flyers in the search bar.
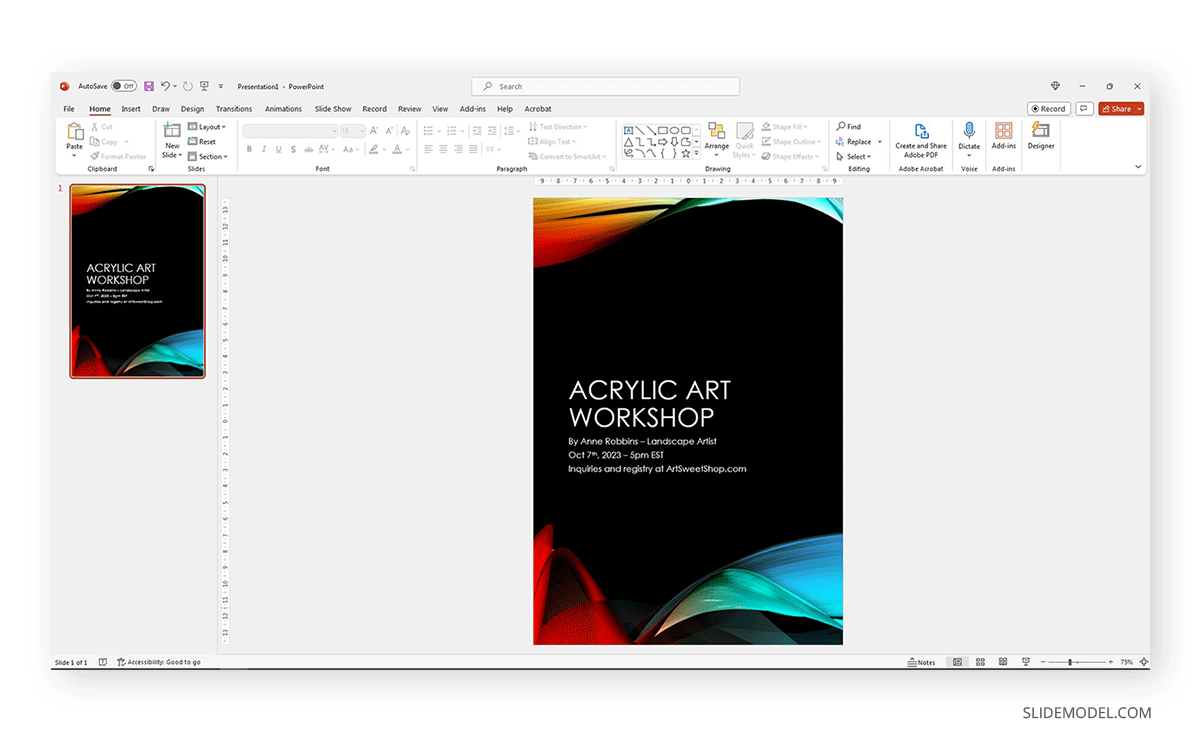
Add your desired content, and the design will look somewhat similar to this result.
How to Print or Export a Flyer in PowerPoint
Now that our design is completed, you’ll certainly want to know how to export to PDF or print the file. As with any other PowerPoint document, go to File > Export.
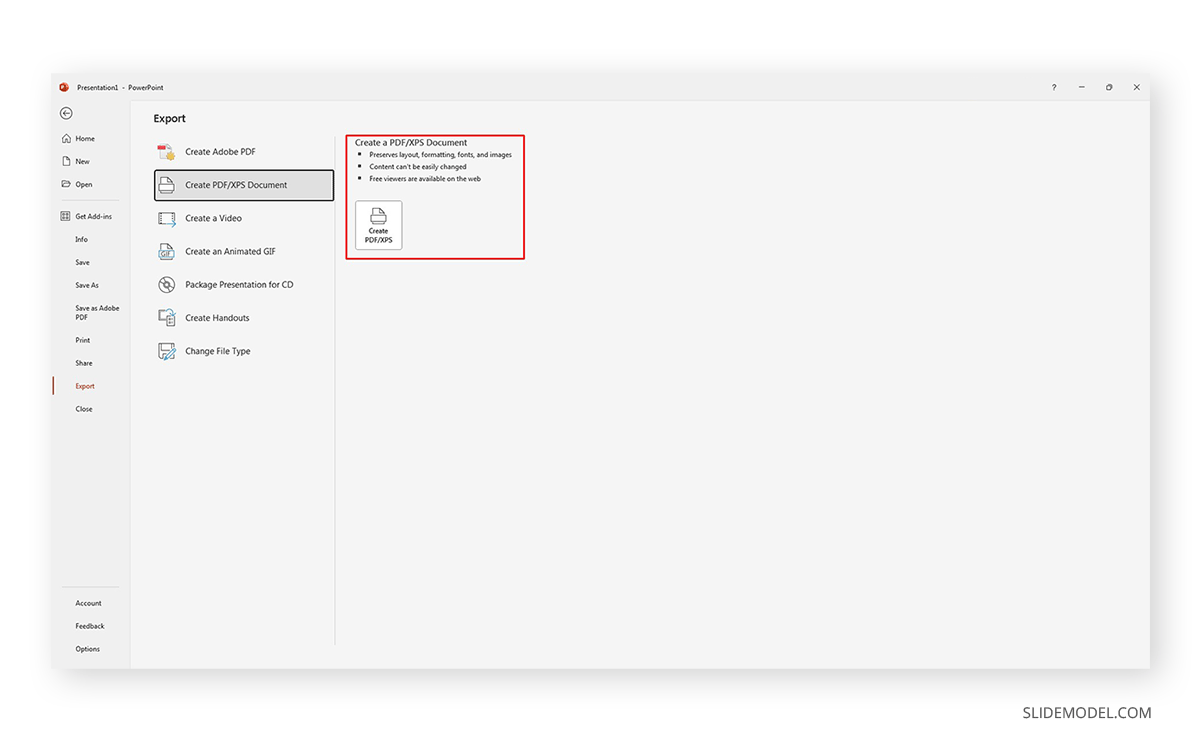
Unless you own a license for Adobe Acrobat, go for the second option: Create PDF/XPS Document. This allows us to create a high-quality, print-ready PDF format. We highly advise users to work with the PDF export rather than directly printing from PowerPoint, as some printers may not accurately reproduce color from PowerPoint’s settings.
How to Work with PowerPoint Flyer Templates
If you want to skip the design process altogether, SlideModel has your back covered with professional-quality flyer templates for PowerPoint. Just follow this link to our premium flyer templates and select the layout that best fits your needs from the product selection.
Like any of our PowerPoint Templates, these flyer PPT files are 100% editable with easy-to-alter placeholder text areas. Customize these designs to meet the requirements of your project in just minutes.
FAQs
Can I create a flyer in PowerPoint without graphic design experience?
Yes, PowerPoint offers easy-to-use tools and pre-designed templates that allow anyone to create professional-quality flyers without graphic design experience.
What are the standard sizes for flyers?
Common sizes for flyers include:
US Standard Sizes:
– Letter: 8.5 x 11 inches
– Mini-flyer (Half Letter): 5.5 x 8.5 inches
– Legal: 8.5 x 14 inches
European/Asian Standard Sizes:
– A4: 8.27 x 11.69 inches
– A5: 5.83 x 8.27 inches
– DL: 3.9 x 8.27 inches
How do I set the size for a flyer in PowerPoint?
To set the size for your flyer, go to Design > Slide Size > Custom Slide Size, and select the desired flyer dimensions from the dropdown menu.
How do I print or export my PowerPoint flyer?
To print or export your flyer, go to File > Export > Create PDF/XPS Document for a high-quality, print-ready PDF. It’s recommended to export as a PDF for better color accuracy when printing.
Can I use PowerPoint flyer templates?
Yes, PowerPoint offers editable flyer templates that can be customized to your needs. SlideModel also provides a wide selection of flyer templates that can be fully customized.
What is the best way to ensure my flyer looks professional?
Choose a clean design, limit the use of fancy fonts, and make sure the colors are appropriate for printing. You can also use professional flyer templates to speed up the design process.
Conclusion
Creating powerful graphics in the form of flyers is a very straightforward process, as we’ve seen, and we can save countless hours by working with either PowerPoint or Google Slides Templates.
As a recommendation, we advise you to avoid using fancy fonts in your PowerPoint documents as, most likely, they won’t be available on other computers – unless you install them. Such a scenario can impact the printed format of a flyer if we use a local printing service instead of our own printer.
