Similar to doing a commentary to videos, you can also add narrations to your PowerPoint Presentation. It’s an interactive way to provide information to your audience instead of letting them read all points on the slide, with the added value that helps people with visual impairments.
This guide will cover how to create a narrated PowerPoint presentation using Microsoft PowerPoint on Windows. Before you start narrating your presentations in PowerPoint, it would worth to read some of the special considerations to set up the environment (reduce noises, configure the mic, etc.).
Method #1: Narrate a PowerPoint Presentation (Audio-Only)
This first method to narrate a PowerPoint presentation is ideal to add audio narration to those already-made presentations.
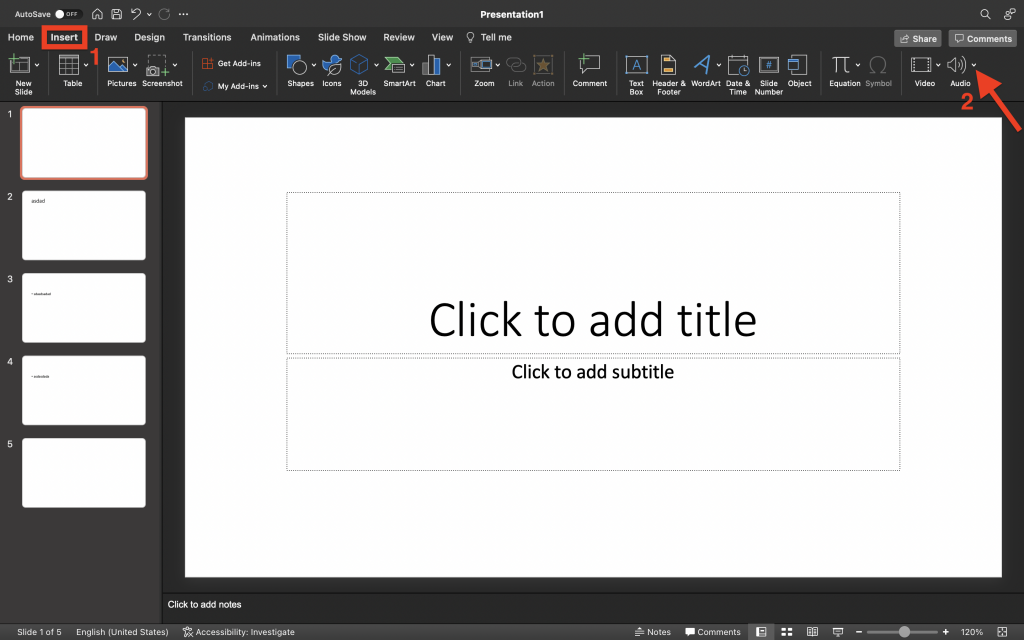
1. Open your PowerPoint presentation, navigate to the Insert tab, and click the Audio dropdown icon.
2. You can add audio using two ways; if your audio is pre-recorded and saved on your computer, select the Audio Browser option and select the narration recording. Whereas if you want to record a new narration, click Record Audio.
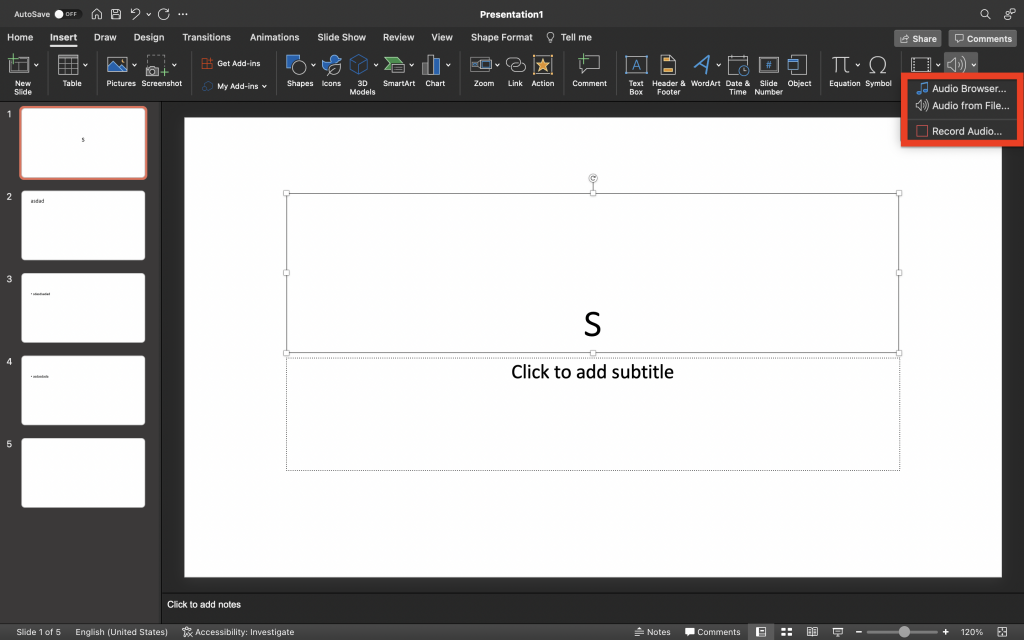
Note: You can only narrate one slide at a time using the Record Audio option, which makes it suitable for narrating key points.
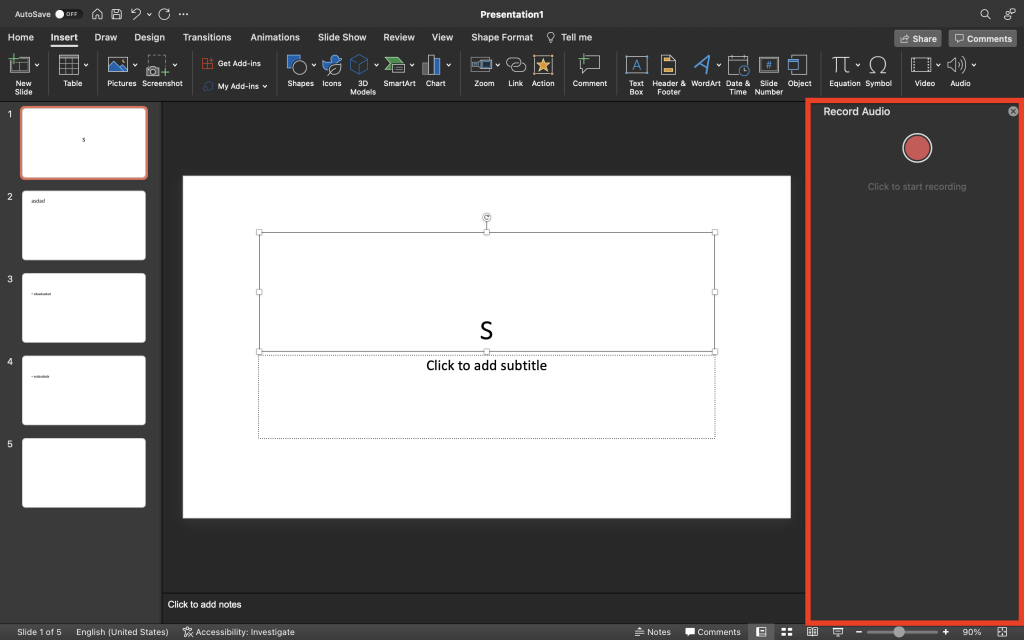
3. After clicking Record Audio, a new window will appear on the right side of the screen.
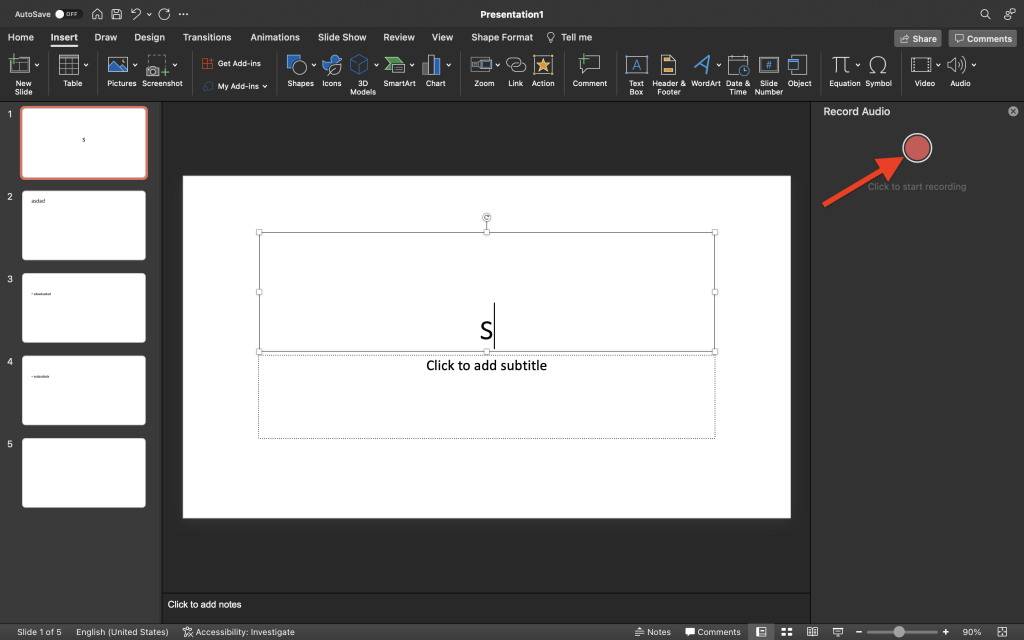
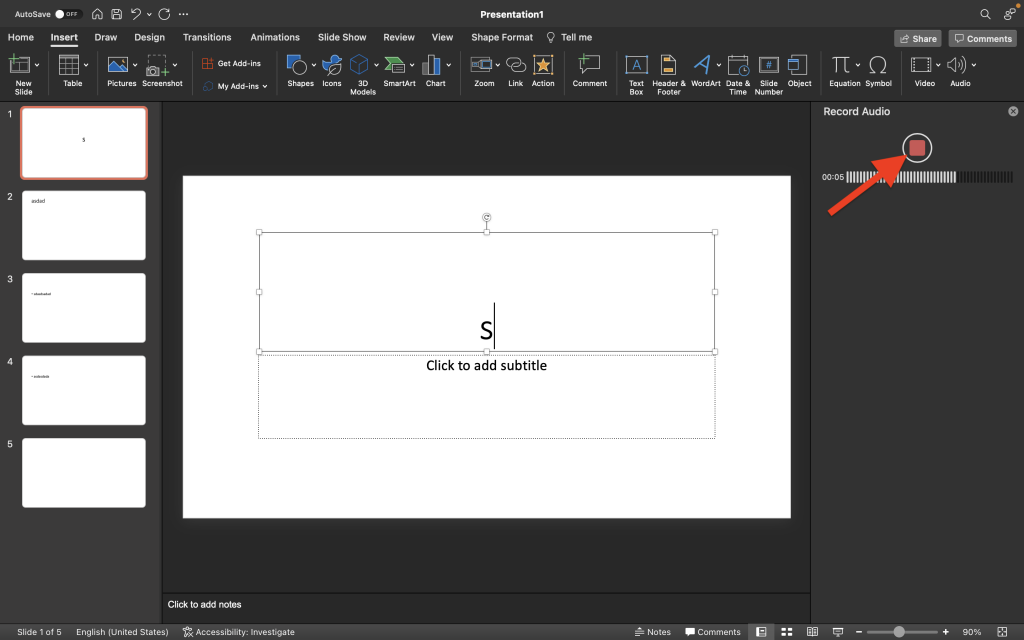
4. To record, click the red button; the audio bar will begin moving as you start narrating.
5. To stop the recording, click the Stop button. You can listen to the narration right after by selecting the Play icon.
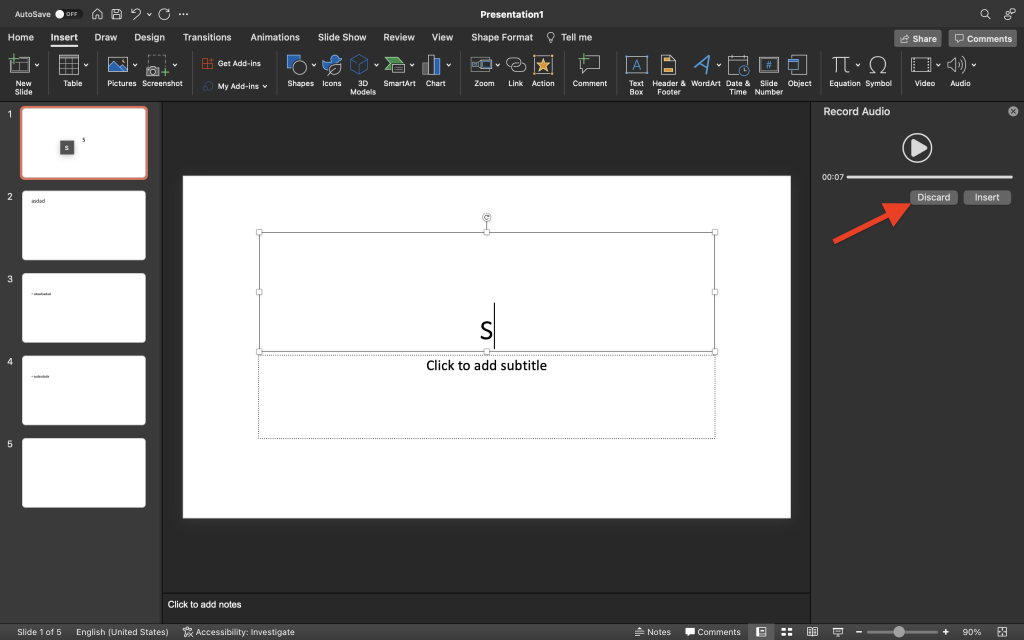
6. If you want to start over, click the Discard button.
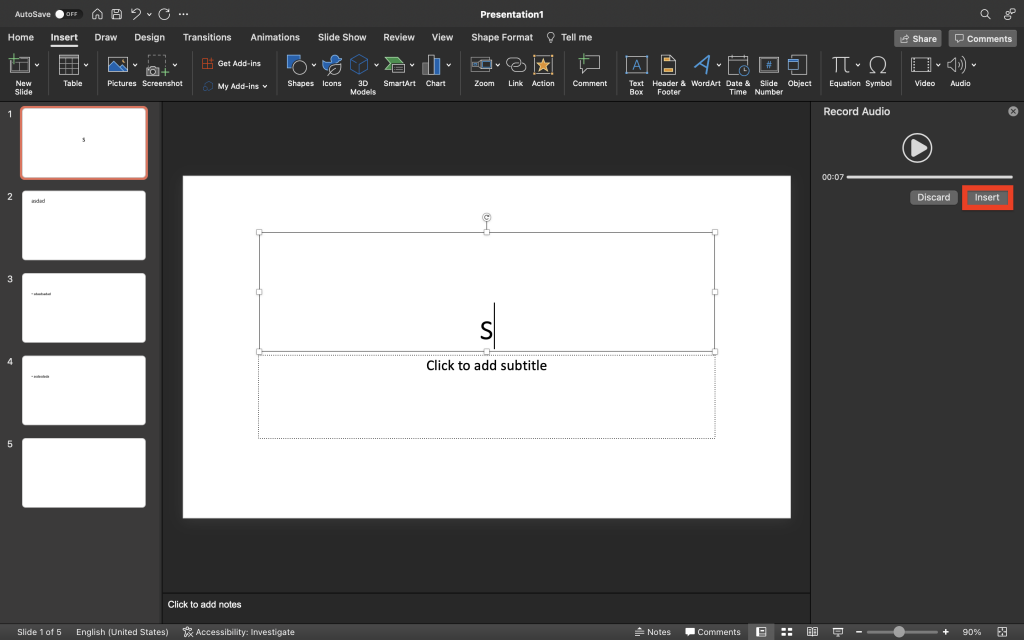
7. When it’s ready, you can add it to the slide by clicking the Insert button.
8. A white audio icon will appear on the slide. You can adjust the icon by selecting it and dragging one of the points on the border. You can also see the play, forward, backward, and volume icons on the playback bar.
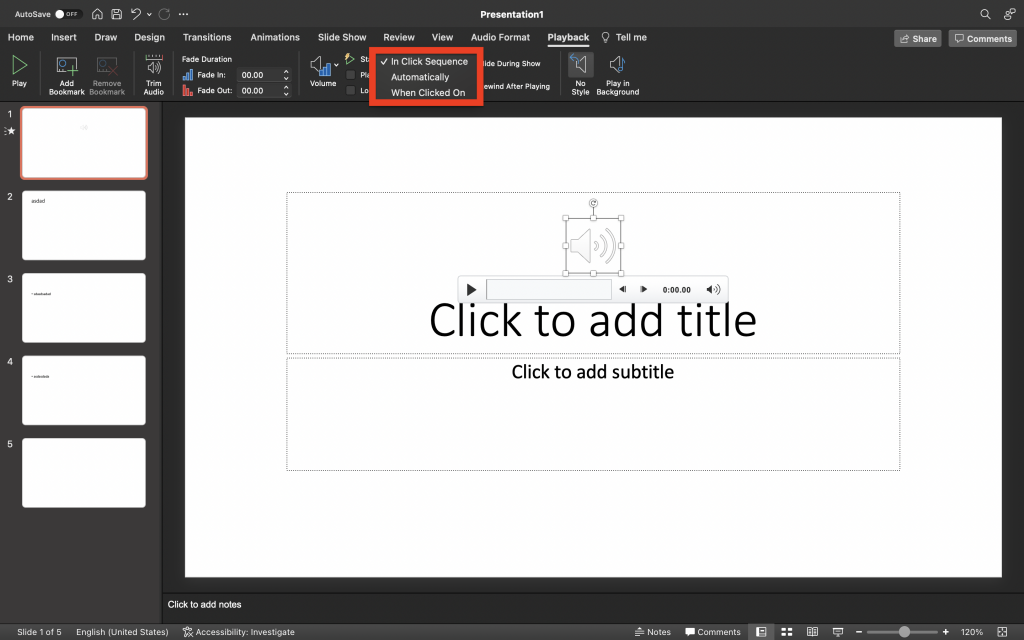
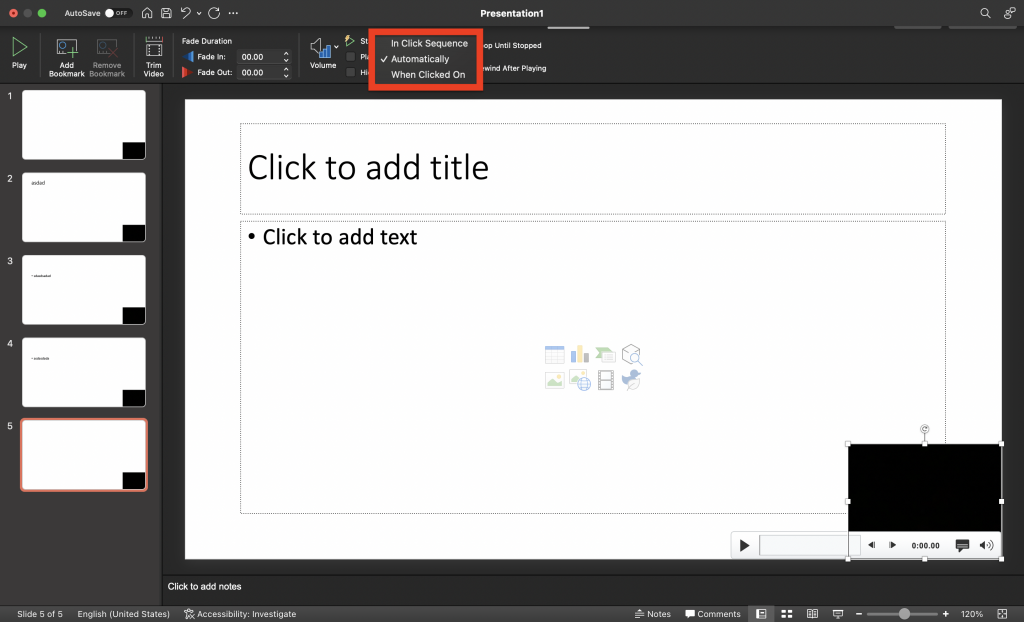
9. To set the timing of when the audio will play, go to the Playback tab and find the Start option (Play icon with lightning). By default, this will be set to In Click Sequence, but you can also change it to Automatically, or When Clicked On.
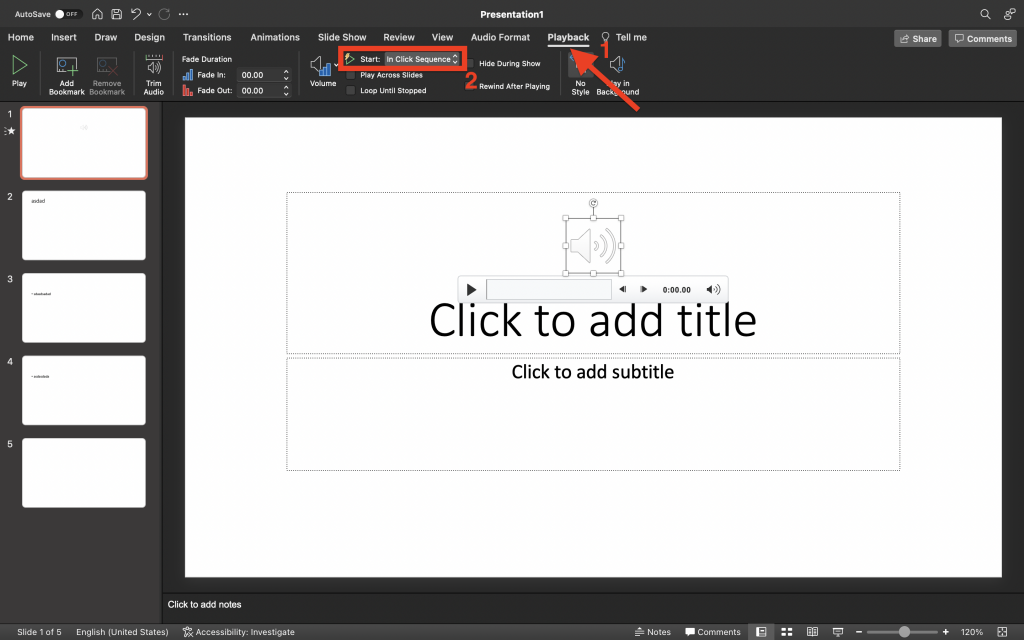
- In Click Sequence – The audio will play based on the click actions or animations that are set in the slide. You can adjust this by going to the Animation Panel. If you don’t have any animations on the slide, the narration will play before you advance to the next slide.
- Automatically – The audio will play as soon as you arrive on the slide.
- When Clicked On – The narration will only play once the audio icon is clicked on Slide Show mode. This works great for audio that’s only optional to listen to.
Method #2: Use Record SlideShow to Narrate a PowerPoint
The second method to narrate PowerPoint presentations may seem more taxing, but it can be done when creating the assets to include in the presentation. Let’s see how to narrate a PowerPoint presentation by recording the slideshow.
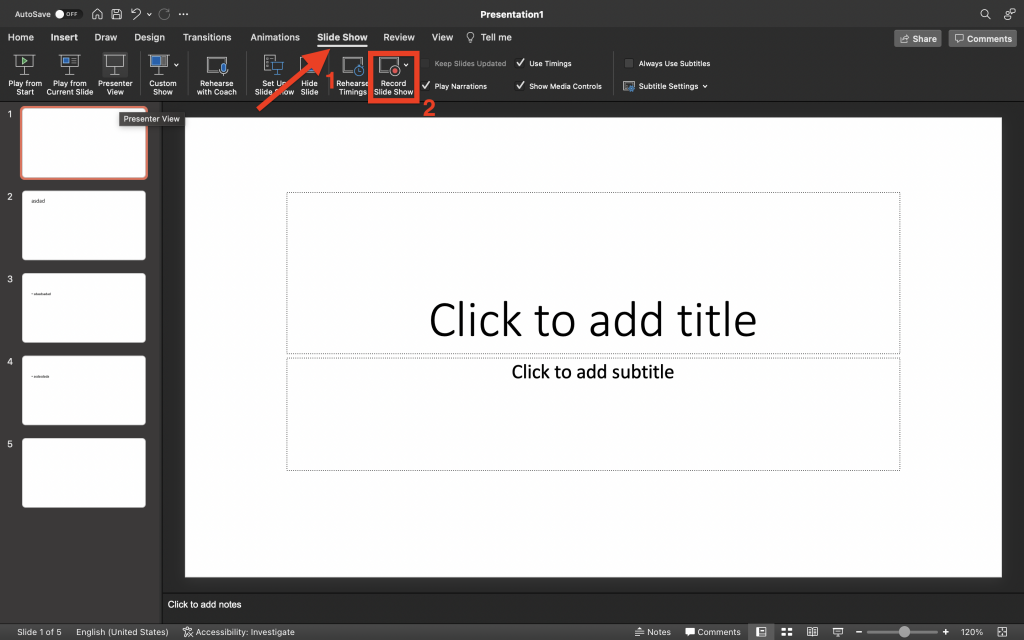
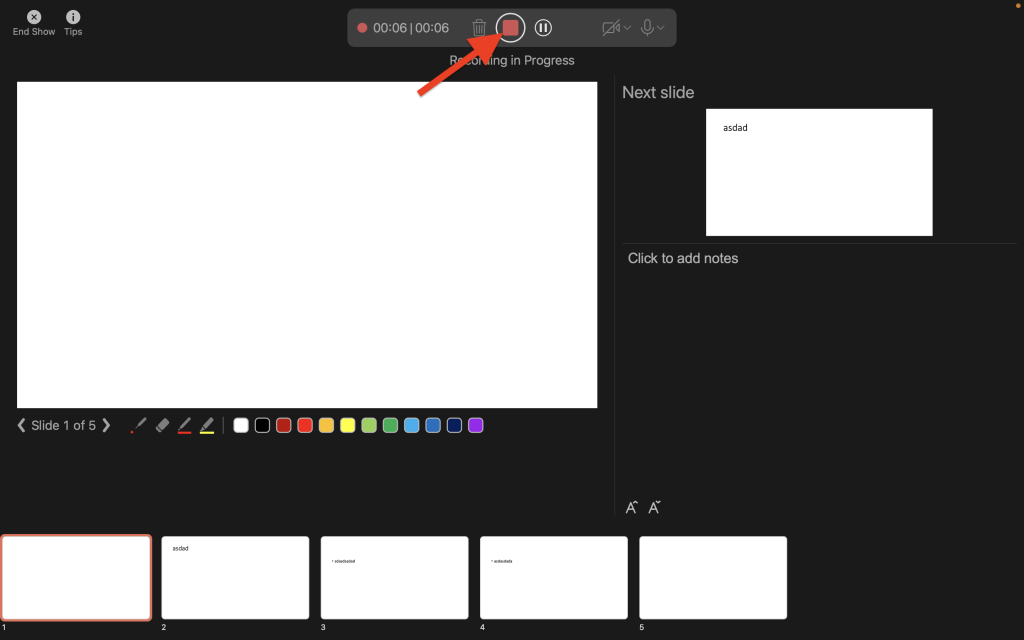
1. Navigate to the SlideShow tab and select the Record SlideShow icon. This will let you record the presentation from the beginning.
2. The Record SlideShow window will soon appear. Here are its parts:
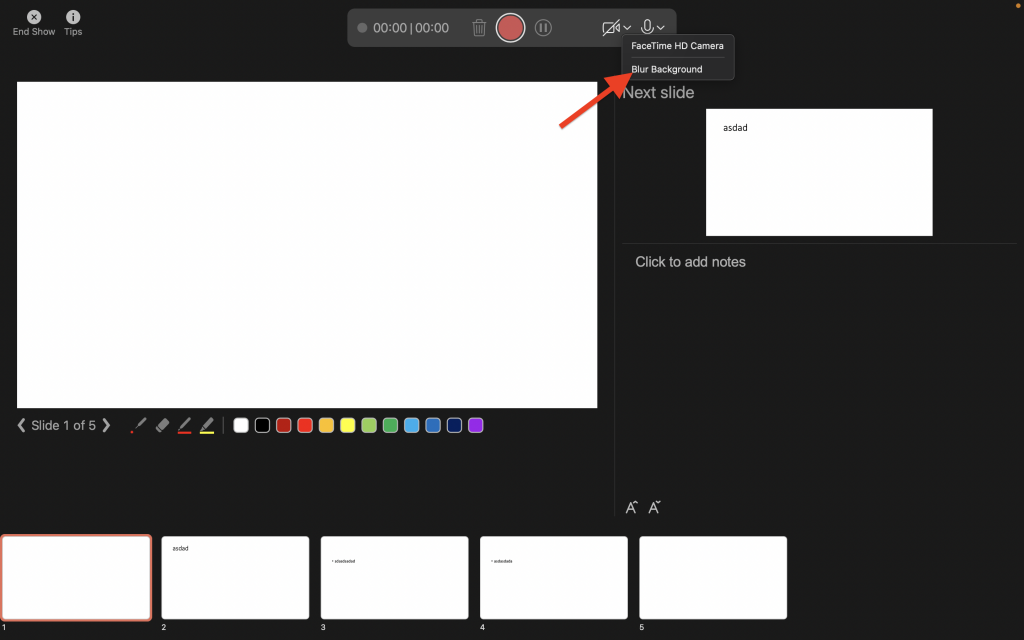
- On the top bar, you’ll see the recording duration, the trash, record, and pause buttons. You can also toggle the camera and microphone by clicking their icons on the right edge of the bar.

To blur your background on the camera, click the Camera dropdown menu and select Blur Background.
- Below, you’ll see the current and next slide previews. You can also add notes under the Next slide preview. You can adjust the font of the notes by clicking the buttons on the bottom-left.
- If you want to move to the next slide or go to the previous one, use the arrow buttons below the Current slide preview.
- To create illustrations or drawings, use the drawing tools that are beside the forward and previous buttons.
- You’ll see all slide thumbnails on the bottom of the screen.
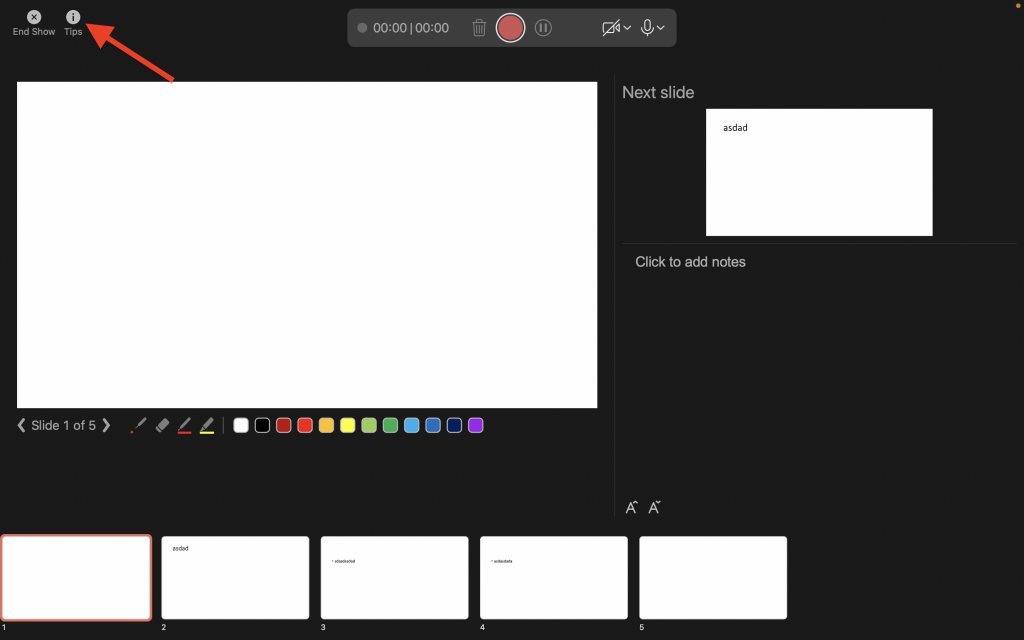
Note: To know more about keyboard shortcuts on the Record SlideShow window, open the Tips button by clicking it.
3. To record the entire presentation, make sure that the camera and microphone features are switched on. Then, press the Record button when you’re ready.
4. You can choose to pause the recording by pressing the Pause button.
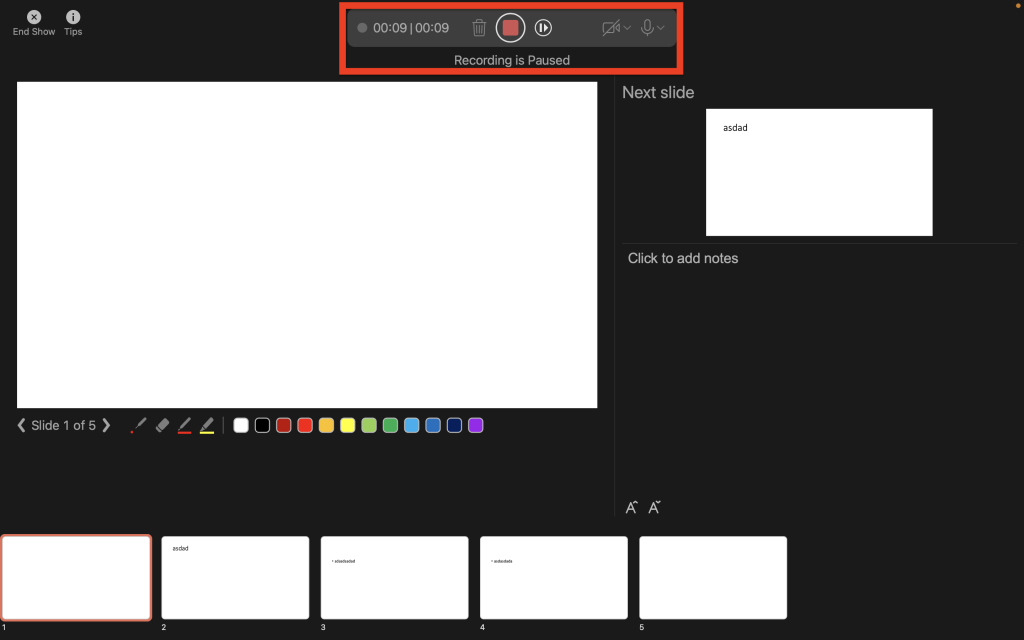
5. To stop the recording, click the Stop button. You can check the narration by pressing the Play button; once you want to delete it, click the Trash button.
6. Once it’s ready, select End Show. You can see the narration on each slide, indicated on the slide thumbnails.
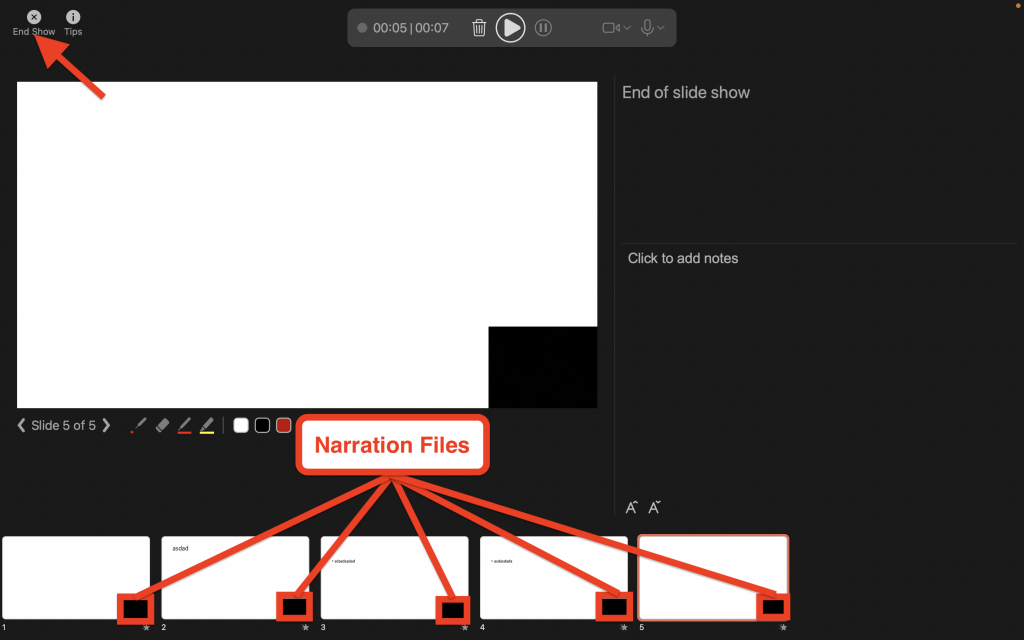
7. To set the timing of when the narration video will play, select the narration thumbnail on the bottom-right of the slide and go to the Playback tab.
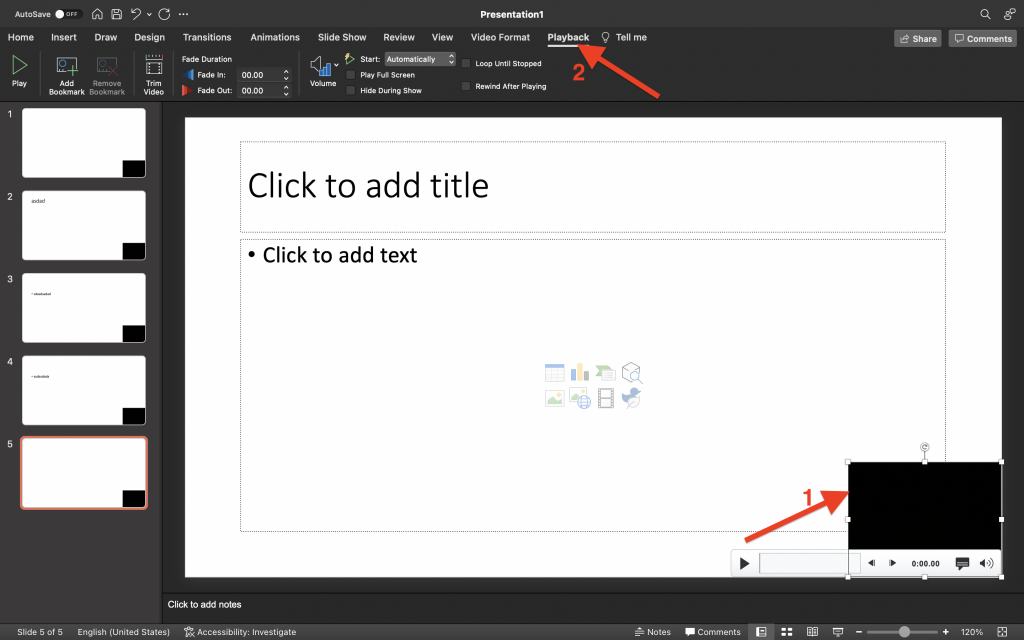
8. Similar to the first method, navigate to the Start options. By default, the timing is set to Automatic. You can also change this to In Click Sequence, or When Clicked On.
9. To clear timings and narrations on all slides, go to the SlideShow tab and select the Record SlideShow dropdown arrow.
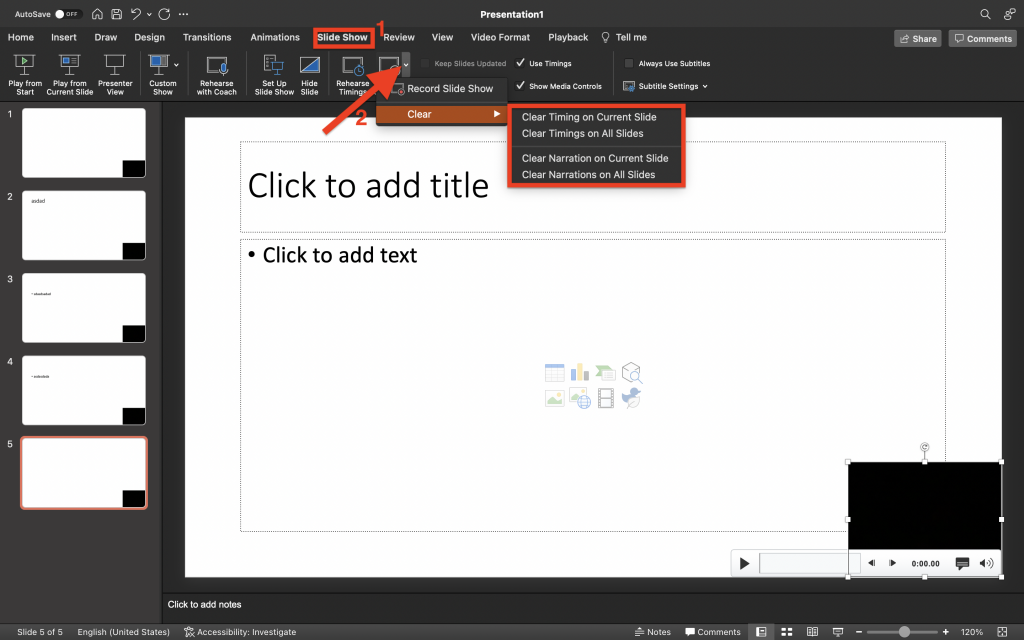
10. Under the Clear options, you can choose if you want to Clear Timings on Current/All Slides or Clear Narrations on Current/All Slides.
Considerations Preparing the Environment Before Narrating a PowerPoint presentation
Before narrating a PowerPoint presentation, make sure that you’re in a quiet environment and free from unnecessary background sound. Noises from air conditioners, fans, street noise, and people nearby can be heard on the narration recording, leading you to start over again. Investing in soundproofing foam for better sound insulation is an expenditure that pays itself over time, you won’t regret such action.
Another factor to look out for is checking if your computer’s microphone works properly. To test your microphone on Windows, follow these steps:
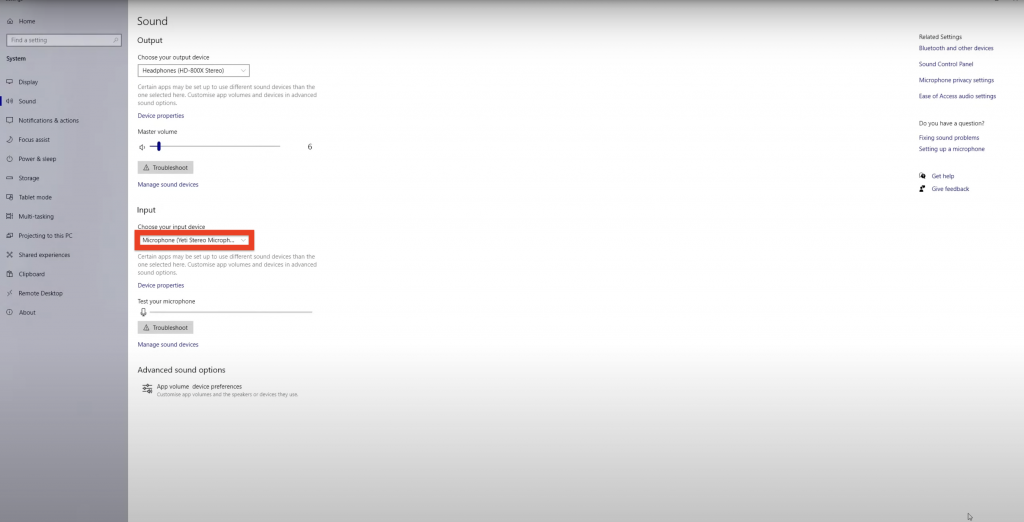
1. Go to the Start menu and select Settings > System > Sound.
2. Under Input, make sure that it is set on your computer’s default microphone.
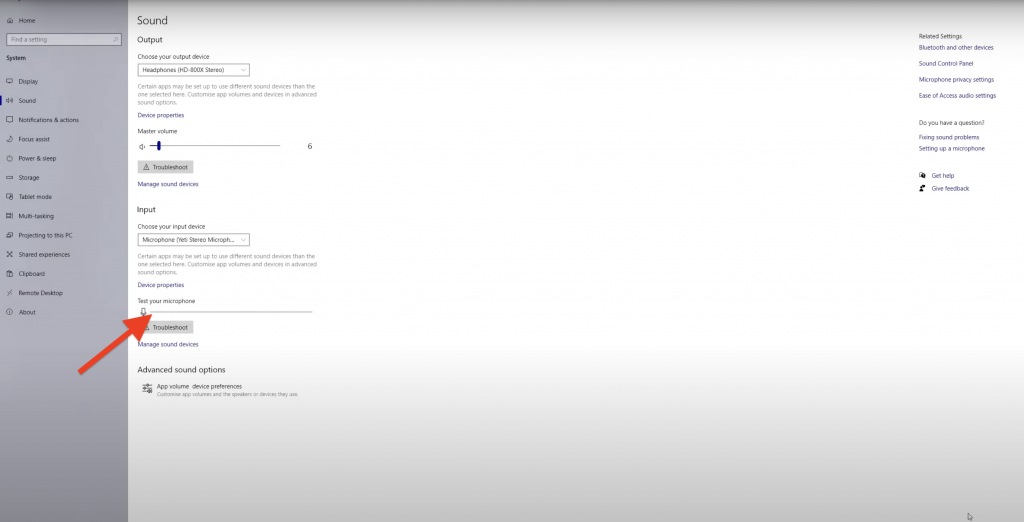
3. Also, try speaking near the microphone and check if the audio bar is moving (under Test your microphone).
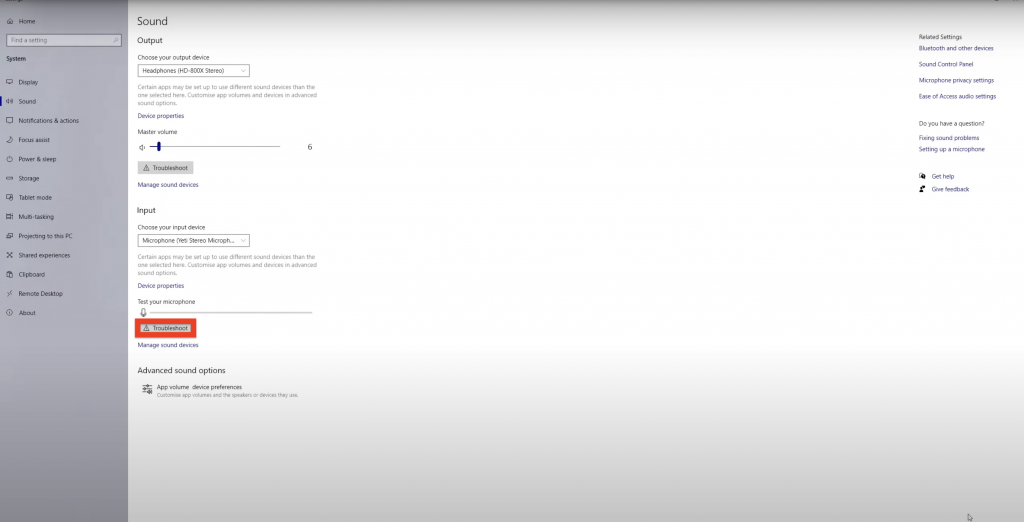
4. If you’re experiencing mic problems, click the Troubleshoot button and follow the on-screen steps. Then, restart your computer and see if the mic issue is solved.
Finally, and as extra caution, be sure to properly place your microphone in the scenario that you use an external microphone (not a handset).
Dynamic microphones, thanks to their affordable price, are an option these days for many users, but they do count with a “recordable” side: this means that according to their polar curve, there is a side on the microphone that will record sound in proximity to it, and there’s a side that won’t capture sound at all. Refer to the manufacturer specs prior to blaming any potential issue.
Final Thoughts
Adding narration to your PowerPoint presentations is a great strategy to keep your audience engaged. You can use these methods to point out the brief points on each slide, besides letting your audience read the content on the slide.
Keep in mind that narrating is not an alternative to inserting videos into your PowerPoint presentations since they target different objectives from a content perspective.