When gathering ideas, representing concepts, and accumulating information around a central theme, one can often find it difficult to connect different topics. Teams often struggle to put all that content together so they can summarize the process thought carried out by their members. Hence, a tool must be introduced to facilitate the experience – enter the Mind Map.
A mind map makes it easy to gather such content and organize information in an easy-to-read layout around a central theme. In this article, we will talk about the importance of using mind maps as presentation aids, how to build one using PowerPoint’s native tools, and how to save time using mind map templates for PowerPoint.
Table of Contents
- What is a Mind Map?
- Why Use PowerPoint for Mind Maps?
- Requirements for Creating a Mind Map
- How to Create a Mind Map in PowerPoint
- How to Create a Mind Map Using PowerPoint Templates
- Design and Layout Recommendations for Mind Maps
- Adding Content to an Existing Mind Map
- Enhancing Interactivity in Mind Maps
- Best Practices for Creating Mind Maps
- Saving and Sharing Mind Maps
- FAQs
- Recommended Mind Map Templates for PowerPoint and Google Slides
- Conclusion
What is a Mind Map?
A mind map or mindmap is a visual depiction of concepts, ideas, or information designed around a primary theme. Such a visual representation is created from a core idea and visually expanded like branches of a tree.
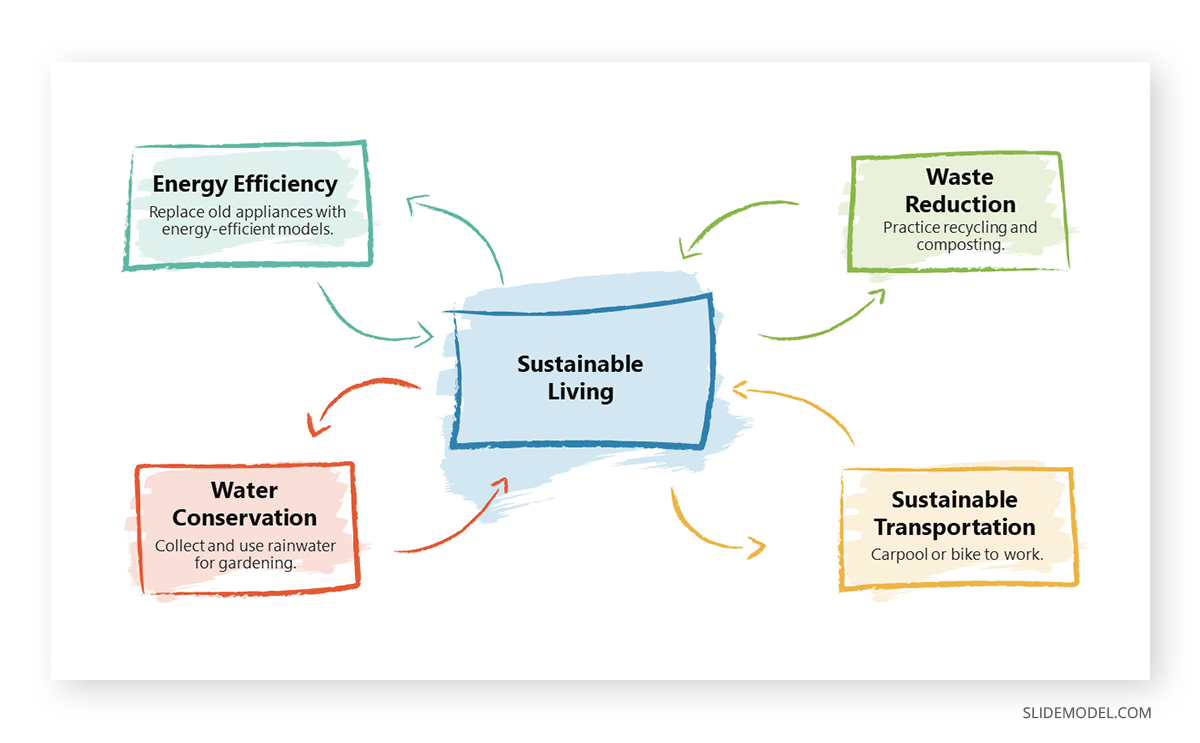
Mind mapping is often performed during brainstorming sessions when designing new products, finding solutions, or gathering information or ideas. Usually, mind maps are created using keywords or short phrases. However, some mind maps also use images. The visual representation of a mind map always contains a central theme, and the remaining information is mentioned around it. Mind maps often use arrows or lines to connect ideas around the core theme. The Hand-Drawn Mind Map Concept PowerPoint Template below is an example of a conventional mind map.
Why Use PowerPoint for Mind Maps?
It is quite likely that a mind map might need to be presented in the form of a PowerPoint presentation. Instead of creating a mind map in different software or in the form of an image to be imported to PowerPoint, it is much easier to use PowerPoint to create a mind map.
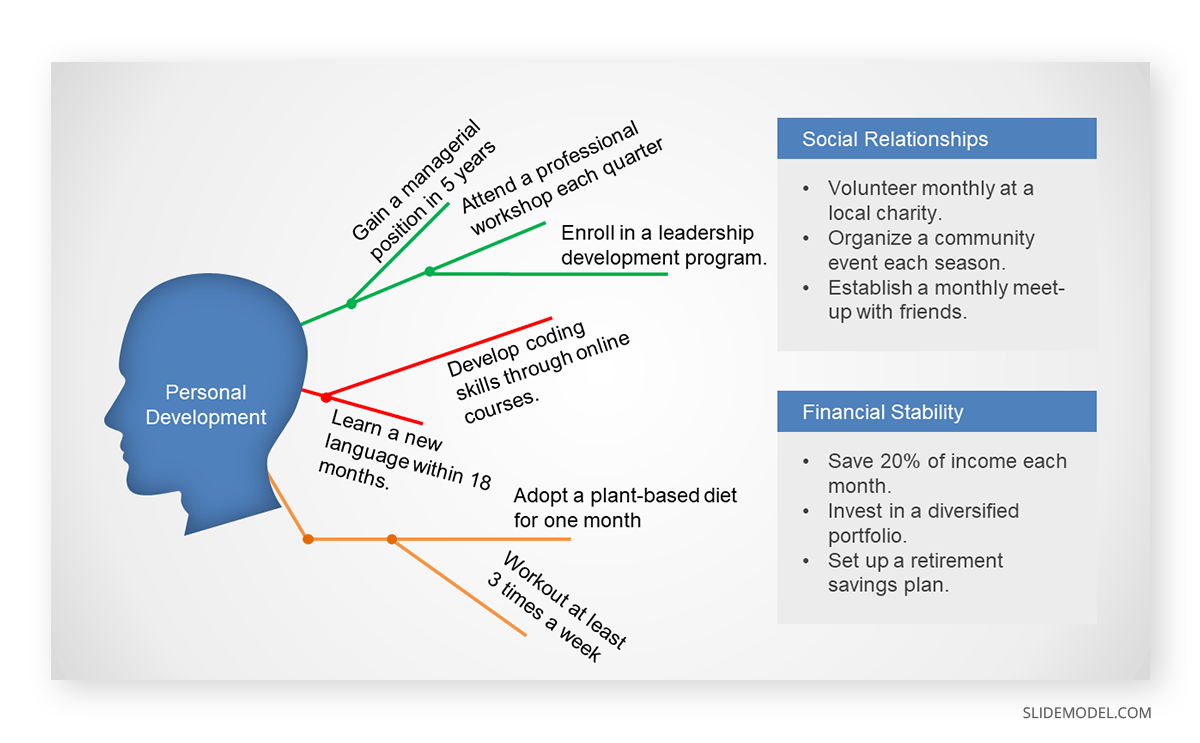
A mind map created in PowerPoint can be easily modified, and many customizable mind map PowerPoint templates make it foolproof to edit and expand the slides according to need. This gives the presenter the margin to make necessary changes to the mind map instantly and to modify the presentation slides to suit their needs. On the contrary, an image imported to PowerPoint or mind maps created in other software won’t be editable using PowerPoint’s tools. You should create it right before importing an image into PowerPoint. The Simple Mind Map PowerPoint Template shown in the image below is an example of how an editable mind map PowerPoint template can be handy in creating a mind map presentation.
Requirements for Creating a Mind Map
Before you start with your mind map, you should consider the map’s central theme and the way you intend to gather and organize information.
Planning Your Mind Map
When planning your mind map, you should consider the following.
Focus on the central concept
You should narrow down the central theme for your mind map to avoid confusion and to make information gathering more focused.
How to gather information
If you aim to gather ideas for a new product, you might want to arrange a meeting with colleagues from relevant departments. You can opt to create the mind map during the meeting or organize information once the meeting is over. Similarly, if you wish to organize ideas for a PowerPoint presentation, you can use something as simple as a piece of paper or a document to organize information. It is important to determine if you need to organize a team meeting, gather information alone, or wish to collaborate periodically to gather information (e.g., by requesting suggestions via email).
How to note down information
You should ensure that at least one person continues to gather the information during the meeting. If you are taking notes or making a mind map alone, use the most convenient method to gather information.
Where to store information
Do you prefer making a mind map on paper and later converting it to a PowerPoint presentation, or do you find mind mapping software convenient? The information for mind maps should be stored in a mode convenient for you to use later to organize and create an illustration. Many also use note-taking apps like Evernote and Google Keep to gather such information.
How to organize information
You can organize information by considering subcategories beforehand or ensuring each idea is placed in a relevant box as you draw your mind map. A mind map should connect to the central theme and not simply branch out infinitely without a clear direction and connection to the core idea. Similarly, subcategories can be quite helpful to organize information better as you draw your map.
Setting Up Your PowerPoint Presentation
Once the required information has been gathered and the data is ready, you can begin setting up your PowerPoint presentation. You can consider the following when making a PowerPoint mind map:
Mind map elements
If you draw the mind map within slides, you can start with PowerPoint Shapes or SmartArt or use a ready-made mind mapping PowerPoint template. The mind map can be created by adding text and images to shapes and arrows to connect different concepts.
Use short keywords and images
Since a mind map can be lengthy, you would want to use short keywords and small images to design your PowerPoint presentation.
Consider the length of the slides
You can opt to showcase your mind map as a single slide or across multiple slides. Sometimes, having one slide with the complete mind map and multiple slides focusing on subcategories might be useful.
Use of graphics and animations
You can use transitions, animations, and graphical elements that stand out and aid your mind map. For example, you can showcase parts of the map with a mouse click. You can gradually reveal the core idea, followed by each subcategory, to make the illustration easy to grasp.
Testing the mind map visual: It is important to test the mind map slideshow to ensure it is easy for your audience to view. You can test the slideshow according to the platform you need to showcase it with, such as via remote meeting apps or on a projector or large LED screen in a hall.
How to Simplify Mind Map Creation
Mind maps can be as simple or as complicated as possible. You can simplify your mind map creation process by following the tips below.
Focus on the central idea
To ensure that you don’t deviate from the basic idea, creating a mind map that is cohesive and easy to create is essential.
Keep nodes limited
There can be several nodes that you can use when making a mind map, including major and minor categories associated with the central idea. You can keep your mind map simple by limiting the nodes. This can help focus on broader categories and avoid expanding the illustration beyond a manageable size.

Branch out in a hierarchy
The temptation when making mind maps is to branch out without a set sequence. By branching out hierarchically, you can avoid a confusing illustration at the end of the mapping process.
Use different colors
Using different colors to distinguish between your categories makes the mind map easy to create and read.
Use connectors
By using connecting lines or arrows, your map can be easy to follow and would help identify the relationship between different nodes.
Consider appropriate layout
Some mind maps might be best created horizontally, whereas others might be easier to read with a vertical orientation.
How to Create a Mind Map in PowerPoint
Below are a few easy steps that you can follow to create a mind map. While mind maps can be created using several apps, this article will demonstrate how to create a mind map in PowerPoint.
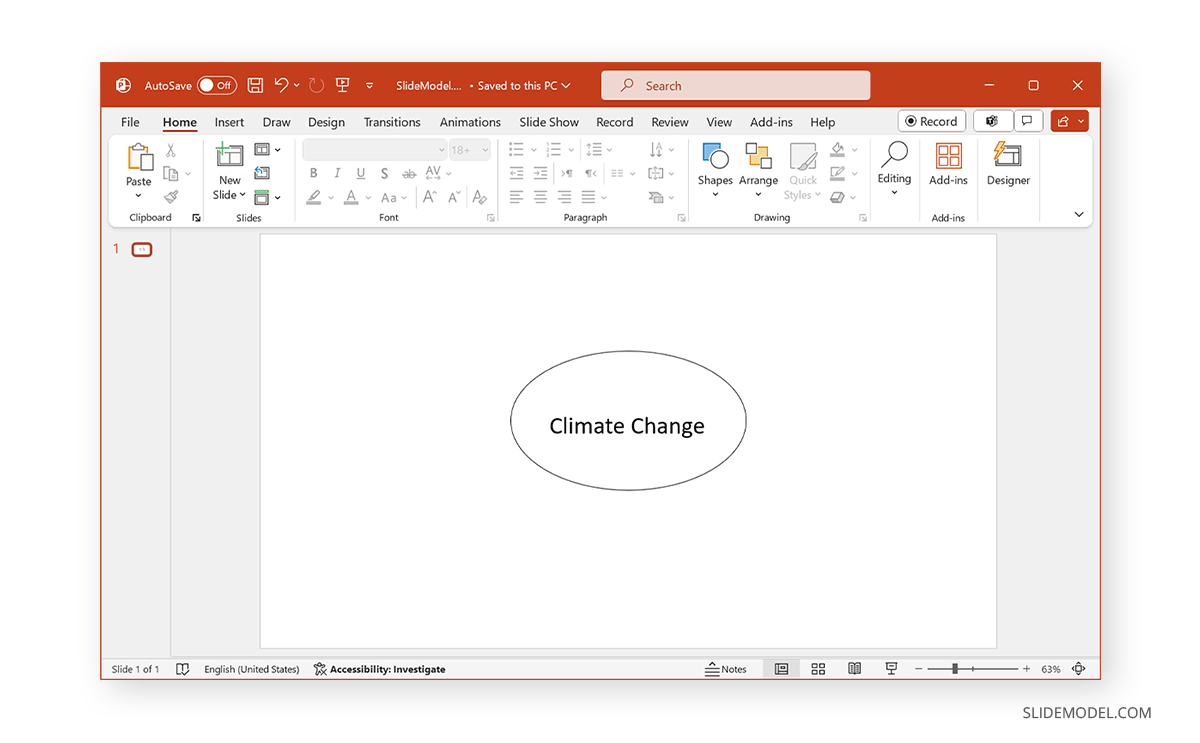
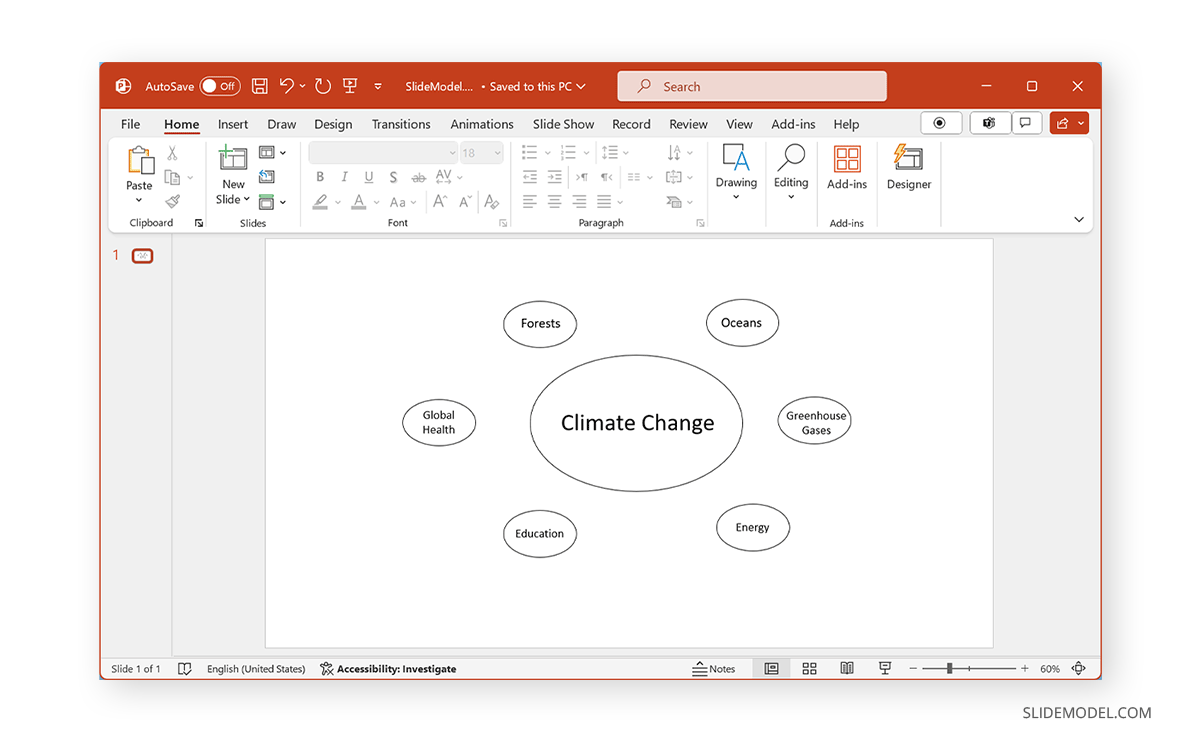
Step 1: Creating the Central Idea
It would be best if you started with the central idea to start your mind map. In our example, we used climate change as the central idea to create a mind map around it. In our example, we will build upon the basic concept of climate change and explore the variables around it. To start our presentation, we used an oval shape and added a text box to start with the central idea.
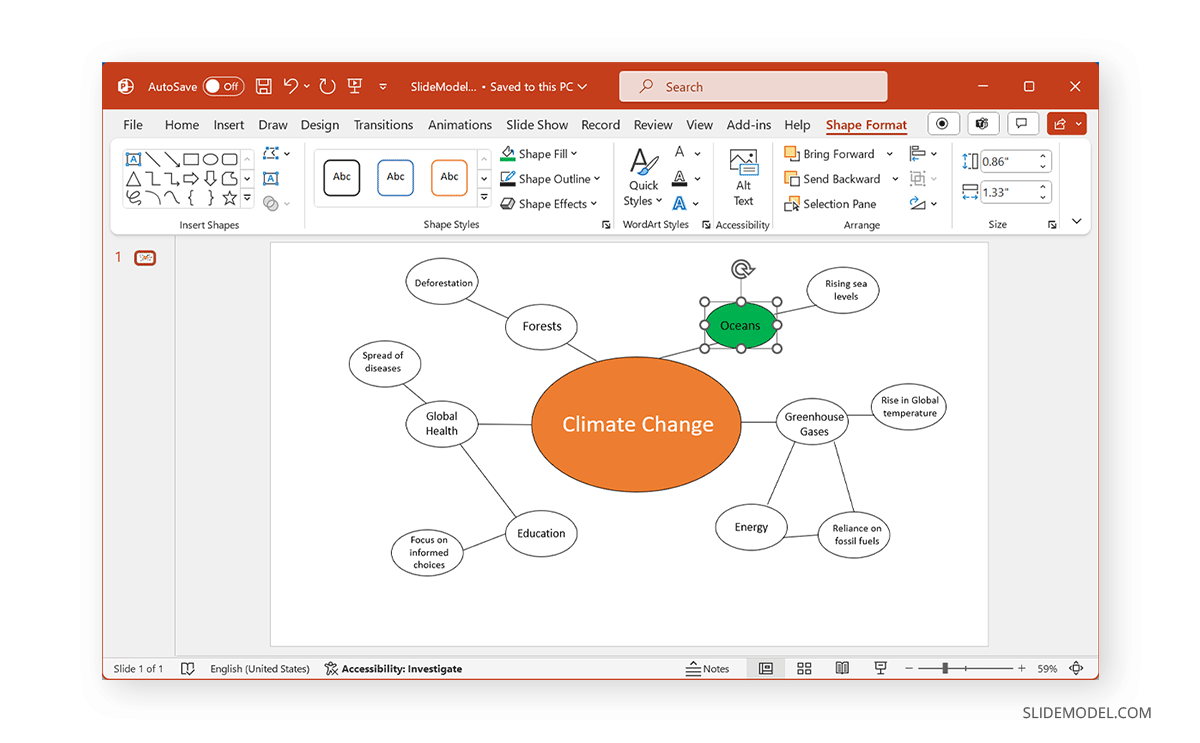
Step 2: Adding Main Branches
You can add the main branches of the mind map around the central theme to design your illustration. These primary categories can encompass the main theme you wish to elaborate on.
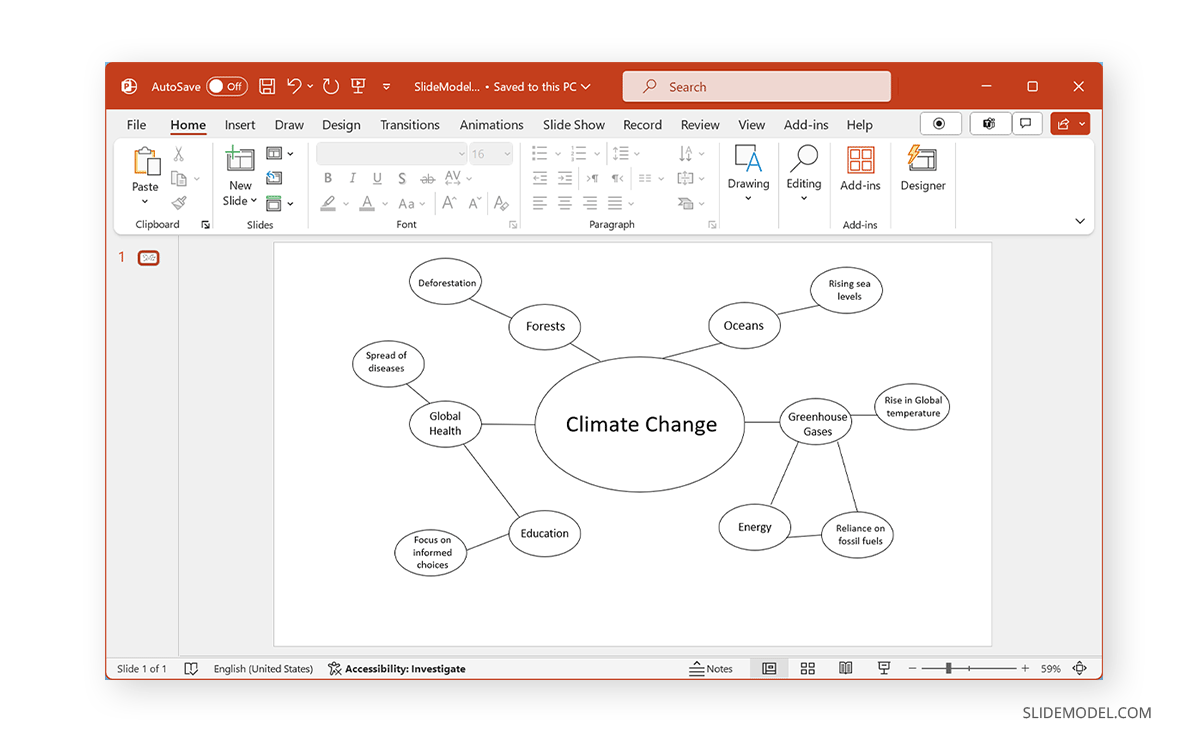
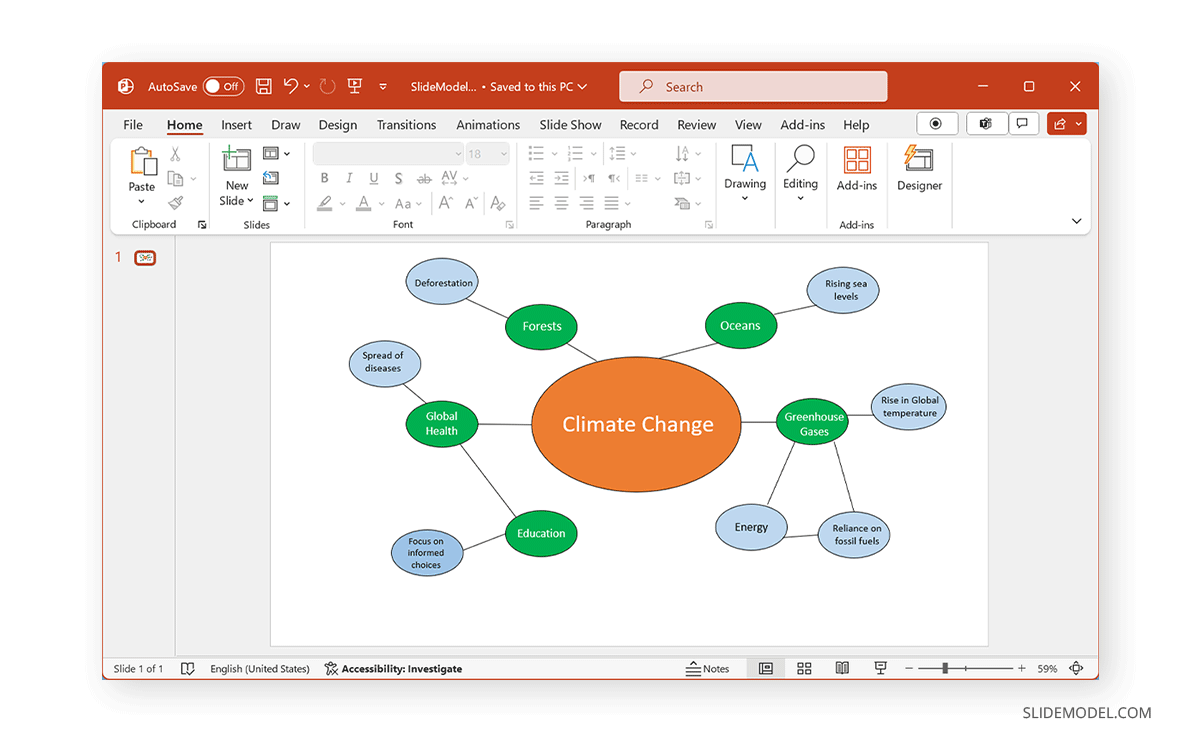
Step 3: Adding Sub-branches
These can be subcategories tied to the primary branches to expand the mind map further. The mind map can be better organized by using main and sub-branches. As you can see from the image below, the sub-branches or subcategories are added next to the main categories, branching out the mind map like a tree.

Step 4: Connecting Elements
To connect elements, you can use lines or arrows. This is also a common method for designing mind maps. The lines can help show interconnectivity and how different map parts connect. In PowerPoint, you can use various connectors by going to Insert -> Shapes to select a line or arrow type for your illustration.
How to Create a Mind Map Using PowerPoint Templates
Creating a mind map using PowerPoint templates is a process that only requires a couple of minutes. We’ll outline the steps here.
Step 1: Select a Mind Map PowerPoint Template
From the vast collection of products SlideModel has, you can find a mind map slide deck that will suit your needs.
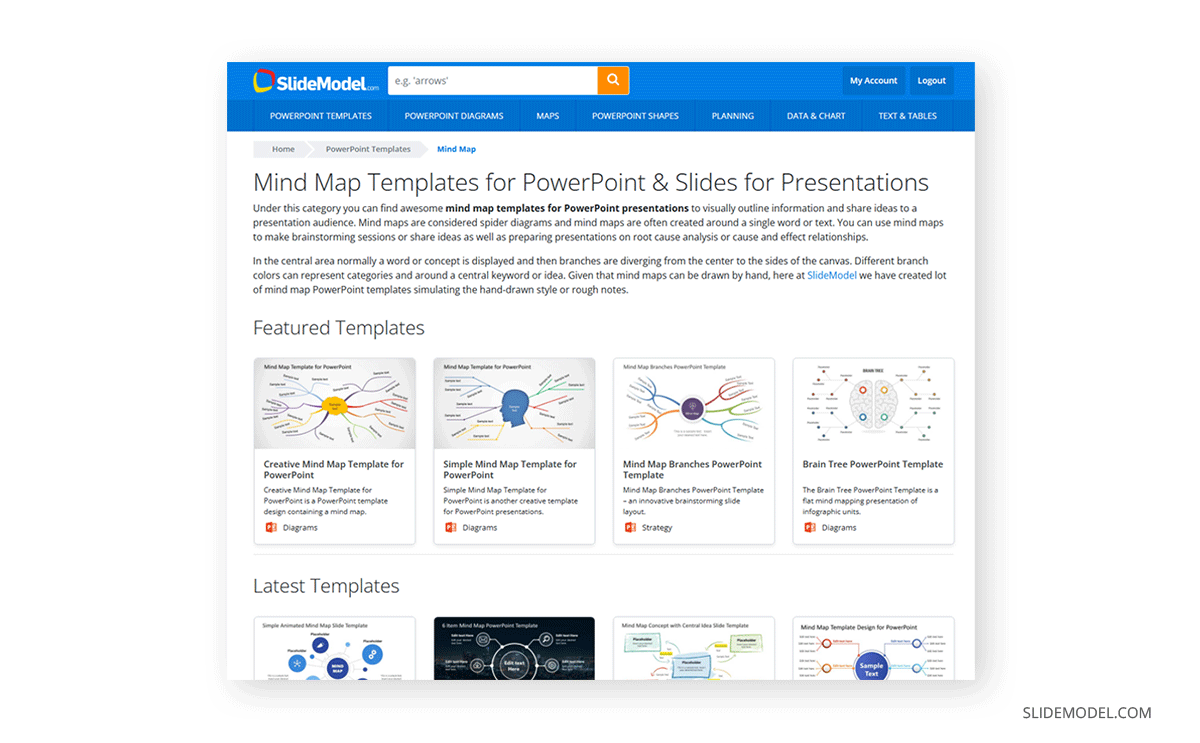
Remember, most of these templates are also compatible with Google Slides (the only effects that may not work are some special shadows or animation effects that lack compatibility with Google Slides available tools).
Step 2: Edit the Template
After you select and download the template, we can start to customize its placeholder areas. Add the text, images, or other media sources required to represent your ideas in the editable areas.
Step 3: Define the Output Format for the Mind Map
Now that the mind map is completed choose whether this will be represented as a slide inside a slide deck (if that’s the case, it will have to match the color theme), a printable (for meetings), or a deliverable (PDF handout, brochure, etc.).
Font size will be determined by the final output of your mind map, as sizes below 18px won’t be visible on large screens.
Design and Layout Recommendations for Mind Maps
Choosing Colors and Fonts
Consider giving different colors to the mind map according to nodes. You can use different colors for the main theme, main branches, and sub-branches. Similarly, you should consider fonts that stand out with your design.
Arranging and Aligning Elements
The elements in your map should be arranged and aligned hierarchically or at least easily understood by the audience. It can be easy to lose track of the central idea and expand your map beyond its original scope. This is why it is important to remain focused on the main theme and to branch out logically to avoid overcrowding the mind map.
Customizing the Mind Map’s Design
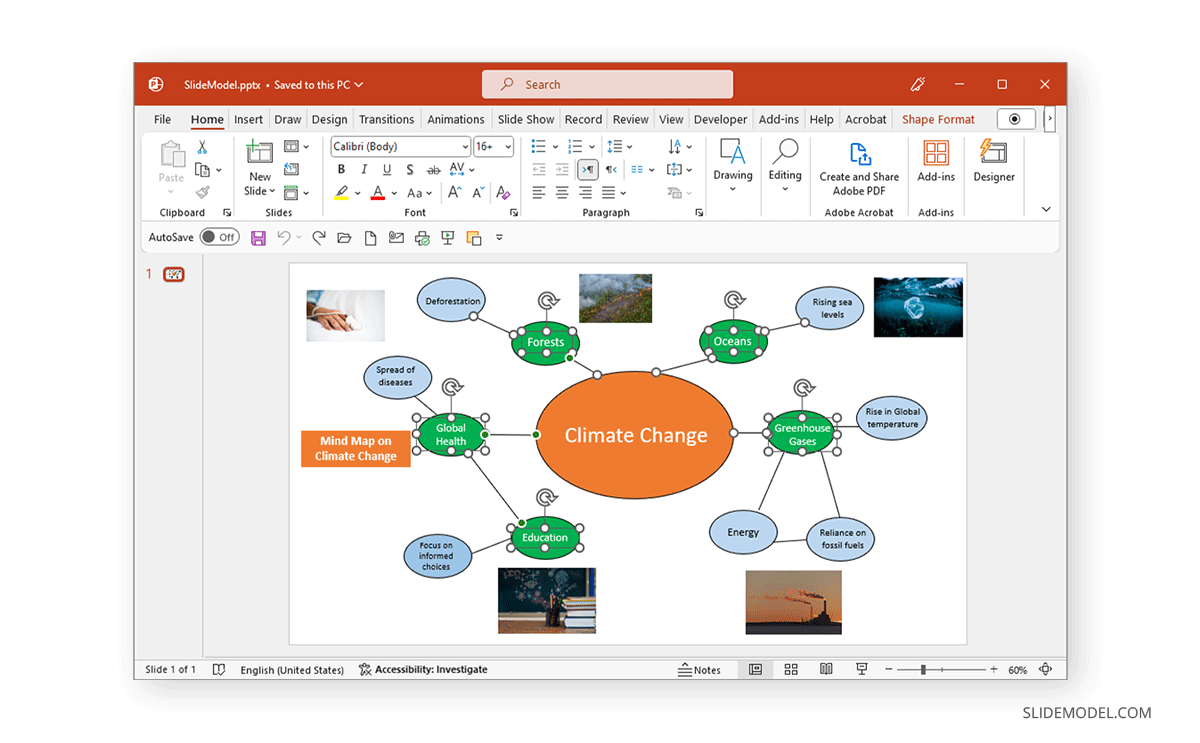
To customize the mind map design, you can add photos, text, and other design elements to highlight key areas and to make the mind map self-explanatory. The idea should be to construct a cohesive-looking illustration that is not only easy to follow but can also help convey the message to the viewer. Mind maps are supposed to be thought-provoking. This is why your design should have elements that can make the viewer think about the key concept and, if necessary, contribute to their ideas.
Adding Content to an Existing Mind Map
Inserting Text
If you’re using PowerPoint to create a mind map, add a text box to add labels for nodes and any accompanying text you might need to add. You can do this via Insert -> Text Box.
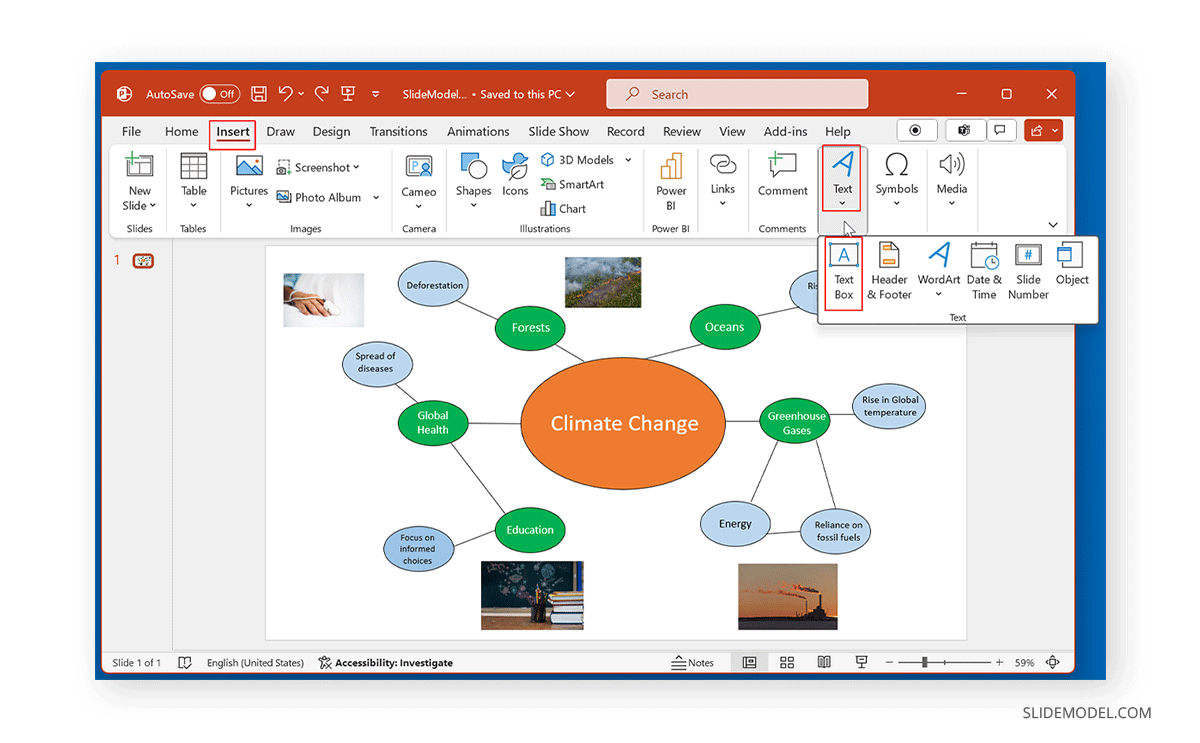
When inserting text in a mind map, consider using short keywords or phrases to avoid making the map unmanageable or difficult to follow.

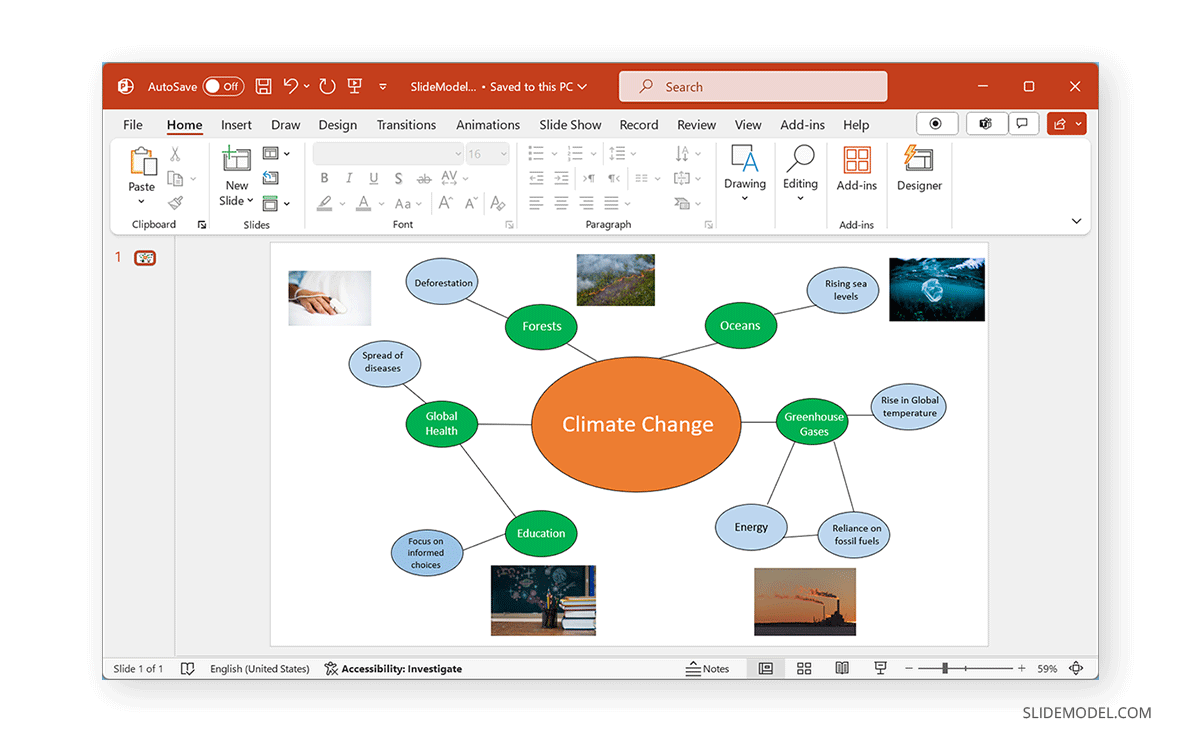
Incorporating Images and Icons
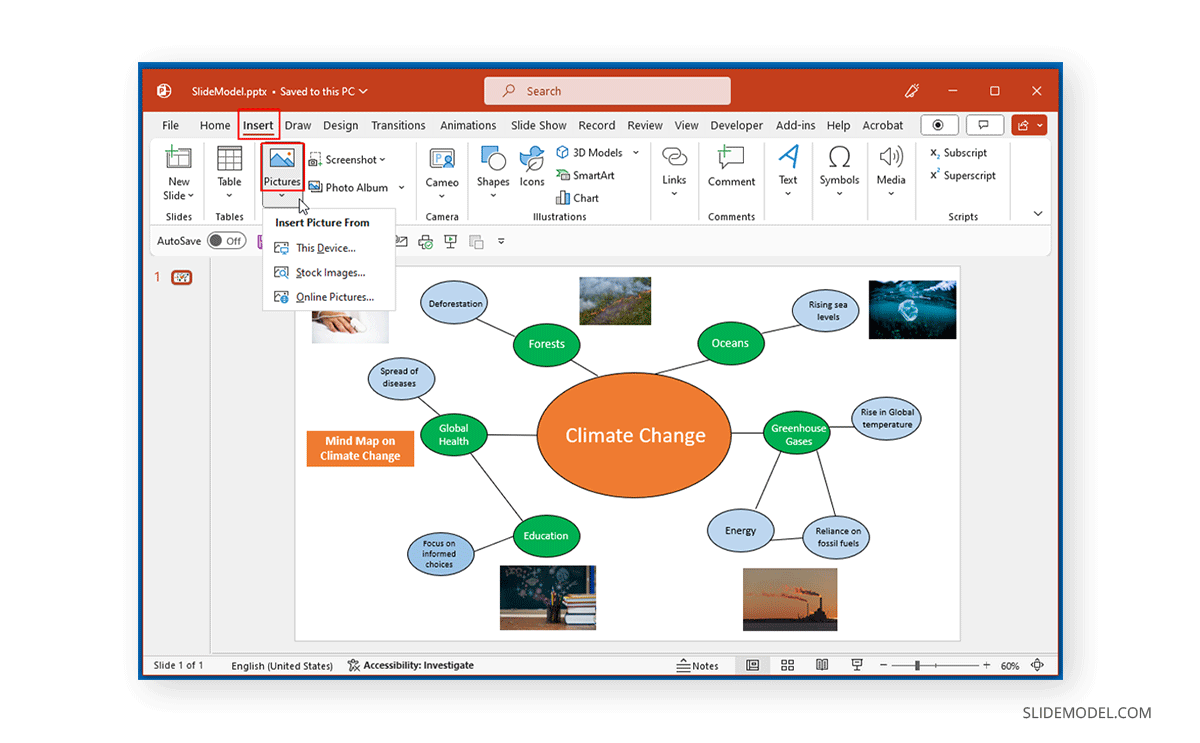
You can incorporate appropriate images and icons to make your mind map more visually appealing. Sometimes, these can also be used to replace text. PowerPoint provides several options to add images via Insert -> Pictures. This includes images from your device, stock images provided by Office, and online images via Bing.
You can also incorporate icons provided by Office via Insert -> Icons to add icons from other sources online by inserting them as images. PowerPoint also provides cutout people, illustrations, and cartoon people that you can incorporate into your presentation slides to create your map. Alternatively, you can check high-quality icons for PowerPoint created by SlideModel.
Structuring and Organizing Content
To make your mind map cohesive, you should ensure that you place your nodes in a manner that suits the overall layout and merges with their respective categories and subcategories. The branching out of nodes should be carefully crafted so fewer nodes can convey more information.
Enhancing Interactivity in Mind Maps
Creating Hyperlinks
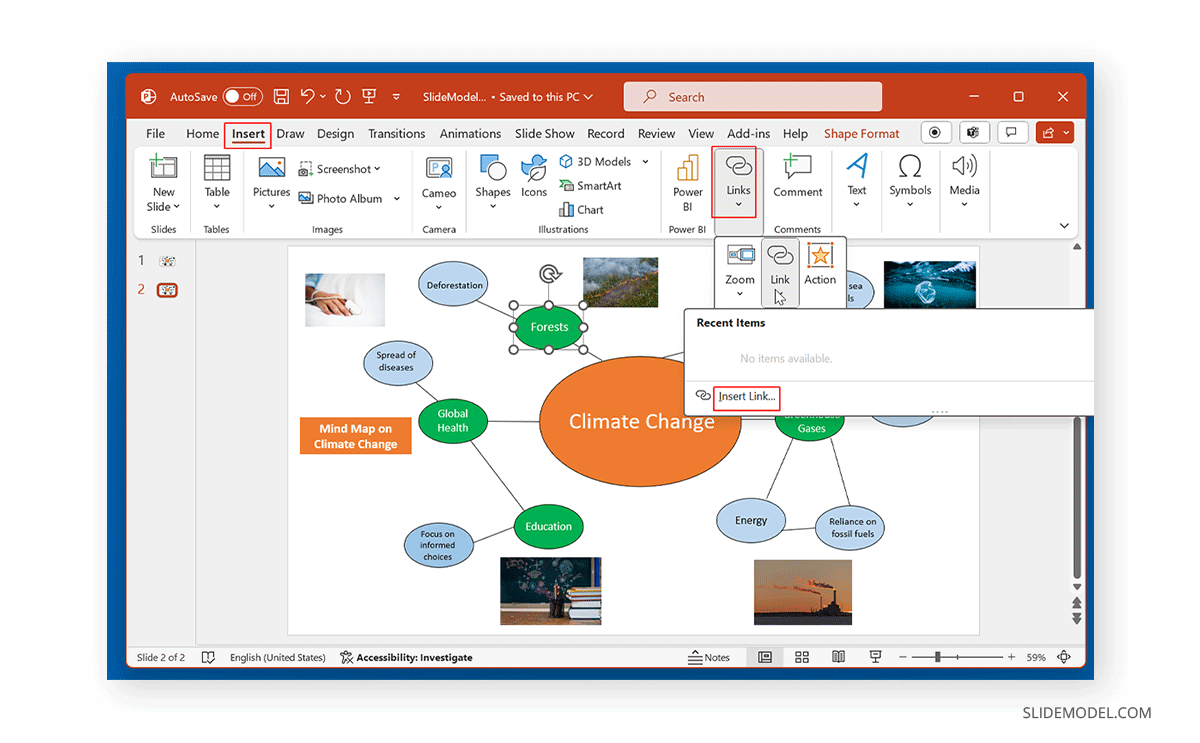
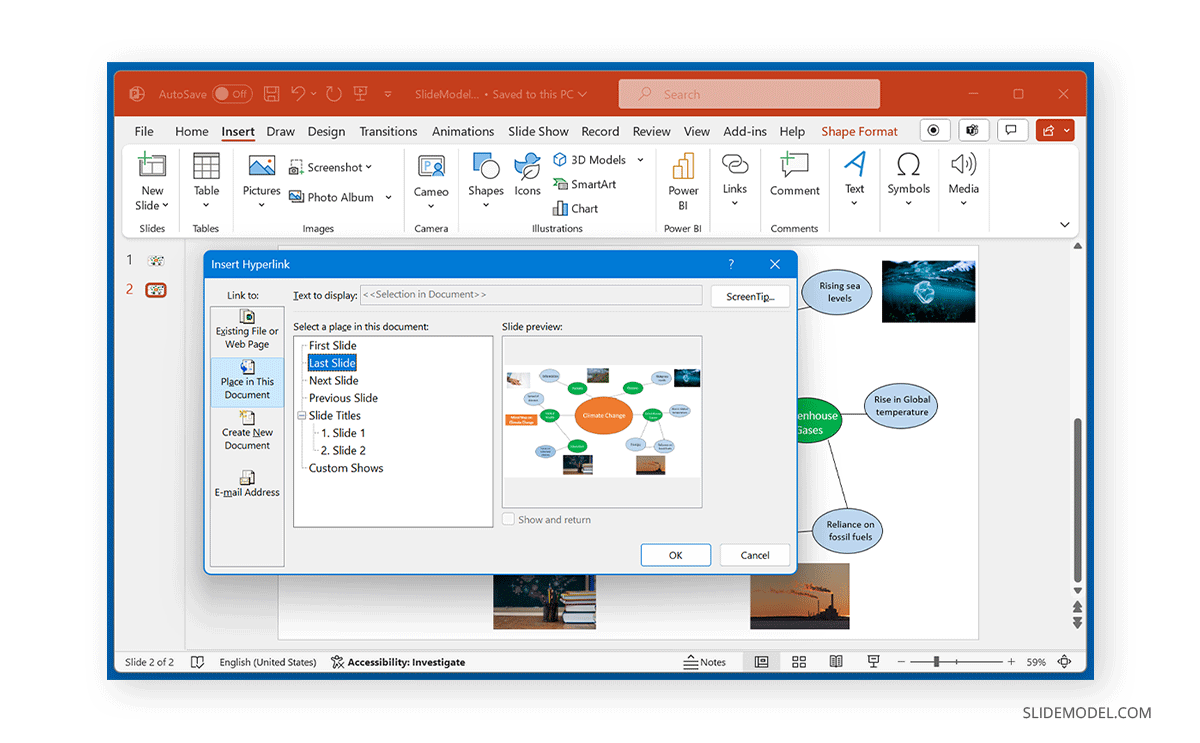
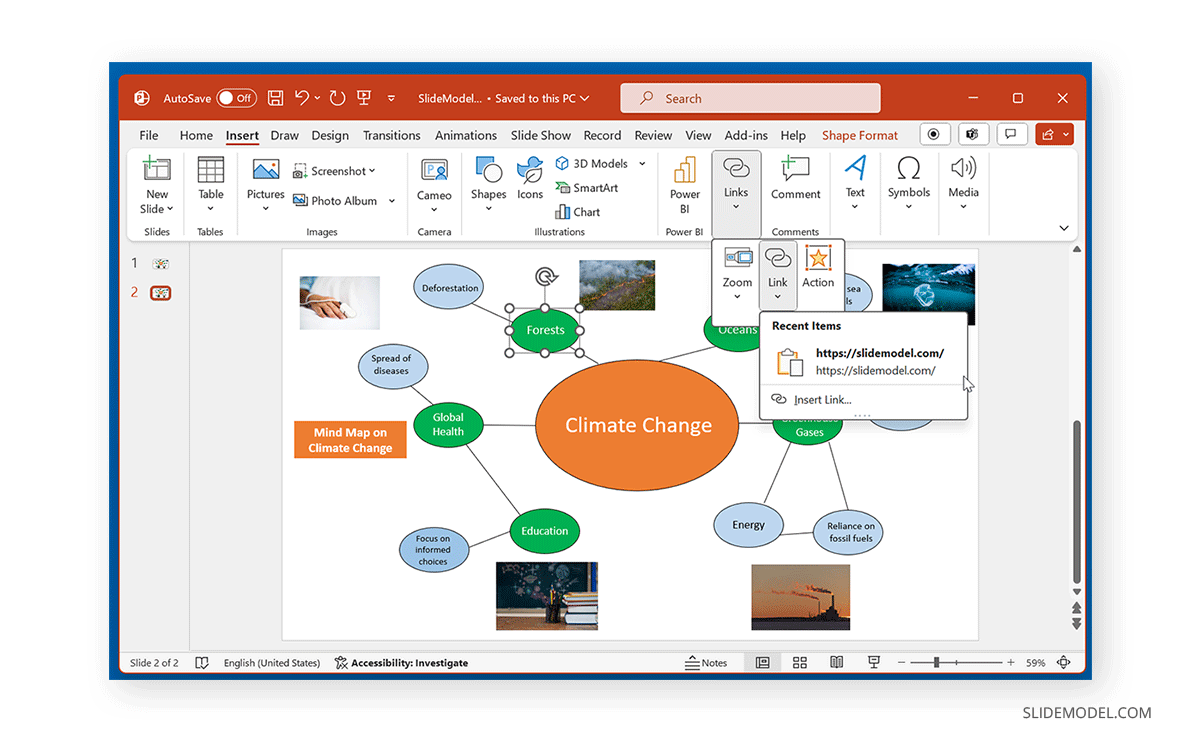
Interactivity in presentations can be quite helpful in switching between content slides. If you have more than one slide, you can connect slides to nodes to switch to more detail regarding a topic on a different slide. For example, by switching on a node about a subtopic, e.g., ‘forests,’ you can move on to a slide with more detailed information regarding deforestation, wildfires, rapid urbanization, etc. To link these slides, go to Insert -> Insert Link in PowerPoint.
You can also hyperlink the content to other resources, such as a document or website, or instantly create a new document to link.
The hyperlinks you add can be inserted into text, images, shapes, etc. Hyperlinks can greatly enhance interactivity and make it easier to switch between your presentations.
Using Animations and Transitions
Animations and transitions can help create PowerPoint presentations that are easy to follow visually. However, it is important not to use too many animations or flashy transitions to make that possible.
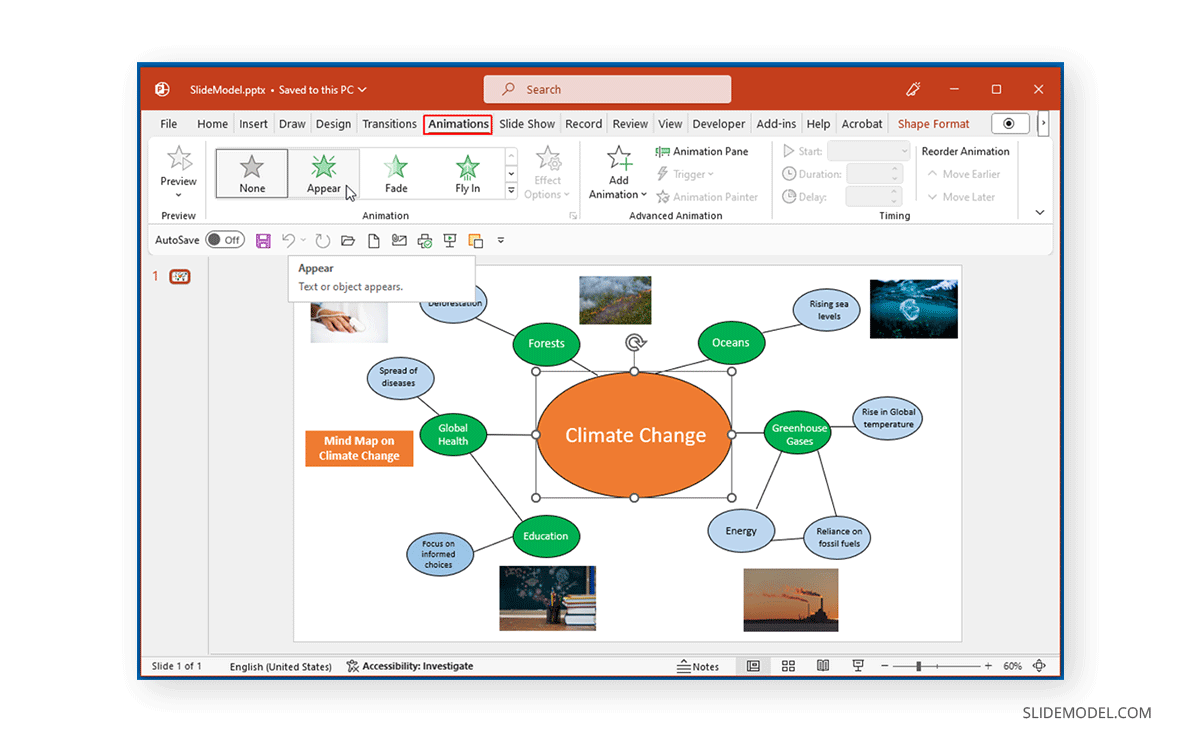
When adding animations to your mind map, you should pick subtle animations that can help reveal or highlight parts of your mind map effectively. After selecting an object from your slide, you can pick relevant animations via the Animations tab in PowerPoint.
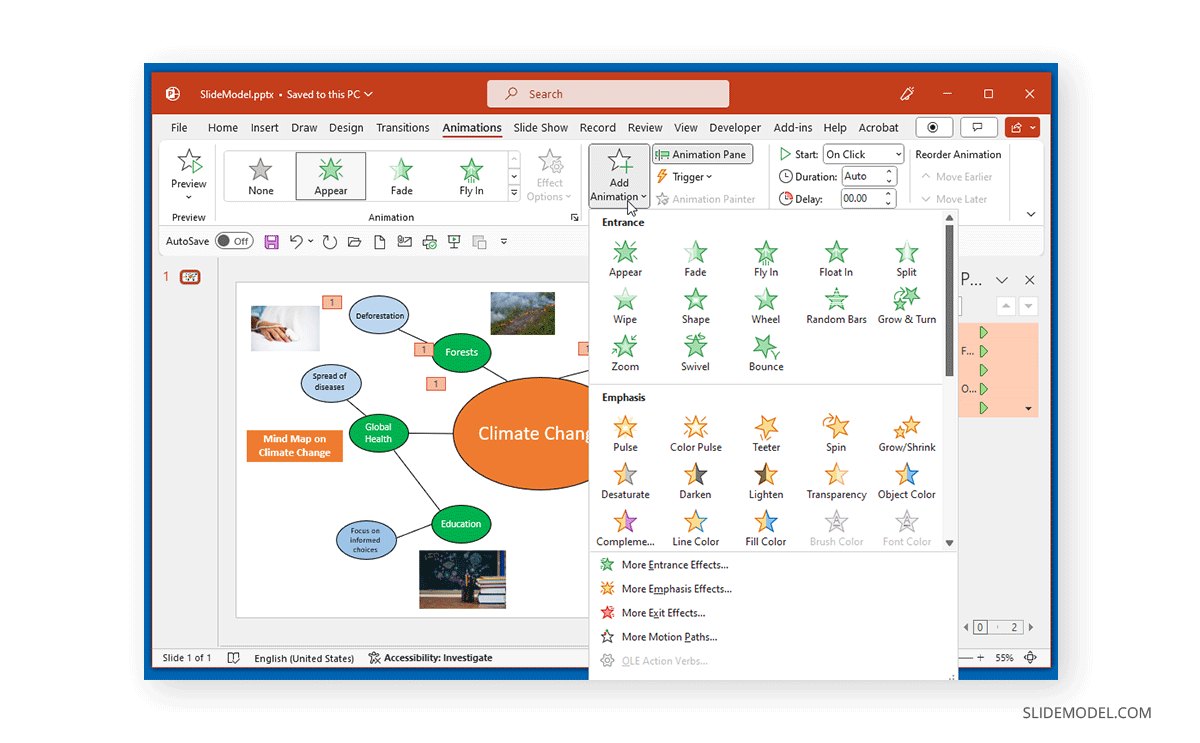
The Animations tab provides animations according to Entrance Effects, Emphasis Effects, Exit Effects, and Motion Paths. You can select an animation from any of these categories. As the names suggest, the entrance and exit effects are used for animations for entering and exiting the animated sequence, whereas Emphasis Effects are used to highlight slide elements. Motion paths deliver an animated sequence, such as arcs, lines, loops, etc.
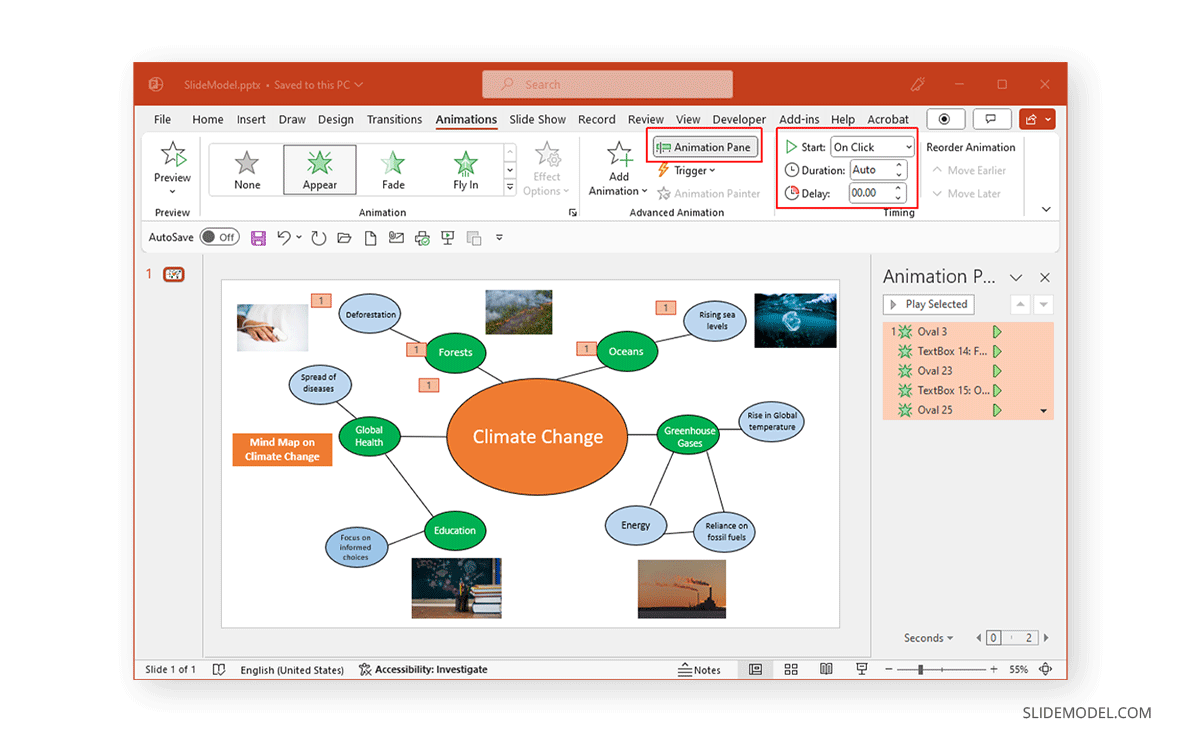
To edit the animated sequence, head over to the Animations pane. This can enable you to view and edit the sequence for your animations. Moreover, you can set the duration for the animation, enable it on click or with the previous or by sequential order, and set a delay time for an animated object.
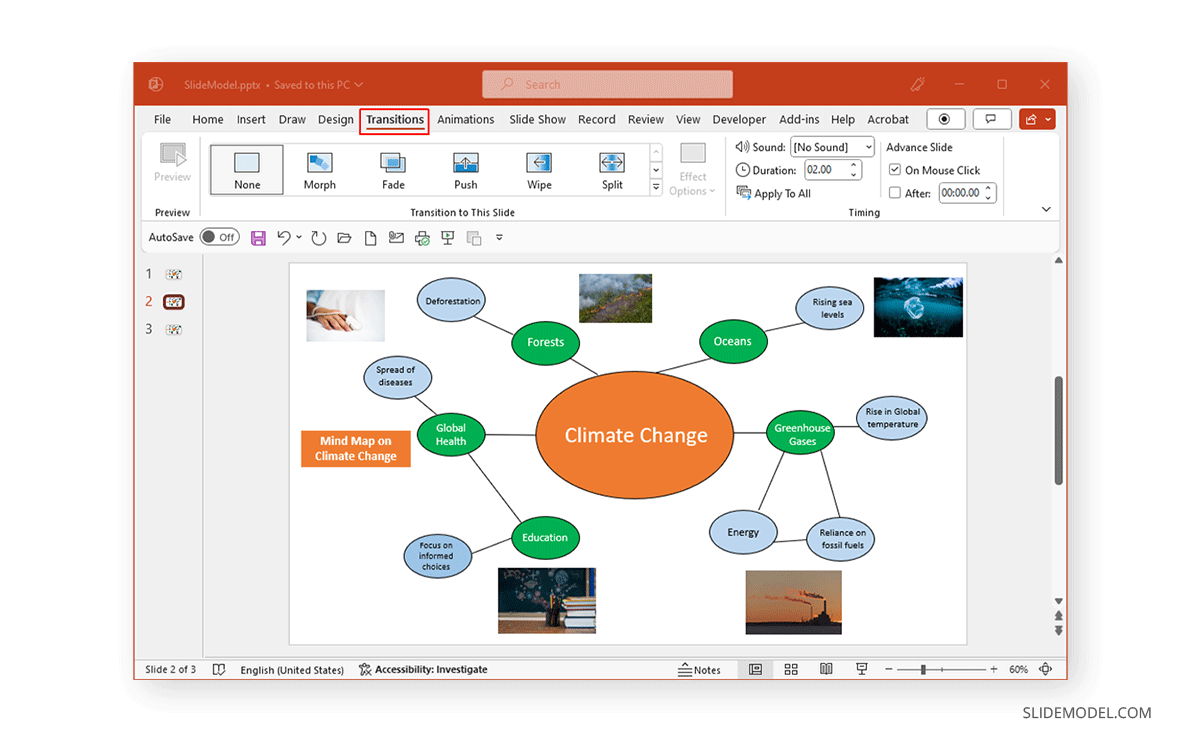
The Transitions tab in PowerPoint provides many transitions to help you move between slides with a specified effect. You can fade, push, wipe, morph, or use other transitions as you switch between slides to add visual appeal to your slide deck.
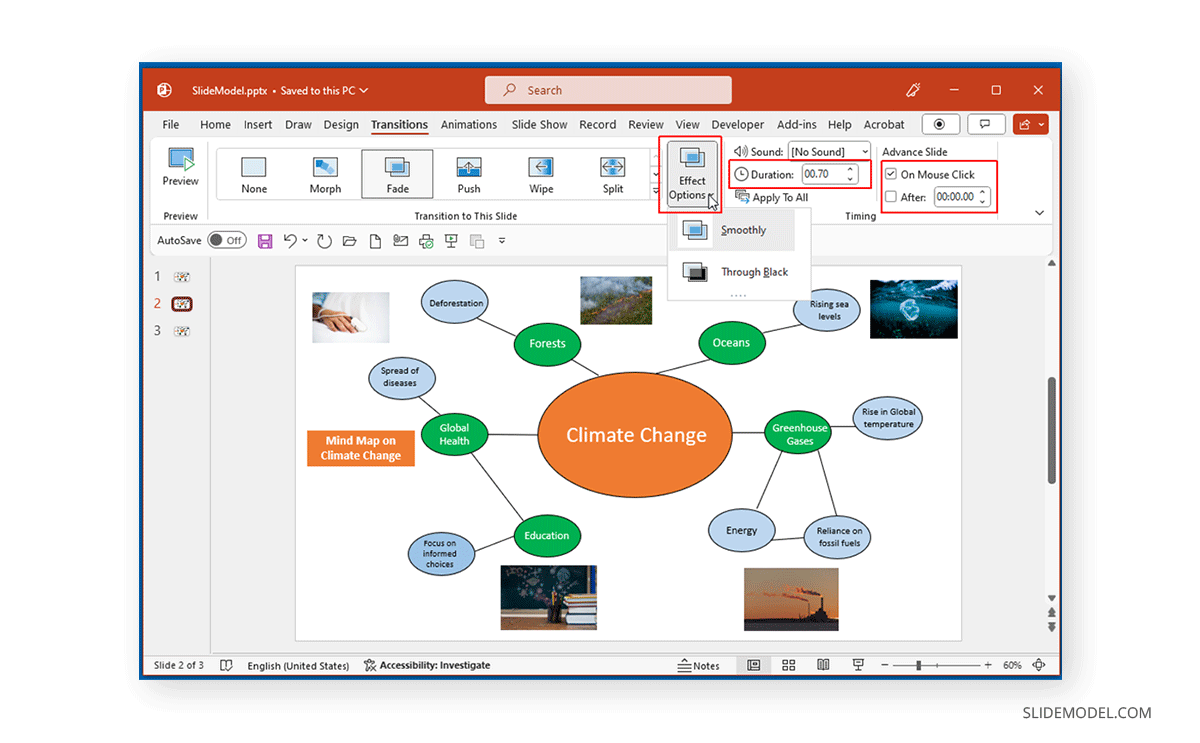
Effect Options can be used to choose whether you want the transition to be applied. For some transitions, you will get the option to apply it either smoothly or through a black screen.
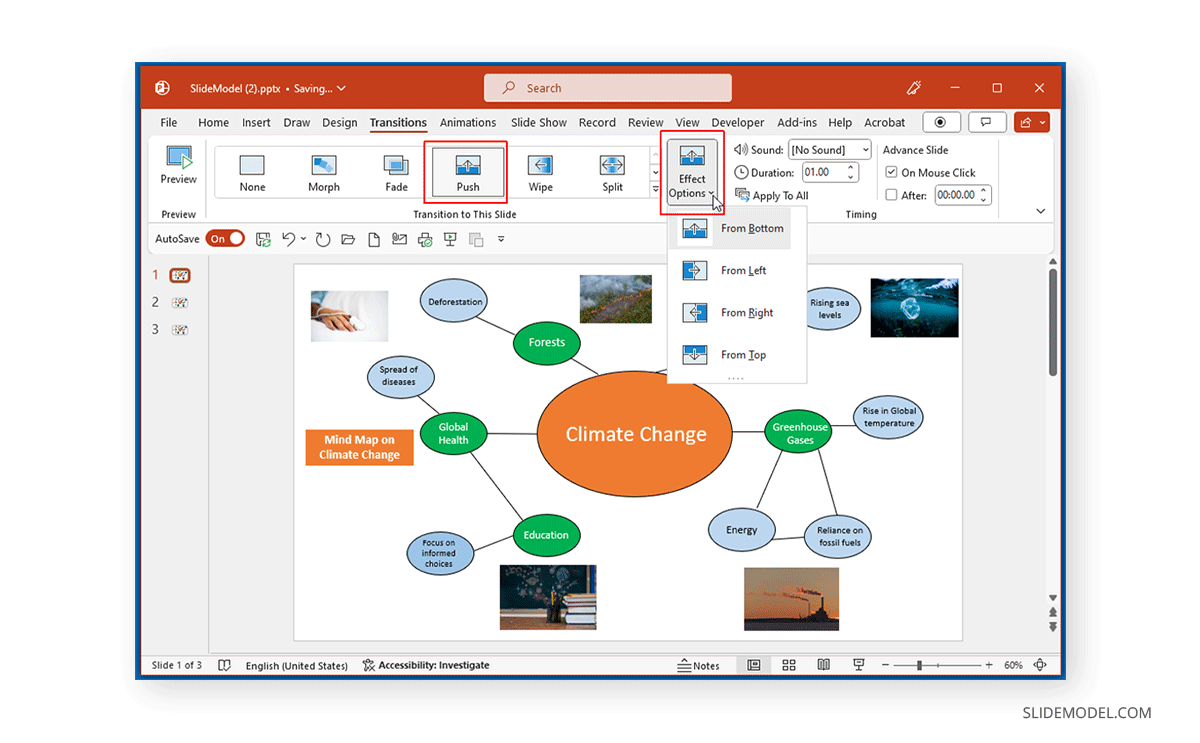
For others, you will get options according to a direction, such as right, left, top, bottom, etc.
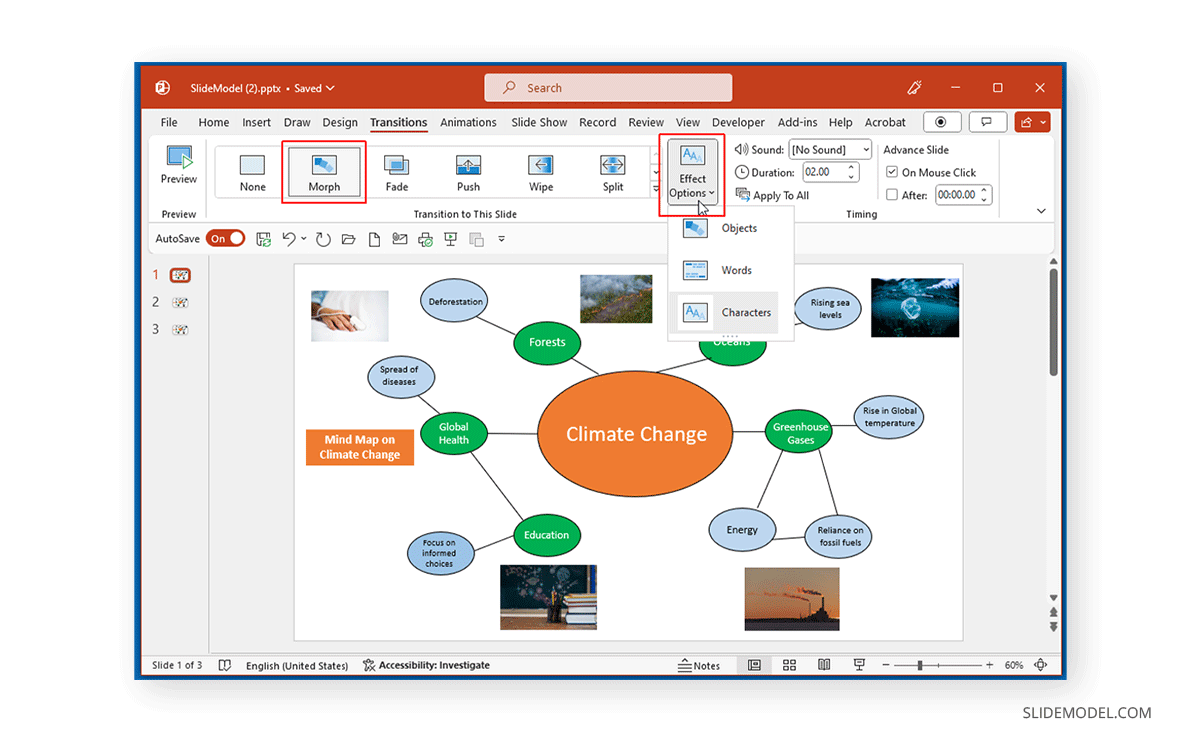
Similarly, for the Morph transition, you can add Objects, Words, and Characters as a part of your slide transition.
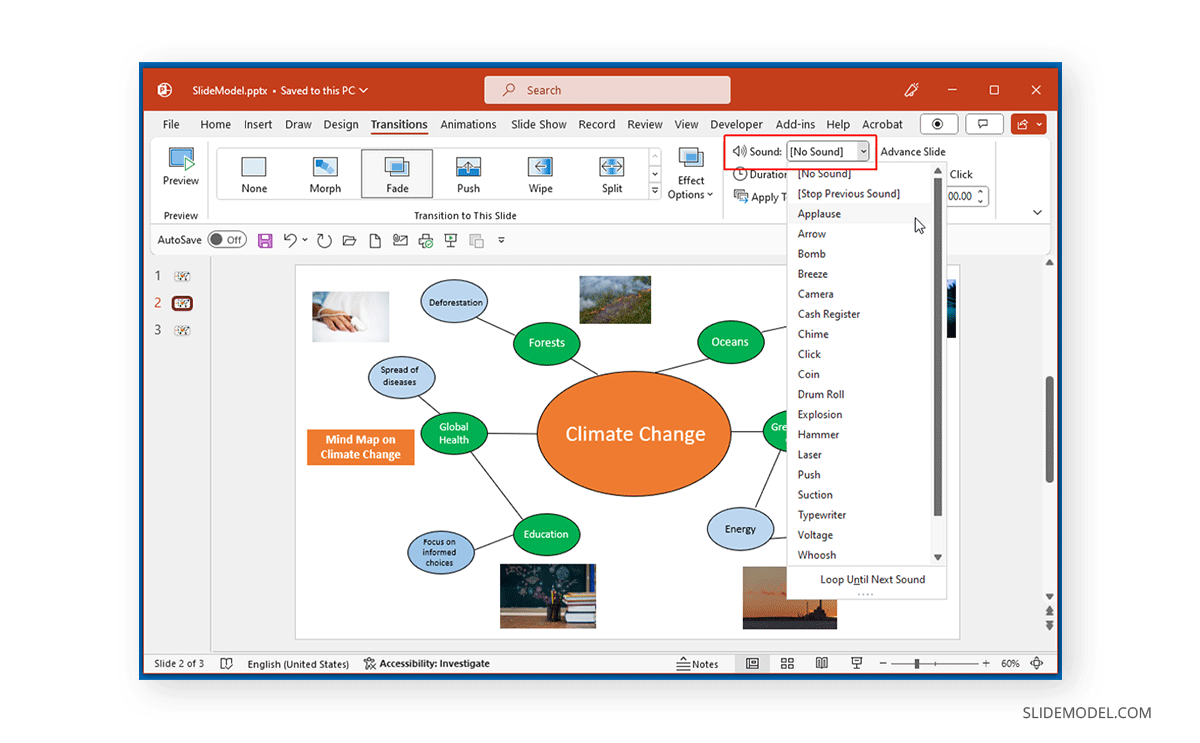
PowerPoint also provides audio effects for transitions that can be added as you switch from one slide to another. These include sound effects such as applause, arrow, bomb, breeze, camera sound, cash register sound, click, coin drop sound, drum roll, etc.
Best Practices for Creating Mind Maps
Common Mistakes to Avoid
You can avoid some common mistakes mentioned below when making mind maps. These mistakes can be avoided using PowerPoint or another method for making mind maps.
- Making a complicated mind map: Mind maps that are too lengthy or have too many words or images can be hard to follow. Use short keywords and keep your mind map as concise as possible.
- Use of a single or too many colors: While occasionally this might not be a bad idea, using the same colors for the whole mind map can make it hard to follow. Also, using too many colors can be confusing. This is why it is important to strike a balance between the colors used for the main idea, categories, and subcategories.
- Don’t ignore hierarchy: By making a mind map with no clear hierarchy, you can end up with an illustration that might not be easy to connect or follow.
- Avoid visuals that are hard to view: Mind maps that are too dull or small can be difficult to view for the audience. Always review your mind map for the audience according to your chosen medium. You can run your slideshow on a projector or digital screen to see if it’s legible enough. Even if you’re using a printed mind map, assessing its visibility from a distance might be best. For printed mind maps, always use high-resolution images and high-quality printing material.
Ensuring Clarity and Readability
You can follow the following tips for ensuring clarity and readability for your mind map:
- Use fewer nodes.
- Use an easy-to-read font.
- Don’t use colors that might look out of place according to your theme colors.
- Use whitespace or light background colors.
- Ensure the mind map is to the optimum size and does not appear pixelated.
Saving and Sharing Mind Maps
Saving Your Mind Map
To save your mind map, head to the File tab in PowerPoint. By going to File -> Save As, you can save your mind map to your PC, to a network location or specified path, and on OneDrive. When saved on OneDrive, you can edit and upload the document Live via an Internet connection. While PowerPoint provides a number of file formats to save your files, not all formats might be suitable for such a file. You can save a mind map in the following formats in PowerPoint as a viable file:
- PowerPoint presentation file (PPT or PPTX)
- Macro-enable PowerPoint file (PPTM)
- Microsoft PowerPoint presentation template file (POTX)
- PowerPoint Slideshow (PPS or PPSX) or a macro-enable PowerPoint Slideshow (PPSM)
- MPEG-4 or WMV video file
- Animated GIF
- Image file (JPEG, PNG, TIFF, or BMP)
- SVG (Scalable Vector Graphic File)
- Open Document Presentation (ODP)
- Portable Document Format (PDF) file
Sharing Options and Methods
The sharing options in PowerPoint can be used to share your presentation to OneDrive, as a link, as an attachment via a mail client like Outlook, and in PDF format.
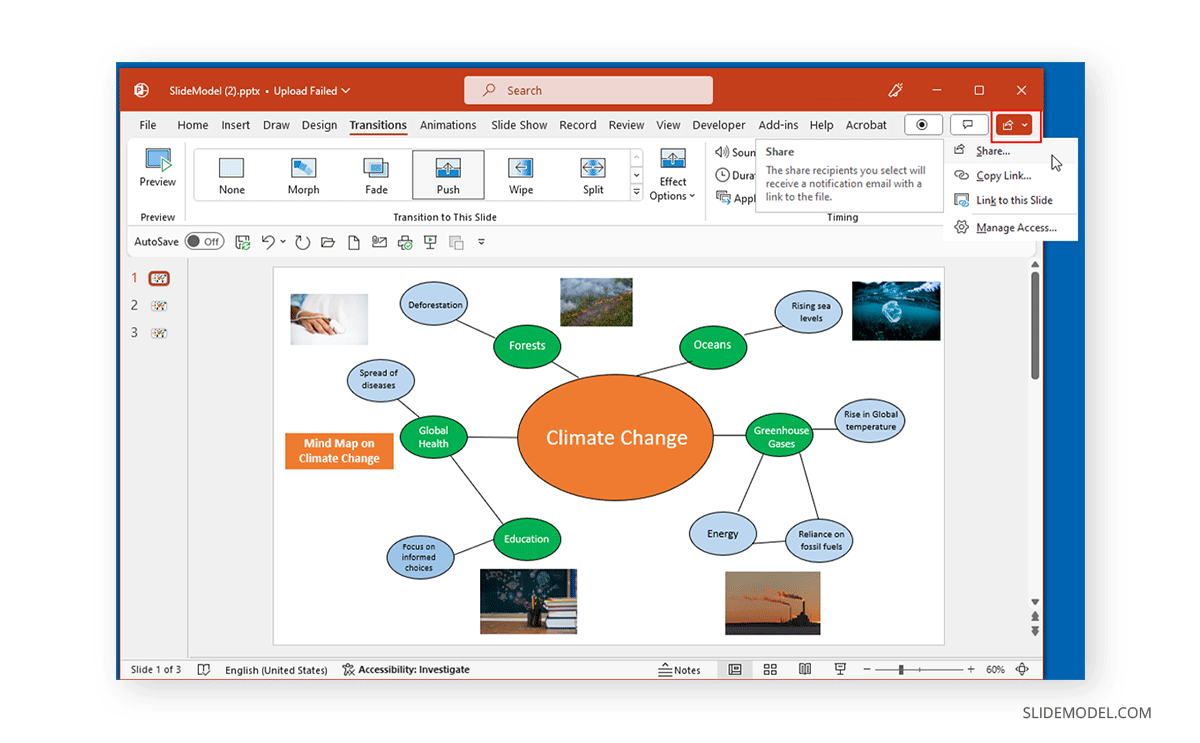
If you’re sharing the PowerPoint file as a link, you can upload it to OneDrive and generate a sharing link.

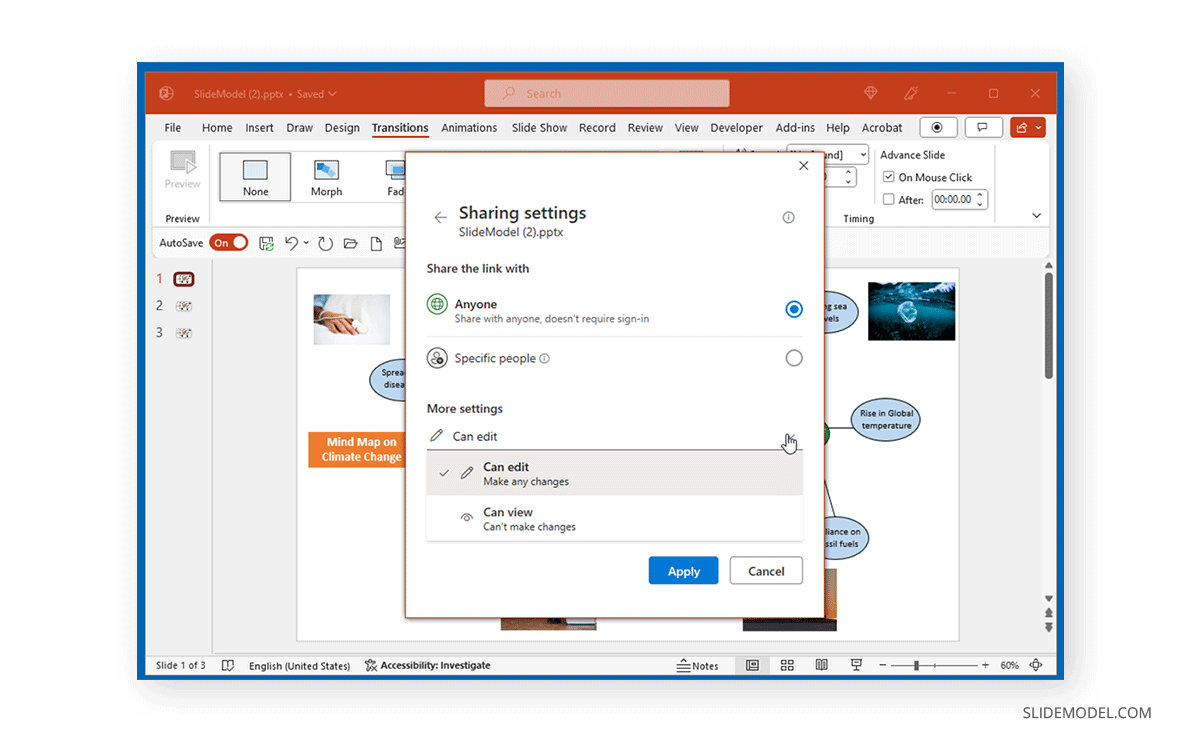
The link can be customized to allow access to specific people to view or edit the file or to generate an open link where anyone with the link can view, download, or edit the file.
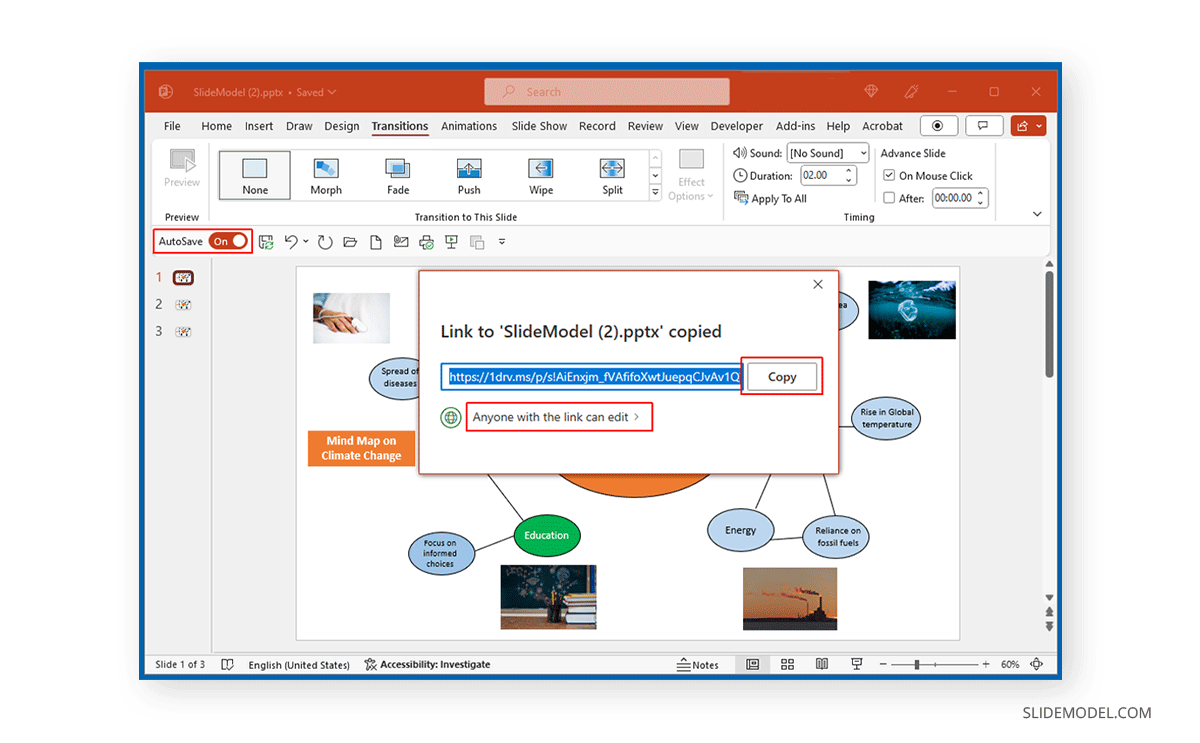
To make the link publicly available, select Anyone. Alternatively, select Specific people to restrict access to the link.
FAQs
Should I include detailed information in my mind map?
Mind maps should be concise, with short keywords or phrases used to describe information in a few nodes.
Can I collaborate on mind maps with others?
Depending on the medium used to create a mind map, you can collaborate on mind maps by using PowerPoint sharing options via OneDrive, through a remote or in-person meeting, such as a brainstorming session, or share your mind map for feedback and ideas with friends via email.
Are there any specific rules for creating mind maps?
There are no specific rules for making mind maps. However, focusing on the central theme and using categories and subcategories to branch out the map based on the main idea flowing through your categorized information is always a good idea.
Can I export my PowerPoint mind map to Google Slides?
Yes, most designs are compatible and editable inside Google Slides. You need to keep in mind that if you add certain complex shapes, shadows, or animation effects, they may display oddly or won’t show up.
How do I balance text and visuals in a mind map?
Use concise text for clarity and supplement with visuals like icons, images, or different colors for emphasis and better memory retention. Remember, the less text, the better.
How can I use mind maps for project planning?
Mind maps can outline project goals, tasks, timelines, and resources. On an organizational level, they can help visualize the project structure and identify potential challenges and dependencies.
Can I integrate data and charts into my PowerPoint mind map?
Yes, although they may look small when placed alongside big mind maps. It’s best to link data or charts using the method shown above.
For further reference, check our guide on how to convert PowerPoint presentations to Google Slides.
Recommended Mind Map Templates for PowerPoint and Google Slides
1. Brain Shaped Mind Map Template for PowerPoint & Google Slides
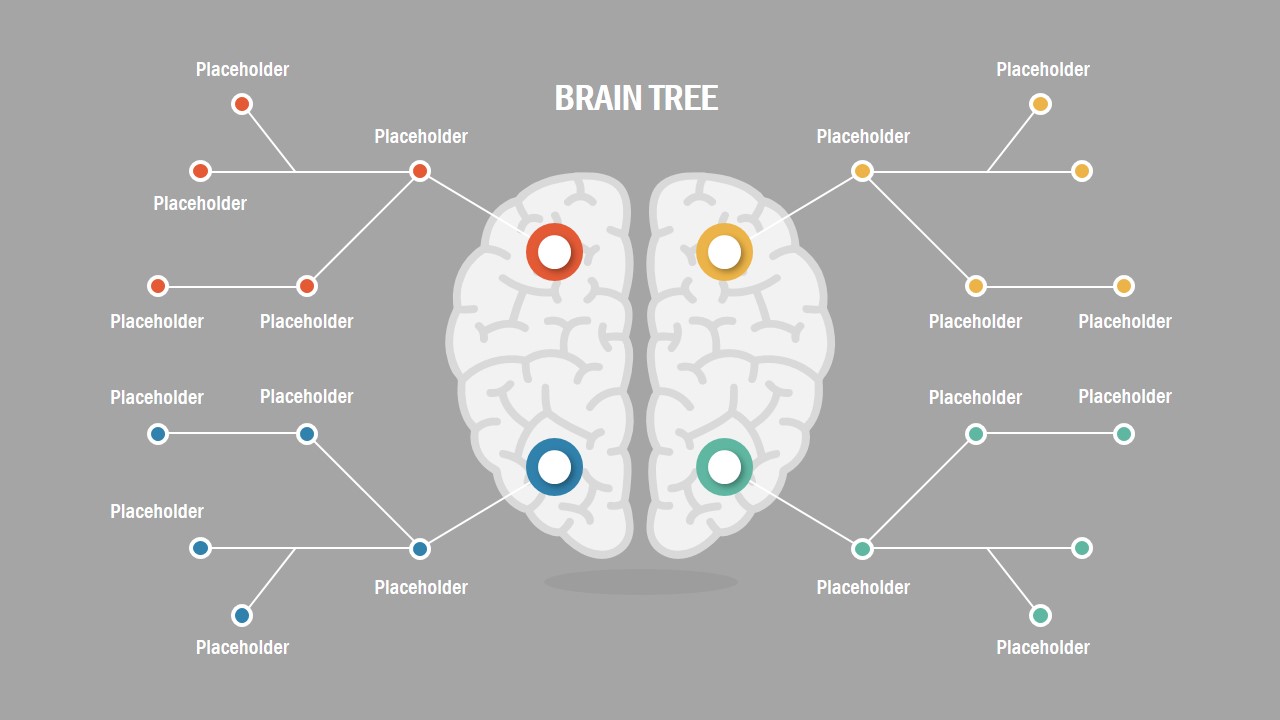
Illustrate the connection points between ideas with this visual representation of a brain, with its two hemispheres clearly split and ideas coming out from it. The branches and sub-branches shown are entirely editable, allowing us to change position, size, and color.
2. Mind Map Branches Google Slides & PowerPoint Template
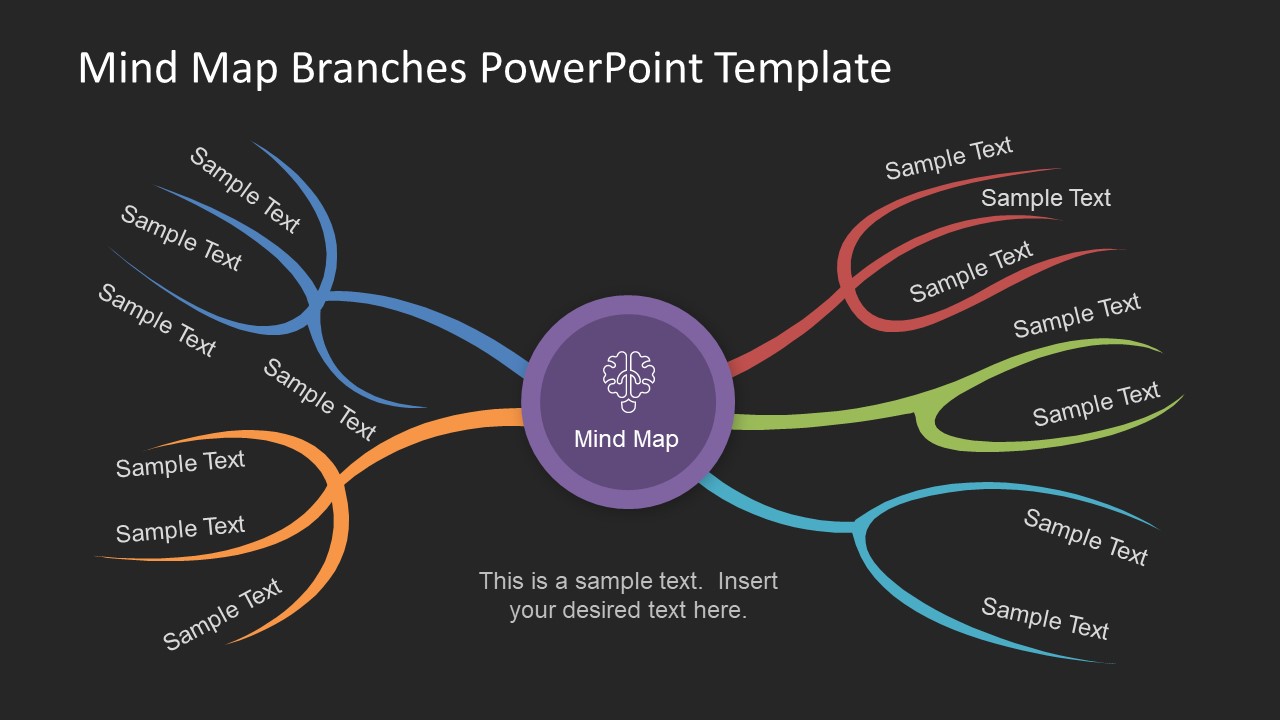
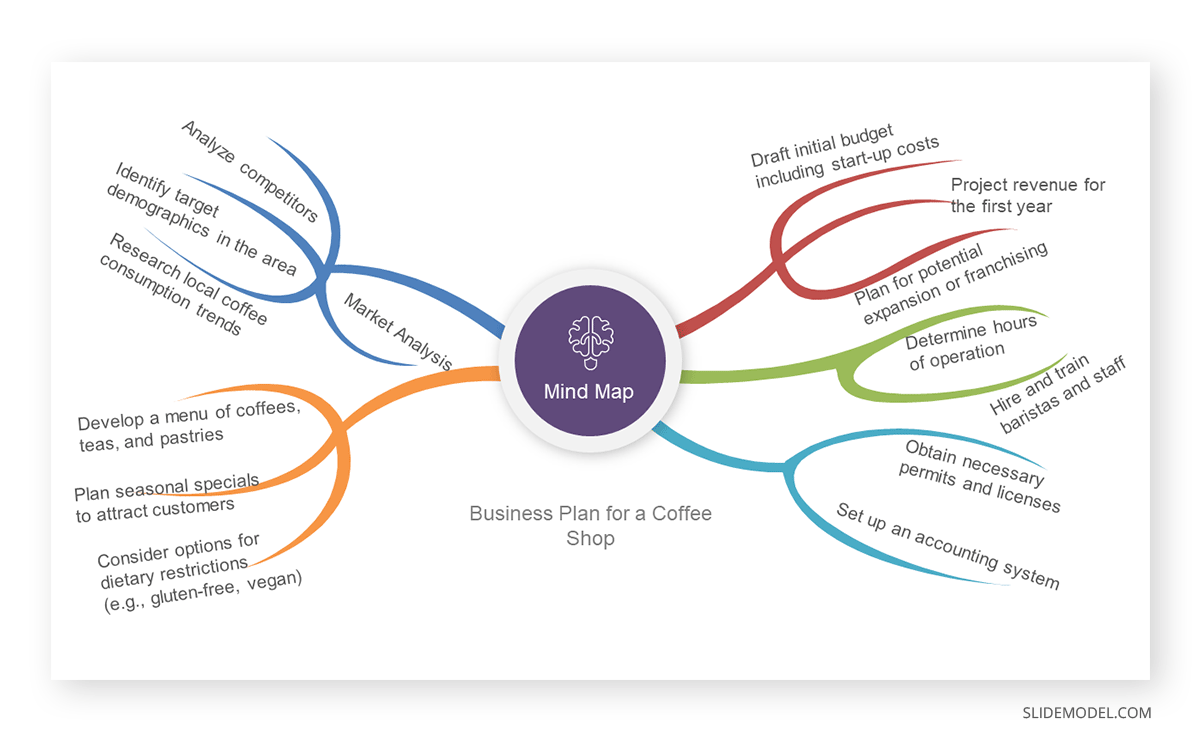
As shown in the example above, this mind map template is ideal for creating highly visual slides in a couple of clicks. Its best use case is for presenters who need to convert pen & paper mind maps extracted from meetings into presentation slides or reports.
3. 6-Nodes Mind Map PowerPoint Template
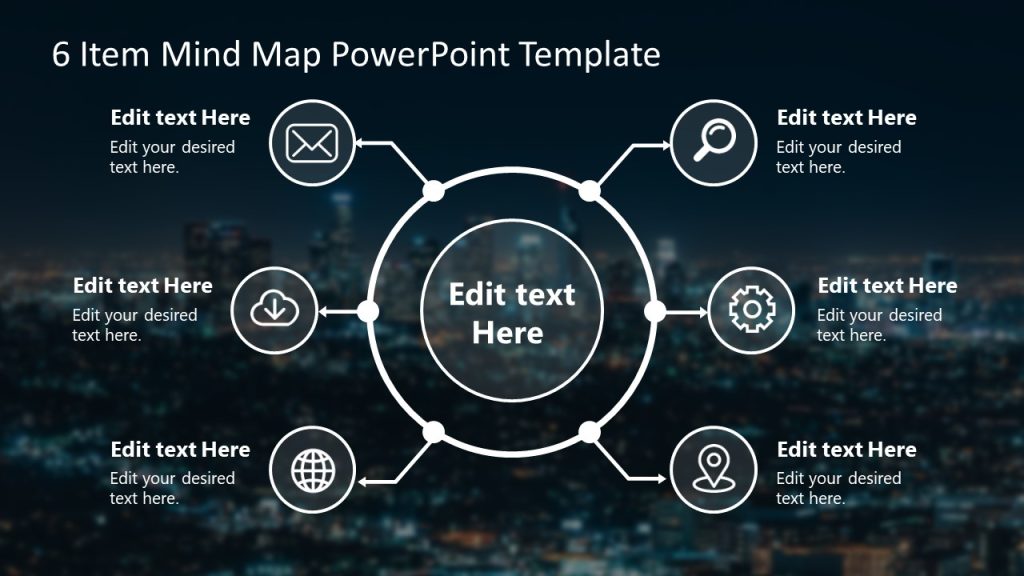
This simplistic take on a mind map has everything required in a circular array containing six nodes and icons to signal each point. Presenters can replace the icons, add more nodes, and edit the placeholder text areas to meet the requirements of their projects. Additionally, the background can be replaced for a single color option, or another image of their choice.
4. Animated Mind Map Template for PowerPoint
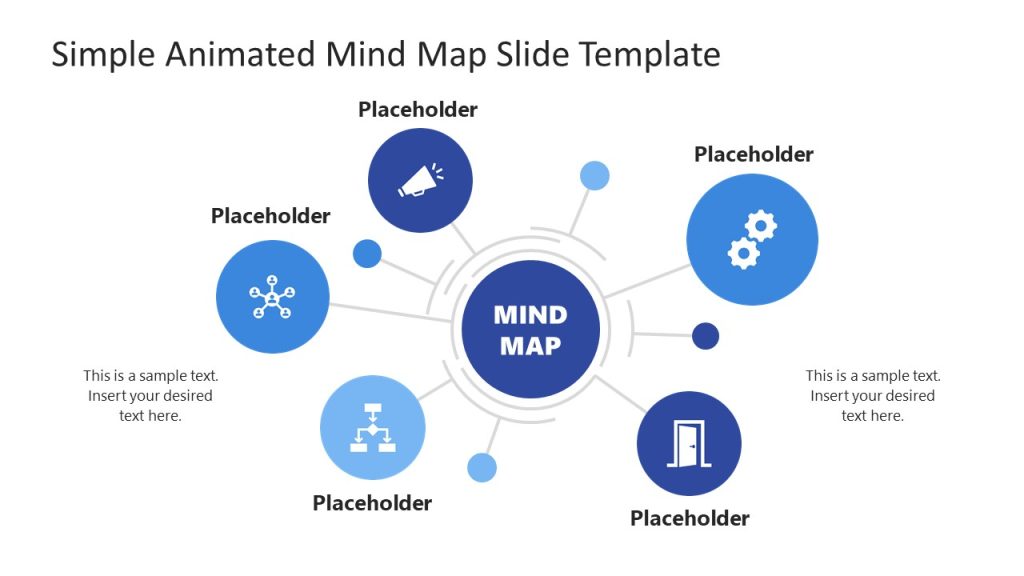
This Prezi-effect mind map template for PowerPoint allows us to expand our thoughts into dedicated slide sections with smooth zoom animation effects. Don’t restrict your creativity to just one online tool; explore all the options available in PowerPoint for mind map presentations
5. Multi-Step Mind Map Slide Deck Template
Explain the thought process behind one concept with this multi-step mind map template. It allows us to work with 5 to 8 steps to explain a process, and it can also help if used with the notion of nodes for presenting different concepts linked to one idea.
Conclusion
Mind maps are an effective tool for gathering ideas, consolidating information, categorizing complex details into smaller and more cohesive illustrations, and presenting complicated information effectively in organized nodes. When making a mind map, it is best to keep it simple and concise while accounting for legibility for an audience, should you need to present it.
While various apps can be used for mind mapping, PowerPoint can be an effective mind-mapping tool, and ready-made PowerPoint templates can help design mind maps effectively and quickly. Mind maps don’t have any strict guidelines, and you can adapt them to suit your needs.