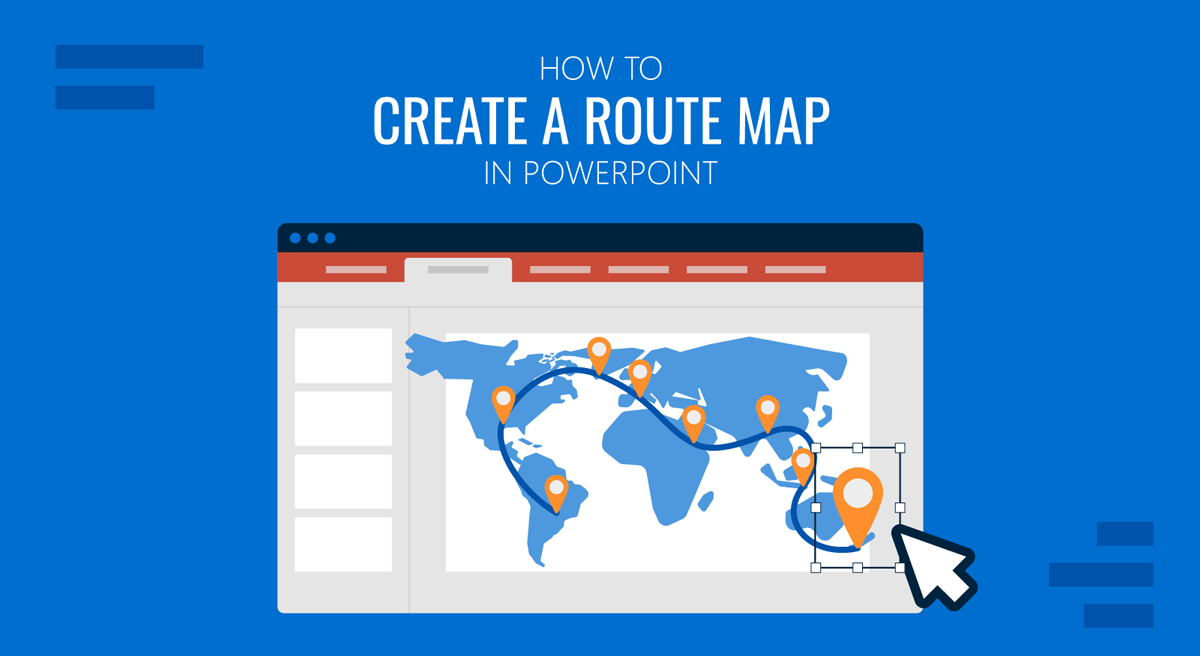
When you need to show directions, highlight a location, or guide your audience from one point to another, making a location map in PowerPoint can be quite helpful. Unlike roadmap diagrams, which show processes or timelines, route maps focus on real-world navigation. In this guide, we will explain various methods to create a route map in PowerPoint, including using shapes, map applications, screenshots, and templates.
What is a Route Map in PowerPoint
A route map is a visual representation of directions between locations. It typically includes a starting point and destination, roads, landmarks, directions, and reference points. These maps are commonly used in event presentations (how to reach a venue), corporate office directions, travel or logistics presentations, training materials, and to highlight the geographical area (e.g., to show market share along a route).
How to Make a Route Map in PowerPoint
You can create a route map in PowerPoint using shapes, PowerPoint templates, and map applications such as Google Maps, Bing Maps, or Apple Maps.
Method 1: Create a Route Map Using PowerPoint Shapes and Templates
This method gives you full control over design and is ideal for simplified, stylized maps.
Step 1: Start with a clean layout to design your map.
Step 2: Go to Insert -> Shapes, use lines, curves, or freeform shapes to draw roads, and adjust thickness and color to resemble streets.
Step 3: Insert shapes such as circles or icons, and label key locations (e.g., start, destination, and landmarks).
Step 4: Use arrows or highlighted lines and choose a contrasting color to make the route stand out.
Step 5: Add Labels and Landmarks by including street names or key reference points. Add icons for buildings, parking, or entrances.
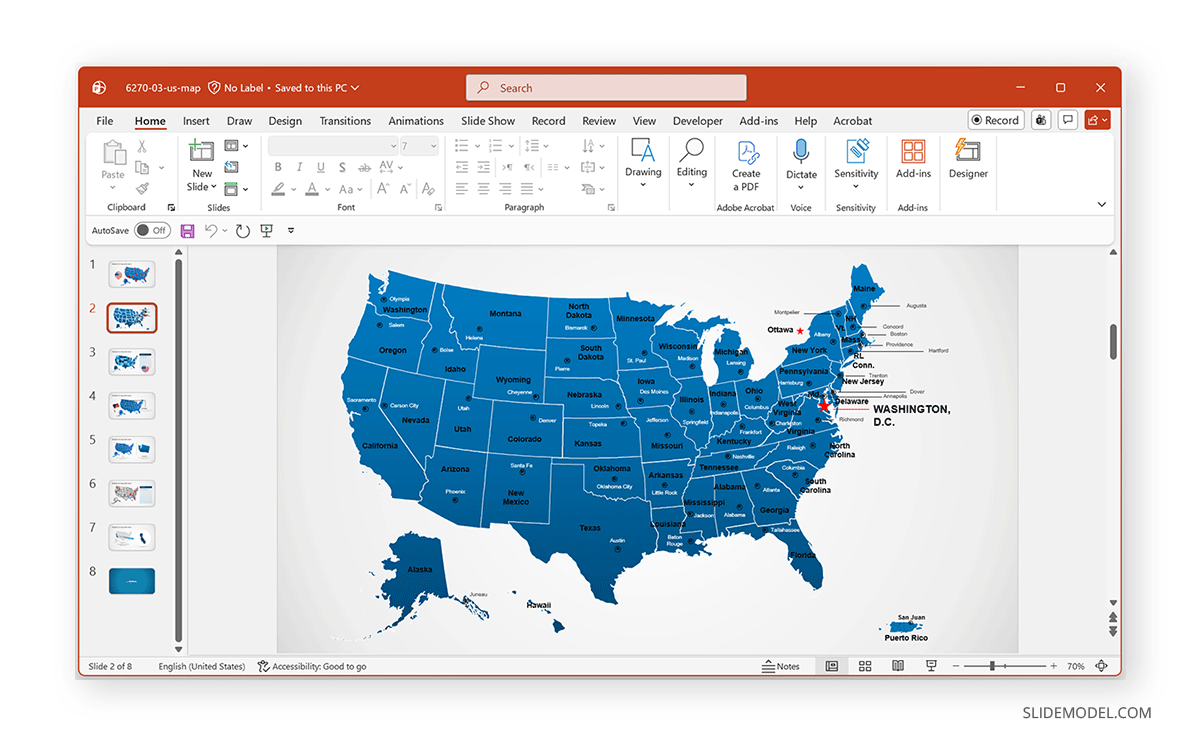
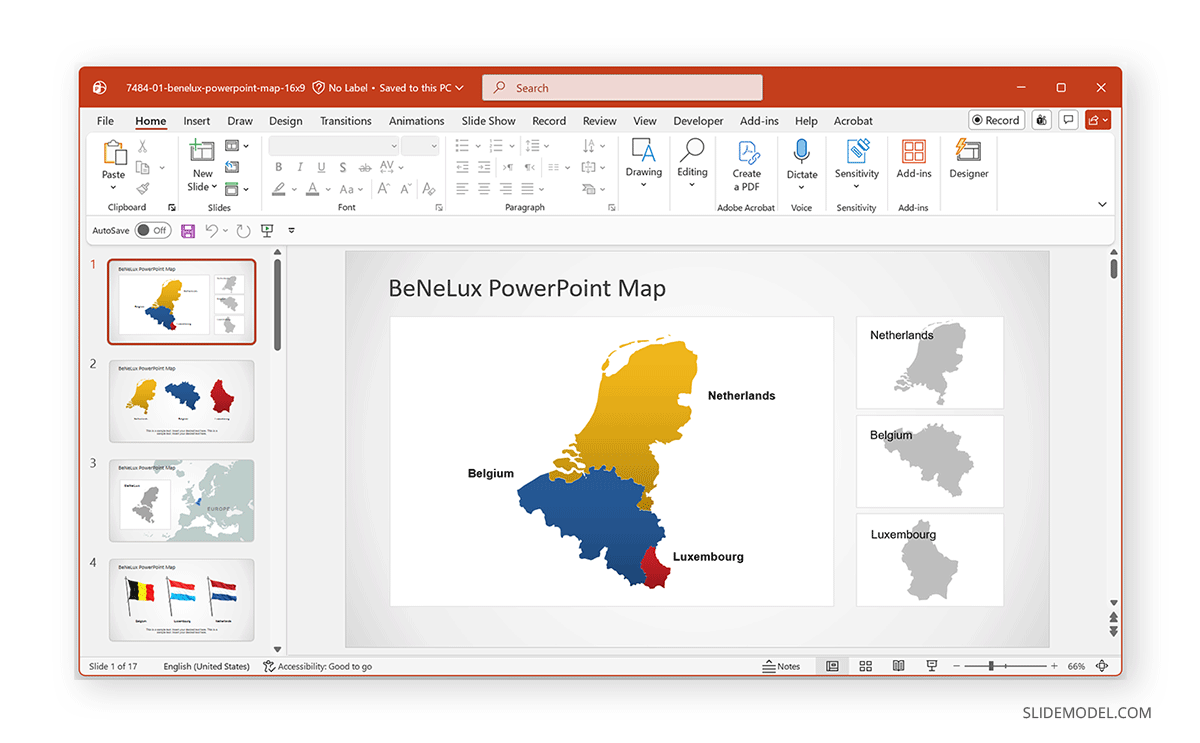
Alternative Option – Use Editable Map Templates: You can also use shape-based map templates for PowerPoint, such as the US Map PowerPoint Template shown below. These templates can be customized to further enhance and showcase key areas on your map. You can see our comprehensive list of Map PowerPoint Templates to discover similar, editable templates for different countries and regions.
Method 2: Use Google Maps for a Location Map in PowerPoint
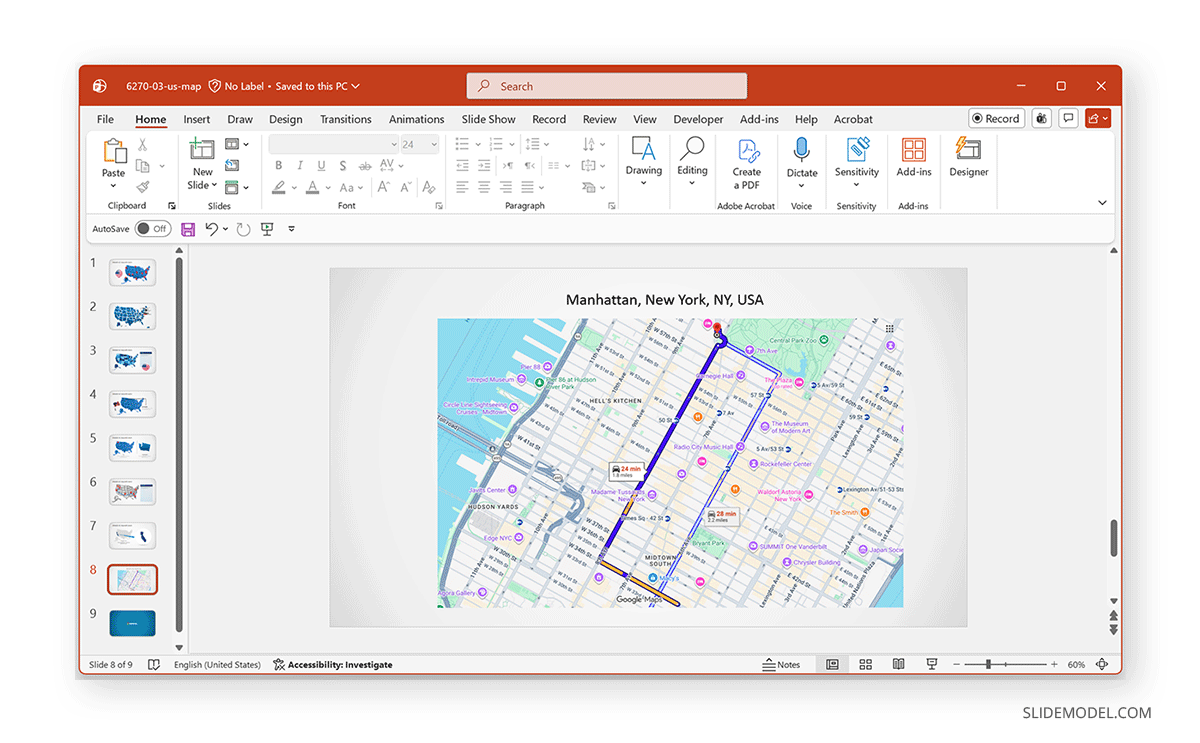
If you need a realistic map, using a map application such as Bing Maps or Google Maps in PowerPoint is one of the easiest options. This method can be useful when you need an accurate geographic representation, want to save time, and want to show real-world directions.
Step 1: Open Google Maps, search for your location, and generate directions.
Step 2: Adjust the View, such as by zooming in to the desired level or switching between map and satellite views, to ensure the route is clearly visible.
Step 3: Take a screenshot of the map showing the route, then save the image.
Step 4: Insert into PowerPoint by going to Insert -> Pictures and selecting the screenshot to add to your slide.
Method 3: Link a Map in PowerPoint
For presentations that want more interactivity, you can link a map in PowerPoint to text, icons, or other objects on the slide.
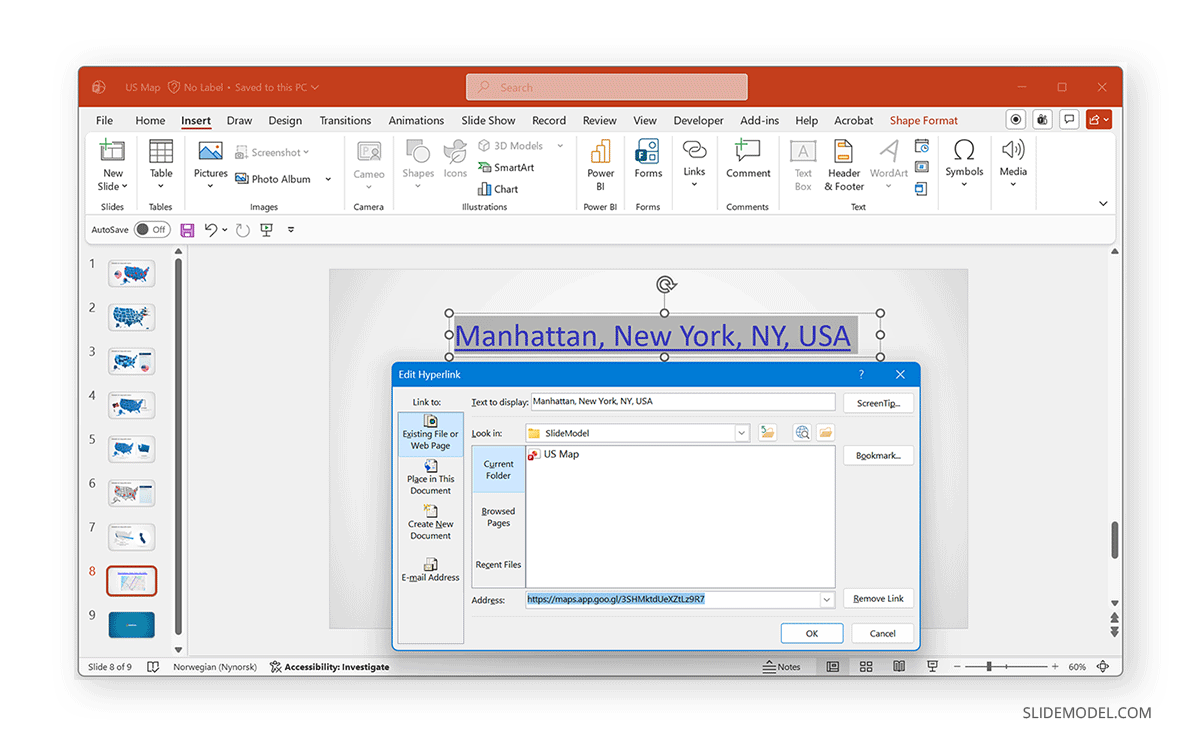
Step 1: Copy the Google Maps URL.
Step 2: Select text or an icon in PowerPoint.
Step 3: Go to Insert -> Link and paste the URL. The link will open the map in the appropriate map application when clicked.
Method 4: Use Screenshot and Link
To make your map look more interactive, insert a screenshot of the map and hyperlink it to Google Maps. This combines visual clarity with interactivity. This method works best when presentations have internet access, showing Live demos and sharing directions with clickable access.
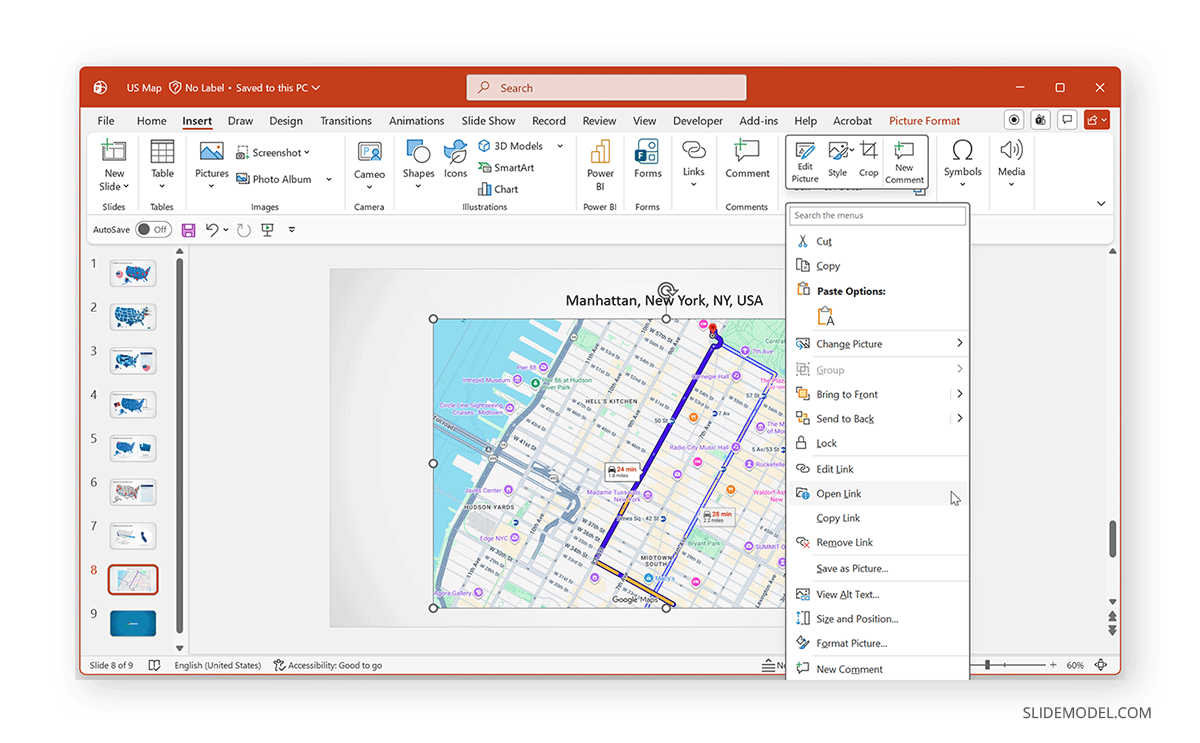
Step 1: Take a screenshot of the map from a map application and insert it via Insert -> Pictures in PowerPoint.
Step 2: Copy the exact location of the map via the sharing link from the map application.
Step 3: Select the image and go to Insert -> Link to hyperlink the screenshot to the original map.
Method 5: Use Icons and Infographics for Route Maps
For a more presentation-friendly design, you can combine icons and shapes. You can use this method when you want your slides to be engaging, easier to understand, and when real-time directions are not specifically needed.
Step 1: Insert icons (cars, pins, buildings, etc).
Step 2: Use curved arrows to indicate routes, or use a drawing tool to draw the route.
Step 3: Add text boxes for directions on the map.
Step 4: Arrange elements cleanly to give it a route map look.
The example below shows a route map template for PowerPoint that uses illustrations. If you are not keen on creating a route map visualization on your own, you can use Location PowerPoint Templates to save time and give your slides a professional look.
Design Tips for Creating a Route Map in PowerPoint
Designing a route map in PowerPoint is about more than just showing directions, as it’s about making those directions easy to understand at a glance. A well-structured map slide helps your audience quickly identify where to go and how to get there without confusion. Here are a few tips to help you design clean-looking route map slides.
Keep the Layout Simple and Focused
Start by simplifying your design. Avoid adding unnecessary roads, labels, or decorative elements that don’t contribute to the main route. A clean layout ensures that your audience can immediately focus on the key directions rather than getting distracted by extra details.
Make the Route Stand Out Clearly
The route itself should be the most prominent element on the slide. Use bold colors, thicker lines, or directional arrows to highlight the path from start to destination. This visual emphasis helps guide the viewer’s eye naturally along the route.
Use Consistent Icons and Visual Elements
Icons such as location pins, buildings, or transportation symbols can improve clarity, but consistency is key. Stick to a single icon style throughout the map to maintain a cohesive and professional appearance.
Add Context with Labels and Landmarks
Including recognizable landmarks, street names, or short notes can make your map easier to follow. These reference points help your audience understand the route in a real-world context, especially when the map is simplified.
Ensure Readability for Map Slides
Text and visual elements should be easy to read from a distance. Use appropriate font sizes and ensure sufficient contrast between the map background and labels. This is especially important when presenting on large screens.
Common Mistakes to Avoid When Designing Route Maps
A route map design can fall short if certain common issues are not addressed. Being aware of these mistakes can help you create more effective and professional route maps.
Overcomplicating the Map
Adding too much detail, such as every road or intersection, can overwhelm your audience. Focus only on the essential parts of the route to keep the map clear and easy to follow.
Using Low-Quality Images
Blurry or pixelated maps can reduce credibility and make it harder to interpret directions. Always use high-resolution images or properly scaled visuals to maintain clarity. Avoid stretching the images too much to avoid loss of quality. Also, consider not compressing the images too much (if at all) to retain original image quality.
Not Labeling Key Locations
A map without labels can be confusing, even if the route is visually clear. Always mark important points such as the starting location, destination, and key stops along the way. By marking key locations, you can also customize the map according to the presentation topic. For example, a route map for an infrastructure project might mark existing landmarks as well as new ones to be built during the project.
Ignoring Scale and Spacing
Even simplified maps should feel balanced. Poor spacing or inconsistent scaling can make the route look distorted or misleading. Align elements properly and maintain proportional spacing to improve visual clarity. To keep the image clear, avoid cluttering the map with too much information or covering too vast an area. If the route is long, you can divide it across different slides for easier explanation. Additionally, you can also use one slide with the complete route, while also breaking down the route across different slides.
Final Words
A route map in PowerPoint doesn’t require advanced design tools. You can make a custom map using shapes, use a screenshot from apps like Google Maps, Bing Maps, or Apple Maps, and add interactive links. You can effectively guide your audience from one location to another. If real-time directions aren’t a concern, using map templates for PowerPoint can also greatly enhance the look of your slides. Such slides can also be a great resource to showcase market share, directions, logistical information, coverage area, and other important details along a route.
To simplify your task, you can also look for shape- or illustration-based PowerPoint templates that include editable maps of different regions or countries. These templates can be customized to suit your slide design needs and to showcase the necessary route and its significance to your presentation topic.