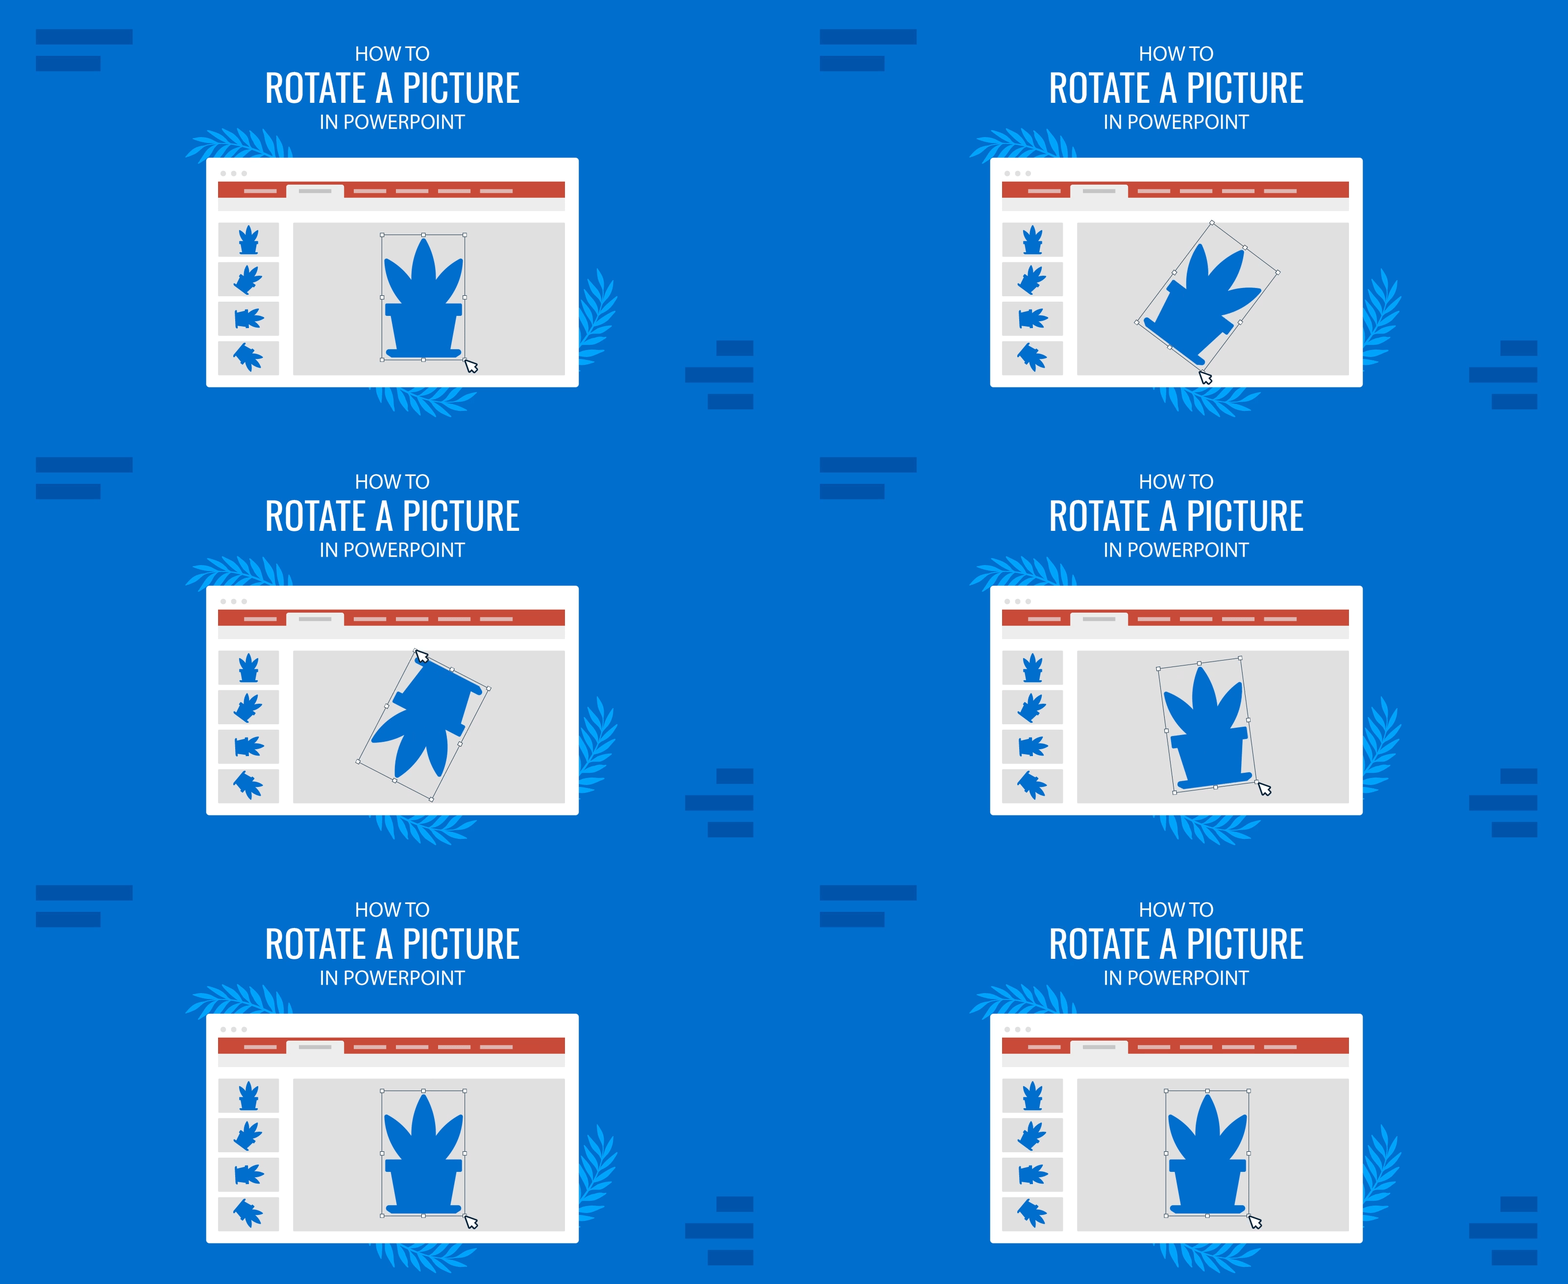
Sometimes, one has the perfect picture for a presentation that seems to be crooked or needs to be rotated to correct its alignment. At other moments, one might want to rotate an image to present a different perspective before an audience. Luckily, it would be best not to waste time using an image editor to rotate an image, as this can be quickly done from within PowerPoint.
How to Rotate a Picture in PowerPoint? The Easy Way
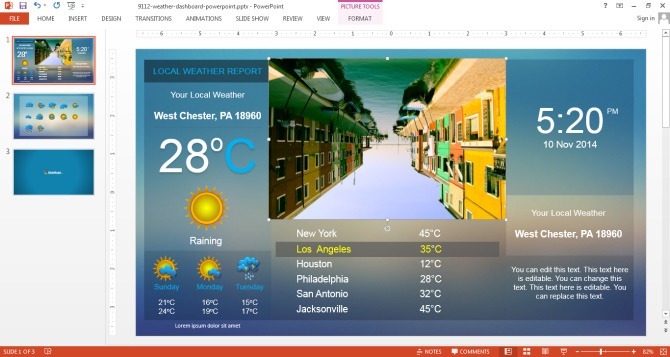
To demonstrate the process we added an image to the Weather Report Dashboard Template for PowerPoint. Let’s say you wish to present the weather outlook for a coming trip to your boss or want to present a presentation about the weather, environment or have a forecast to present which might affect the supply of goods. In such a case adding a relevant image might make your presentation that much more effective.
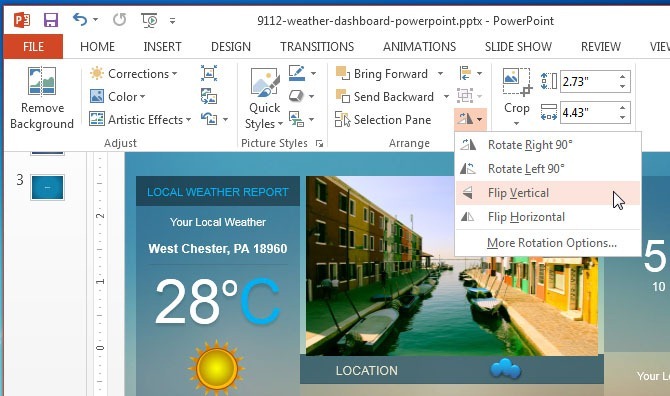
As you can see from the below screenshot, the image needs to be rotated to fix its alignment. To start rotating a picture in PowerPoint, you will have to click the image on your slide, go to the Format tab, and click Rotate.
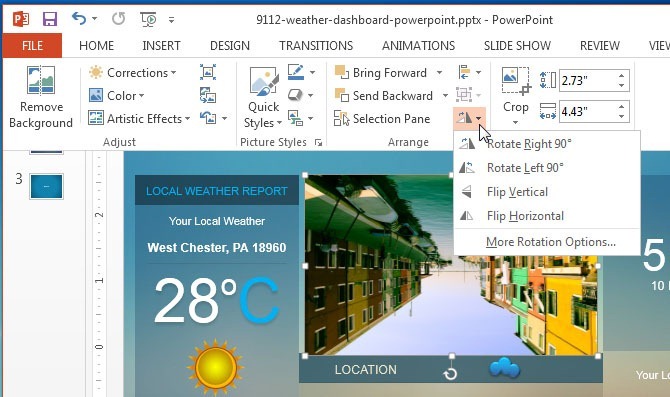
This will present you with a drop-down menu with rotation options allowing you to rotate the image 90 degrees in all four directions, i.e., vertically, horizontally, to the left, and the right.
Pick a direction that fixes the alignment of the image. When you hover your mouse over each option, you will be given a preview.
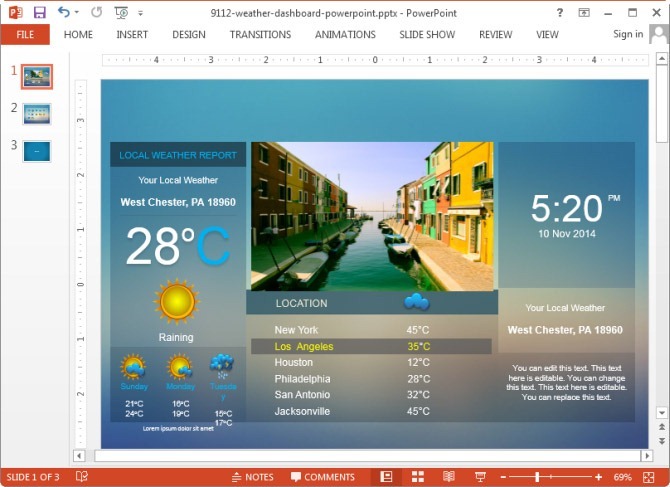
The below image shows the rotated image after we horizontally aligned it in PowerPoint.
Advanced Options for Rotating a Picture
Of course, your alignment requirements might not be merely covered using the four basic options, hence, you can opt for More Rotation Options to rotate your image according to more specific parameters.
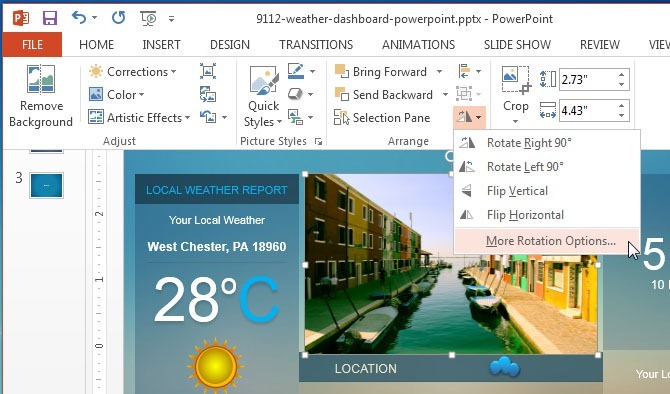
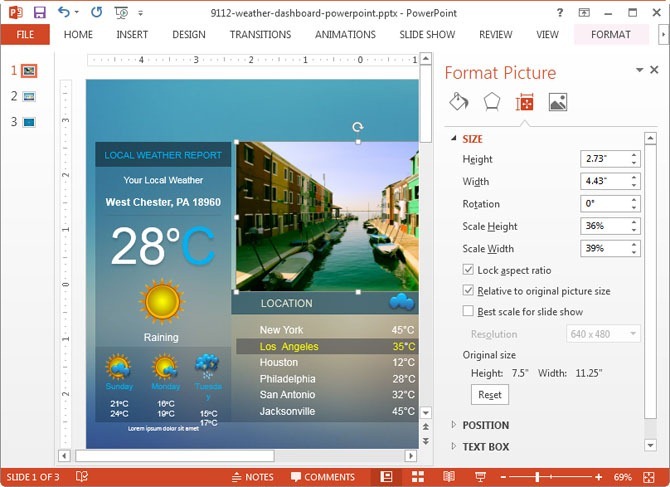
These advanced rotation options will display a menu from where you can configure the height and width of the picture, scale the picture, set a custom rotation angle, as well as set a desired height and width for your image.
This menu also provides options to lock the aspect ratio, set a position for the inserted image and to reset it.
Other options in this menu can also allow you to align your textbox and to set an Alt text title and description.
Pro Tip: You can make use of presentation templates that allow inserting one or more images or sections to better accommodate large chunks of data like charts, tables, diagrams, etc. Using such slide designs can be helpful in reducing the number of slides in a presentation and help you easily focus on important information.
We have seen how to rotate a picture in PowerPoint. In our experience, the process described in this article can help to streamline the presentation design process. Alternatively, you may want to read more on how to flip or mirror a picture in PowerPoint or Google Slides.
If you would like to download professionally-designed presentation templates for PowerPoint & Google Slides which can help you accommodate wide range of content in a single slide, then check out these Dashboard PowerPoint Templates.
FAQ’s
How can I rotate a picture in PowerPoint?
To rotate a picture in PowerPoint:
– Click on the image you want to rotate.
– Go to the Format tab.
– Click on Rotate.
– Choose from the rotation options in the drop-down menu to rotate the image 90 degrees, flip vertically, or flip horizontally.
What are the basic rotation options available in PowerPoint?
PowerPoint provides basic rotation options, including:
– Rotate 90° to the right.
– Rotate 90° to the left.
– Flip vertically.
– Flip horizontally.
How do I access advanced rotation options for an image in PowerPoint?
To access advanced rotation options:
– Select the image you want to rotate.
– Go to the Format tab and click Rotate.
– Choose More Rotation Options from the drop-down menu.
– In the Format Picture pane, you can set a custom rotation angle and adjust other parameters.
Can I set a custom rotation angle for an image in PowerPoint?
Yes, you can set a custom rotation angle:
– Click on the image.
– Go to the Format tab and click Rotate.
– Select More Rotation Options.
– Enter the desired rotation angle in the Rotation box in the Format Picture pane.
How do I maintain the aspect ratio of an image when rotating it?
To maintain the aspect ratio of an image:
– Select the image.
– Go to the Format tab and click Rotate.
– Choose More Rotation Options.
– Check the box next to the Lock aspect ratio in the Format Picture pane.
What other adjustments can I make when rotating an image in PowerPoint?
In addition to rotation, you can:
– Adjust the height and width.
– Scale the image proportionally.
– Set a specific position for the image on the slide.
– Reset the image to its original state.
Can I flip an image horizontally or vertically in PowerPoint?
Yes, you can flip an image:
– Select the image.
– Go to the Format tab and click Rotate.
– Choose either Flip Vertical or Flip Horizontal.
How do I reset an image to its original orientation in PowerPoint?
To reset an image:
– Select the image.
– Go to the Format tab.
– Click on Reset Picture in the Adjust group.
Can I rotate a picture to any angle other than 90 degrees?
Yes, by using the More Rotation Options, you can rotate a picture to any specific angle by entering the desired rotation degree in the Rotation box.
Is it possible to rotate a picture using keyboard shortcuts in PowerPoint?
PowerPoint does not have specific keyboard shortcuts for rotating images. However, you can use the arrow keys to nudge the image after selecting it and use the Rotate handle for finer adjustments with the mouse.
