Columns are used to design layouts and can be effectively managed to help make the most out of content to be added to a slide. A single or two-column slide allows adjusting text and images according to need while addressing key information to account for the best use of slide space. See the instructions below to learn how to add columns in Google Slides templates.
How to Create Columns in Google Slides
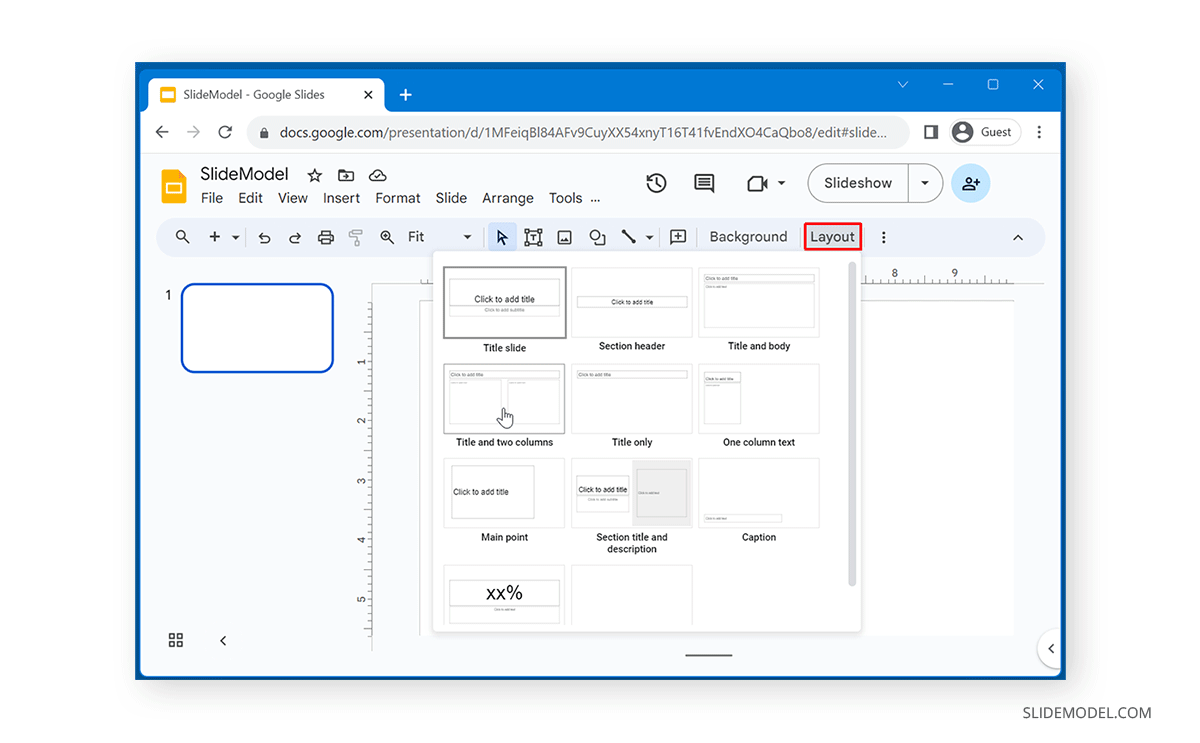
Whether you are wondering how to make two columns in Google Slides or add a single column on a blank slide, you can add columns via the Layout menu to find and add the type of column(s) you need. The column options in this menu include Title and Two Columns, One Column Text, and other options that can enable dividing slides into different sections, such as the Section Title and Description layout.
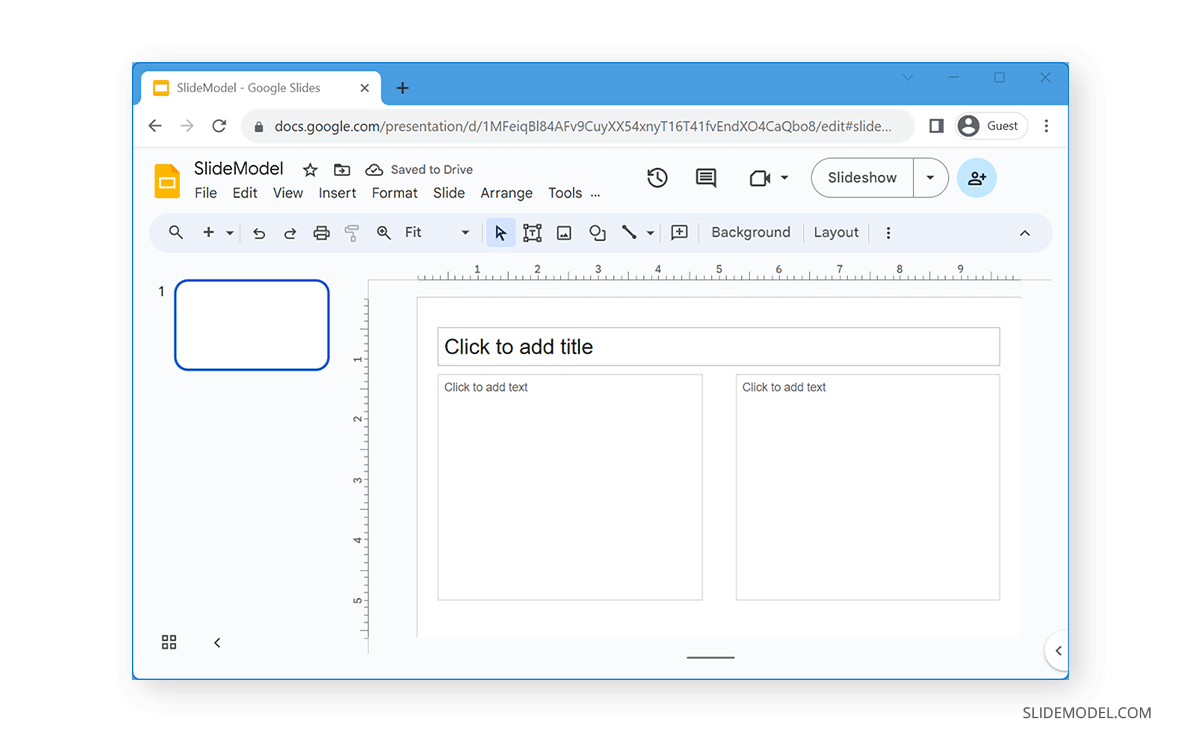
The below image shows a two-column slide example in Google Slides.
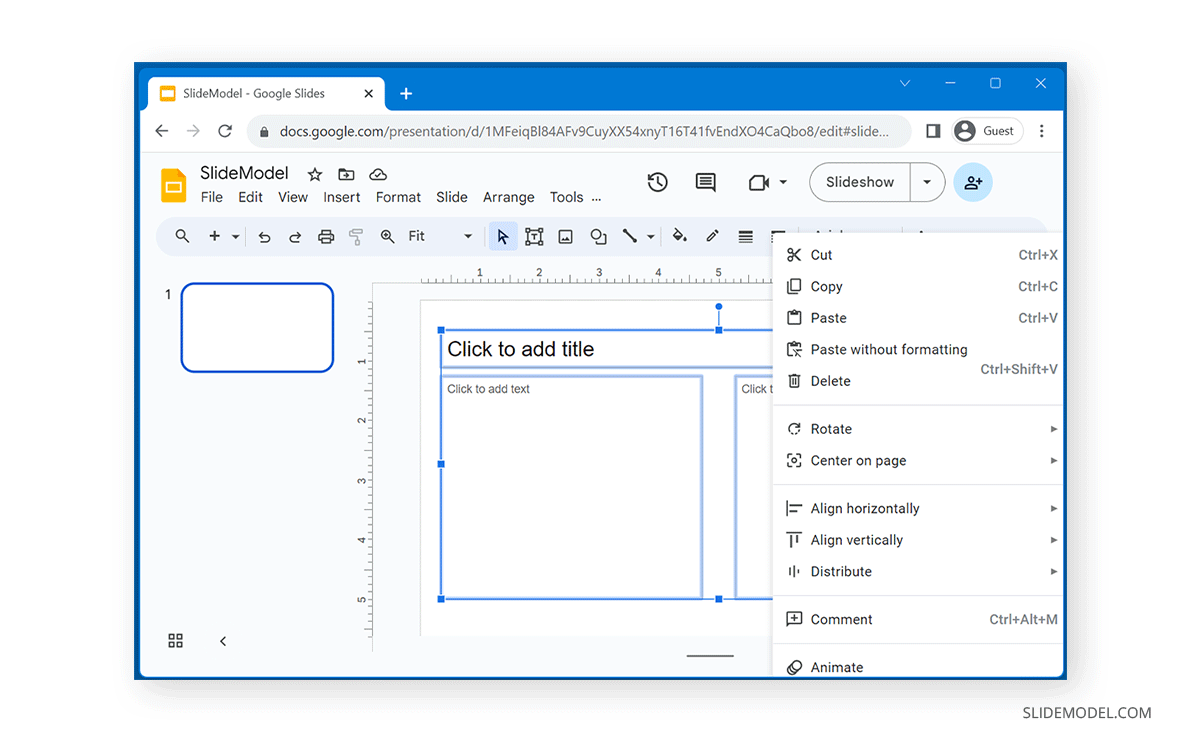
You can right-click to adjust the column orientation to rotate, align, and distribute columns to further edit the columns.
How to Add Insert Table Columns in Google Slides
If you want to add table columns in Google Slides, select the number of columns to add. Using this option, you can add as many as 20 x 20 rows and Insert -> Table columns simultaneously.
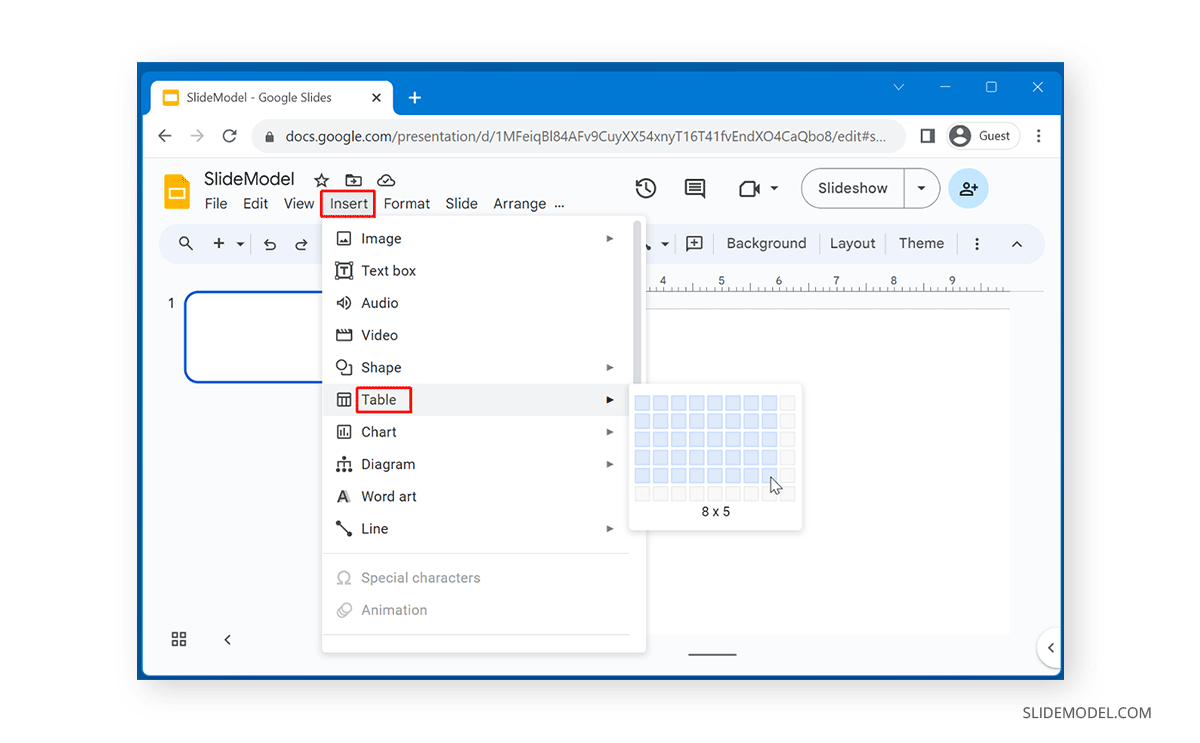
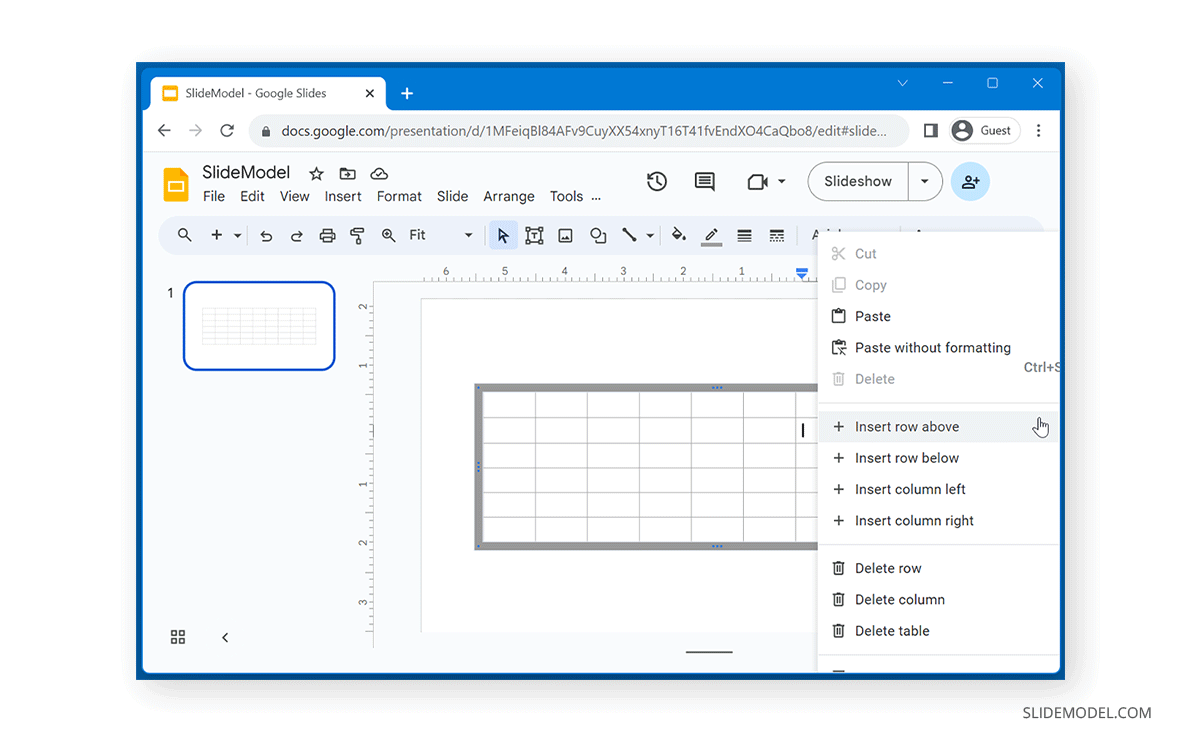
To add extra rows and columns, right-click on the table to customize it further. You can insert columns in Google Slides, as well as adjust rows (left or right), or delete them according to need using the right-click context menu.
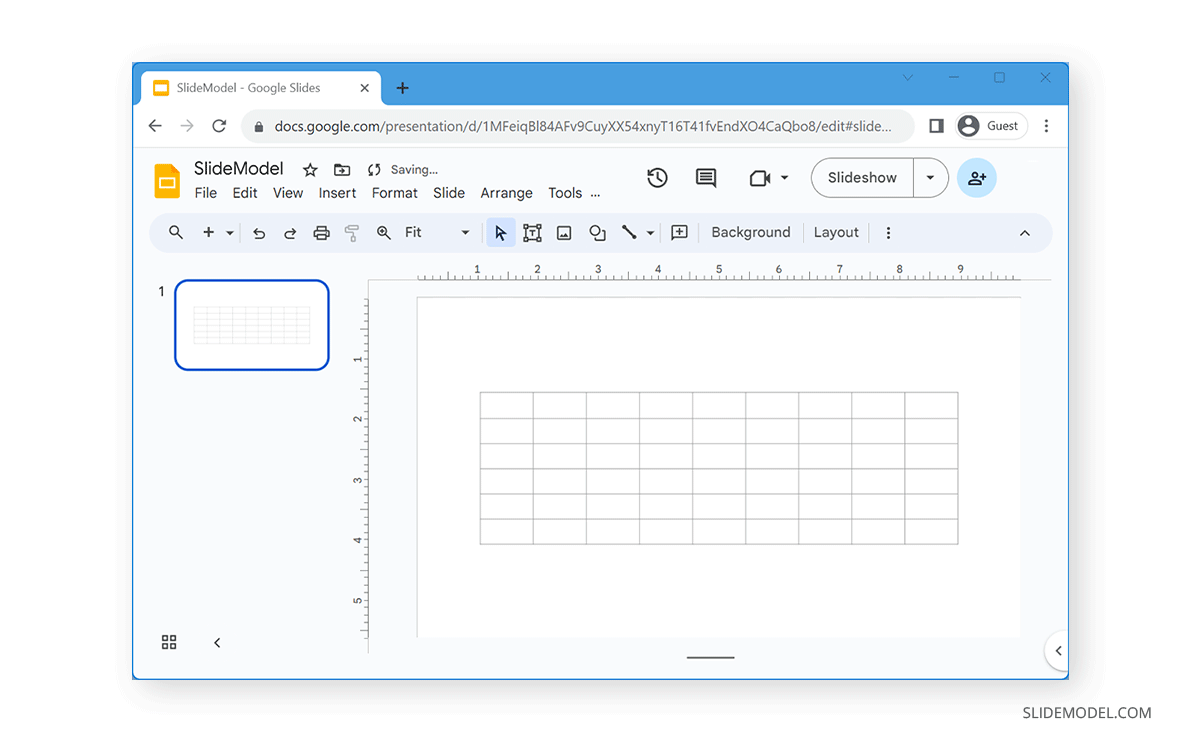
The below example shows a table added to Google Slides with multiple columns.
FAQs
What are the different types of column layouts available in Google Slides?
Google Slides offers several column layouts, including:
– Title and Two Columns
– One Column Text
– Section Title and Description
– These options help divide the slide into sections according to your content needs.
How do I create columns in Google Slides?
To create columns:
– Go to the Layout menu.
– Select the type of column layout you need, such as Title and Two Columns or One Column Text.
Can I adjust the orientation of columns in Google Slides?
Yes, you can adjust the orientation of columns by right-clicking on the column layout and selecting options to rotate, align, or distribute columns.
How do I add table columns in Google Slides?
To add table columns:
– Go to Insert -> Table.
– Select the number of rows and columns you want to add (up to 20 x 20).
How do I customize a table in Google Slides after inserting it?
To customize a table:
– Right-click on the table.
– Use the context menu to insert additional rows or columns, adjust their positions, or delete them as needed.
Can I change the size and alignment of columns in Google Slides?
Yes, you can change the size and alignment of columns. Use the options available in the right-click context menu or the toolbar to adjust the size and alignment to fit your slide design.
How do I insert a row in a Google Slides table?
To insert a row in a table:
– Right-click on the table where you want to add a row.
– Select Insert row above or Insert row below from the context menu.
Can I delete specific columns or rows in a Google Slides table?
Yes, you can delete specific columns or rows by right-clicking on the table and selecting the option to delete the selected column or row from the context menu.
How do I make sure my slide doesn’t look cluttered when using columns?
To avoid clutter:
– Use a clean and simple design.
– Make sure to balance text and images.
– Use spacing and alignment options to ensure content is evenly distributed.
Are there any shortcuts to quickly add columns or tables in Google Slides?
There are no specific shortcuts for directly adding columns or tables. However, using the Insert and right-click context menus can help speed up the process.
Can I apply different styles to columns in Google Slides?
Yes, you can apply different styles to columns by selecting the text or table cells and using the formatting options in the toolbar to change fonts, colors, and other style elements.
Final Words
Be it Google Slides columns in text box form via the Layouts menu or multiple columns added as a table, adding columns can be a great way of showcasing information in a compact form in Google Slides presentations. Like other presentation apps, the Columns can be edited to increase or decrease their size and alignment. Creating slide decks that can show information accurately without creating cluttered slides is possible. If you enjoyed this article, we recommend you to check out some of our other articles about Google Slides, for example how to apply hanging indent on Google Slides or make the slides vertical on Google Slides.

