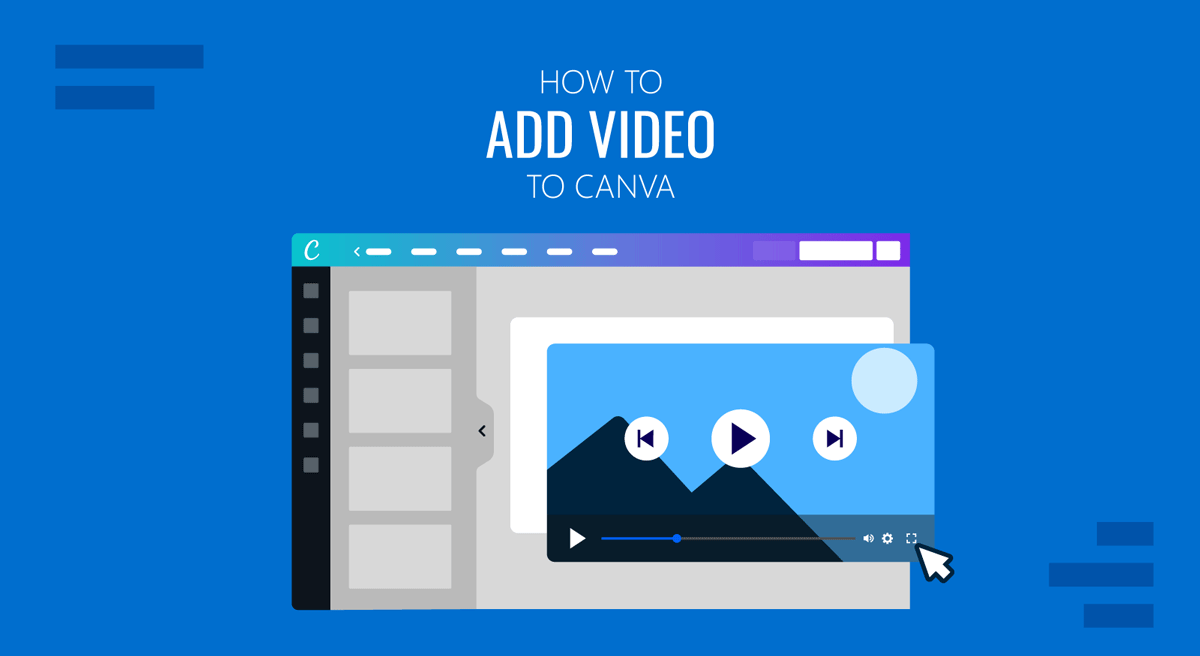
Adding video to a Canva design is an effective way to create more engaging presentations, marketing materials, and social media content. When showcasing a product, explaining a concept, or adding technical information to a presentation, videos can make your message easier for an audience to understand. Canva offers three primary ways to add videos to a design. You can use videos from Canva’s built-in stock library, upload your own video files, or embed videos hosted on platforms such as YouTube, TikTok, or Vimeo. Each method serves a different purpose, depending on how you plan to edit, present, or share your project.
This guide explains how to add video to Canva, how to edit and manage video clips once they’re inserted, and the differences between uploading and embedding videos, so you can choose the most suitable option for your design.
Why Add Videos to Canva
Videos can communicate information more effectively than text or images alone. They allow you to demonstrate products, illustrate processes, and tell stories. For presentations, videos can break up text-heavy slides and help explain complex topics through demonstrations or recorded footage. In marketing materials, they can highlight product features or customer testimonials, while educators can use them to create more interactive learning resources.
Supported Video Formats and Size Limitations in Canva
Before we explain how to add videos to Canva, it’s important to understand the Canva video formats supported and size limitations. Canva supports a wide range of common video formats, including MP4, MOV, GIF, MKV, WEBM, and MPEG, with individual uploads limited to 1 GB. This compatibility makes it easy to work with videos captured on smartphones, digital cameras, screen-recording software, or professional editing applications without converting them beforehand.
How to Insert Video in Canva
Let’s take a look at the different methods to add video clip to Canva design, including using videos from the video library, your device, and third-party streaming services.
Method 1: How to Use Canva Stock Videos
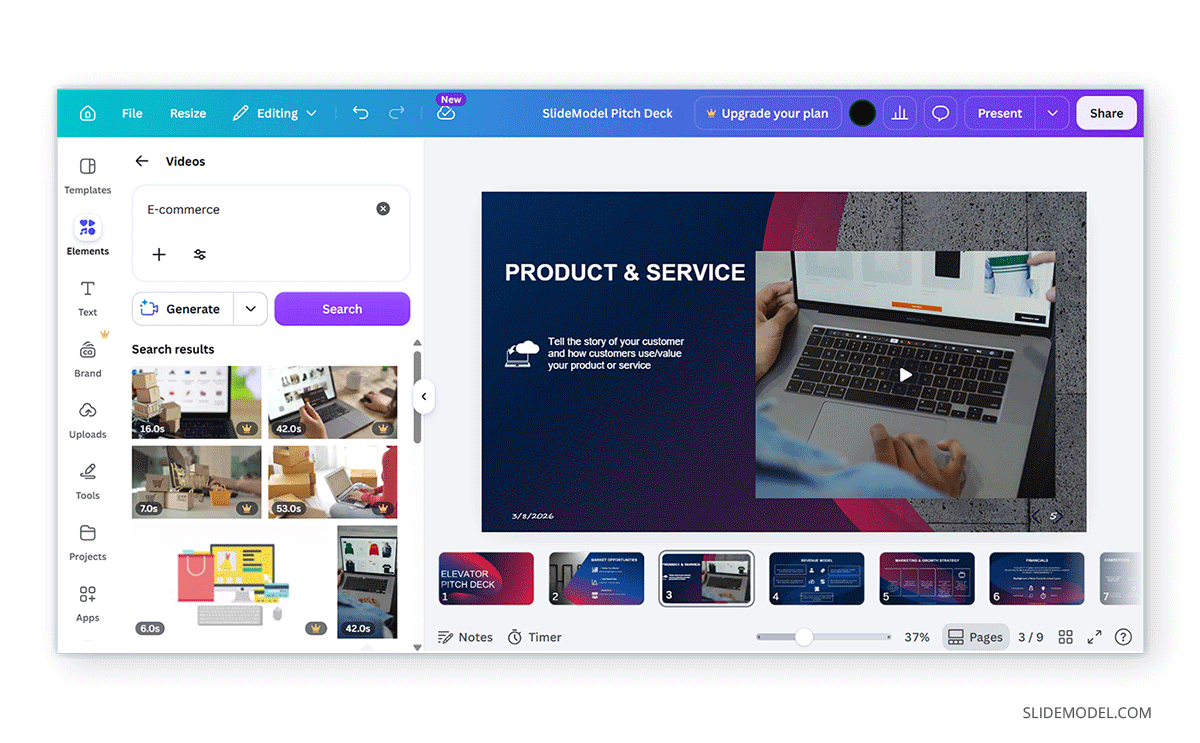
One of the quickest ways to add video to a Canva design is by using Canva’s built-in stock video library. This collection includes thousands of professionally produced clips covering business, education, technology, travel, nature, lifestyle, and many other topics.
Step 1: To insert a stock video, open your design and navigate to Elements -> Videos to open the library in the editor. Browse featured categories or search for videos using keywords related to your topic.
Step 2: Select a video and add it to your Canva design.
Step 3: Resize, reposition, or edit the stock video like other design elements in Canva.
Stock videos are especially useful when you don’t have your own footage or need high-quality visuals without arranging a video shoot. Canva offers both free and premium stock videos. Free users have access to a large collection of clips suitable for many common projects, while Canva Pro subscribers can choose from a significantly larger premium library.
Method 2: How to Upload Video to Canva
If you’ve recorded your own footage or received video content from a colleague or client, Canva also allows you to upload video files directly into your project.
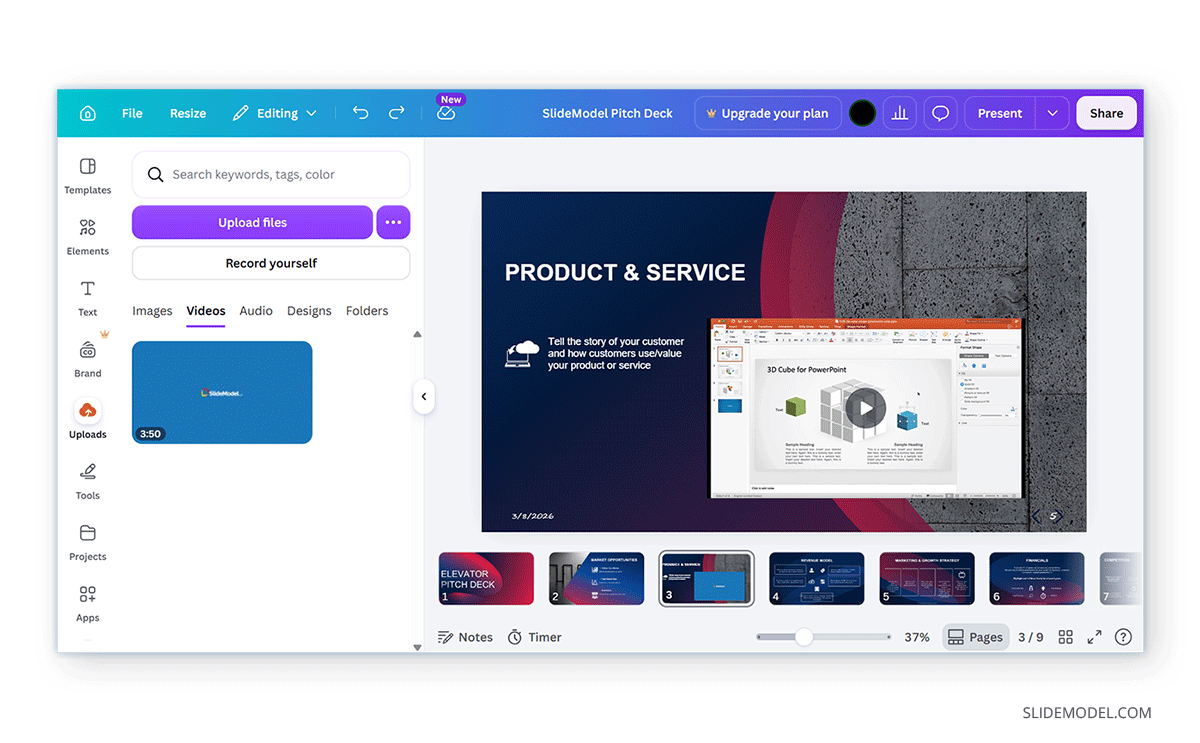
Step 1: To upload a video, open the Uploads section.
Step 2: Select a source, such as your device or a cloud service like Google Drive, to choose a video.
Step 3: After you upload your video, add it to your design and place it wherever you want it to appear. Like other Canva elements, you can resize uploaded videos and move them around the canvas to fit your overall layout.
Once the upload is complete, the video becomes part of your Canva library and can be inserted into any compatible design. Unlike embedded videos, uploaded files are stored with your Canva project, allowing you to edit and reuse them across multiple designs. Uploading your own videos gives you complete control over the content you include in your design. This approach is ideal for presentations featuring company announcements, product demonstrations, training videos, event footage, or personalized messages that aren’t available in Canva’s stock library.
Method 3: How to Embed Video in Canva
If your video is already hosted online, Canva also lets you embed it into your design without uploading the video file. This option is especially useful for presentations that reference existing content on platforms such as YouTube, TikTok, or Vimeo, as it lets you display the original video directly in Canva. This method also answers the common question of how to embed a YouTube video in Canva, the most common platform people use to quickly enhance their designs.
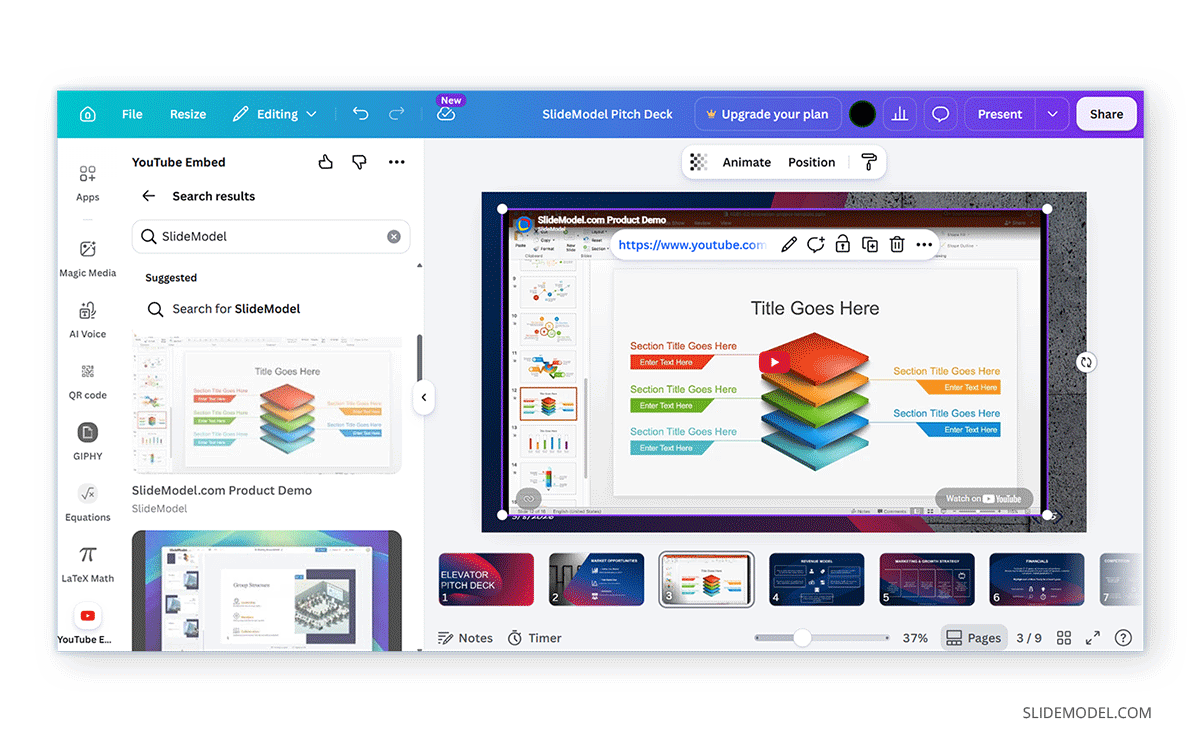
Embed Video via App: To embed a video, open the YouTube Embed or Vimeo app in Canva to search and embed the video.
Embed Video Using URL: Paste the URL of the YouTube, Vimeo, or TikTok video you want to use. Canva will generate an embedded player.
Once embedded, place and resize it within your design like any other element. Embedding is often the preferred option when you want to reference publicly available videos, avoid uploading large files, or ensure viewers always access the latest version of a video hosted online.
Note: Canva supports embedding content from a variety of platforms, although available apps and supported link types may change over time. In addition to YouTube, Vimeo, and TikTok, videos from services such as Facebook may also be supported depending on the integration available in your version of Canva.
Choosing Between Stock, Uploaded, and Embedded Videos
Canva offers three ways to add videos to a design, each suited to different project types. If you’re a presenter, consider the utility of each method before deciding how to add video to a Canva presentation.
Canva Stock Videos
Stock videos are the fastest way to add professional footage to a design. Because they’re available directly within Canva’s built-in library, you can search for and insert clips without leaving the editor. They’re ideal for adding visual interest to presentations, marketing materials, or social media content when you don’t have your own video footage.
Uploading Videos to Canva
Uploaded videos are files that you import from your computer or a cloud service like Google Drive. Once uploaded, they’re stored in your Canva project, allowing you to trim, reposition, replace, and reuse them across multiple designs. This option is best for original content such as product demonstrations, company announcements, recorded presentations, tutorials, or event footage. Since the video becomes part of your project, you can also include it when exporting compatible file formats.
Embedding Videos in Canva
Embedded videos work differently. Instead of storing the video in Canva, they display content hosted on external platforms such as YouTube, TikTok, or Vimeo. This makes embedding a convenient option when you want to reference an existing online video without uploading the original file. However, because the video remains online, playback depends on an internet connection, and embedded videos are meant for viewing in Canva’s online presentation mode rather than in exported video files.
Editing and Managing Videos in Canva
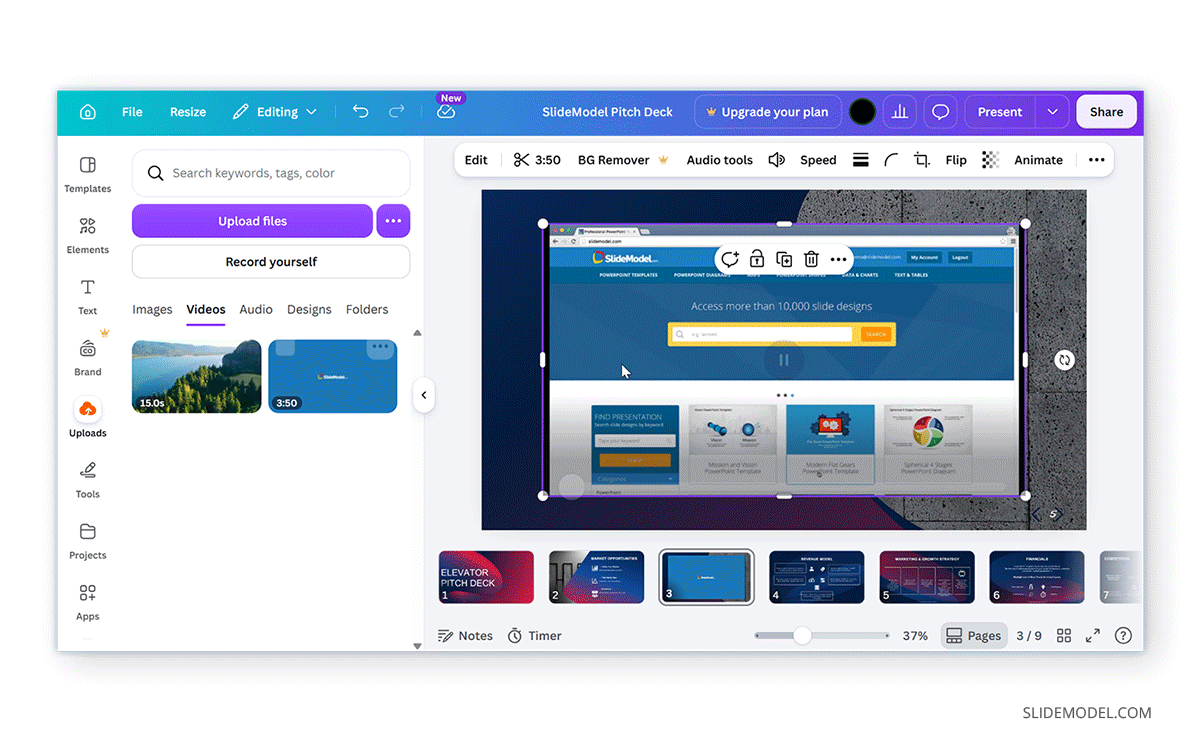
After adding a video to your design, Canva provides several editing tools and apps to help you tailor it to your presentation or project. You can shorten a clip, reposition it within your layout, edit audio, or replace it entirely without redesigning the page.
Trim a Video
Not every project requires an entire video clip. If you need only a specific section, Canva lets you trim the beginning or end of the video. Select the video in your design to display the editing controls, then adjust the clip to keep only the portion you want to use. Trimming removes unnecessary footage while helping your presentation maintain a clear pace and focus. This feature is especially useful for demonstrations, interviews, or recorded presentations where only a short segment is relevant.
Reposition and Resize a Video
Videos behave like other design elements in Canva, allowing you to move and resize them to suit your layout. Simply drag the video to a new position on the page or use the resize handles to adjust its dimensions. Depending on your design, you can use a video as the main focus of a slide, place it alongside text and graphics, or enlarge it to serve as a full-screen background. Taking time to position videos carefully helps create balanced layouts that keep supporting text and visual elements easy to read.
Audio Tools and Video Speed
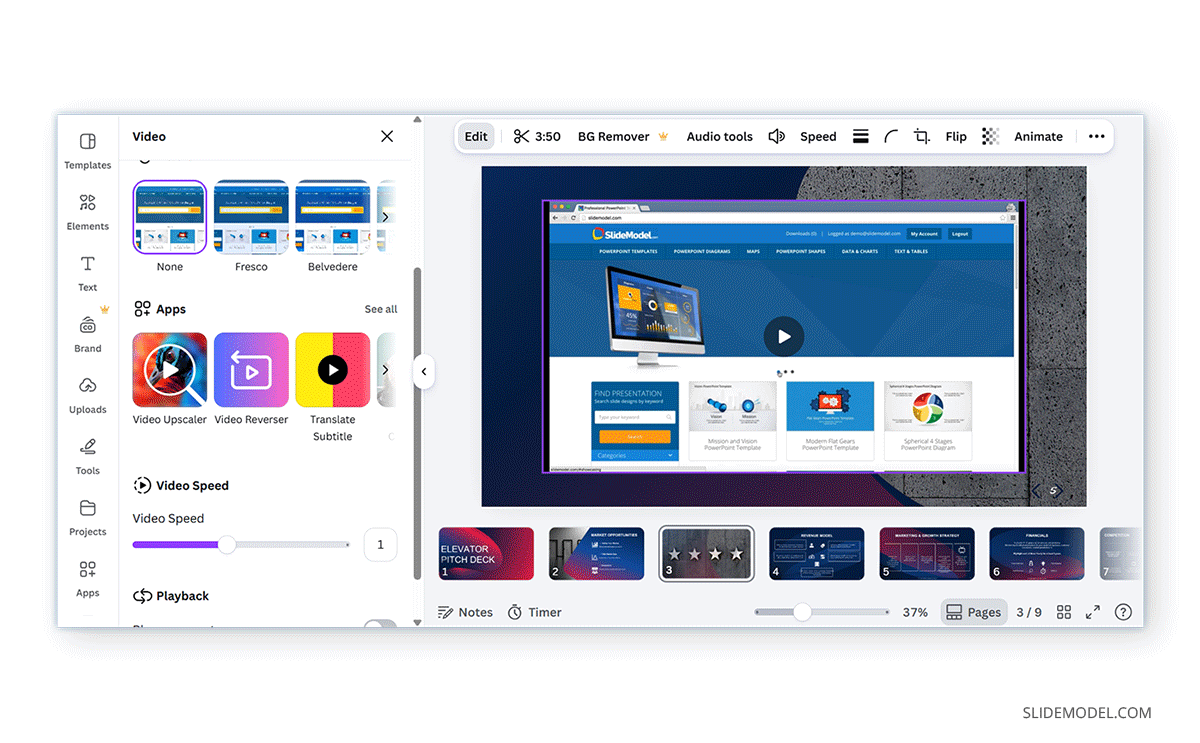
You can enhance audio or extract it from a video using Canva’s Audio Tools. The Speed option also lets you adjust video speed by moving the slider.
Video Background Remover
One of Canva’s premium features is video background removal. You can select and edit the background, or replace it as needed, using Canva’s BG Remover tool.
Canva Video Editing Apps
Canva integrates several video editing apps that offer a range of handy features, including video reversal, progress bar maker, cartoonification, video upscaler, video optimizer, video enhancer, video background changer, AI video loop, etc.
How to Replace a Video in Canva
Sometimes you need to update a presentation without redesigning an entire slide. Instead of deleting a video and rebuilding the layout, Canva lets you replace an existing clip by selecting it and snapping a new one over it. This feature is useful when updating presentations with revised product footage, replacing draft videos with final versions, or adapting the same presentation for different audiences.
Canva vs. PowerPoint for Adding Videos
Both Canva and Microsoft PowerPoint make it easy to include videos in presentations, but they support slightly different workflows.
When Canva is a Better Option
Canva focuses on simplicity and browser-based collaboration. Its built-in stock video library and drag-and-drop interface make it quick to create visually engaging presentations without requiring advanced editing skills. Embedding online videos also lets you reference external content directly within a presentation.
When PowerPoint is a Better Option
PowerPoint offers greater flexibility for professional presentations that rely heavily on multimedia. It provides more advanced playback controls, supports embedded media for offline presentations, and offers additional options for controlling how and when videos play during a slideshow. These capabilities make it a stronger choice for presentations that require precise timing or are delivered without a reliable internet connection.
Final Words
Adding video to Canva is a simple way to create more engaging and informative presentations and designs. Canva’s stock video library is ideal when you need professional footage quickly, while uploading your own videos gives you greater control over editing, reuse, and exporting your project.
Embedding videos from platforms such as YouTube, TikTok, or Vimeo is a convenient option when you want to reference existing online content without storing the original file in Canva.