Making a presentation alone can be pretty laborious, and the last thing you need is to use complicated procedures to edit your images using Photoshop. Thankfully, PowerPoint provides many basic image manipulation options, such as the ability to rotate an image, reshape and crop images and remove background from an image. You can use the below-mentioned method to remove background from images within PowerPoint templates or Google Slides templates, and also learn how to match PowerPoint backgrounds to your selected image background color.

How to Remove Background from Picture in PowerPoint
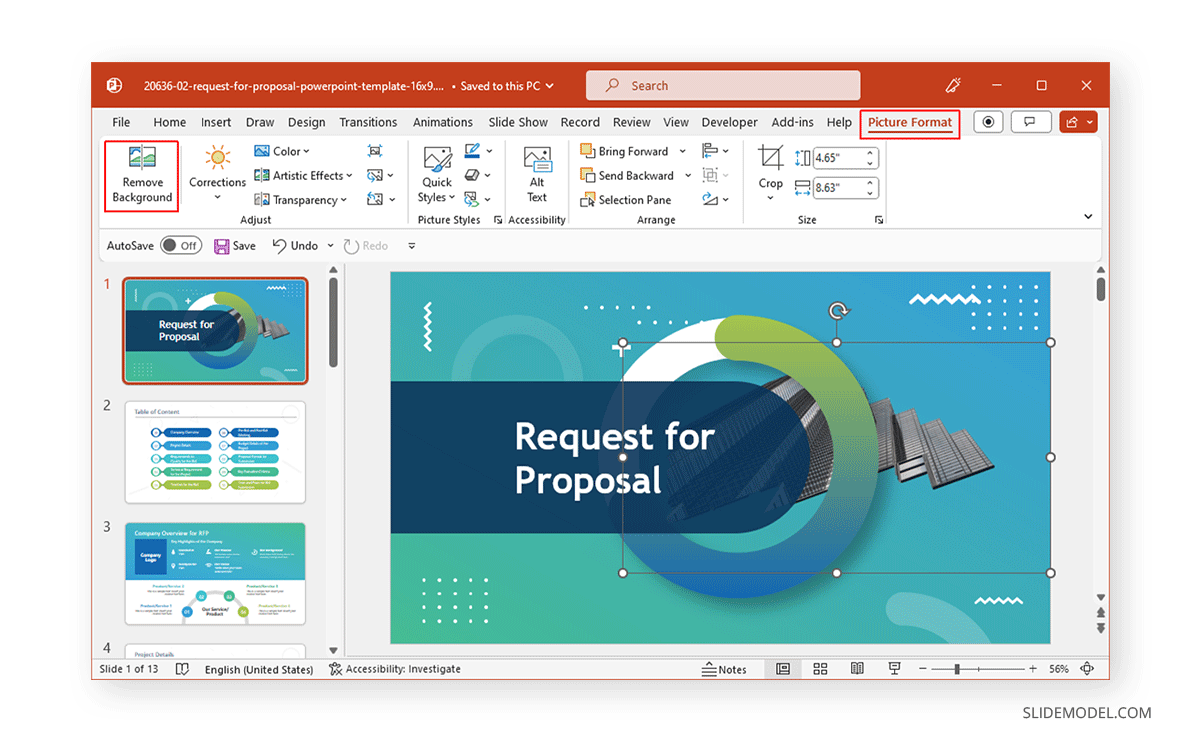
In the first step, click the image from within your PowerPoint slide and go to the PictureFormat tab. From here, select the Remove Background option.
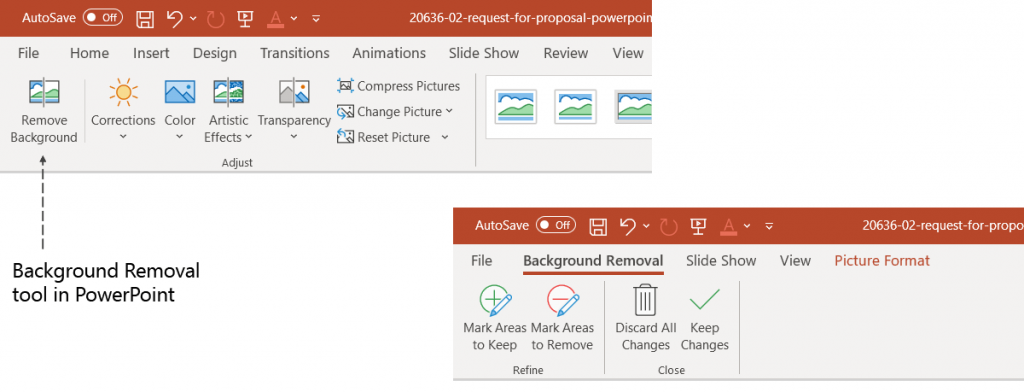
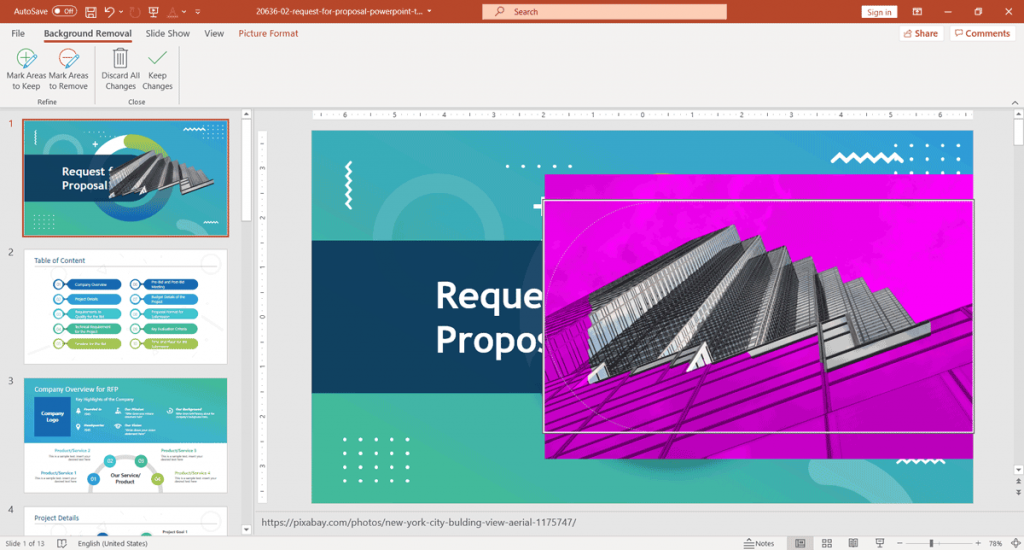
This option will highlight most of the background automatically. However, PowerPoint often gets the area selection wrong, at least to some extent; this is why you will require selecting the area you wish to keep or remove.
For the purpose of this article, we will use the Request for Proposal PowerPoint template, which contains a building image in the cover slide, and remove the background from the image in PowerPoint to retain the building image in the picture.

For the sake of this example, we’ll use an image of a corporate building in New York that you can grab for free from Pixabay here.
Mark Areas to Keep
In the next step, click Mark Areas to Keep and click the portion you wish to keep. The highlighted area is the one that will be removed when you save changes made to the image, whereas the visible area is the one which will be retained. The plus signs show the areas you have picked to retain.
Mark Areas to Remove
There will probably be unwanted areas that will not be auto-detected by PowerPoint. To remove them, click mark areas to Remove and click on the areas to remove them. This will add a minus sign and shade those areas so that you can identify what part of the picture is set to be removed.

Select ‘Keep Changes’ to Retain the Desired Area
Once you are satisfied with the changes, click Keep Changes to remove the background from your image. And if you’re wondering how you to remove the background of an inserted image, the process is the same.

Pick a Style to Change Image Background
You can optionally change the image’s background color and frame style by going to the Picture Styles menu via Picture Format. From here, you can pick a frame to stylize the image.
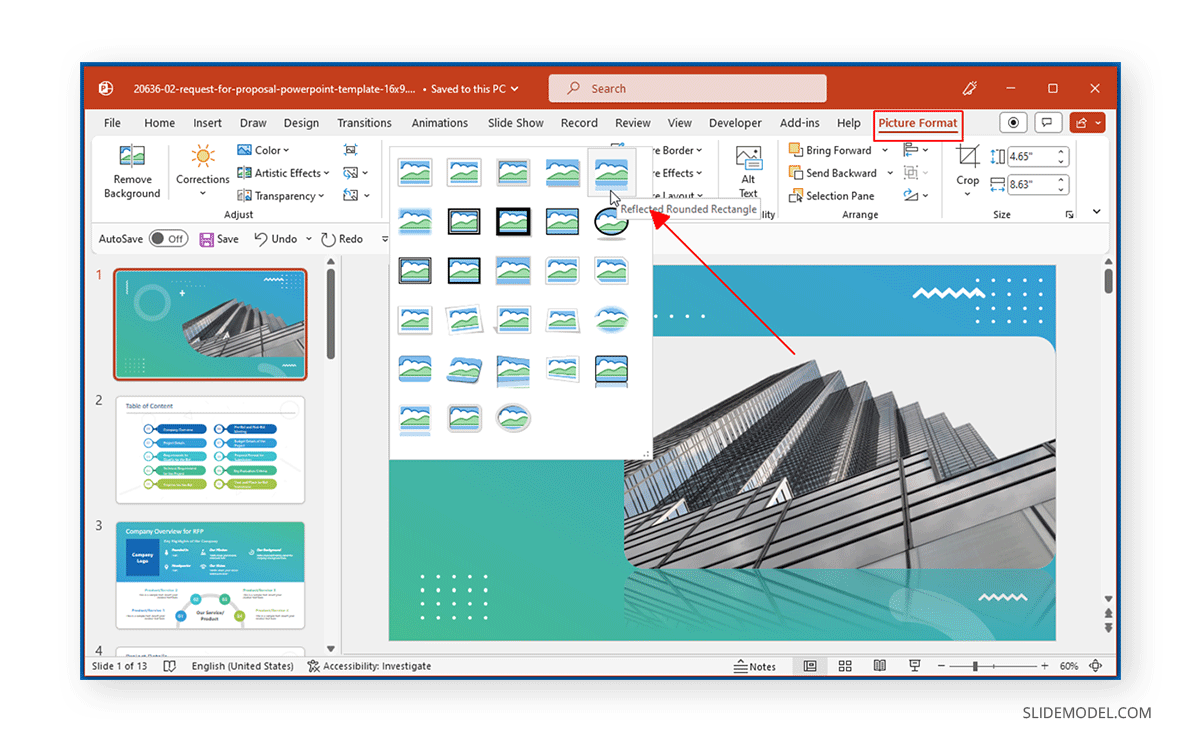
You can use a variety of picture styles to match your needs, including 3D picture frames to make the image pop out.
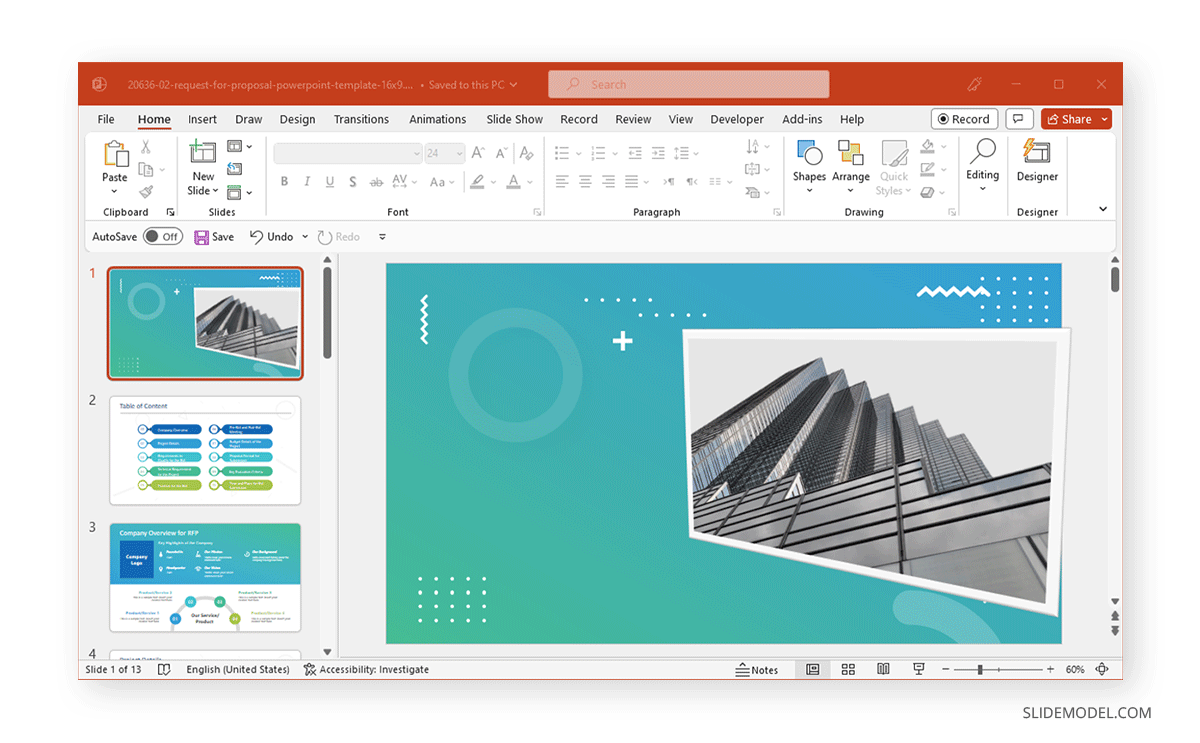
Change Image and Slide Background
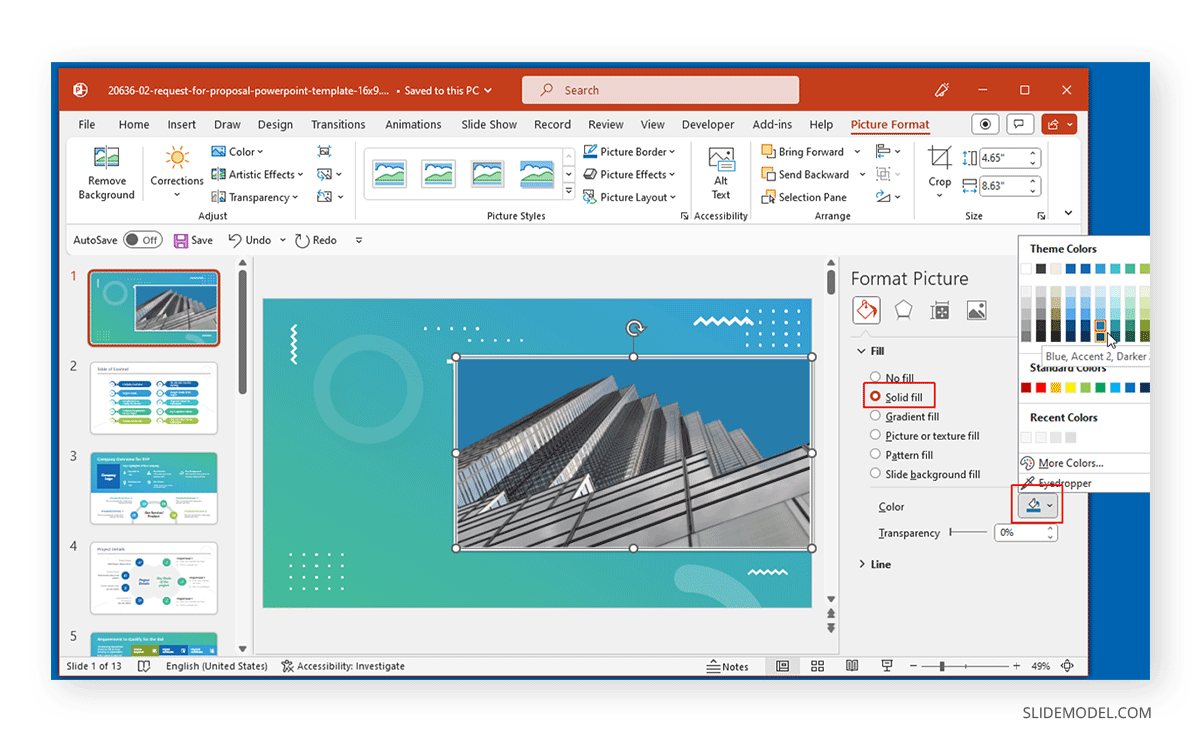
To change and match the image and slide background, you can further edit the image via Format Picture.
To change the background of the image, pick either a color via Solid Fill, or you can also use a gradient, picture, pattern, or slide background fill.
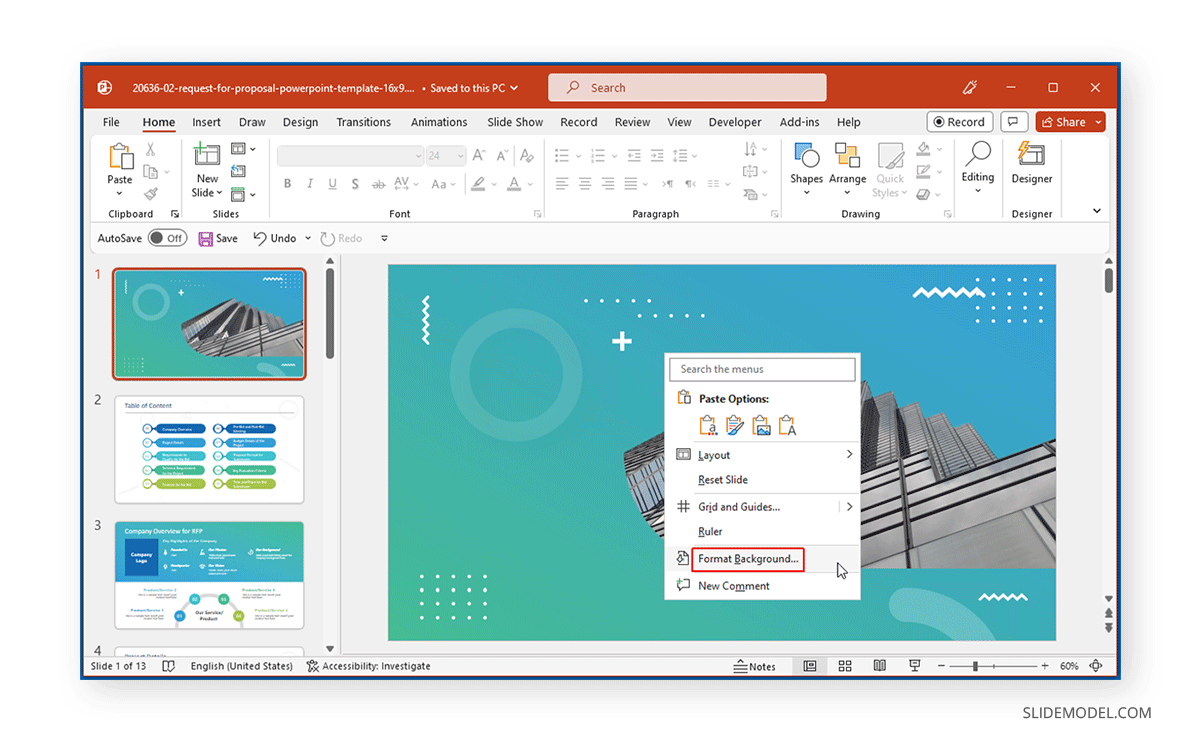
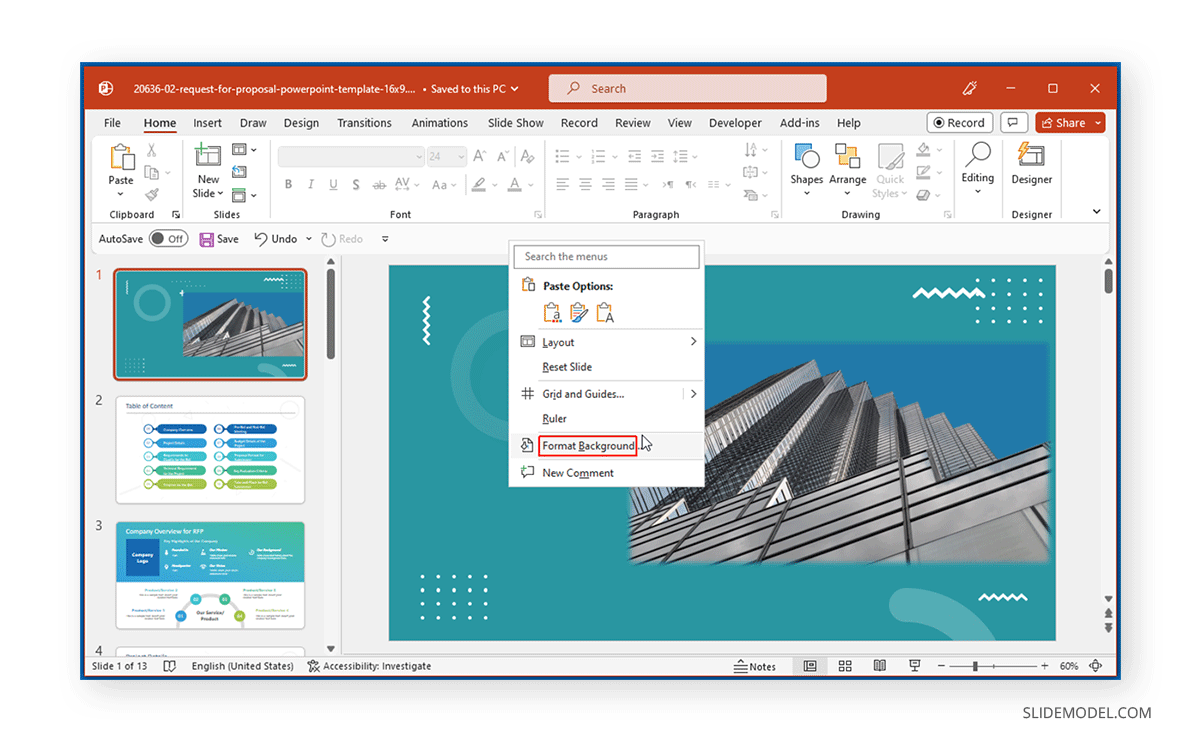
To match the slide background with the image background, right-click the slide and select Format Background.
Similar to how you changed the picture background, you can pick a color to fill the slide background.
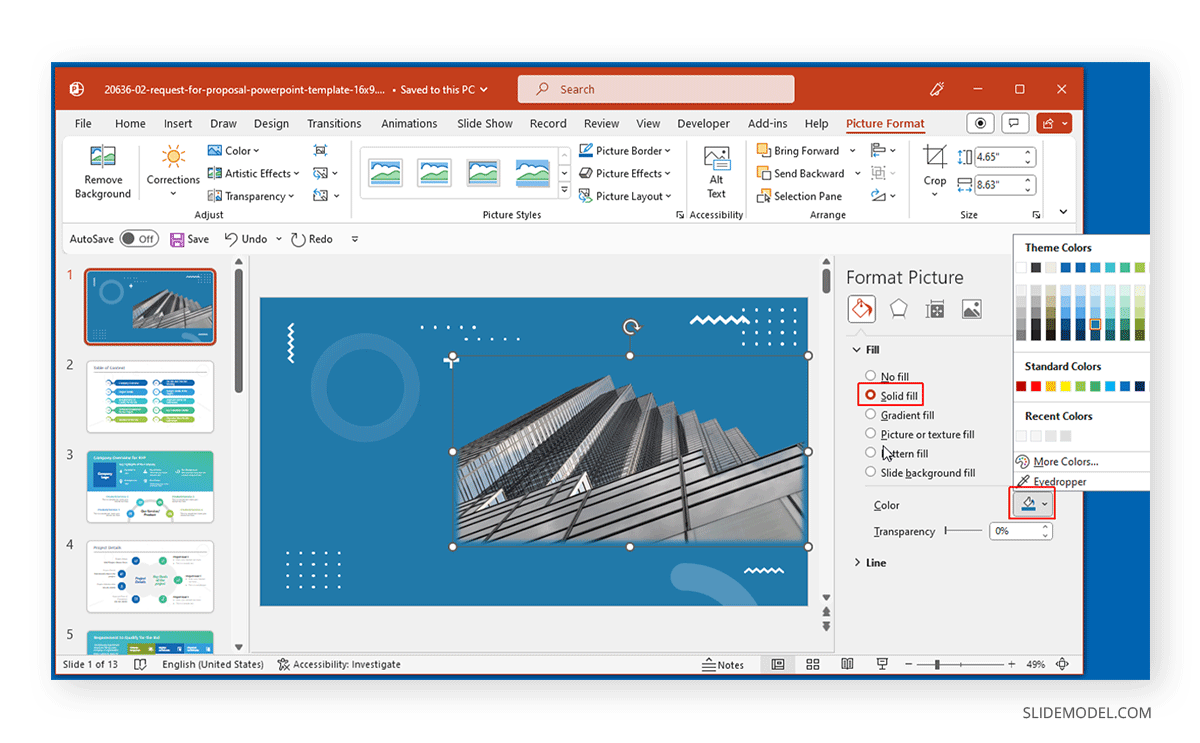
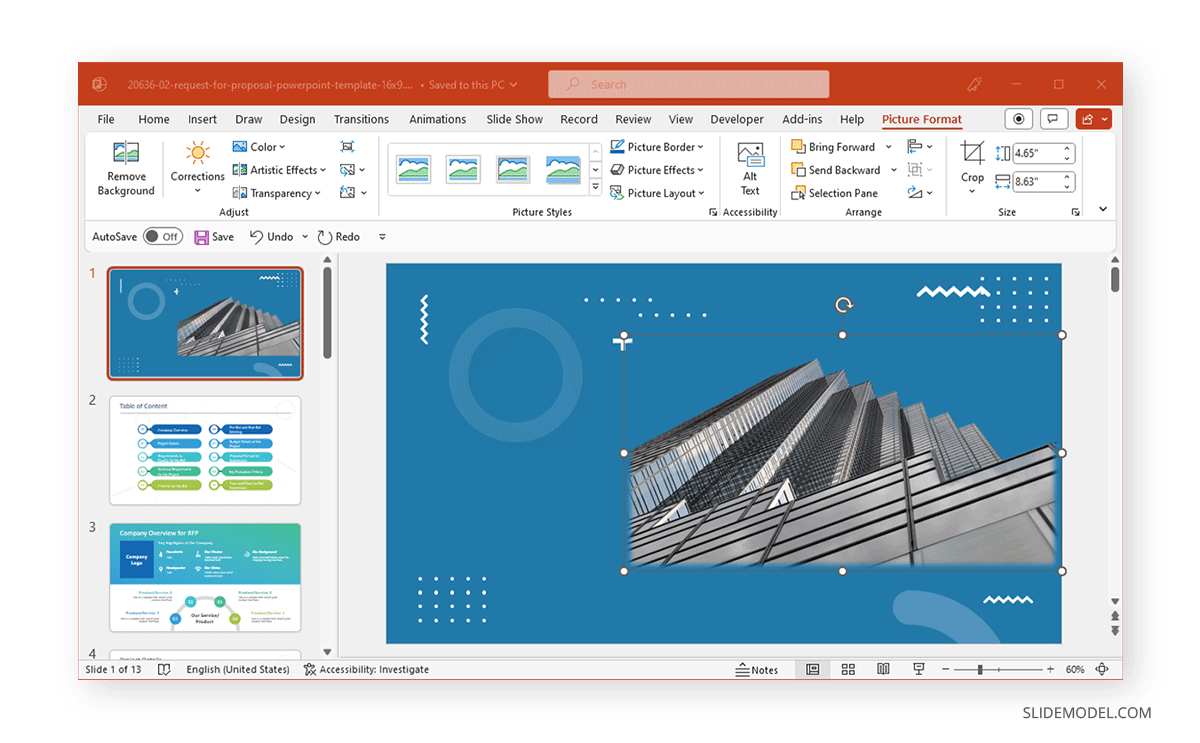
The below image shows a blue background that was used to replace the green PowerPoint transparent background. Of course, you can also use a gradient, picture, pattern, slide background fill, or an image in transparent form. There is also always the option to experiment with dark colors such as a red slideshow background, purple PowerPoint background, or perhaps PowerPoint background black in color.
FAQs
How do I remove the background from a picture in PowerPoint?
To remove the background from a picture in PowerPoint, select the image, go to Picture Format > Remove Background. PowerPoint will auto-detect and highlight the background, which you can adjust further by marking areas to keep or remove.
Can I remove the background from any picture in PowerPoint?
Yes, you can use the Remove Background tool on any image. Keep in mind that the tool works best with images that have distinct foreground and background areas.
What if PowerPoint doesn’t detect the background accurately?
You can refine the selection by using Mark Areas to Keep or Mark Areas to Remove options. Click on parts of the image to add or exclude sections until you achieve the desired result.
How to remove background in PowerPoint and make it transparent?
Follow the steps to remove the background, then choose Keep Changes to apply. You’ll be left with a transparent background, which you can adjust or place on various slide backgrounds.
What is the quickest way to remove backgrounds from multiple images in PowerPoint?
PowerPoint doesn’t allow batch background removal, so you’ll need to repeat the Remove Background steps individually for each image.
How to make the background of a picture in PowerPoint transparent?
Use the Remove Background tool to eliminate the unwanted areas and create a transparent background. Alternatively, set a specific area to be transparent by adjusting image options in Format Picture > Picture Transparency.
Can I apply a specific color to the image background after removing it in PowerPoint?
Yes, go to Format Picture > Fill > Solid Fill or Gradient Fill to choose a color that fits your slide design.
Final Thoughts
Removing backgrounds from PowerPoint can be a tedious and time-consuming process. Following the steps outlined in this article, you can remove background from an image easily and efficiently and even make a transparent background in PowerPoint. Changing the image background color or adding a frame might be useful when the template background color might not go well with the transparent version of the image.
Don’t forget to check out our website for more helpful tips and tricks on graphic design. Also, check our article about how to flip an image in PowerPoint and how to make a picture the background in PowerPoint.
