The Morph Transition in PowerPoint is one of the most coveted effects that presenters want to master. This transition allows seamless movement of objects from one slide to another, creating fluid PPT animations and making your presentations more dynamic. In this article, we’ll walk you through the basics of the Morph transition, how to apply it, and tips for using it effectively to enhance your PowerPoint presentations.
Table of Contents
- What is Morph Transition in PowerPoint?
- Why Use Morph Transition in PowerPoint?
- Use the “!!” Prefix to Control How Morph Works in PowerPoint
- How to Add Morph Transition in PowerPoint
- Creative Ways to Use Morph Transition in PowerPoint
- Morph Transition vs. Other PowerPoint Transitions
- FAQs
- Final Words
What is Morph Transition in PowerPoint?
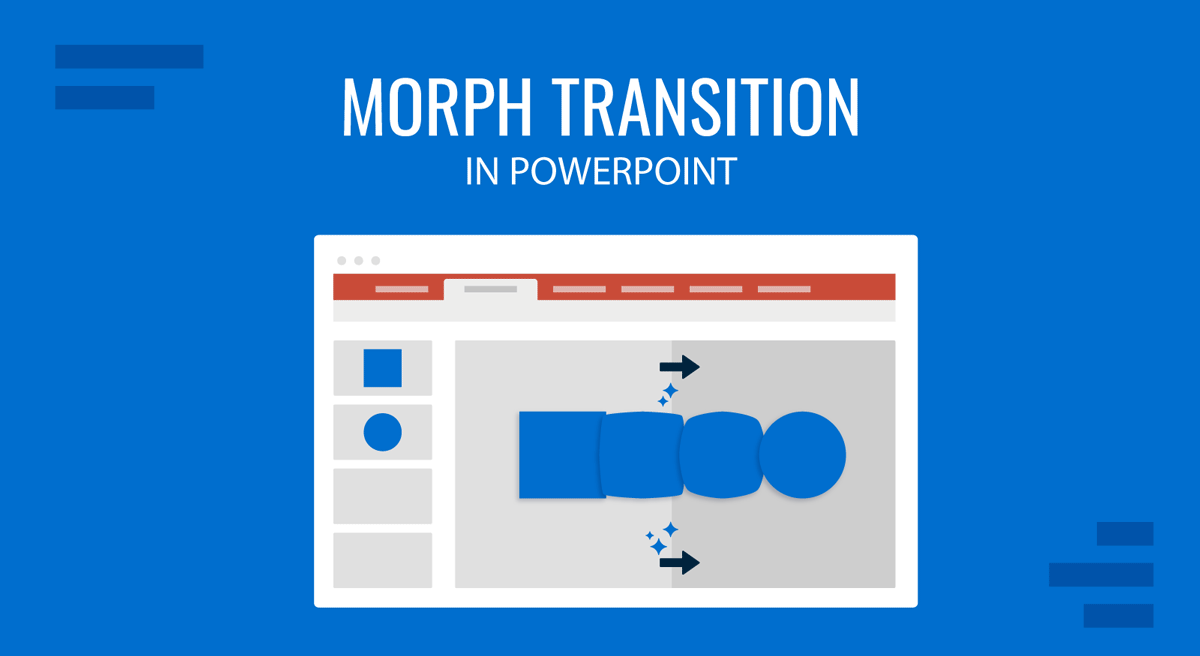
The Morph transition was first introduced in PowerPoint 2016 and is now a standard feature in all modern versions of Microsoft PowerPoint, including Microsoft 365 and PowerPoint for the web. It works by creating smooth transitions between two slides, where objects on the first slide transform and move into new positions, sizes, or shapes on the second slide. This makes your presentations visually compelling and help create engaging presentations.
Unlike standard transitions (like Fade or Wipe), the Morph transition doesn’t just change the background or the entire slide. It animates specific objects, text, shapes, and pictures, resulting in a smoother flow and a more professional feel.
Why Use Morph Transition in PowerPoint?
The Morph transition in PowerPoint isn’t just another PowerPoint transition to switch between slides but a visual tool to morph slide elements to enhance audience engagement, improve message delivery, and streamline storytelling. Morph adds a layer of professionalism and creativity that traditional transitions often lack, as it can provide a transition between two slides and enable you to make slides that seem interconnected.
1. Enhances Visual Storytelling
Morph allows you to animate elements so that multiple slides can appear as a single diagram presented in a set sequence. Rather than showing static before-and-after slides, you can morph objects across the screen to demonstrate transformation, progression, or connection. This is incredibly useful for storytelling. Imagine a product prototype evolving into its final form or a customer journey, visualizing a step-by-step transition, or a diagram of the Milky Way presented before students. The flow captures attention and helps audiences retain complex information more easily.
2. Smooths the Flow of Information
Abrupt transitions can distract viewers, break their concentration, and lead to Death by PowerPoint. The Morph transition offers a seamless experience, guiding your audience from one idea to the next without visual interruptions. This is particularly beneficial in executive briefings or pitch decks where clarity and fluidity are essential.
3. Elevates the Professionalism of Your Slides
In corporate presentations, quality is directly reflected on the presenter. Morph transitions give your slides a polished, modern appearance, instantly setting your work apart from generic presentations. It subtly communicates that you’ve put thought and effort into your visuals, which builds credibility with stakeholders, clients, and colleagues.
4. Drives Focus to Key Messages
By animating only specific elements—such as zooming in on a data point or sliding an icon into position—you can guide your audience to the parts of the slide that matter most. Instead of relying on verbal emphasis alone, Morph adds a visual cue that reinforces your message without overwhelming the audience with motion.
5. Reduces the Need for Complex Animations
Traditional object-by-object animation in PowerPoint can be time-consuming and often results in clunky outcomes. Morph simplifies this process by letting you move, resize, recolor, or rotate objects across slides without individually animating them. It’s a more intuitive way to create cinematic-like effects with less manual work.
6. Boosts Engagement in Remote Presentations
Virtual meetings and webinars often suffer from limited attention spans. Morph transitions can improve flow during static screen shares, helping maintain audience engagement. A subtle animation or object transformation can recapture wandering attention and prevent slide fatigue in longer sessions.
7. Supports Data Narratives
In data-driven presentations, Morph is particularly powerful. You can gradually reveal insights by animating charts, graphs, and numbers across slides, letting trends emerge visually. For example, transitioning a pie chart into a bar graph or changing data labels on the fly can help tell a clearer story and reduce data overload.
8. Ideal for Educational and Training Content
Educators and trainers can use Morph to visually represent abstract or complex concepts, like lifecycle stages, process flows, or cause-and-effect relationships. Because the animation is smooth and intuitive, it helps learners understand how concepts are related and progress over time.
9. Enables Micro-Interactions in Presentations
You can use Morph to simulate interactivity by moving icons, zooming into sections, or “navigating” through a dashboard-style interface. While PowerPoint isn’t a fully interactive design tool, Morph helps you simulate user experience-like transitions that make presentations feel alive and responsive.
10. Perfect for Branding and Consistency
If you’re working with branded templates or storytelling presentation formats, Morph transitions can be integrated to maintain a consistent tone across multiple slides or decks. It allows you to animate logos, brand elements, and taglines to reflect your organization’s visual identity, without relying on repetitive, mechanical animations.
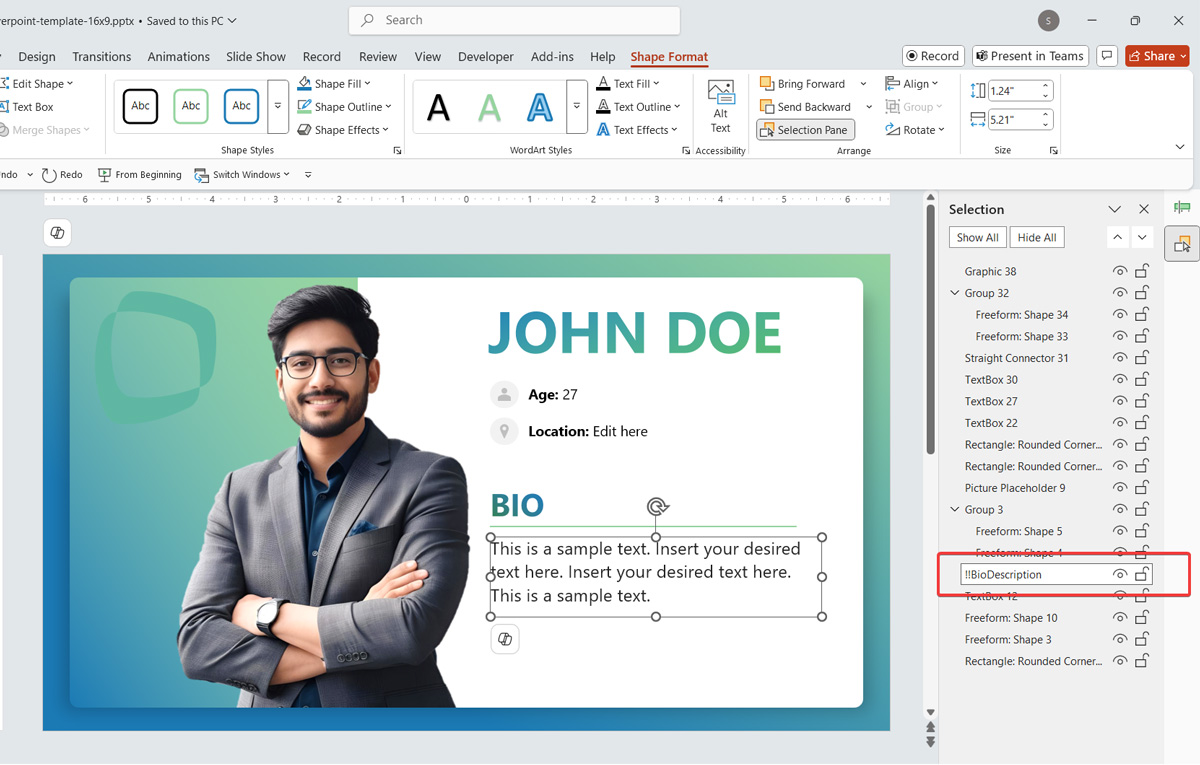
Use the !! Prefix to Control How Morph Works in PowerPoint
By default, PowerPoint uses visual similarity to determine how objects morph between slides. This is handled automatically by PowerPoint, but when multiple elements look alike, or if you want full control, this can lead to unexpected behavior. That’s where the “!!” naming convention comes in.
How it works? When you name an object (shape, text box, image, etc.) with the same name prefixed by “!!” on two slides, PowerPoint forces the Morph transition to match those specific objects, regardless of appearance or position.
For example:
- On Slide 1, you have a shape named !!BioDescription
- On Slide 2, you have a different shape (in a new location, resized or recolored) also named !!BioDescription
PowerPoint will animate a smooth transition between them, treating them as the same object, even if they’re completely different visually. This advanced PowerPoint pro tip can help you to gain full control on how Morph transition works.
Why Use It?
- Ensures predictable transitions between matching elements.
- Prevents Morph from making incorrect assumptions based on visual similarity.
- Essential when dealing with duplicated slides with complex layouts.
- Lets you reuse animations across different sections of your presentation with more control.
When applying the !! prefix in conjunction with Morph transition, remember to use clear and consistent naming (e.g., !!Icon1, !!HeaderText, !!ImagePlaceholder).
Let’s say you’re showing a process diagram that evolves across three slides. Instead of re-creating each shape, just rename them with the !! prefix in the first slide, duplicate the first slide and reposition the objects for each stage. The Morph transition will take care of the animation, no manual animation paths needed.
How to Add Morph Transition in PowerPoint
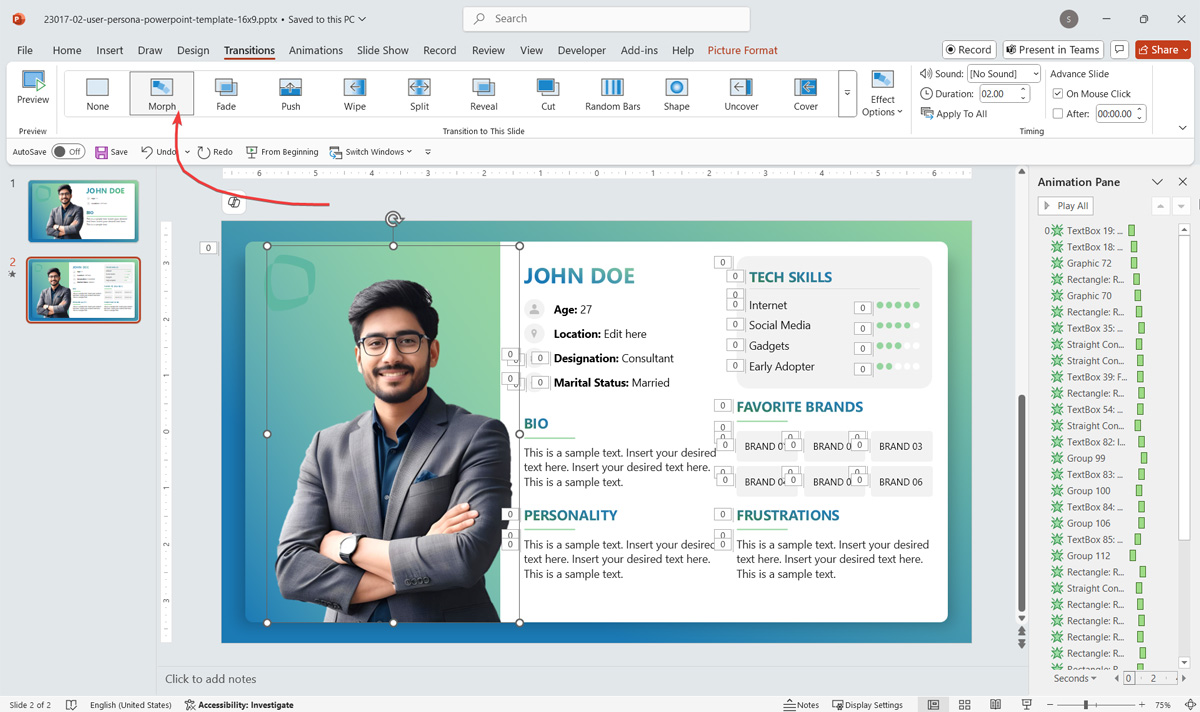
Step 1: Start by creating two slides that contain similar objects. You can add text boxes, images, shapes, or icons to these slides. The Morph transition will work by moving objects between slides, so the more similar the objects are, the smoother the transition.
For the purpose of this post, we will add the Morph transition to the first two slides of the User Persona Analysis Template to demonstrate the process of How to apply Morph effects between two slides in Microsoft PowerPoint.
Step 2: Go to the second slide of your presentation and then Add a new Transition to it by going to the Transitions tab in the PowerPoint Ribbon menu and selecting Morph transition option.
Once selected, PowerPoint automatically applies the Morph transition between the two slides.
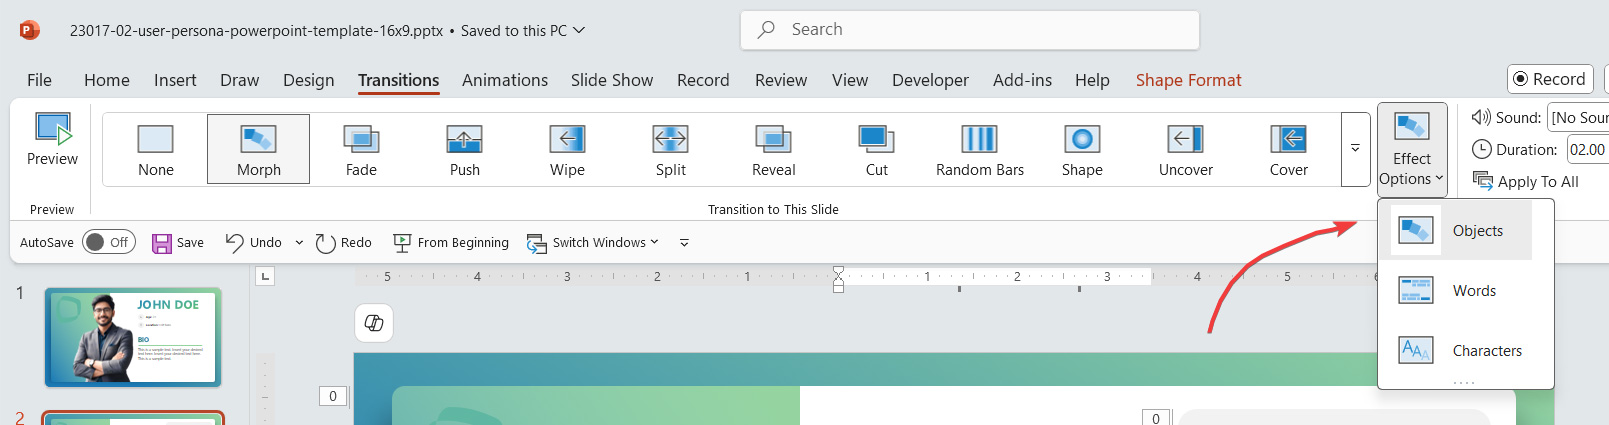
Step 3: Use the Effect Options button to choose whether the Morph transition affects objects, words, or both. Adjust the timing and duration to control the speed of the transition.
Step 4: Use the !! when naming shapes in the Selection Pane to give more control on how shapes are animated with the Morph Transition.
Step 5: Once applied, you can preview the effect in Slide Show mode to preview the transition effect.

Creative Ways to Use Morph Transition in PowerPoint
1. Morphing Shapes and Objects
You can animate shapes, text, and other objects with the Morph transition. For example, if you want to show the evolution of a diagram, you can morph the shapes as they change size or position, creating a smooth visual flow.
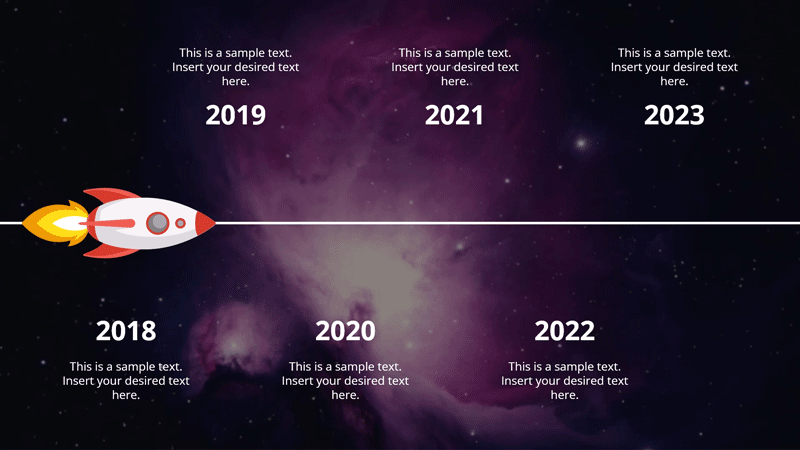
2. Creating Dynamic Timelines
The Morph transition is excellent for visualizing timeline slide templates or progress. By applying Morph to your slides, you can create smooth transitions between dates, steps, or milestones, making your timeline presentation much more engaging.
3. Product or Concept Demonstrations
Morphing in PowerPoint can help showcase product features or conceptual changes. You can animate product lifecycle diagrams to demonstrate different angles, transformations, or features. This is a great option for product presentations or technical demos.
4. Enhancing Data Visualization
Use the Morph transition to make data charts and graphs more dynamic. By morphing different types of charts or adjusting the data dynamically between slides, your audience can better visualize the changes or progress being made.
5. Interactive Presentations
Incorporating Morph transitions into an interactive presentation can improve the user engagement. With morphing effects, you can smoothly guide your audience through different sections or options within your presentation, making it feel like a seamless experience.
6. Zooming into Infographics or Diagrams
Instead of revealing a complex diagram all at once, you can create a sense of focus by morphing into specific sections. Duplicate the slide and zoom in on one part (e.g., a branch of a mind map or a quadrant of a matrix). Morph smoothly animates the zoom to guide the audience’s eye without overwhelming them.
7. Before-and-After Comparisons
Showcasing transformations, like design mockups, renovations, or UX changes, becomes far more engaging with Morph transition in PowerPoint presentations. Place before and after objects in the same position across two slides and use Morph to animate subtle changes like color shifts, shape refinements, or image replacements. Use our comparison slide template or before and after PPT templates to find creative slides to use for comparisons.
8. Simulated Scrolling and Navigation
Create a scrolling effect in PowerPoint to simulate moving through a web page, app interface, or vertical dashboard. PowerPoint Morph transition can animate objects moving up or down, giving the illusion that you’re scrolling through content. This is especially useful in presentation demos or UI walkthroughs.
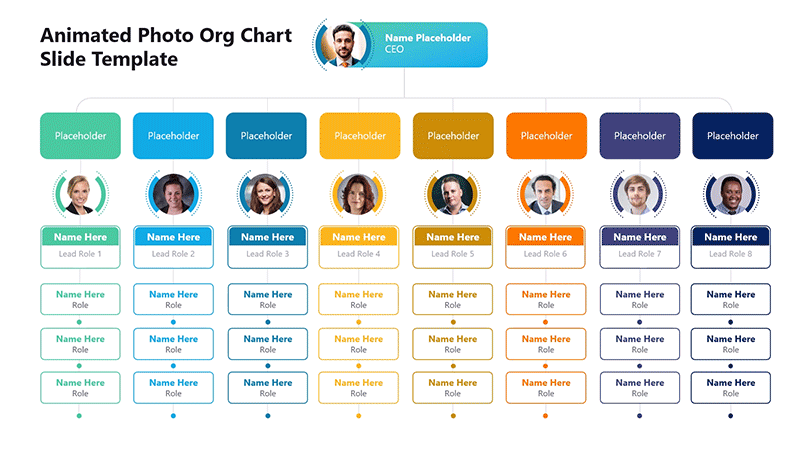
9. Animating Organizational Charts
Rather than dumping an entire org chart onto one static slide, use PowerPoint Morph transition to build it out in layers, like the first image example we presented in this article. Start with leadership on top, then morph to expand into departments and sub-teams. This approach helps retain clarity and prevents cognitive overload.
You can see the entire process of how to create a morph transition effect in PowerPoint in the speed video down below. It provides a walkthrough on how to design a creative PowerPoint template that takes full advantage of the Morph transition in PowerPoint.
Morph Transition vs. Other PowerPoint Transitions
Morph Transition vs. Google Slides
Google Slides also offers transitions, but they are not as advanced as PowerPoint’s Morph transition. While Google Slides provides a range of basic transitions, it cannot animate individual objects between slides. PowerPoint remains the preferred tool for users who require more dynamic and advanced animations, and this is why advanced animation effects from PowerPoint won’t be compatible with Google Slides.
Standard Transitions
Standard PowerPoint transitions like Fade, Wipe, or Push change the entire slide’s appearance, but the Morph transition only animates specific elements. The Morph transition is designed for a more fluid and sophisticated animation, making it more suitable for presentations where you need to highlight specific points or objects. You can learn more from our tutorial about how to add a transition in PowerPoint.

PowerPoint Morph Templates
If you want to save time and effort, several PowerPoint Morph Templates are available online. These templates come pre-designed with the Morph transition applied, making it easier for you to create professional-looking presentations without needing to manually apply the transition effect. For example, the 6-Step Head Diagram Morph Template for PowerPoint shown below uses the Morph transition to showcase each part of the illustration as a separate slide, giving the illusion of the main diagram zooming into each part of the diagram in a rotating sequence.
You can find various other templates with the Morph transition with readymade Animated PowerPoint Templates at SlideModel to create professional looking presentations. Here are some example of PowerPoint presentations with Morph transitions that you can use as PPT templates.
1. Visual Roadmap with Morph Transition PowerPoint Template
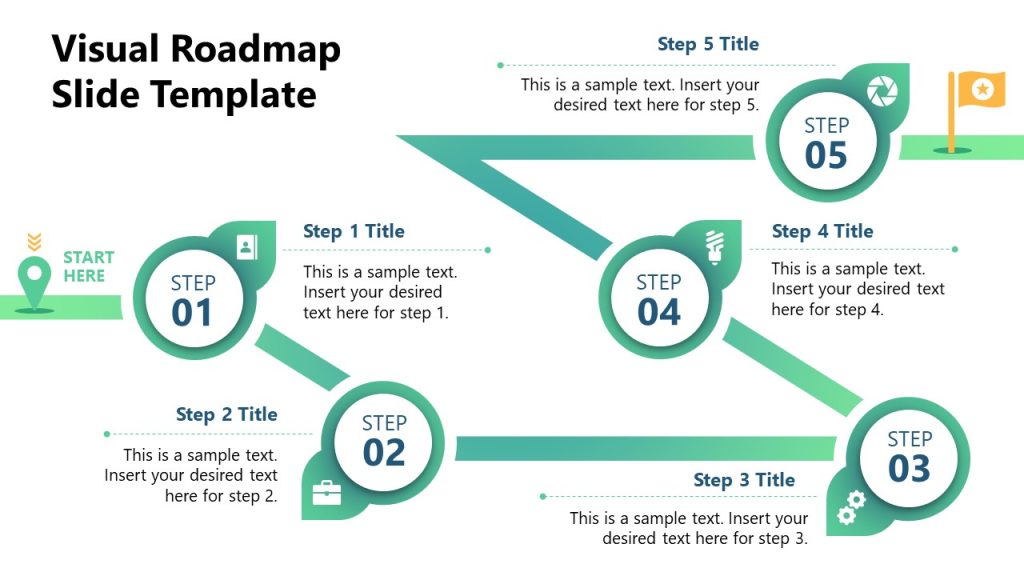
The Visual Roadmap PowerPoint Template is a customizable, fully editable tool designed to visually present business growth, project progress, personal development, or career roadmaps with engaging animations. It features a unique diagram with five circular steps, each marked with bold numbers and relevant graphics, starting with a location pin and ending with a racing flag to symbolize goal achievement.
Ideal for project managers, marketers, students, and professionals, the template helps communicate strategies, milestones, and timelines to stakeholders in executive sessions.
With Morph transitions and editable text boxes, it ensures interactive and clear presentations. Compatible with PowerPoint, Google Slides, and Keynote, it’s perfect for creating compelling roadmap presentations.
2. 5-Step Progressive Infographic Slide Template with Morph Transition
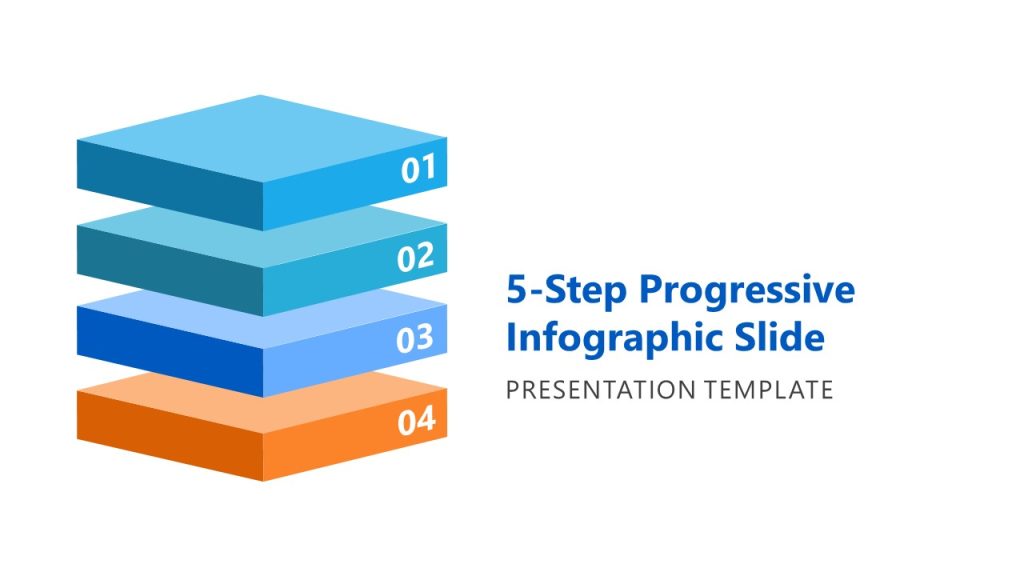
The 5-Step Progressive Infographic Slide Template is a customizable, animated tool for professionals to visually present project processes or business operations in executive sessions. Compatible with PowerPoint, Google Slides, and Keynote, it features three colorful 3D rectangular boxes—blue for the first three, orange for the last—arranged variably across slides (vertical, central with pointers, or stairlike). A subsequent slide displays four 3D square boxes in a 2×2 layout.
The morph transition enhances engagement by seamlessly transforming box layouts between slides. Editable text areas with colored fonts allow clear information presentation. Users can modify colors, fonts, and layouts to suit their needs, making it ideal for impactful, interactive presentations.
3. Morph Transition Effect Customer Segmentation PowerPoint Template
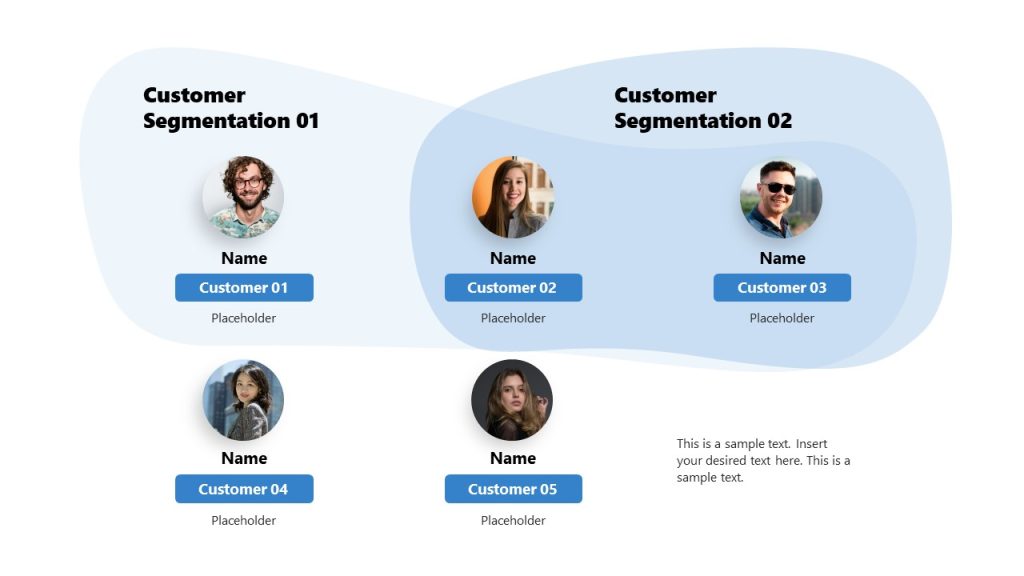
The Customer Segmentation PowerPoint Template is a modern, interactive tool for professionals, marketers, and sales associates to present customer analysis in business meetings. It enables dividing customers into groups based on demographics, behaviors, preferences, or location to create personalized ads and strategies. This best PPT template features three colorful slides with circular customer images, text placeholders, and rounded rectangular shapes to highlight segments.
The first slide shows two segments, with some customers overlapping. The morph transition enhances visual appeal by smoothly transitioning slide layouts. Fully editable, it allows customization of text, colors, and labels. Compatible with PowerPoint, Google Slides, and Keynote, it’s ideal for engaging stakeholders in market research presentations.
4. 6-Step Head Diagram Morph Template for PowerPoint
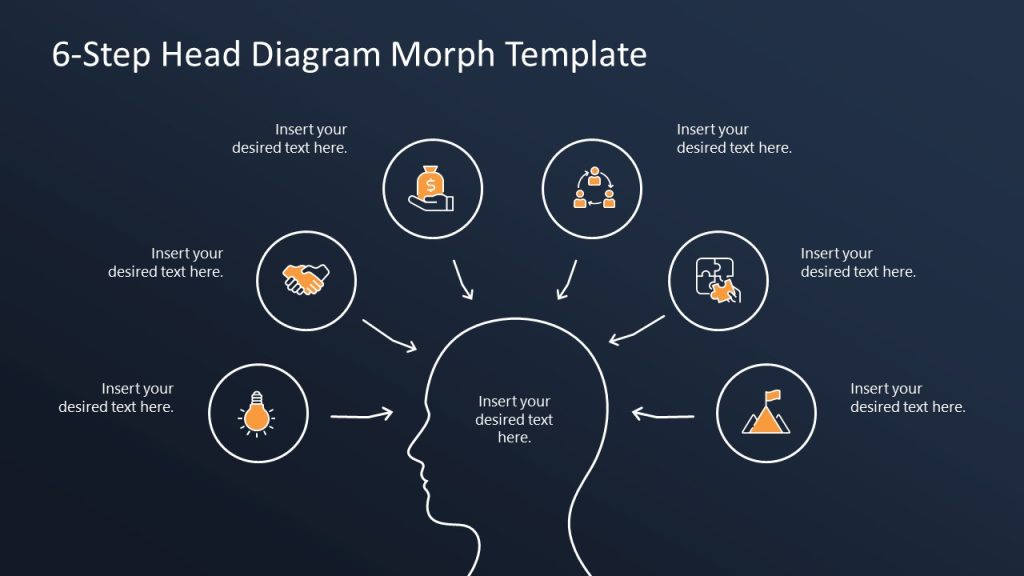
The 6-Step Head Diagram Morph Template for PowerPoint is a dynamic tool for presenters and professionals to showcase brainstorming outcomes or project plans. Featuring a central human head diagram symbolizing creative thinking, it uses a dark color scheme with a black background, yellow infographic icons, and white lines for visual impact. Six circular shapes with relevant icons surround the head, each paired with editable text boxes for key points.
The morph transition animates element movements, enhancing engagement during slideshows. Fully customizable, it’s compatible with PowerPoint, Google Slides, and Keynote, allowing presenters to tailor it for business leaders or stakeholders to convey innovative ideas effectively.
5. 9-Item Perspective Platform Morph PowerPoint Template
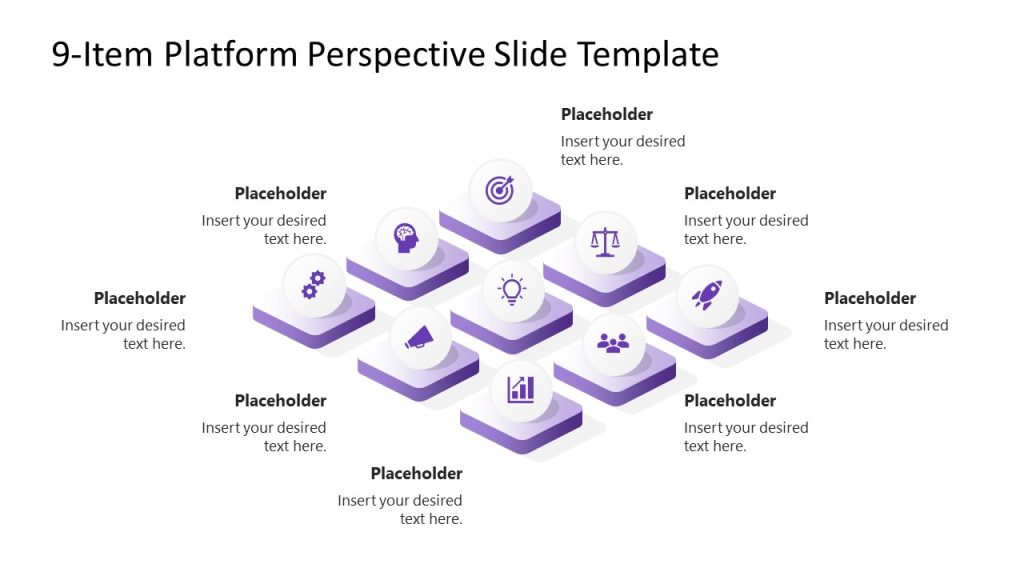
The 9-Item Perspective Platform PowerPoint Template is an interactive tool for professionals to present brainstorming ideas, KPIs, or project stages, utilizing morph transition to highlight the central item on the second slide for enhanced audience focus. Featuring a 3×3 matrix with nine 3D square shapes, each with placeholder text and a white sphere enclosing a relevant icon, it allows project managers to visualize project life cycles or product developers to outline development stages. The second slide emphasizes the central icon.
Fully editable, it’s compatible with PowerPoint, Google Slides, and Keynote, enabling customization of icons, colors, and fonts to suit business growth strategies or other topics for executive meetings.
6. Morph PowerPoint Template

The Morph PowerPoint Template is a corporate profile presentation with 10 unique slides designed to introduce a company’s environment, services, and goals, featuring morph transition for dynamic, engaging slide shifts. Ideal for sales meetings or employee reviews, it includes an Agenda slide for objectives, About Us slide for business goals, Our Services slide with six infographic segments, Who We Are slide with graphics and text, Our Mission slide with a GPS-style timeline, Meet Our Team slide with cutout frames, Company Timeline slide with circular segments, and an Infographics slide with twisted arrowheads.
Fully customizable with high-quality graphics and a sunrise color theme, it’s compatible with PowerPoint, Google Slides, and Keynote for startups or entrepreneurial pitches.
FAQs
How to Add Morph in PowerPoint?
To add the Morph transition in PowerPoint, select the slides you want to apply the effect to go to the Transitions tab, and choose Morph from the list of available transitions.
Does PowerPoint 2016 Have Morph Transition?
Yes, PowerPoint 2016 has the Morph transition, but it is only available for Microsoft 365 and PowerPoint 2019 users. Users with older versions of PowerPoint will not have access to this feature.
Is PowerPoint Morph Transition Free?
The Morph transition feature is not free in PowerPoint. It is available for users who have an Microsoft 365 subscription, PowerPoint 2019, or PowerPoint for the web.
How to Enable Morph Transition in PowerPoint?
To enable the Morph transition in PowerPoint, use an updated version of Microsoft 365 or PowerPoint 2019 or later. If you don’t see the Morph option in the Transitions tab, your software version may not support this feature.
Final Words
Morph transition in PowerPoint is a game-changer when creating dynamic, visually appealing presentations. Its ability to animate objects and create smooth, flowing transitions between slides enhances the overall quality of your presentation, making it more engaging and professional. Whether you’re guiding an audience through a process, illustrating a timeline, or highlighting product evolution, Morph adds polish, clarity, and continuity to your message.
In a world where digital communication is the norm and first impressions often happen via a screen, leveraging Morph isn’t just a creative choice; it’s a competitive advantage. With the ability to enhance audience focus, simplify complex information, and deliver a smooth narrative flow, Morph helps professionals elevate their presentations from ordinary to impactful.
From corporate boardrooms to virtual classrooms, Morph transitions can empower presenters to be more persuasive, educators to be more engaging, and marketers to be more memorable. Pairing it with dynamic layouts and morph PowerPoint templates can help you achieve professional results without extensive design experience. Moreover, as remote work and digital pitches continue to grow, mastering tools like Morph positions you ahead of the curve, equipped to create content that’s not only beautiful but functional and persuasive.