WordArt or Word Art is used to form words or phrases using graphical text. Many Office users are familiar with the term due to its use in apps like Word and also to customize PowerPoint templates. The method to use WordArt in Google Slides is slightly different and requires more manual customization for designing your text art.
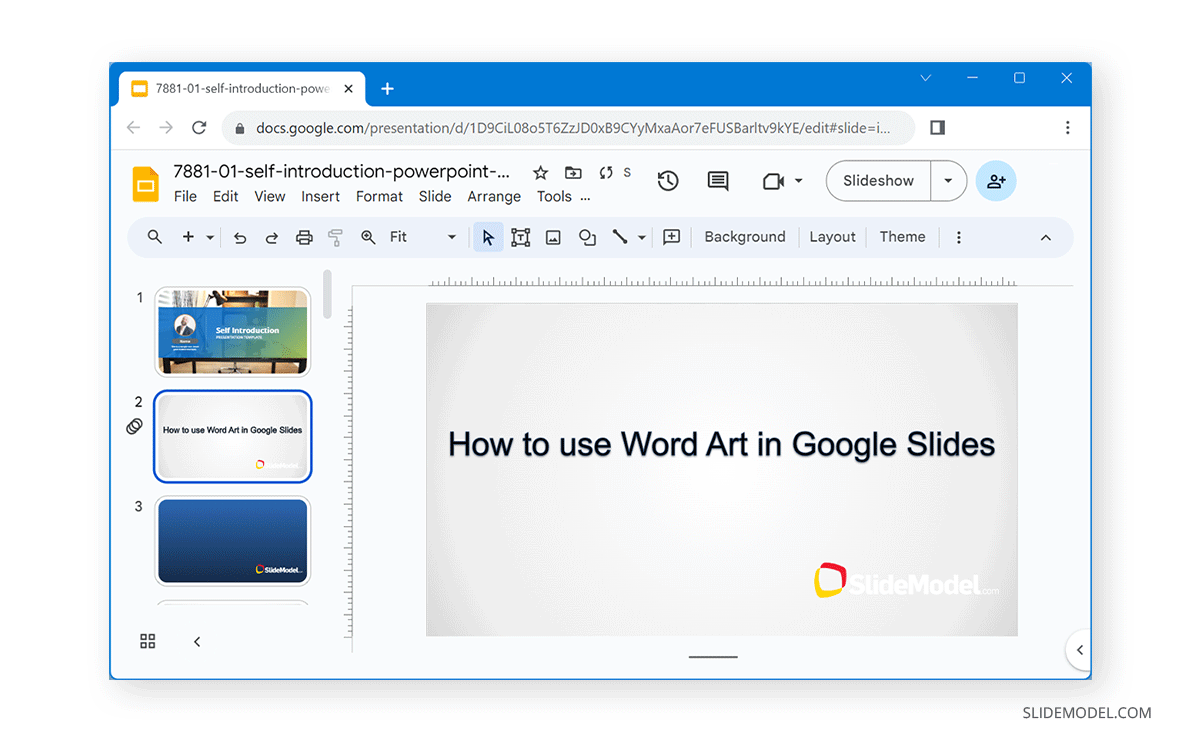
How to Insert Word Art in Google Slides
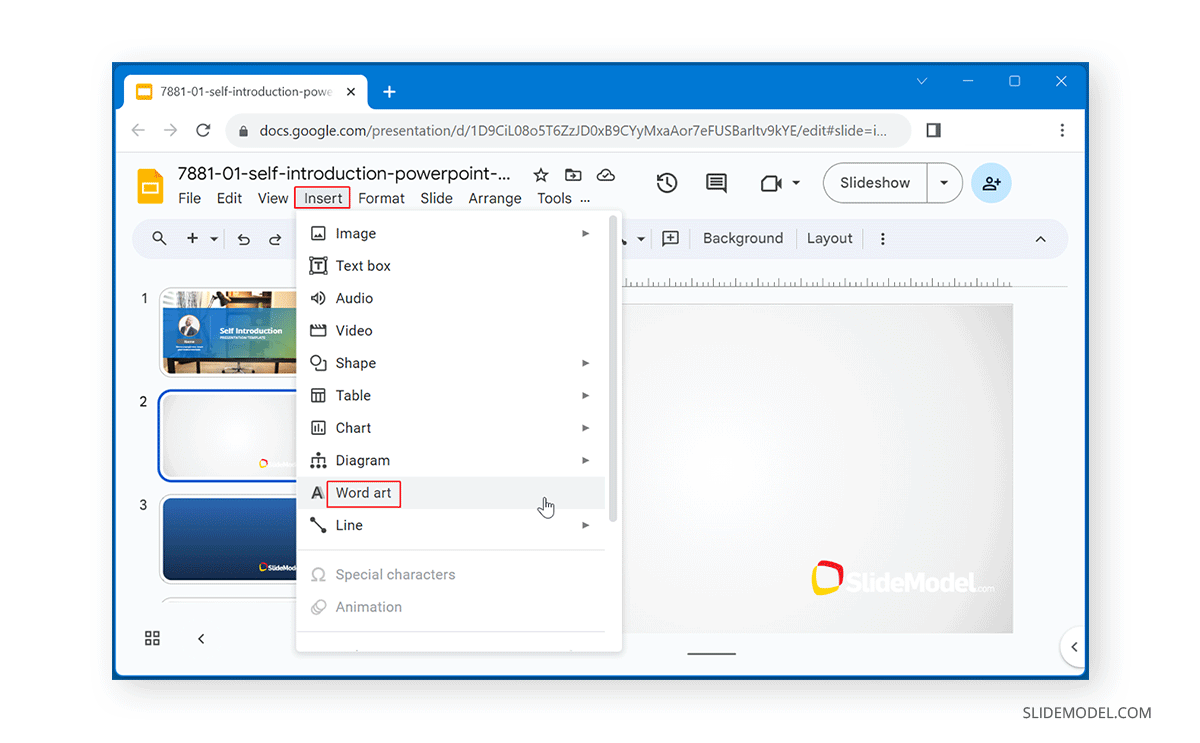
To insert WordArt in Google Slides, go to Insert -> Word Art.
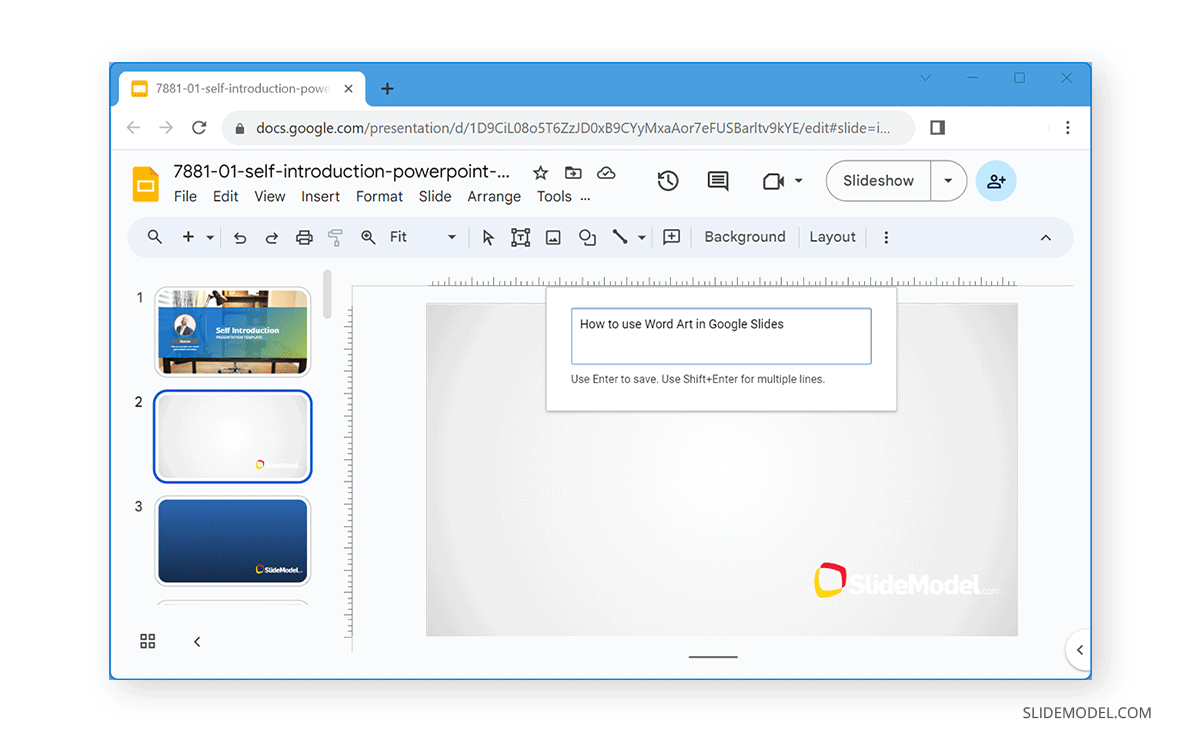
In the text box that appears, enter the required text and hit Enter to save or Shift+Enter to add a new line. Once your text is inserted, you can make further changes to it.
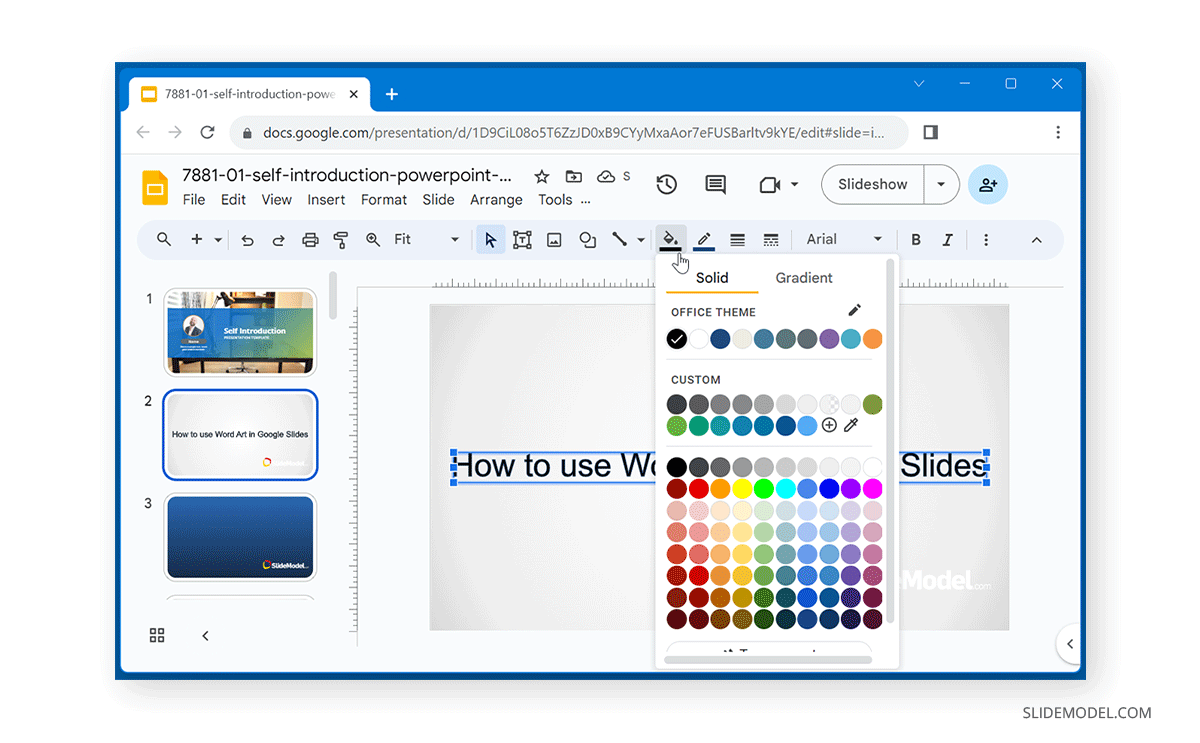
One of the first customization options you might be interested in is to fill color, border color, or size of the text. These settings can be managed from the top toolbar after selecting the text.
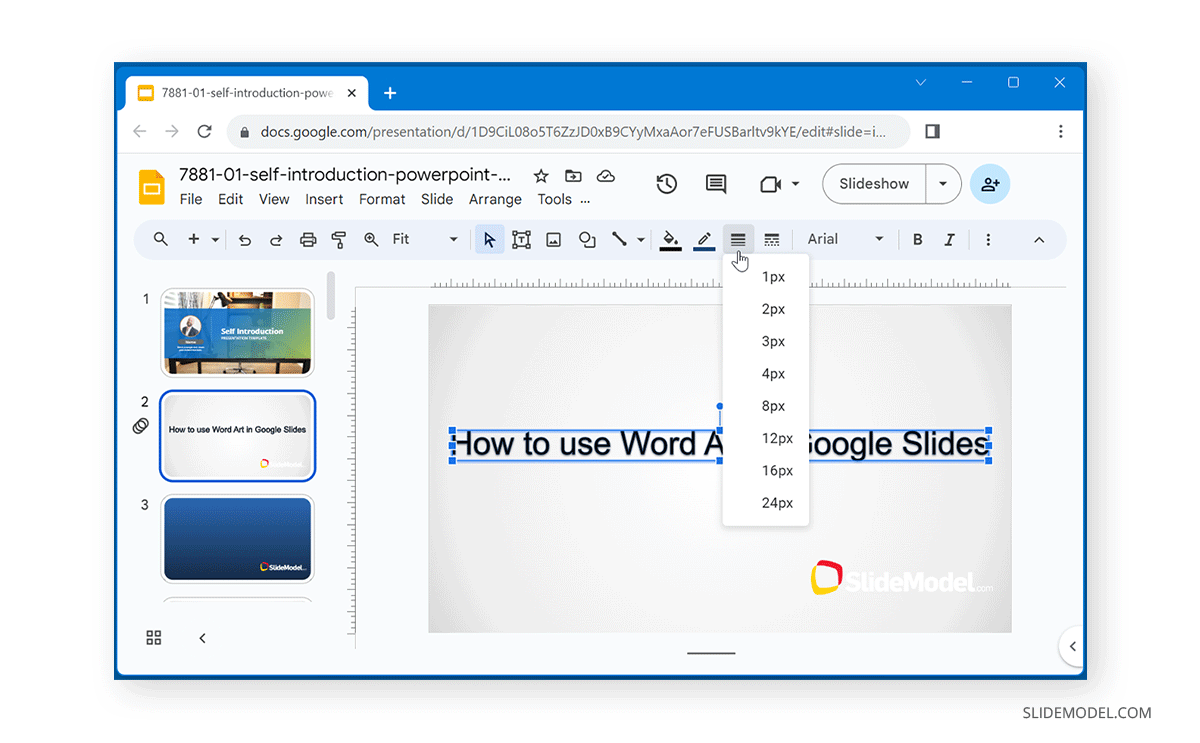
The Border Weight option can help you change the size of the Word Art text. Similarly, you can convert the text to dots using the Border Dash option adjacent to Border Weight.
You can change the font and find additional formatting options from the top toolbar.

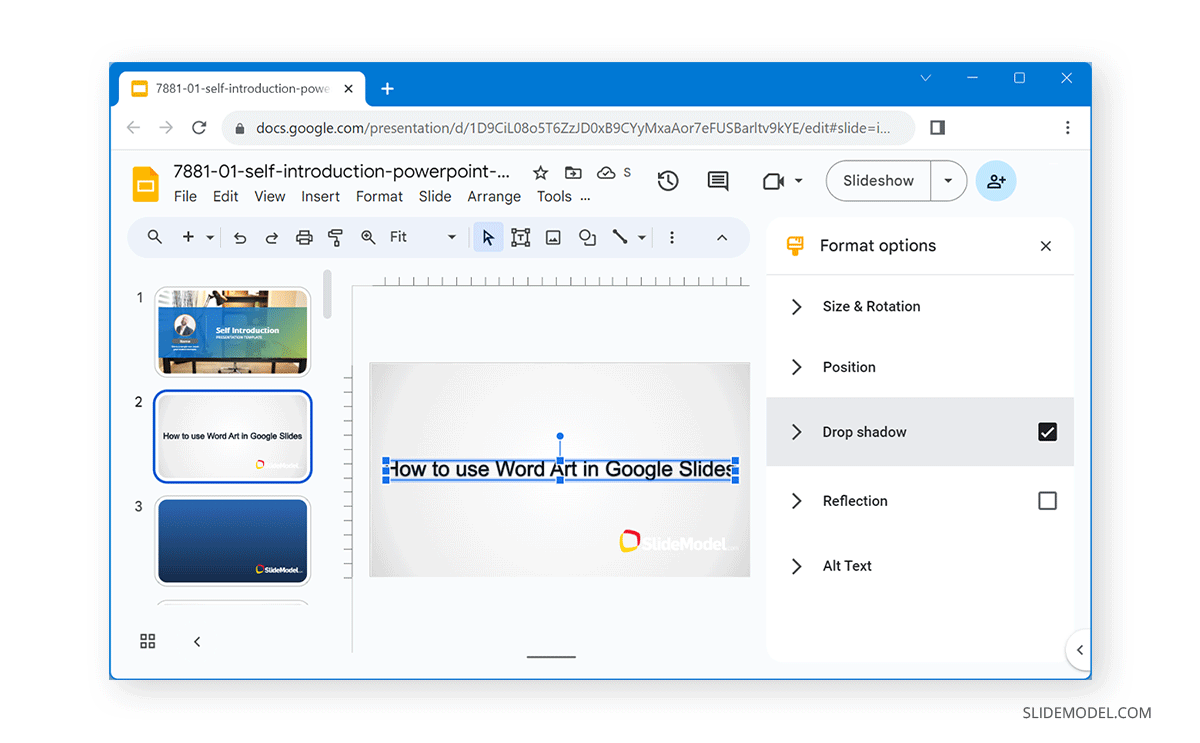
This will provide you with submenus for managing the size and rotation of the slide’s text position and allow you to add a drop shadow, reflection, and alt text.
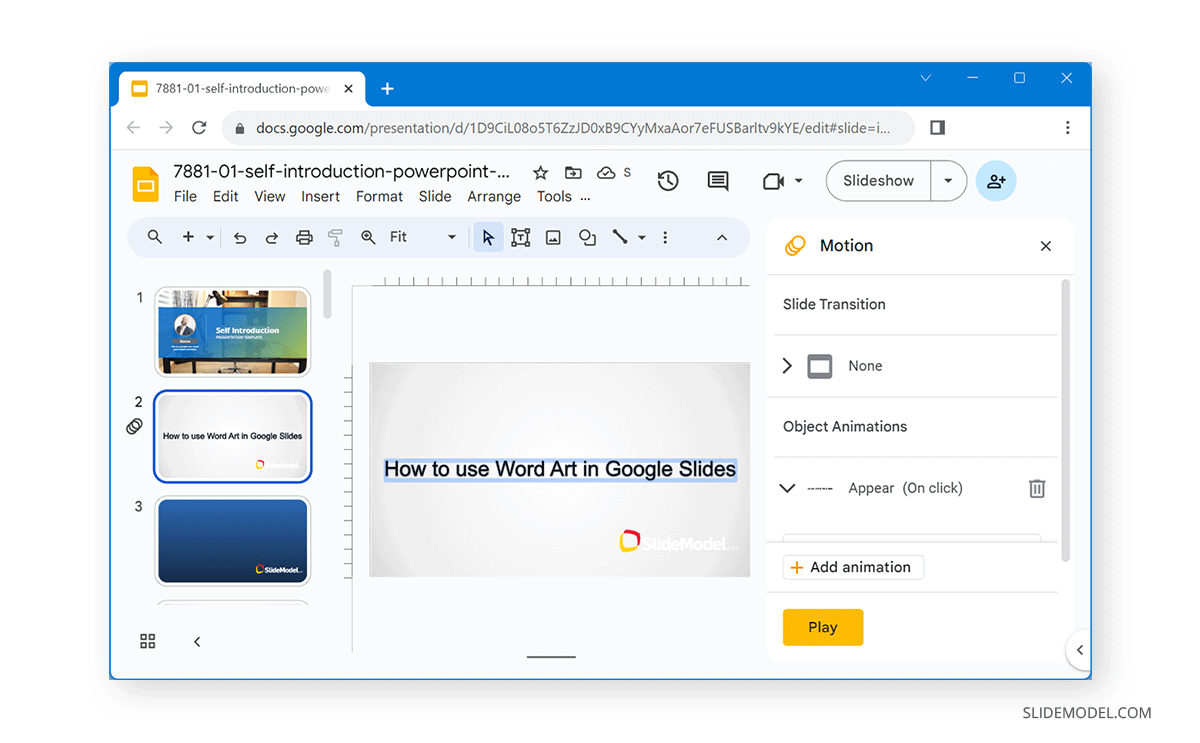
The added WordArt can also be animated via the Animate option. This will open up a menu where you can add animations and transitions to your text.
You can add Google Slides Word Art by adding text and customizing it using the method mentioned above.
FAQs
How do I insert WordArt in Google Slides?
To insert WordArt in Google Slides, go to the Insert menu and select Word Art. Then, enter your desired text in the text box that appears and press Enter to save or Shift+Enter to add a new line. This will insert the WordArt into your slide.
How can I customize the appearance of WordArt in Google Slides?
Once you’ve inserted WordArt, you can customize its appearance using the top toolbar. You can change the fill color, border color, border size (stroke), and apply different text effects. The Border Weight option lets you adjust the thickness of the text border, while the Border Dash option allows you to change the style of the border to dots or dashes.
Can I change the font of WordArt in Google Slides?
Yes, you can change the font of WordArt in Google Slides. After selecting the WordArt text, use the font dropdown menu in the top toolbar to select your desired font style.
What additional formatting options are available for WordArt in Google Slides?
You can access additional formatting options by selecting the WordArt text and clicking on Format Options from the top toolbar. These options allow you to adjust the size, rotation, position, add a drop shadow, reflection, and set alt text for the WordArt.
How do I add animations to WordArt in Google Slides?
To add animations to WordArt, select the WordArt text, go to the Animate option from the top toolbar. This will open a menu where you can add animations and transitions to your WordArt to make your presentation more dynamic.
Is WordArt in Google Slides the same as in Microsoft Office applications?
While WordArt in Google Slides offers basic text customization similar to Microsoft Office applications, it lacks the wide array of pre-designed WordArt styles available in Microsoft Office. Google Slides provides more manual customization options, allowing you to create unique text art using various formatting tools.
Can I add drop shadow or reflection effects to WordArt in Google Slides?
Yes, you can add drop shadow or reflection effects to WordArt in Google Slides. After selecting your WordArt, go to Format Options and choose Drop Shadow or Reflection from the submenus to apply these effects.
Are there any limitations to using WordArt in Google Slides?
The primary limitation of using WordArt in Google Slides is that it does not offer the extensive range of pre-designed styles that are available in Microsoft Office applications. Users must manually customize their text using the formatting options provided in Google Slides.
Final Words
WordArt is commonly used in Office apps. However, you can get similar text art in Google Slides by adding and customizing WordArt. Unlike Office, you don’t get a wide array of WordArt designs to customize in Google Slides but rather the option to add and customize the text using text formatting options. If you want to save yourself from the time and effort needed to create WordArt, you can download these Google Slides templates with readymade designs.