Guides in PowerPoint are an essential tool for aligning objects, ensuring consistency, and maintaining a professional appearance in your presentations. Whether you’re designing a single slide or an entire deck, guides can help you achieve precise placement and alignment. This article will walk you through the steps to display and use guides in PowerPoint.
Why Use PowerPoint Guides?
Here are some reasons why you may want to use Guides in PowerPoint when designing your presentations:
- Alignment: PowerPoint Guides help you align text, images, and other objects, ensuring everything is perfectly positioned. By displaying guides in PowerPoint, the presentation designer will have more control on how to align shapes and text objects.
- Consistency: By using guides, you can maintain a consistent layout across multiple slides.
- Professionalism: Properly aligned content looks cleaner and more professional. With the help of guides and aligning objects correctly, you can make pixel perfect presentation designs, which can make a significant impact on your audience.
How to Display Guides in PowerPoint
Step 1: Open Your PowerPoint Presentation
First, open the PowerPoint presentation where you want to use guides. You can either create a new presentation or open an existing one.
Step 2: Access the View Tab
Navigate to the “View” tab on the PowerPoint ribbon. This tab contains various options for how you view your presentation.
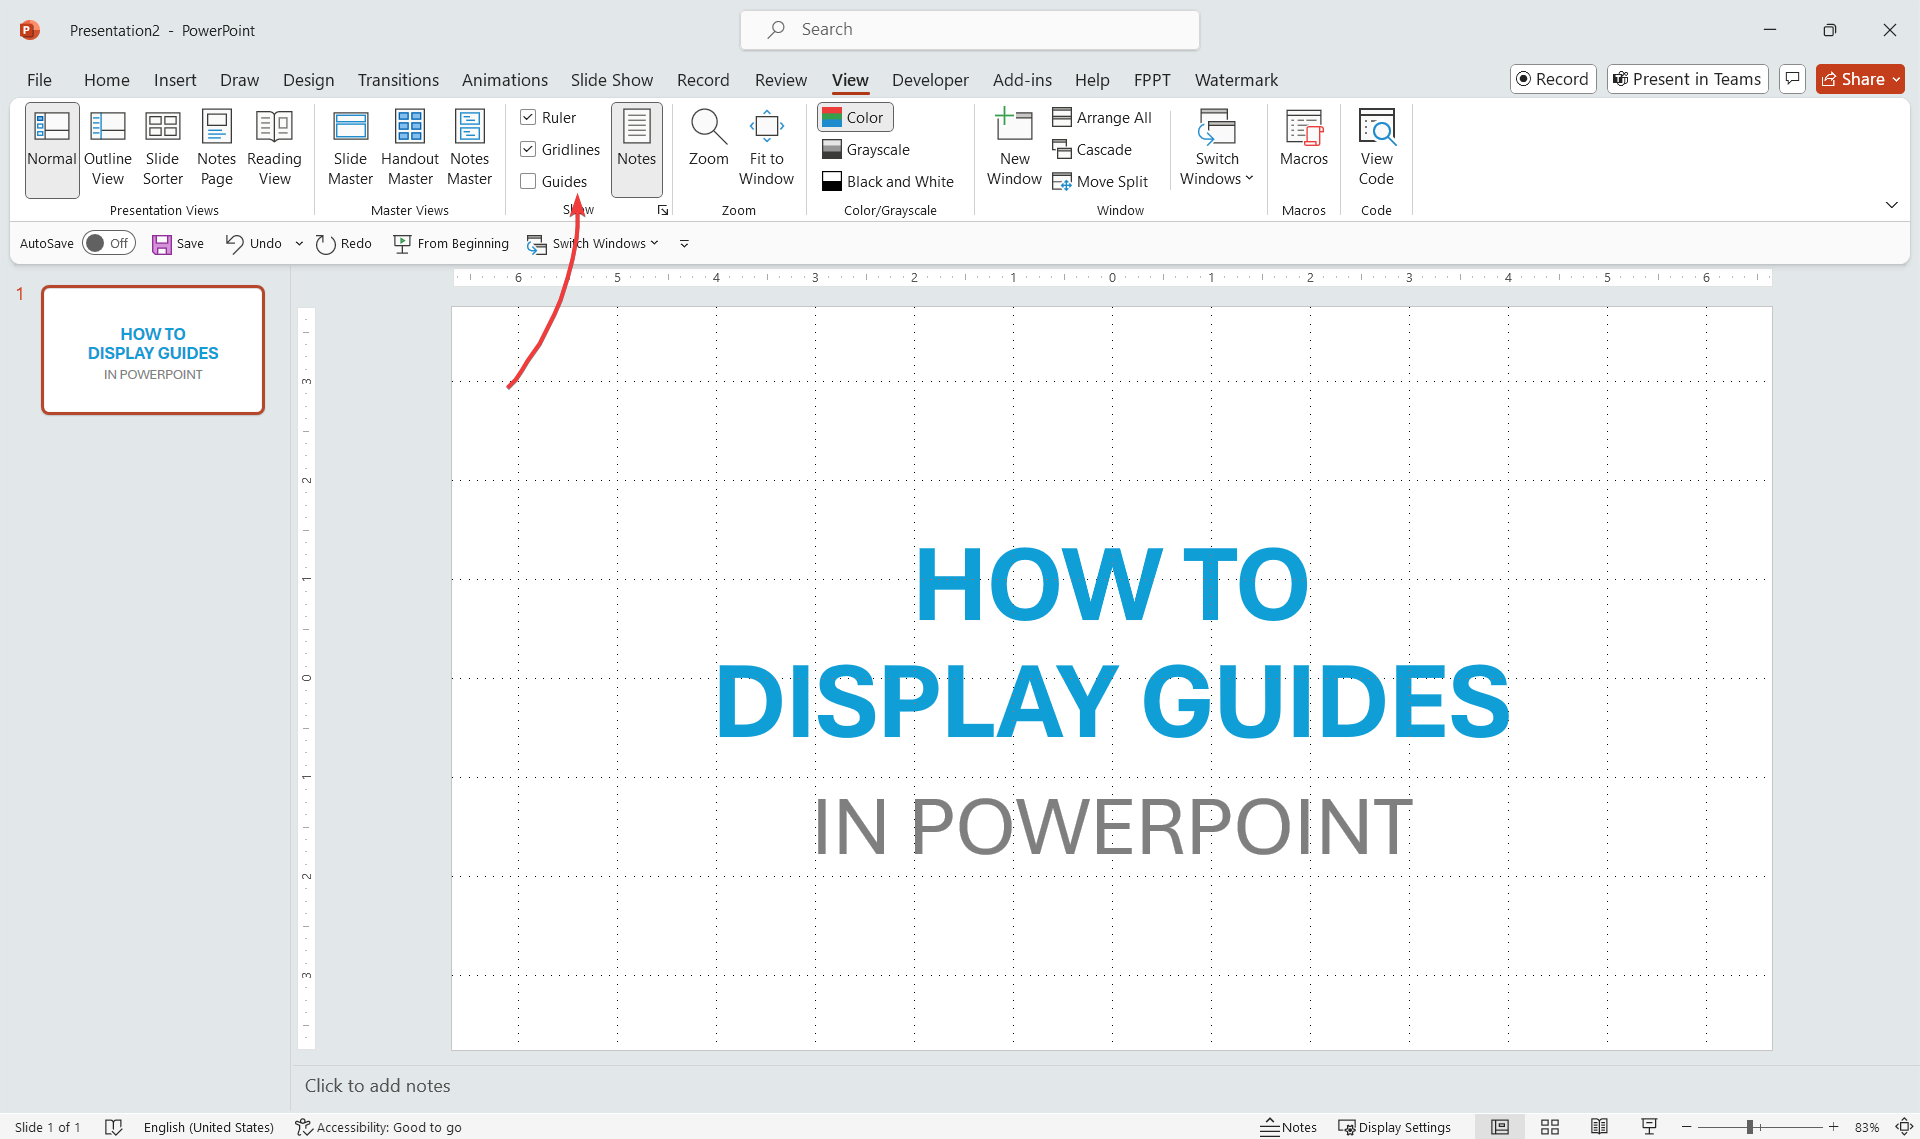
Step 3: Show Guides
In the “Show” group within the “View” tab, you’ll find a checkbox labeled “Guides.” Check this box to display the guides on your PowerPoint slide.
Step 4: Adding Additional Guides
By default, PowerPoint displays one horizontal and one vertical guide. To add more guides:
- Right-click on an existing guide.
- Choose either “Add Vertical Guide” or “Add Horizontal Guide” from the context menu.
Step 5: Moving Guides
To move a guide, click and drag it to the desired location. You can place guides anywhere on the slide to help with alignment.
Step 6: Using the Ruler and Gridlines
For even more precise placement, you can use the ruler and gridlines in conjunction with guides:
- Ruler: To show the ruler, go to the “View” tab and check the “Ruler” checkbox. The ruler appears at the top and left side of the slide. Learn here how to show ruler in PowerPoint.
- Gridlines: To display gridlines, check the “Gridlines” checkbox in the “View” tab. Gridlines can help you align objects with greater precision.
Step 7: Locking Guides
Unfortunately, PowerPoint does not have a built-in feature to lock guides in place. A workaround to lock guides in PowerPoint is by using Slide Master view. You’d put the guides on a Slide Master layout and they’ll be locked in normal editing mode.
Step 8: Hiding Guides
If you no longer need the guides, you can easily hide them by unchecking the “Guides” checkbox in the “View” tab. This will remove the guides from your slide view, but they will remain in place if you decide to show them again later.
Tips for Using Guides in PowerPoint Effectively
- Snap to Grid: Enable the “Snap to Grid” feature for easier alignment. This option can be found in the “View” tab under the “Grid Settings” menu.
- Use Multiple Guides: Don’t hesitate to use multiple guides to create a well-structured layout.
- Combine with Other Tools: Combine guides with the align and distribute tools in the “Format” tab for even better precision.
Displaying Guides in PowerPoint for Mac
Unlike PowerPoint for Windows, or Microsoft 365 version, PowerPoint for Mac has a different way to display guides.
To display guides in PowerPoint for Mac, you just need to go to the View menu and then click Guides checkbox or you can right-click over the slide and look for the Guides option.
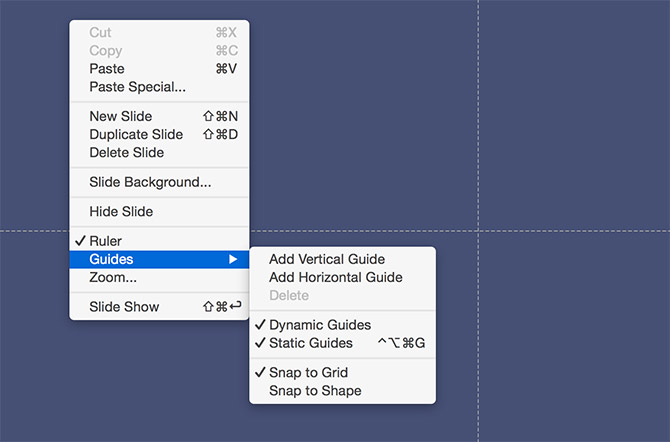
The Guides submenu in the contextual menu will show different options available, including Add Vertical Guide, Add Horizontal Guide or other options such as Dynamic Guides or Static Guides. You can also check here if you want to Snap objects to Grid or to a Shape.
What is the difference between Static & Dynamic guides? While Static Guides are the guides that you configure in the slide manually to any specific position, Dynamic Guides appear on the screen while you drag or align objects. These guides are very useful if you need to align objects by dragging them in the slide.
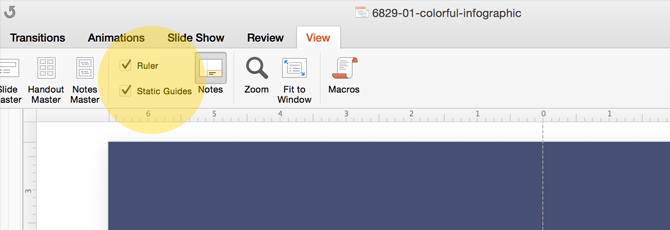
In the View menu, there are two checkboxes available that let you control whether or not to display the Ruler & Static Guides on the screen. To enable the Ruler & Static Guides make sure the checkboxes highlighted like in the figure above are checked.
To illustrate this article we have used the infographics PowerPoint template that is available in our content catalog. You are welcome to download it if you want to make creative infographics in PowerPoint with colorful objects.
Conclusion
Displaying and using guides in PowerPoint is a simple yet powerful way to enhance the alignment and consistency of your presentations. By following the steps outlined in this article, you can easily add, move, and manage guides to create professional and visually appealing slides.