Content alignment is vital to ensure a harmonious look in your slides, but how do you manage to place your items, namely images, text boxes, video, and graphics, in place if you lack visual references? This is where the PowerPoint ruler comes in handy to help us sort everything in the right container areas.
In this quick tutorial, we’ll show you how to show ruler in PowerPoint, one of PowerPoint’s in-built features for slide design.
How to Show the Ruler in PowerPoint
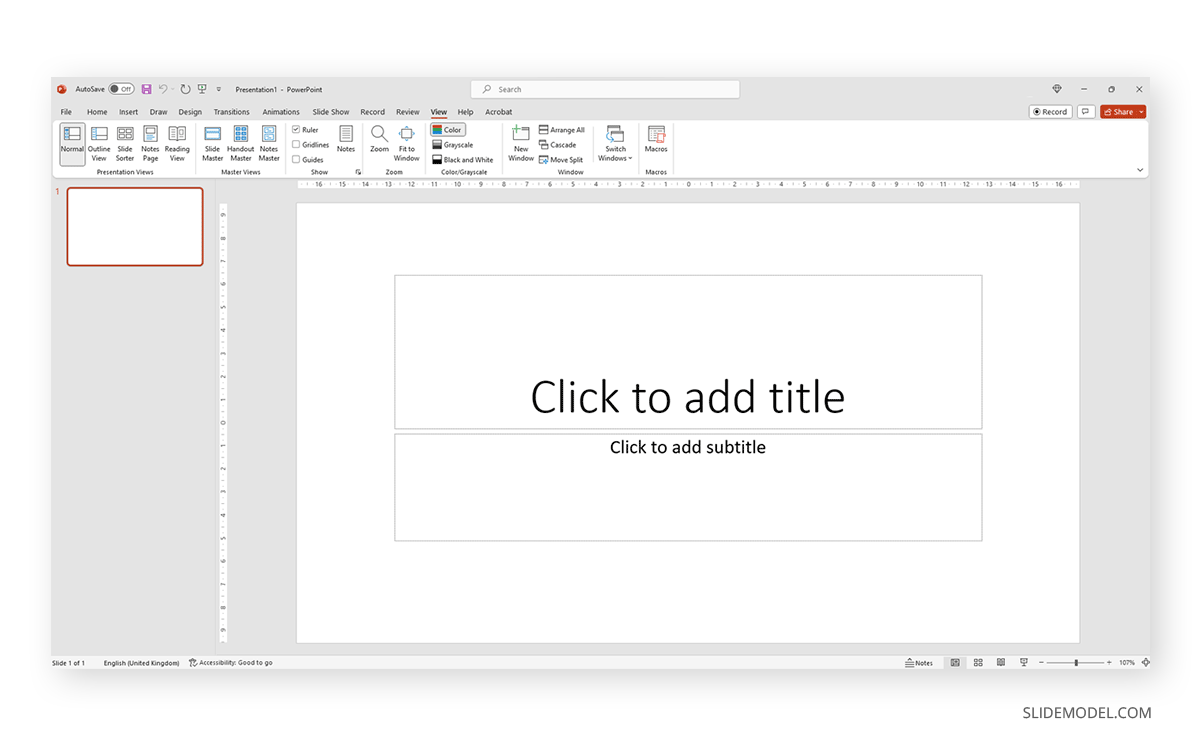
To properly display the ruler on a PPT file, open PowerPoint and switch to the View tab in the Ribbon area. In there, locate a box that says Ruler.

Check that box and the ruler will become available from now on in all PowerPoint documents.
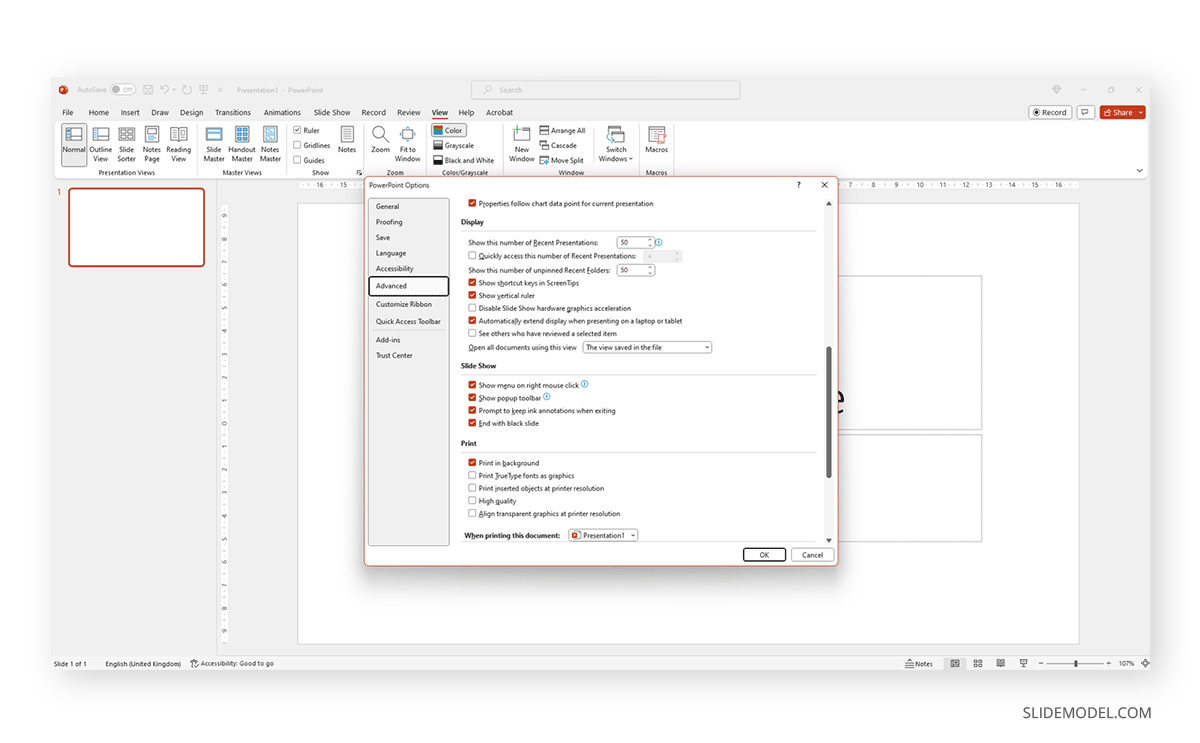
There’s an alternative method, in case you work with legacy versions or, by some bug, the ruler randomly disappears from PowerPoint. We need to go to File > Options > Advanced and click on Show Vertical Ruler. This may solve a common issue when the ruler is only available on the horizontal axis.
How to Show the On-Slide Ruler in PowerPoint
Unknown to some, an extra ruler is available for us presenters to work with, one that gets placed above our presentation slide and which we can move and rotate to our needs. That ruler is available at the Draw tab of PowerPoint’s Ribbon, and we can activate it by clicking on Ruler under the Stencils box.

This additional ruler has some interesting features. For instance, for those who ask how to rotate a ruler in PowerPoint, that’s easily done by scrolling up and down with the mouse wheel. The number in the middle will change, making it easier to stick the ruler to a certain degree.
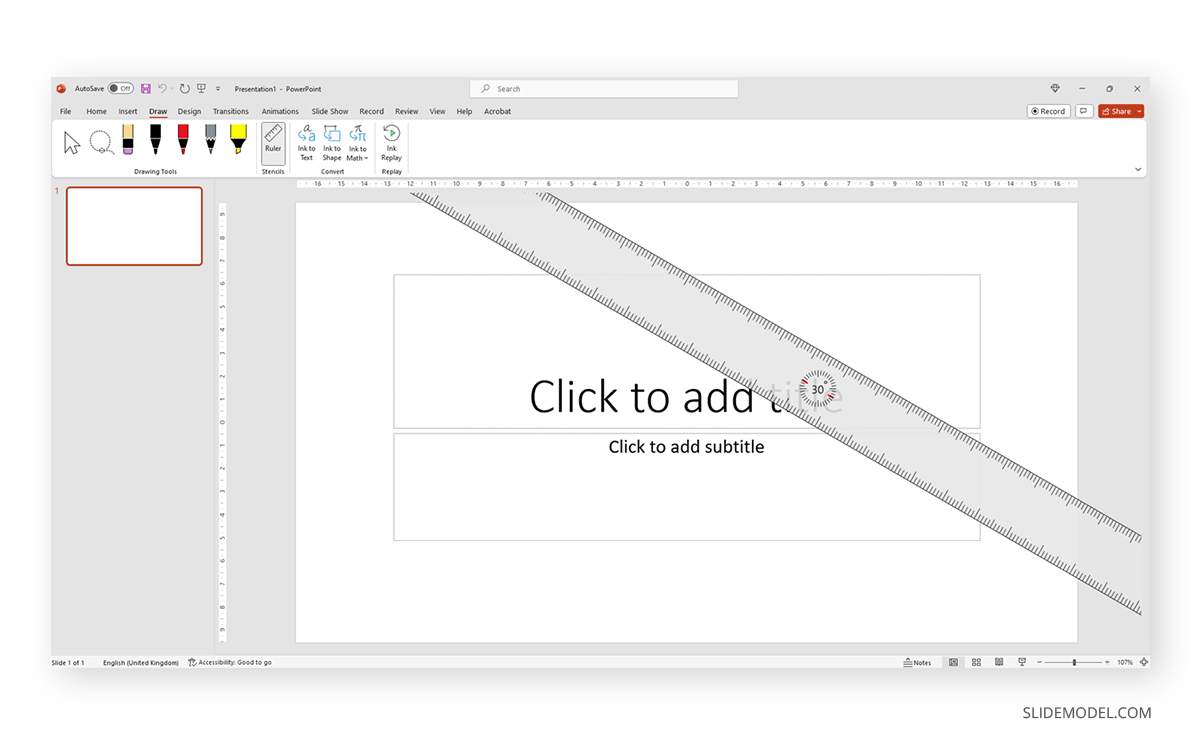
Remember that the ruler only rotates if you hover over it with the cursor and then move up and down. We just click over it to change its position and drag it to the desired place.
FAQs
What is the ruler in PowerPoint used for?
The ruler in PowerPoint helps with content alignment, allowing you to precisely place images, text boxes, graphics, and other elements on your slides for a professional and well-organized layout.
How do I enable the ruler in PowerPoint?
To enable the ruler, go to the View tab on the Ribbon and check the Ruler box. This will display the ruler for all your slides.
Why isn’t the ruler showing up in my PowerPoint?
If the ruler isn’t visible, go to File > Options > Advanced, and check the Show Vertical Ruler option. This setting can fix the issue when the ruler is only available horizontally.
Is there a way to display a vertical ruler in PowerPoint?
Yes, to display the vertical ruler, ensure that the Show Vertical Ruler option is checked under File > Options > Advanced.
Can I rotate the ruler in PowerPoint?
Yes, you can rotate the on-slide ruler in PowerPoint by using the Ruler option under the Draw tab. To rotate it, hover over the ruler with your cursor and use the scroll wheel to adjust its angle.
Can I customize the ruler in PowerPoint?
While PowerPoint doesn’t offer much customization for the ruler itself, you can enable or disable the vertical ruler, move the on-slide ruler, and adjust its rotation. This gives you flexibility when positioning elements.