Many users, when sharing PowerPoint files via email, can end up realizing that the file is too big to be sent via their email service provider because of its excessive file size. While there are many third-party apps that enable sending large files via sharing links, not only can they be less secure to use for confidential documents, but the files might take a while to download by the recipient due to the heavy file size. therefore, Compressing a PowerPoint presentation can help you avoid such issues.
Compress a PowerPoint Presentation File
There are different methods by which you can compress a PowerPoint file and elements within the file to reduce the file size and make your slide deck more manageable.
1. Compress Images in PowerPoint
The most common method to reduce the file size of a PowerPoint presentation is to compress slide images. This method is also quite useful if you’re wondering how to compress a ppt file for email since it provides the option to reduce the images down to a very low resolution of 96 PPI, which is usually sufficient to make the presentation small enough for an email attachment.
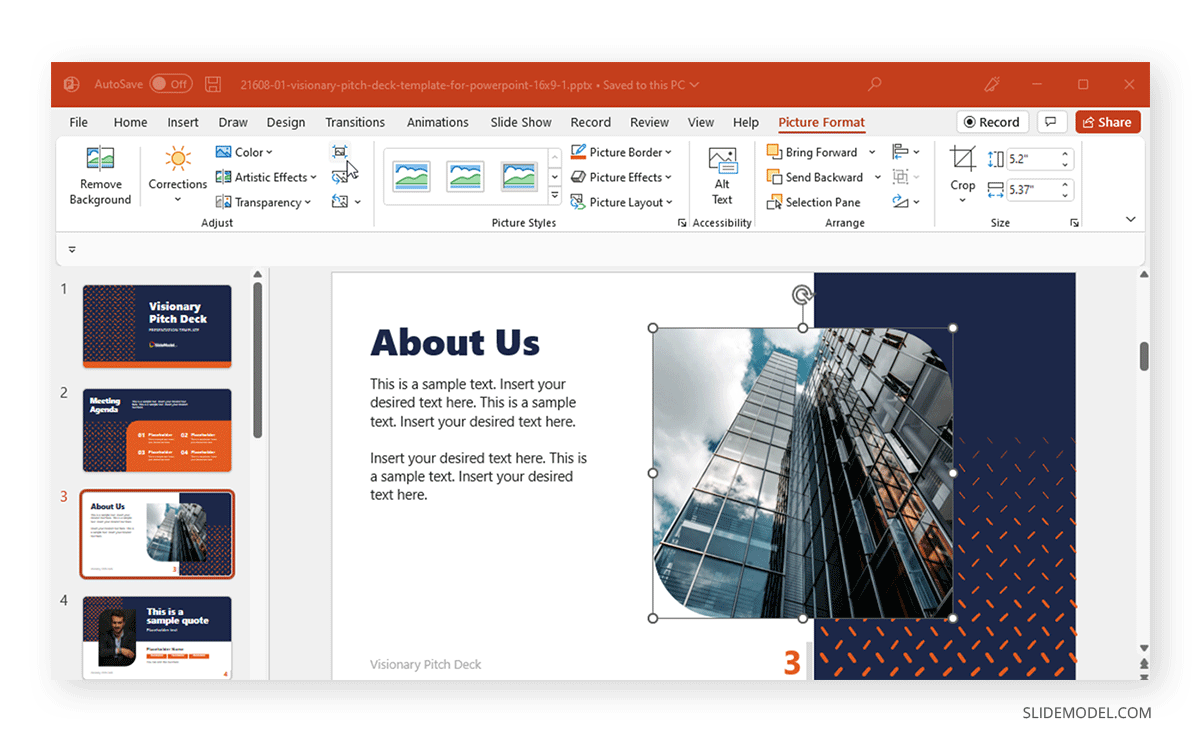
To compress one or more images in PowerPoint, select an image from the presentation, go to the Picture Format tab, and select Compress Picture from the Adjust menu.
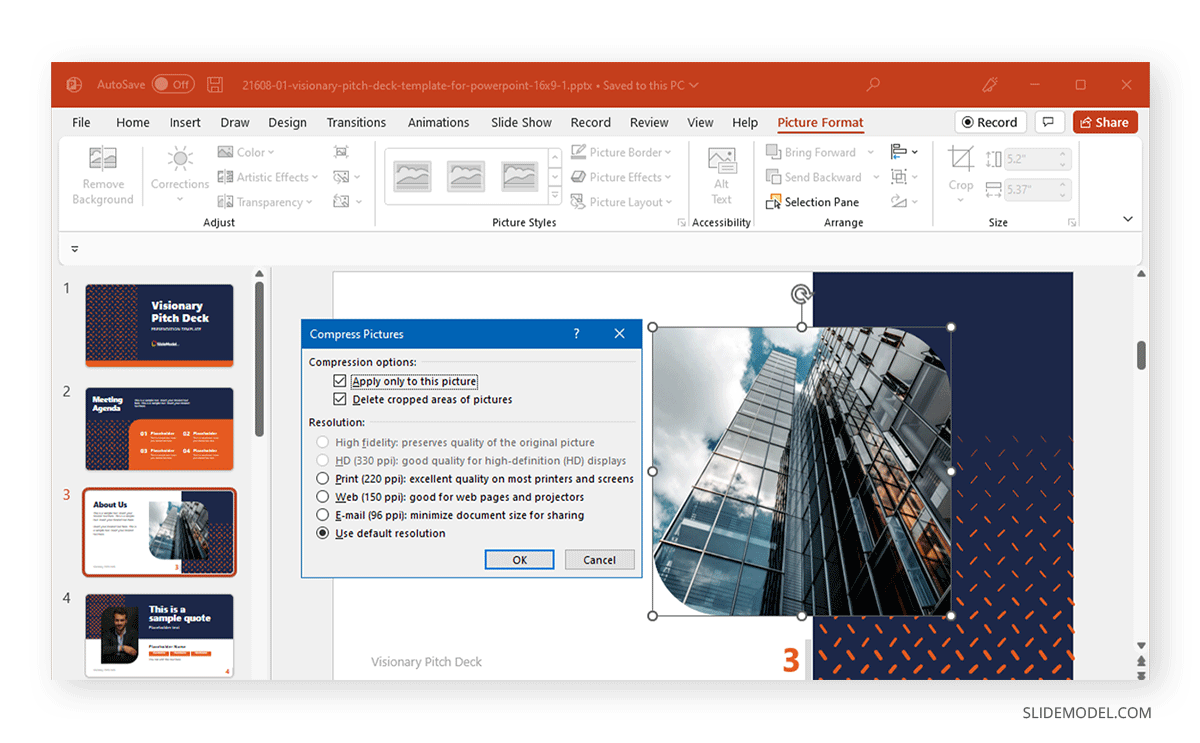
From the dialog box that appears, you can choose various compression options. If you want only to compress the selected image, check Apply only to this picture checkbox.
The compression options available from the given dialog box can be used to reduce the size of the current or all images in the presentation file for print (220 PPI), web (150 PPI), and email (96 PPI), or you can choose the default resolution.
For more information, check our article about how to compress images in PowerPoint.
2. Compress Video and Audio in PowerPoint
Video and audio files can take up a lot of space and make PowerPoint presentations difficult to manage due to their large file size. If you have media files added to PowerPoint that are heavy, your presentation might also lag in SlideShow mode.
To compress video and audio files in PowerPoint, go to File > Info > Compress Media. Select a lower resolution of the media files from the drop-down menu to reduce their file size.
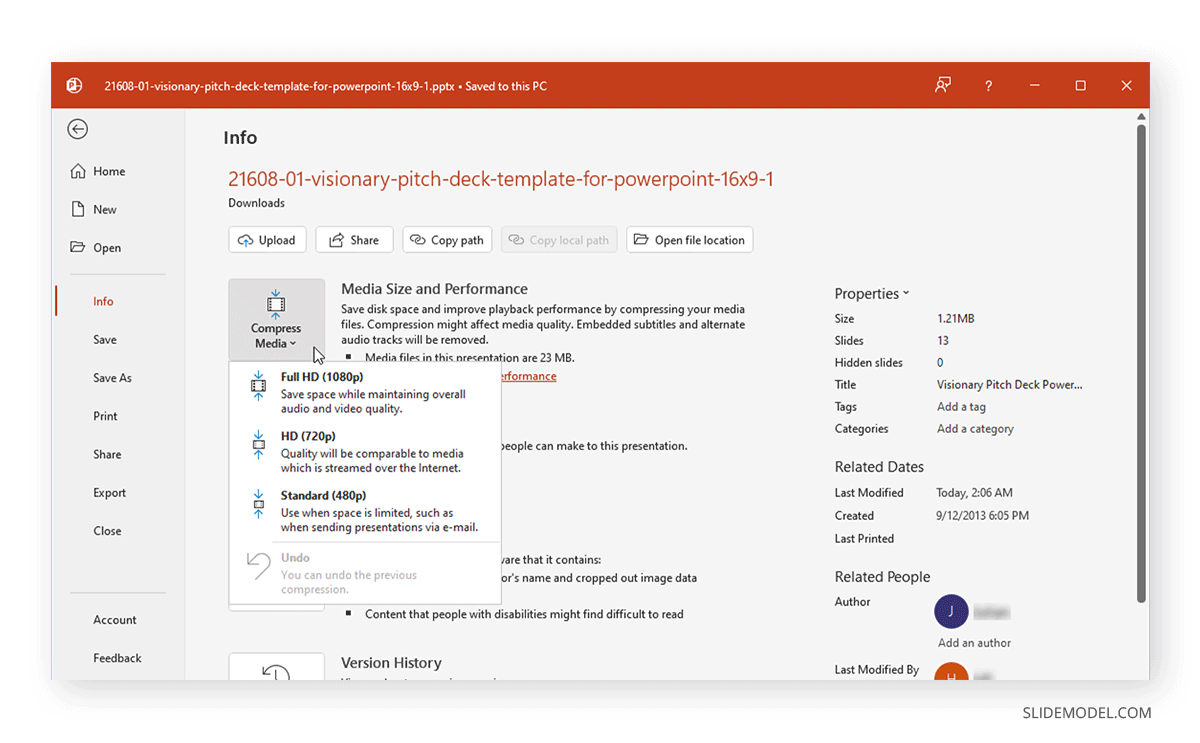
This will shrink the PowerPoint file size and reduce the file size for video and audio files, with information regarding how much the files were compressed.
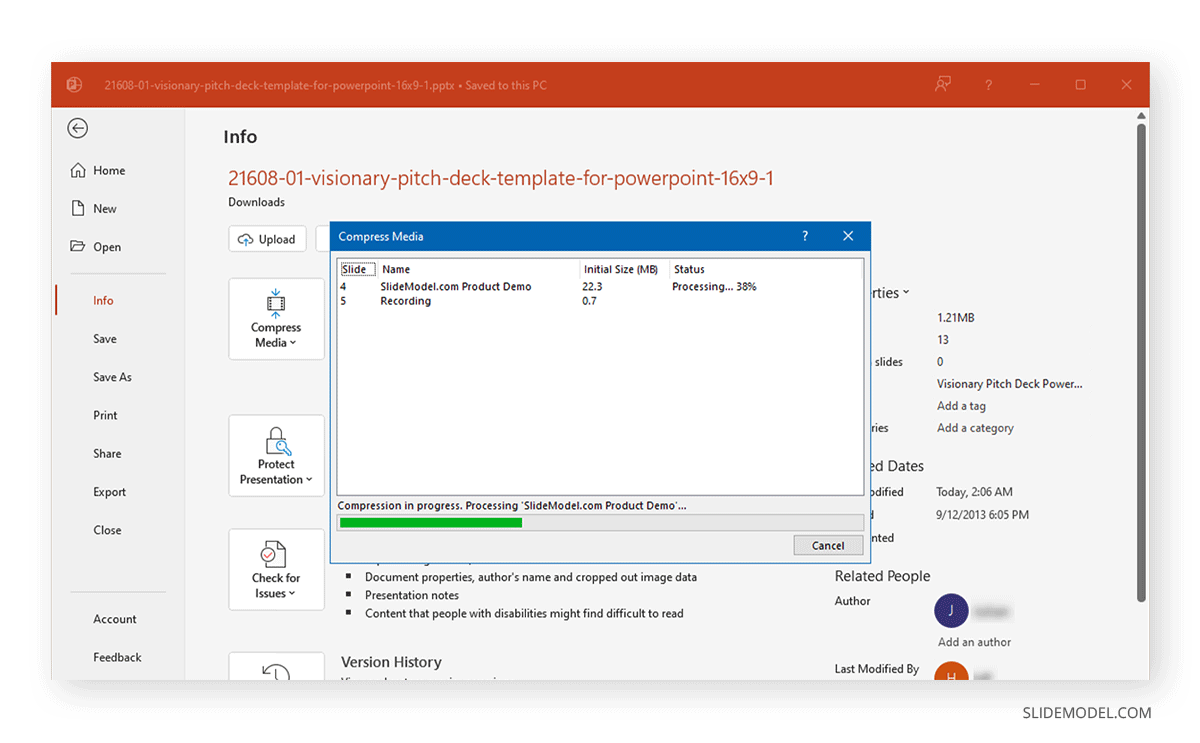
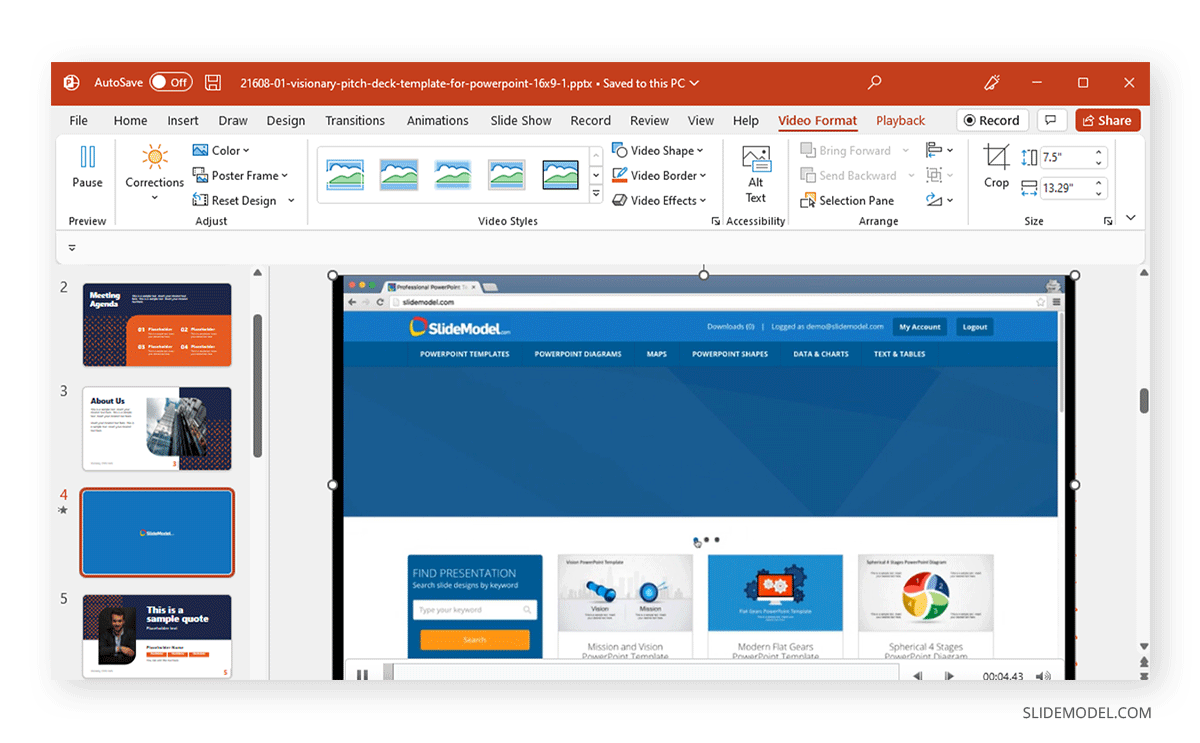
You can play to preview the media files to ensure the quality of the converted media files is satisfactory. Suppose you aren’t satisfied with the compression quality and reduced file size.
In that case, you can also compress the media files using third-party tools, including online converters like CloudConvert and ZamZar or media file conversion apps like HandBrake, Xilisoft audio/video converter, Freemake audio/video converter, etc.
It is also important to note that if you use audio in your presentations, MP3 files typically compress the audio more than WAV files. To reduce the file size of your presentations with audio, consider inserting MP3 audio files into your presentation, over the WAV format. Check out our article how to add audio to PowerPoint presentations to learn more about the available audio formats.
3. Remove Heavy Graphics and Slide Elements
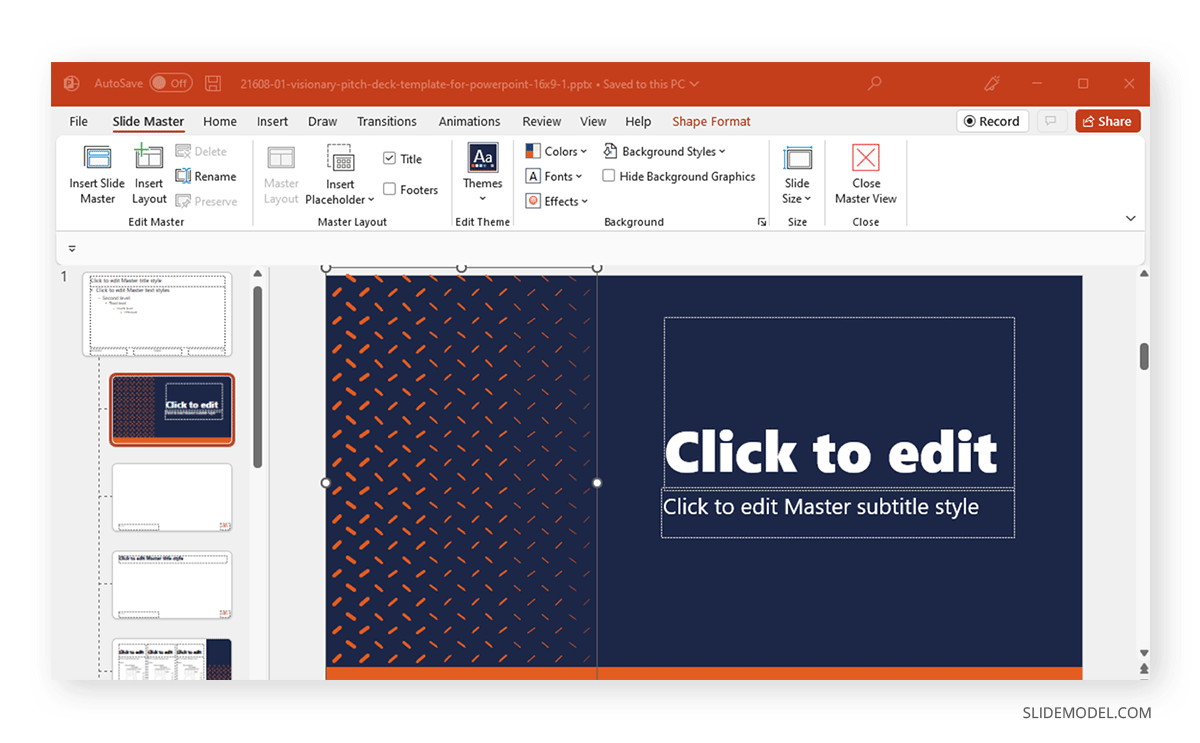
Another easy method to compress PowerPoint and shrink its size is to remove unwanted elements to reduce the file size. You can either do this directly from slides or edit the layouts of the deck via View > Slide Master.
4. Replace Media Files with Links and Embedded Content
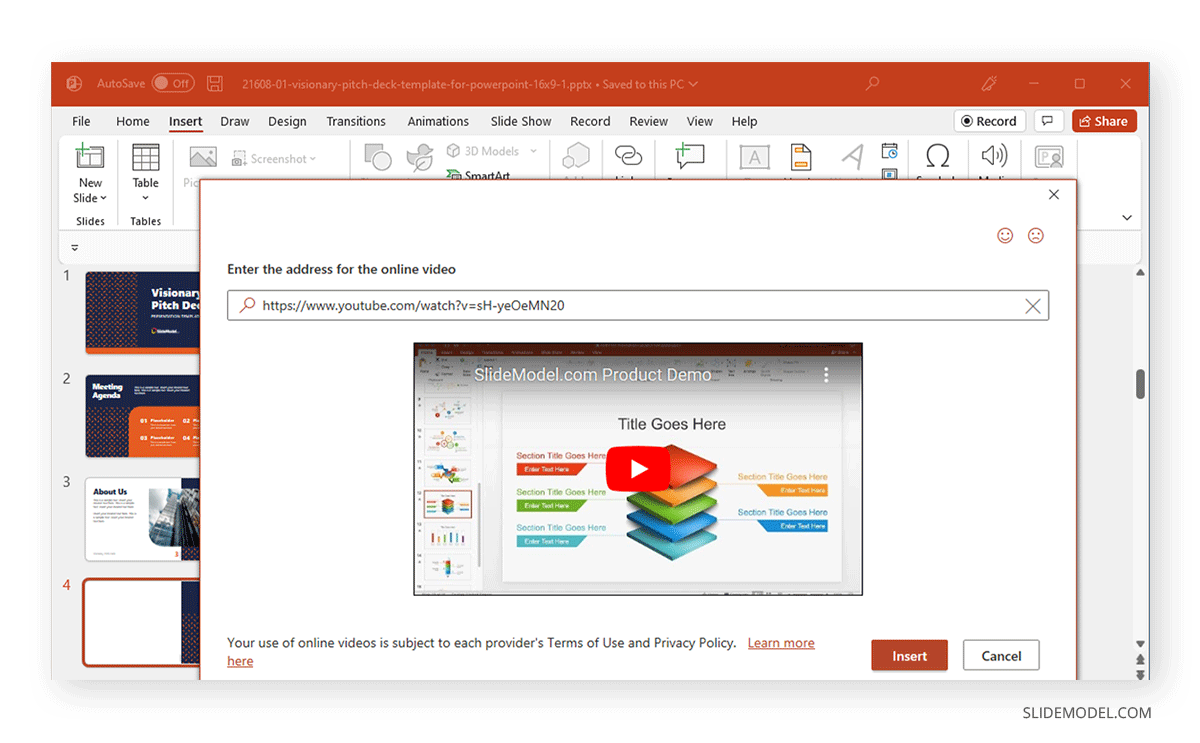
You can also replace certain files that might be making your slides heavy. Embedding the media files directly via online sources like YouTube or by adding links to media instead of embedding files in your presentation will significantly reduce file size.
5. Convert PowerPoint File Type to Compress File Size (E.g. Export to PDF)
If you don’t need to present your slides as a PowerPoint file, Converting PowerPoint presentations to a different format, such as PDF, can compress the file size. This will also remove media files such as audio and video files that you can instead add as a clickable link for the recipient prior to conversion. This process could also shrink PowerPoint file size. Learn how to save a PowerPoint presentations to PDF.

6. Compress a PowerPoint File using a File Compression Format
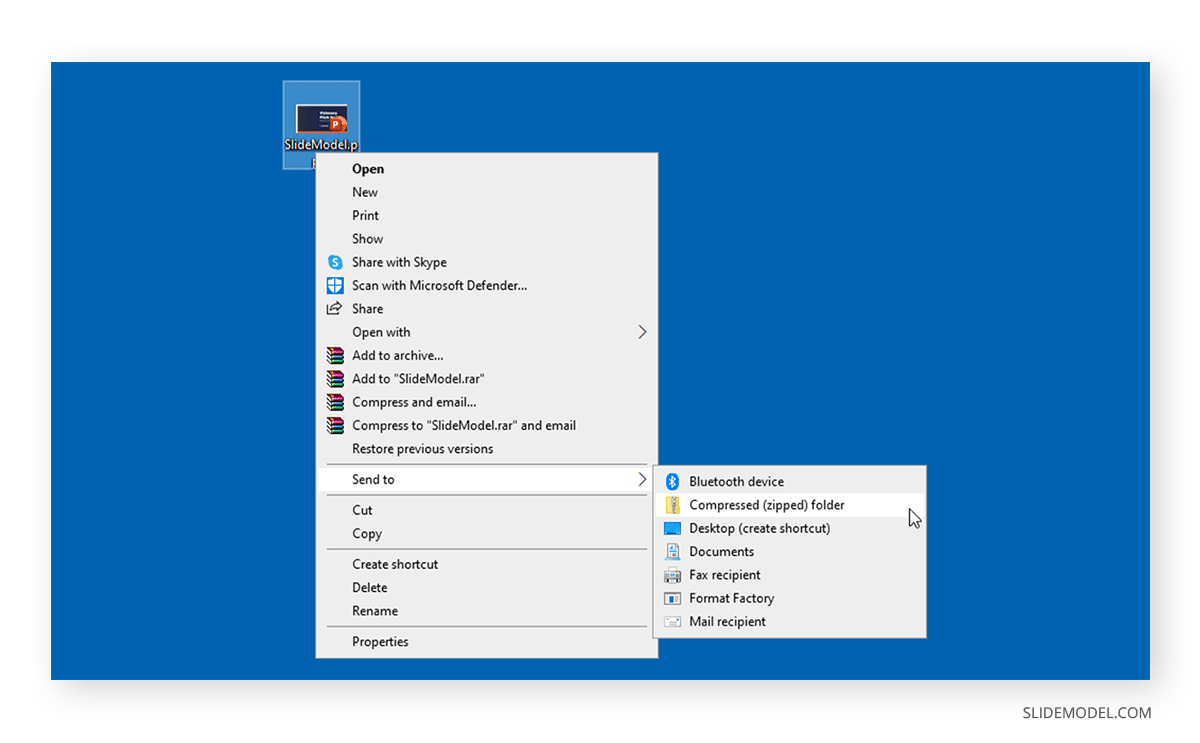
To share a PowerPoint file online in a compressed format, you can convert it to a ZIP file or use a number of formats supported by your operating system or third-party apps such as RAR, 7z, GZIP, TAR, XZ, WIM, etc. The compression feature is often integrated via the right-click context menu or long tap for mobile operating systems.
Some of the most famous tools known to provide a high file compression ratio and various security features for file compression include 7-Zip, WinRAR, WinZIP, PeaZip, etc.
FAQ’s
Why should I compress my PowerPoint presentation?
Compressing your PowerPoint presentation can help reduce the file size, making it easier to share via email, improve loading times, and reduce storage space. It also ensures that the recipient can quickly download and access the presentation.
What is the most common method to reduce the file size of a PowerPoint presentation?
The most common method is to compress the images in your presentation:
– Select an image in your presentation.
– Go to the Picture Format tab.
– Click on Compress Pictures in the Adjust group.
– Choose the desired compression options (e.g., for print, web, or email).
What should I do if the media quality is unsatisfactory after compression?
If the media quality is unsatisfactory, you can compress the media files separately before adding them back to your presentation using third-party tools. Tools like HandBrake, Xilisoft, and Freemake can help you achieve better compression results.
How can I reduce the file size by removing heavy graphics and slide elements?
To reduce the file size by removing unnecessary elements:
– Review each slide and identify heavy graphics, images, and other elements that can be removed or simplified.
– Use the Slide Master view to make global changes to the slide layouts, reducing the number of heavy elements across all slides.
Is it possible to replace media files with links or embedded content?
Yes, you can replace media files with links to online sources or embed content directly from websites like YouTube. This reduces the file size significantly by not storing large media files within the presentation.
How do I convert a PowerPoint file to a different format to reduce file size?
You can convert your PowerPoint presentation to a PDF:
– Go to File > Save As.
– Choose PDF from the file format options.
– Save the file. This will remove media files and significantly reduce the file size.
Can I use file compression tools to compress a PowerPoint file?
Yes, you can use file compression tools like 7-Zip, WinRAR, or WinZIP:
– Right-click on the PowerPoint file.
– Select Send to > Compressed (zipped) folder.
– Alternatively, use third-party tools to compress the file into ZIP, RAR, or 7z formats.
What are the potential downsides of compressing a PowerPoint presentation?
The potential downsides include:
– Loss of media quality due to compression.
– Incompatibility issues if the recipient does not have the required software to decompress the file.
– Reduced functionality if converting to a different format like PDF, as interactive elements may be lost.
How do I ensure the recipient can open a compressed PowerPoint file?
To work with full compatibility:
– Use common compression formats like ZIP.
– Provide instructions or links to software if using less common formats like RAR or 7z.
– Consider sharing a link to an online version of the presentation if possible.
Compressing PowerPoint files can have pros and cons, including loss of media quality or inability of the recipient to open the file if it’s in a compression format that requires a specific app that he/she might not have. Therefore, you should pick a mode of compression that is convenient enough for you and the recipient of the file.


