Images often play a central role in presentations, whether in PowerPoint or on platforms like Canva. The Canva interface includes a variety of built-in image editing tools that allow users to make quick adjustments without switching to dedicated photo-editing software. In this guide, we will explain how to edit an image in Canva, explore the available editing options, and show how to download your edited image for use in other projects.
Why Edit Images in Canva
Images rarely fit perfectly into a presentation the moment they are added to a slide. A photo may need to be cropped, brightened, recolored, or otherwise adjusted to match the presentation’s visual style. For example, a marketing presentation might require images that align with company branding, while a business report may benefit from subtle image adjustments to improve readability and reduce distractions. Instead of relying on external software, Canva allows many of these edits to be performed directly from the presentation editor.
From applying filters and effects to adjusting transparency and removing backgrounds, Canva provides several ways to customize images directly within a presentation. Canva comes with many AI-powered tools to help enhance, edit, and transform images. You can not only use conventional image-editing features to make adjustments in Canva but also add new elements, isolate and remove slide content, and enhance existing details in an image.
How to Customize Images in Canva
Step 1: To edit an image in Canva, open your presentation and select the image you want to modify.
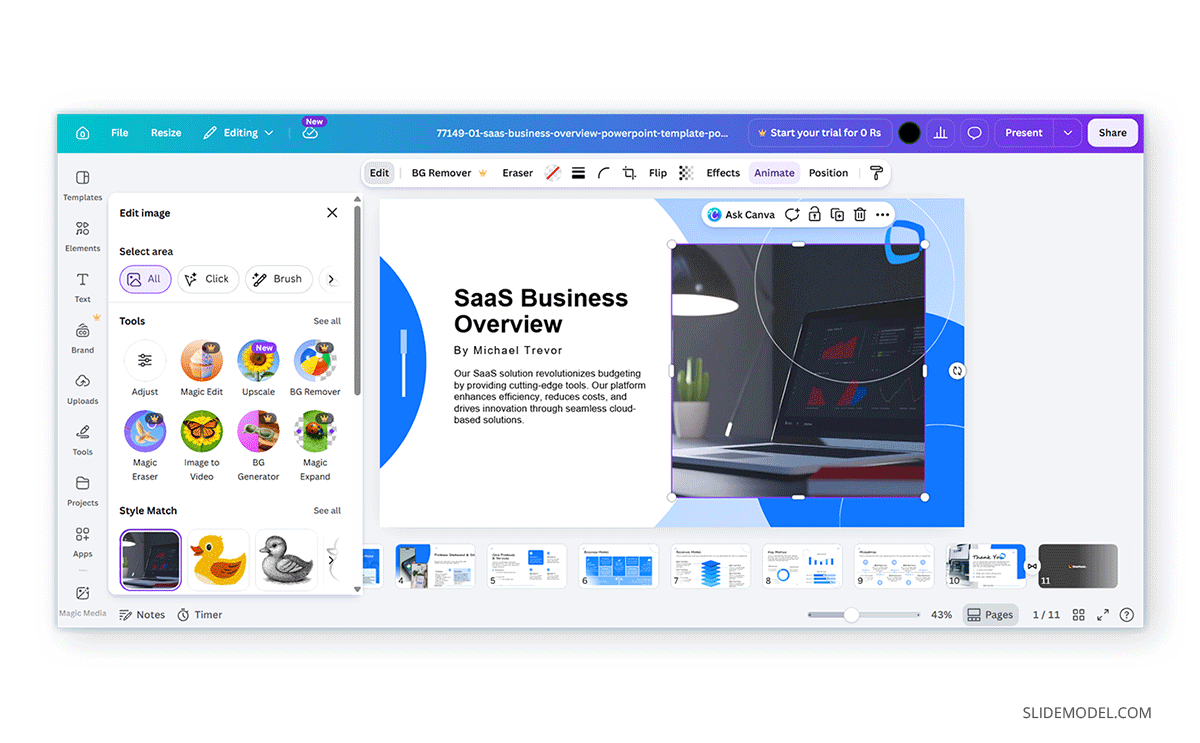
Step 2: Once an image is selected, Canva displays an Edit Image option in the toolbar. Clicking this button opens a panel with the available image-editing tools.
Step 3: You can begin using filters, effects, adjustment controls, and enhancement tools. The specific options may vary depending on the type of image being used and the features available in your Canva plan.
Element Selection Tools
Canva’s element selection tools can identify specific content within an image and separate it from the surrounding visuals. The Magic Grab feature can isolate objects for repositioning or editing, while Grab Text detects text within an image and converts it into editable text elements. For example, you can isolate and drag out specific parts of an image as needed by simply selecting the object and clicking Grab in the Magic Grab menu.
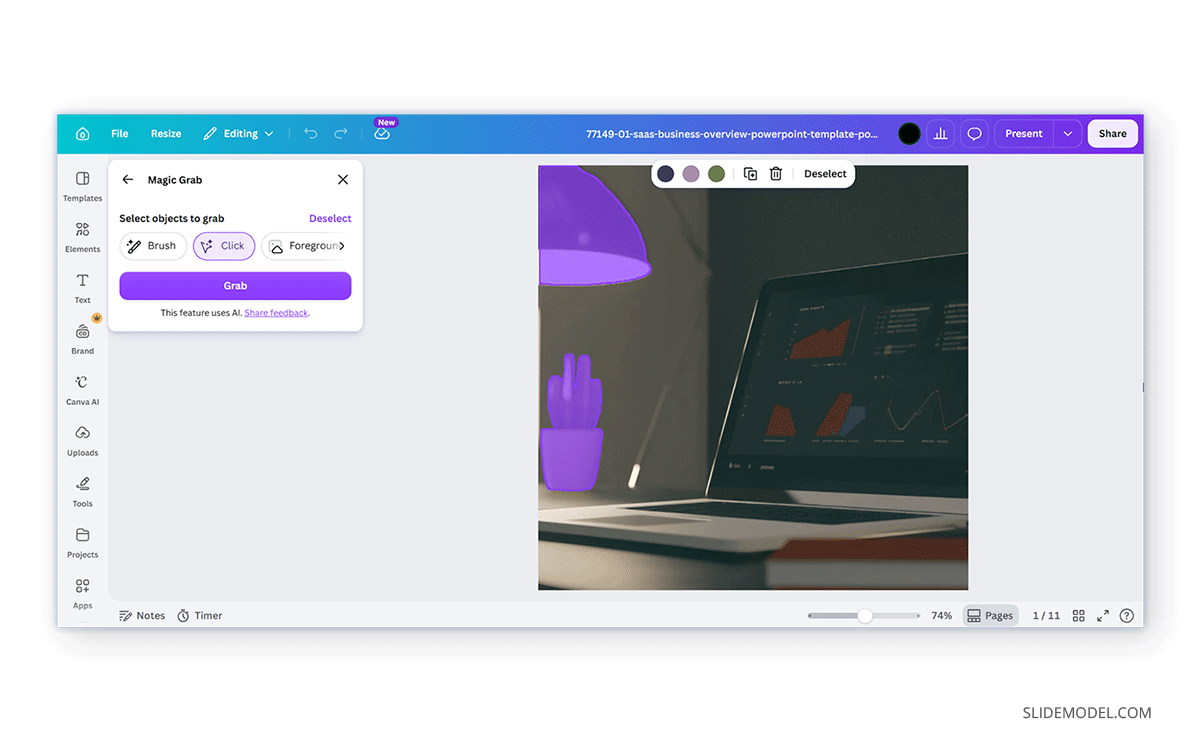
Image Adjustment and Enhancement Tools
Canva provides several image enhancement tools that can improve image quality or remove unwanted elements. Depending on your Canva plan, these may include Adjust, Upscale, Background Remover, Magic Eraser, Blur, Auto Focus, and Face Retouch. These tools can be used to improve clarity, remove distractions, adjust image quality, or enhance portraits.
Sometimes an image only needs minor corrections rather than a dramatic transformation. Canva provides adjustment controls that let you fine-tune an image’s appearance. Common settings include brightness, contrast, saturation, warmth, highlights, shadows, and sharpness. These controls can be particularly useful when working with photographs that appear too dark, washed out, or inconsistent with the rest of the presentation.
For example, increasing brightness can help improve visibility in a dim photograph, while adjusting contrast may make important details stand out more clearly.

Image Reimagining Tools
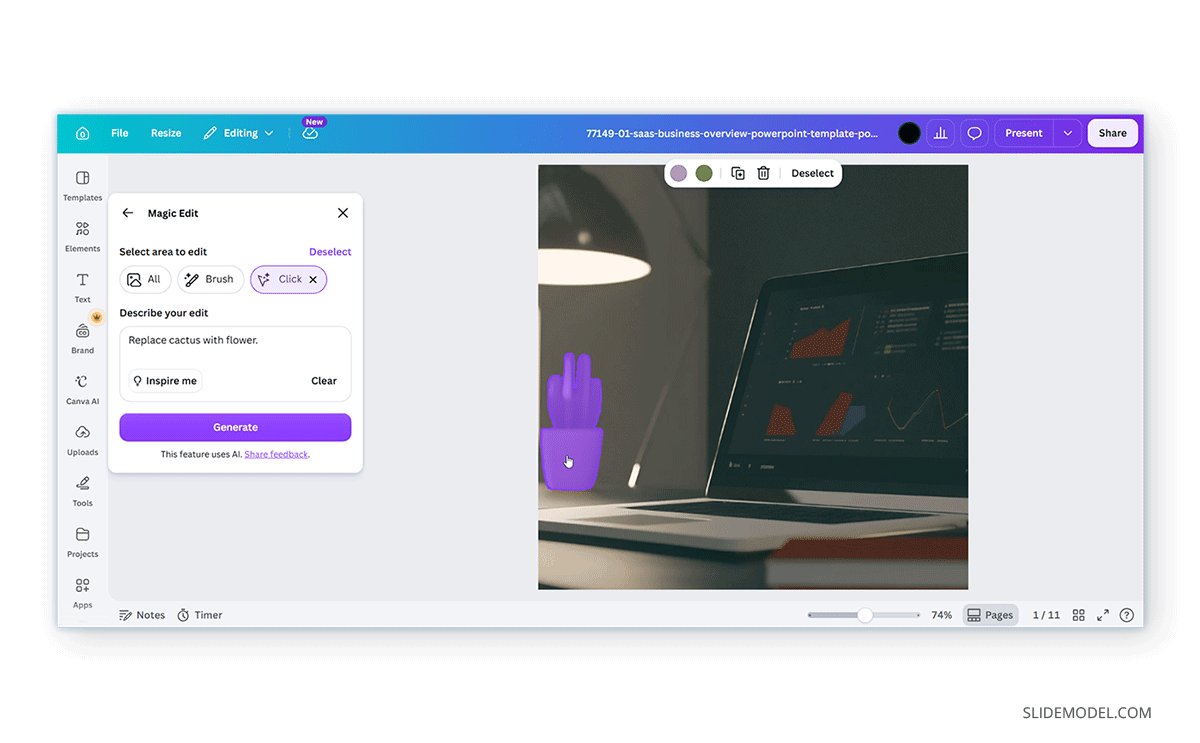
Canva also includes AI-powered image reimagining tools. Magic Edit allows users to select a specific area of an image and modify it using a text prompt, whereas Magic Expand can extend an image beyond its original boundaries. Image to Video can transform a static image into a short animated sequence, while BG Generator can create entirely new backgrounds based on AI-generated content.
Applying Filters and Effects
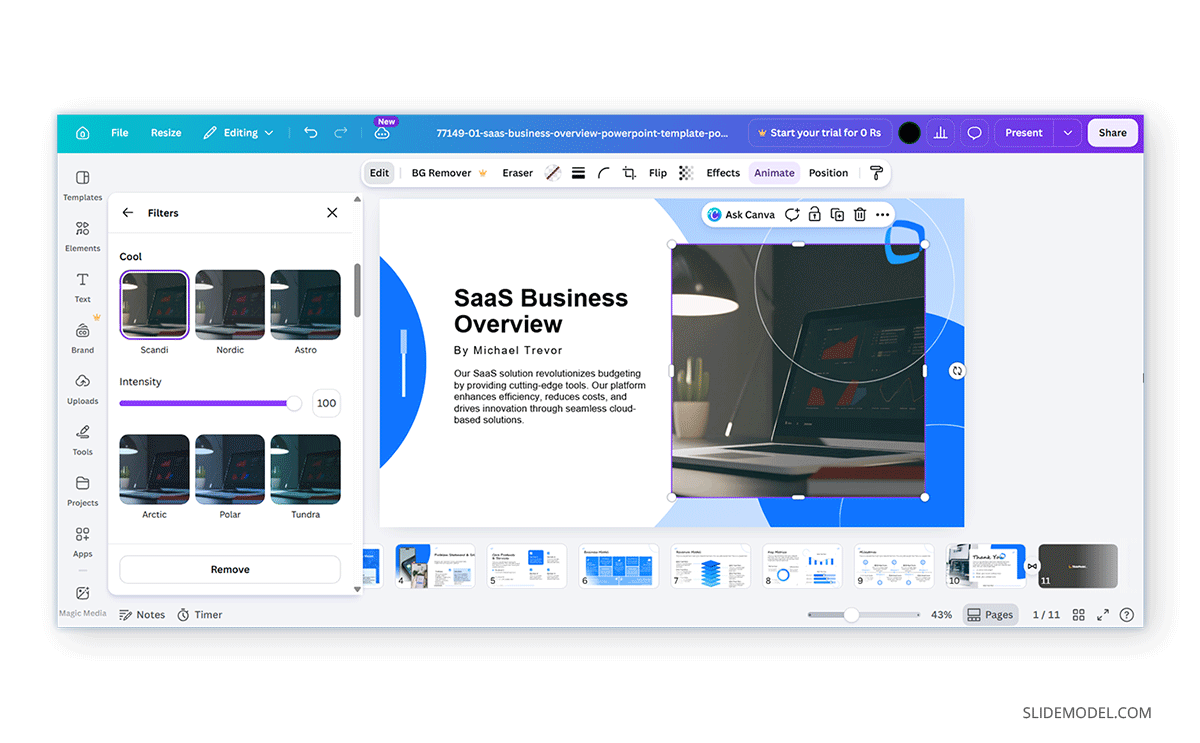
One of the quickest ways to change the appearance of an image is by applying a filter. Filters adjust multiple image properties at once, allowing you to create a consistent visual style across several slides. For example, a presentation that uses photos from different sources may benefit from applying the same filter to all images to create a more unified look.
Canva also includes a variety of visual effects that can dramatically alter an image’s appearance. Depending on the available features, you may find options to blur backgrounds, create artistic effects, soften images, or apply stylistic treatments designed for social media and presentation graphics. While effects can add visual interest, it is generally a good idea to use them selectively. In professional presentations, subtle adjustments often look more polished than heavily edited images.
Cropping and Resizing Images
Not every image arrives in the correct size or composition for a slide layout. Cropping allows you to remove unwanted areas of an image and focus attention on the most important content. Canva makes this process straightforward by allowing users to drag crop handles and adjust the visible portion of an image directly on the canvas.
Resizing is equally useful when adapting images to different slide layouts. An image that works well as a full-slide background may need to be reduced in size when used alongside charts, text boxes, or diagrams. Careful cropping and resizing can often improve a slide more than applying filters or effects.

Removing Backgrounds
One of Canva’s most popular image-editing features is the Background Remover. Located under the Enhance menu, Canva provides a handy background removal tool to quickly make image backgrounds transparent. Instead of manually cutting out subjects in external software, Canva can automatically separate a subject from its background with just a few clicks. This can be useful when creating profile slides, product showcases, promotional materials, or custom graphics. Once the background has been removed, the subject can be placed over different colors, images, or presentation layouts without the distraction of the original background. Since background removal relies on automated processing, it is still worth reviewing the results carefully and making refinements when necessary.
Using Transparency in Canva
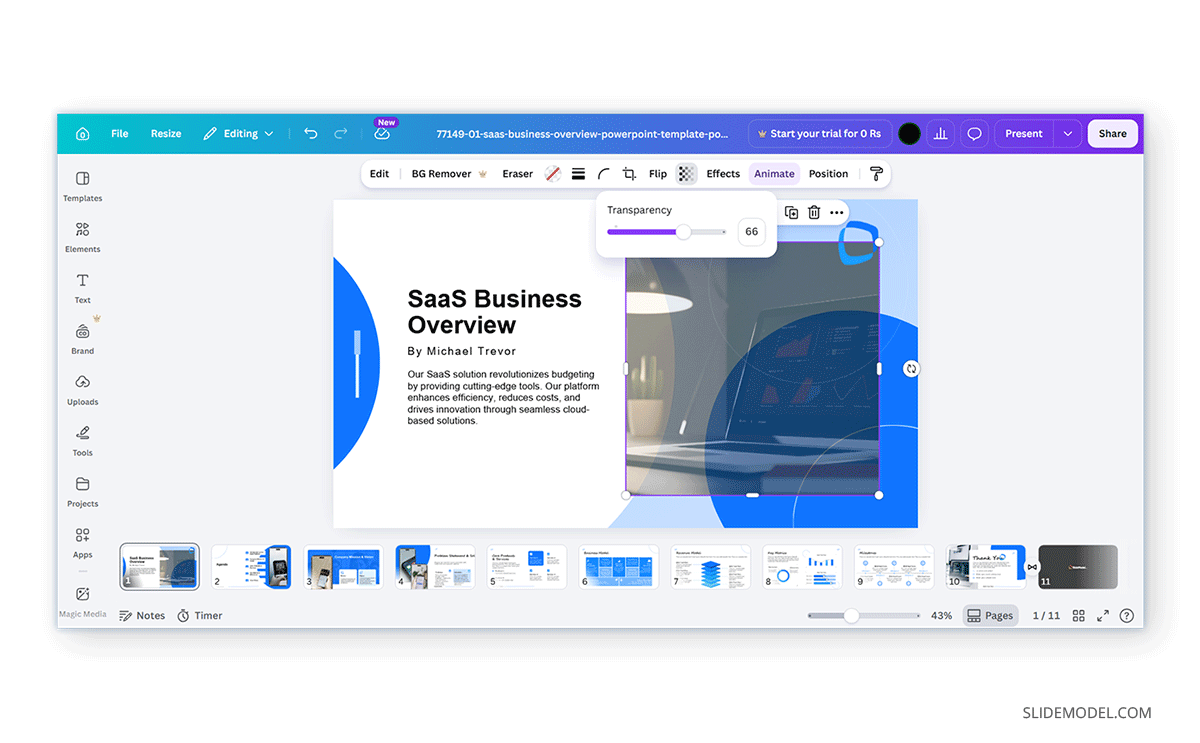
Transparency is one of the most useful image-editing features available in Canva presentations. By reducing an image’s opacity, you can create subtle backgrounds that support slide content without competing for attention. Transparency is often used when placing text over photographs, adding watermark-style graphics, or creating layered design effects. To adjust transparency, select the image and choose the transparency option from the toolbar. Moving the slider lets you adjust the image’s visibility.
Canva Style Match Feature
Canva’s Style Match feature can apply visual styles to an image based on a selected reference style. Depending on the available options, users can transform images with artistic looks, creative effects, or stylized treatments that align with a particular design aesthetic. This can be useful when creating presentations that require a consistent visual style across multiple images. Some examples of available styles include scrapbook, watercolor, cartoon, doodle, sketch, line art, chrome, pixel art, clay, plush, marble, and 3D art.

Downloading an Edited Image from Canva
Common image export formats include PNG, JPG, SVG (for supported graphics), and GIF. If the edited image remains part of a presentation or design, Canva also supports exporting entire projects as PDFs, PPTX files, or MP4 files.
To download an edited image, select the image or design, choose the Share or Download option, and select the preferred file format. If the image includes transparency, PNG is often the preferred format, as it supports transparent backgrounds. JPG files may be more suitable when smaller file sizes are required. Before exporting, it is worth checking image quality settings to ensure the downloaded file meets your requirements.
Common Issues and Fixes
While Canva image editing is generally straightforward, users occasionally encounter challenges.
Image Appears Blurry
An image may appear blurry if the original file resolution is too low or the image is stretched beyond normal.
Fix: In such cases, replacing the source image with a higher-quality version usually produces better results than applying additional enhancements. If you are unable to find a better resolution, you might want to avoid stretching the image too much or generate an enhanced version of it using AI tools (if the image is not copyright-protected).
Filters Look Too Strong
Sometimes effects or filters may appear too strong after they are applied.
Fix: Rather than removing the effect entirely, reducing the intensity often produces a more natural appearance.
Legibility Issues
Users may notice that text is difficult to read in Canva.
Fix: If this occurs, adjusting opacity levels or adding a subtle overlay behind the text can improve readability.
Image Appears Distorted
Certain effects, cropping adjustments, AI editing tools, or resizing actions can occasionally make an image look stretched, compressed, or visually unbalanced.
Fix: Select the image and use Canva’s Reset option to remove recent edits. You can also review crop settings, aspect ratio, and applied effects to restore the image’s original appearance.
Background Removal Errors
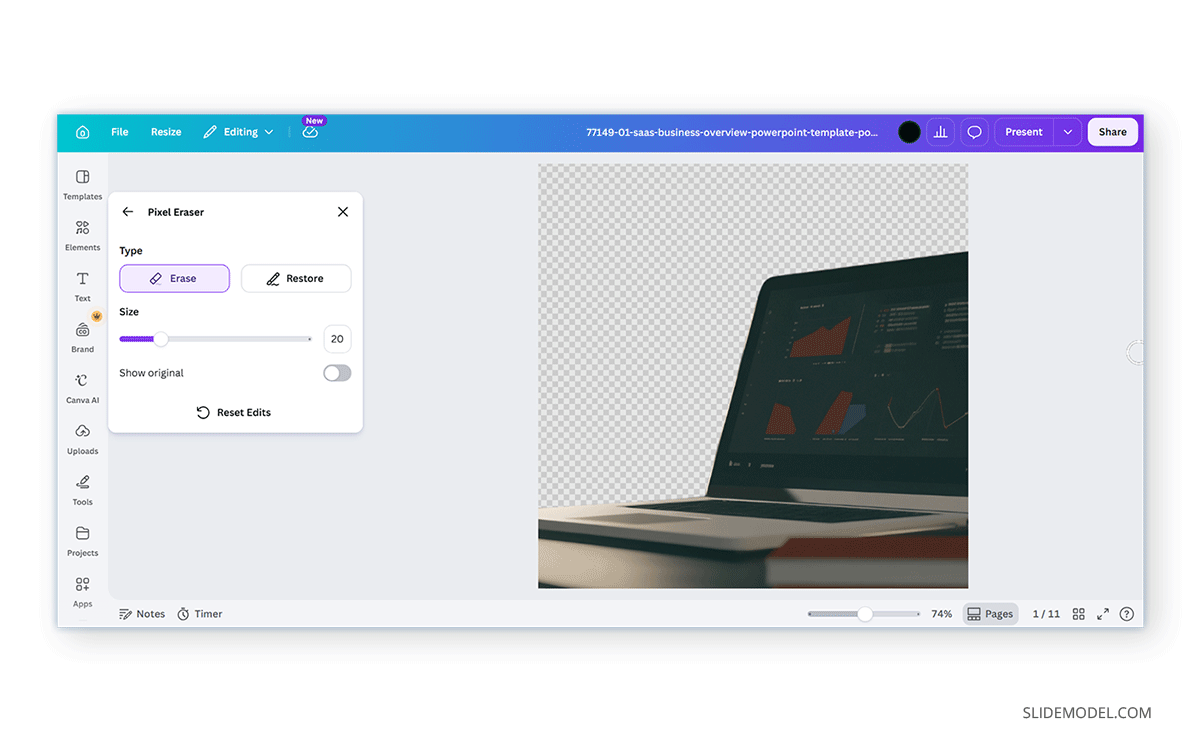
Canva’s Background Remover may occasionally remove parts of the subject or leave unwanted background elements behind, especially when working with complex images, fine details, or low-contrast subjects.
Fix: Use the Restore and Erase brushes in the Background Remover tool to manually refine the selection. If the image contains intricate details such as hair, transparent objects, or overlapping elements, making small adjustments can often improve the final result.
Final Words
Once you learn how to edit an image in Canva, it can help you create more refined presentations without relying on separate photo-editing software. Whether you need to crop a photo, adjust colors, apply effects, remove a background, or work with transparency, Canva provides a range of tools that you can use directly in the presentation editor.
The most effective image edits are often the least noticeable. Small adjustments to brightness, contrast, composition, and transparency can improve visual quality while keeping the audience focused on the message.