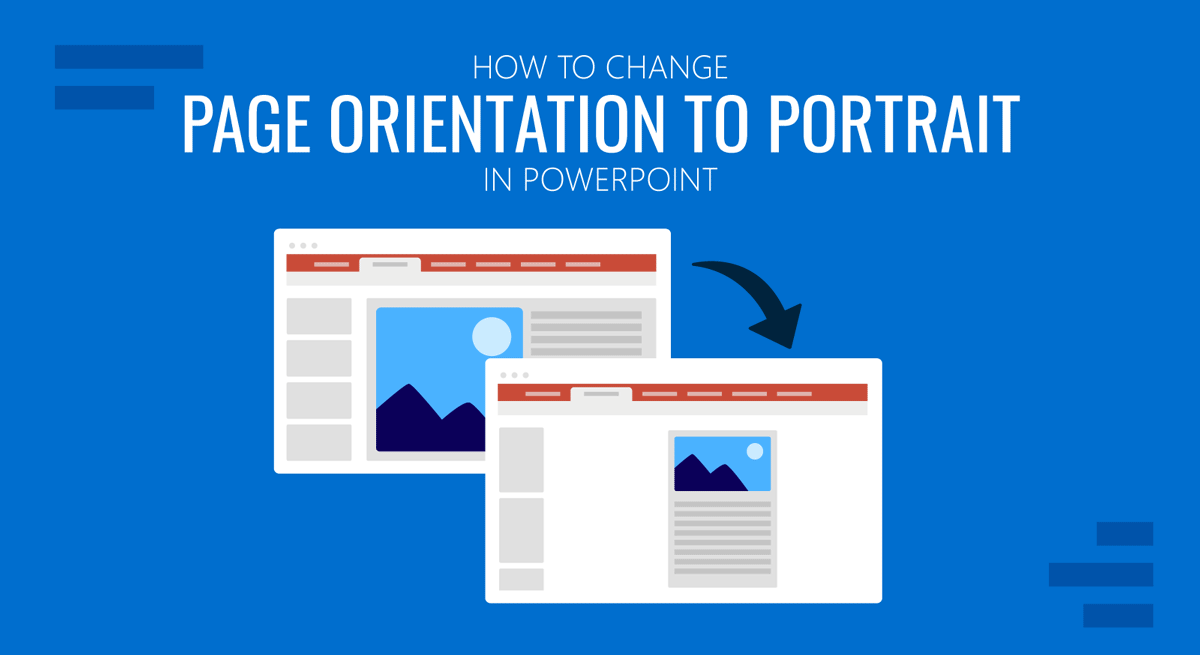
The page orientation in a presentation slide, also known as the PowerPoint portrait orientation, is the way in which the rectangular slide is oriented for normal viewing while presenting. The two most common types of orientation are portrait and landscape and these are the two formats available in Microsoft PowerPoint.
In PowerPoint, it is very easy to change the page orientation from landscape to portrait or vice versa. Here we will show you how to change PowerPoint to portrait and modify the slide orientation so you can use a portrait layout format instead of the default landscape style.
Table of Contents:
- Why Change Slide Orientation in PowerPoint?
- Benefits of Portrait Orientation
- How To Make PowerPoint Portrait by Changing the Page Orientation?
- How to Change Slide Orientation in PowerPoint
- How to Change Slide Orientation in PowerPoint 2011 for Mac
- Applying Portrait Orientation to Templates
Why Change Slide Orientation in PowerPoint?
When it comes to creating a compelling PowerPoint presentation, choosing the right slide orientation is more important than you might think. The default landscape orientation is suitable for many scenarios, but there are situations where switching to portrait orientation, like how to change to portrait in PowerPoint, can greatly enhance your presentation’s effectiveness.
- Focus on Vertical Content: Portrait orientation is particularly useful when your content is more vertically oriented. For example, if you’re showcasing a series of tall images, vertical charts, or lengthy textual content, portrait orientation ensures that your audience can see the entire content without excessive horizontal scrolling.
- Print-Friendly: Portrait orientation aligns well with standard paper sizes. So, if you intend to print your slides or create handouts, portrait orientation allows for a seamless transition from digital to printed materials.
- Emphasize Storytelling: Portrait orientation encourages a more storytelling-friendly layout. It can be ideal for sequential storytelling, timelines, or presentations with a clear top-to-bottom flow.
- Mobile and Tablet Compatibility: With the rise of mobile devices, portrait orientation works well for presentations viewed on smartphones and tablets. This ensures your content is easily readable, even on smaller screens.
Benefits of Portrait Orientation
Switching to portrait orientation offers several advantages that can help you create more engaging and visually appealing PowerPoint presentations:
- Enhanced Readability: Portrait orientation allows for larger text and graphics, making your content more readable, especially from a distance.
- Visual Impact: It provides a unique, eye-catching format that can captivate your audience and make your presentation stand out.
- Improved Aesthetics: Certain types of content, such as tall images and vertical infographics, look more aesthetically pleasing in portrait orientation.
- Storytelling and Sequencing: Portrait orientation encourages a storytelling approach, enabling you to present information in a more structured and sequential manner.
- Print and Handout Compatibility: If you plan to distribute handouts or print your slides, portrait orientation ensures a seamless transition from digital to physical formats.
How To Make PowerPoint Portrait by Changing the Page Orientation?
You can change the slide orientation in Microsoft PowerPoint by using a special setting in the PowerPoint Ribbon, under Slide Size option. This option will help to change landscape to portrait in PPT, and it can also be used to change PowerPoint slide dimensions to a different format or Aspect Ratio (learn more about PowerPoint slide size here).
Follow the following steps to change the landscape orientation to portrait orientation in PowerPoint. If you use Google Slides, you can make your Google Slides presentation vertical here.
1. Open the PowerPoint presentation and then click on the Design tab at the top menu.
2. Then click the Slide Size menu button located at the right side of the toolbar.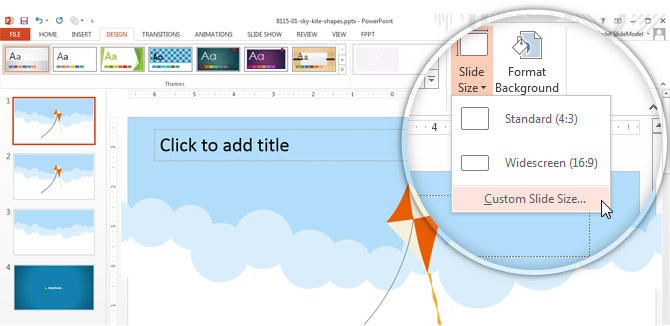
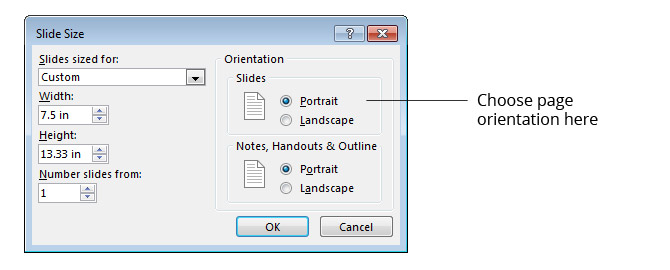
3. Click the Custom Slide Size… option to open the Slide Size dialog box. Here you can choose the Slide Size properties. You can select a preset, i.e. if you want to change from the Normal layout size (On-screen Show 4:3) to Widescreen (16:9) presentation layouts, width, and height. You can also change the value to number slides from, as well as orientation options either for Slides as well as Notes, Handouts & Outline
How to make slides Portrait in PowerPoint
4. To change the slide orientation from PPT landscape to portrait, just select the Portrait option by checking the corresponding radio button. This process demonstrates how to change a PPT to a portrait in a straightforward manner.
5. A new dialog box will appear, this time asking what to do while scaling to a new slide size. Here you can choose to maximize the visible area or Ensure Fit to scale it down and ensure the new design will fit on the new slide format.
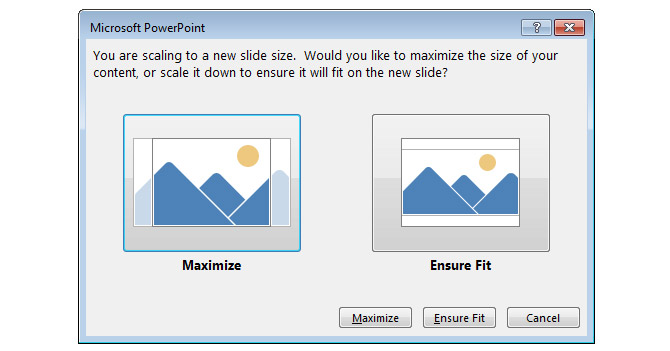
- Maximize: This option lets you take advantage of the entire slide dimension to cover the slide with the current content.
- Ensure Fit: This option will scale the current content down to ensure it will fit on the new slide. Depending on your design, by choosing this option you may find two empty bars at the top or bottom of the slide as displayed in the thumbnail examples shown below.
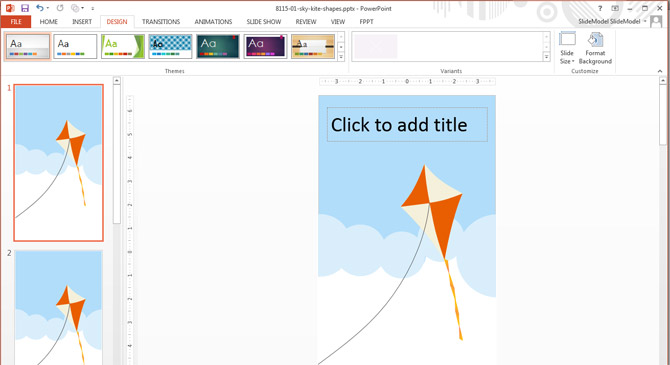
Finally, here we can see the new orientation applied to the PowerPoint presentation. The following screenshot shows our Kite PPT template adjusted to a portrait format in PowerPoint and ready to be used to design a flyer or eye-catching brochures in PowerPoint.
Did you know? The portrait word definition comes from the fact that a close-up portrait of a person’s face and upper body is more fitting for a canvas or photo where the height of the display area is greater than the width, and is more common for the pages of books. Landscape originally described artistic outdoor scenes where a wide view area is needed, but the upper part of the painting would be mostly sky and so is omitted. [source: Wikipedia]
How to Change Slide Orientation in PowerPoint
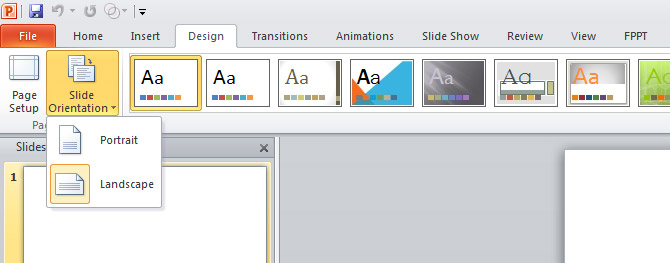
In Microsoft PowerPoint 2010 you can also change the slide orientation. This option is located in the Design menu under the Page Setup section as shown in the screenshot below.
How to Change Slide Orientation in PowerPoint 2011 for Mac
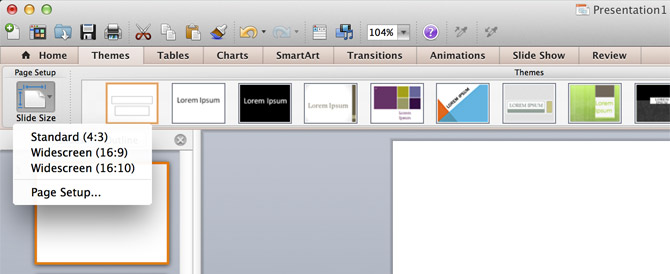
If you are using Mac instead of Windows, then you can also change the slide orientation in Microsoft PowerPoint 2011. In this case, the Page Setup option is located under the Themes menu.
1. Go to the Themes menu and click on the Slide Size button.
2. Then, click Page Setup…
3. Now choose the new slide orientation as shown in the following screenshot.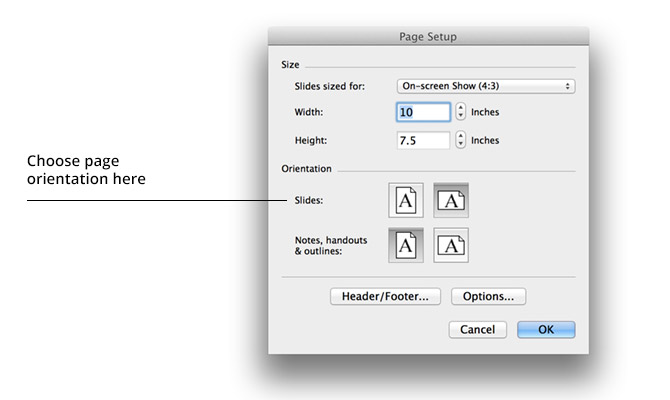
Applying Portrait Orientation to Templates
Applying portrait orientation to PowerPoint templates is a simple process that can add a fresh and unique touch to your presentations. Here’s how you can do it:
- Open a Blank Presentation: Start with a blank PowerPoint presentation or the one you wish to modify.
- Design Tab: Click on the “Design” tab at the top menu to access the design options.
- Slide Size Menu: Next, click on the “Slide Size” menu button located on the right side of the toolbar. This menu allows you to adjust the slide size and orientation.
- Custom Slide Size: Choose the “Custom Slide Size” option to open the Slide Size dialog box. Here, you can customize the slide size properties to suit your needs.
- Select Portrait Orientation: To change from PowerPoint landscape to portrait, check the radio button for “Portrait” under the “Slides” section.
- Scaling Options: You will be prompted with a dialog box asking how you’d like to scale your content to fit the new slide size. Choose between “Maximize” or “Ensure Fit” depending on your design preferences.
By applying portrait orientation to templates, you can create visually striking presentations that are tailored to your content and audience, ensuring that your message is delivered effectively and memorably.
By using a different slide orientation format in PowerPoint you can control how the slide will be displayed either while presenting or while designing a PowerPoint presentation that you plan to print later. For example, this can be very useful if you want to design a flyer, a poster for a University, or even a restaurant menu from Microsoft PowerPoint.
FAQs
How do I change the slide orientation in PowerPoint?
To change the slide orientation to portrait:
– Go to the Design tab in the PowerPoint Ribbon.
– Click on Slide Size on the right side of the toolbar.
– Select Custom Slide Size.
– Choose Portrait under the “Slides” section.
– Select Maximize or Ensure Fit when prompted.
What is the difference between ‘Maximize’ and ‘Ensure Fit’?
Maximize: Uses the entire slide space but may crop or distort content.
Ensure Fit: Scales content to fit within the new dimensions, potentially leaving empty space.
Why should I use portrait orientation in PowerPoint?
Portrait orientation is useful for:
– Vertical content like tall images or infographics.
– Printing flyers, posters, or handouts.
– Presentations viewed on mobile or tablet screens.
– Emphasizing sequential storytelling with top-to-bottom flow.
Can I apply portrait orientation to specific slides only?
No, PowerPoint applies orientation changes to all slides in the presentation. However, you can create separate presentations with different orientations and merge them as needed.
How do I ensure my content doesn’t distort when changing orientation?
Choose Ensure Fit when prompted during orientation changes. This option scales your content proportionally to fit the new slide dimensions.
Resources