Recording your presentation to create a video to share later, especially when the audience cannot attend live or when you want to practice your delivery before speaking in front of others, is easier to do than many presenters think. You can record directly in presentation software like PowerPoint, capture your slides and webcam with screen-recording software, or record your presentation separately and edit the footage afterward. For PowerPoint users, Cameo offers another option: placing the presenter’s live camera feed directly on the slide.
This guide explains how to record yourself presenting, how to use Cameo in PowerPoint, how to capture slides and webcam at the same time, and what to check before starting the final recording.
How to Record Yourself Presenting
Before choosing software, decide what the audience actually needs to see. A presentation for an internal project update may only require the slides, your webcam, and clear audio. However, a training video or client-facing presentation may need more careful framing, better lighting, and at least basic post-recording editing. If the purpose is rehearsal, the simplest recording method is usually enough because the goal is to review your own delivery rather than produce a finished video.
At a minimum, you need a presentation deck, a webcam or camera, a microphone, suitable lighting, and software that can record the presentation and your camera feed. This is all you need to record yourself giving a speech or a presentation.
The camera does not need to be expensive. In practice, poor audio is more distracting than average webcam quality, so check the microphone before worrying about upgrading the camera. It is also worth deciding whether you want the presenter video to appear as part of the slide design or simply as a webcam overlay. That choice determines whether PowerPoint Cameo or a screen recorder is the more natural workflow.
How to Use Cameo in PowerPoint
PowerPoint Cameo allows you to place a live camera feed directly on a slide. Instead of appearing in a separate recording window, the presenter becomes part of the slide layout. This is useful when the camera position needs to work with the design. For example, a presenter can appear beside a timeline, inside an unused corner of the slide, or within a consistent frame that repeats throughout the deck.
How to Insert Cameo in PowerPoint
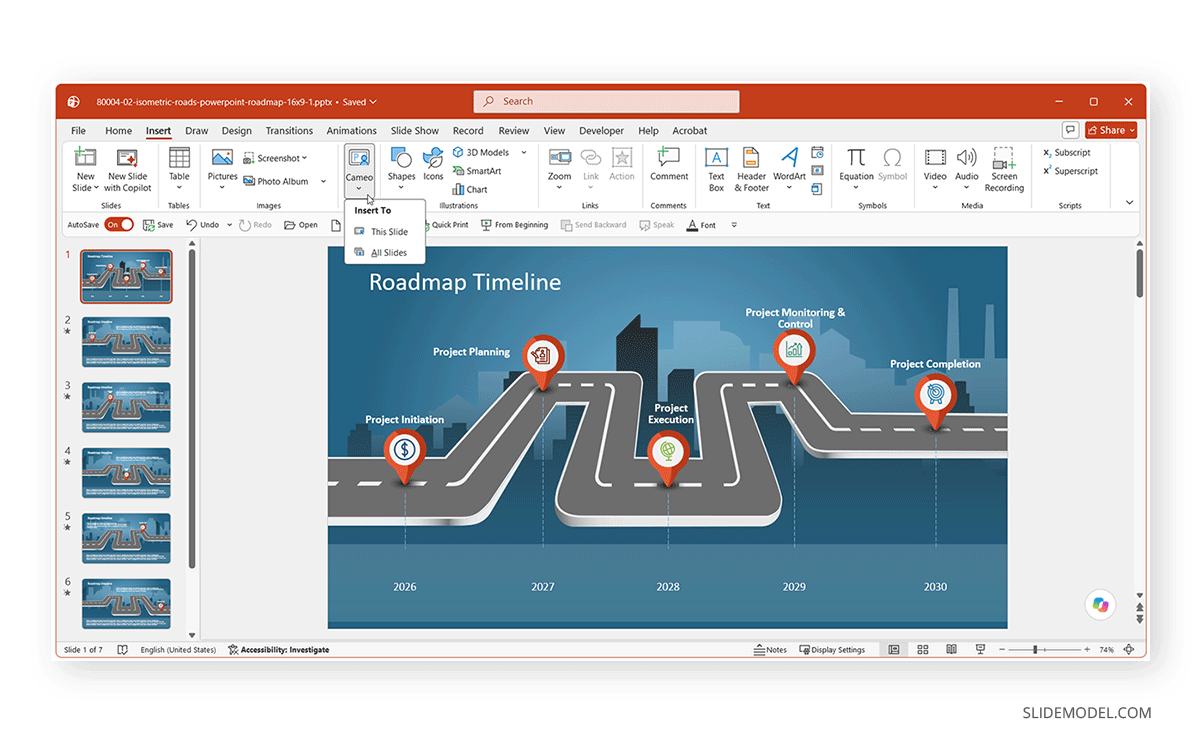
Step 1: Open the PowerPoint presentation you want to use Cameo with and go to Insert -> Cameo.
Step 2: Select whether you want Cameo to appear on the current slide or all slides.
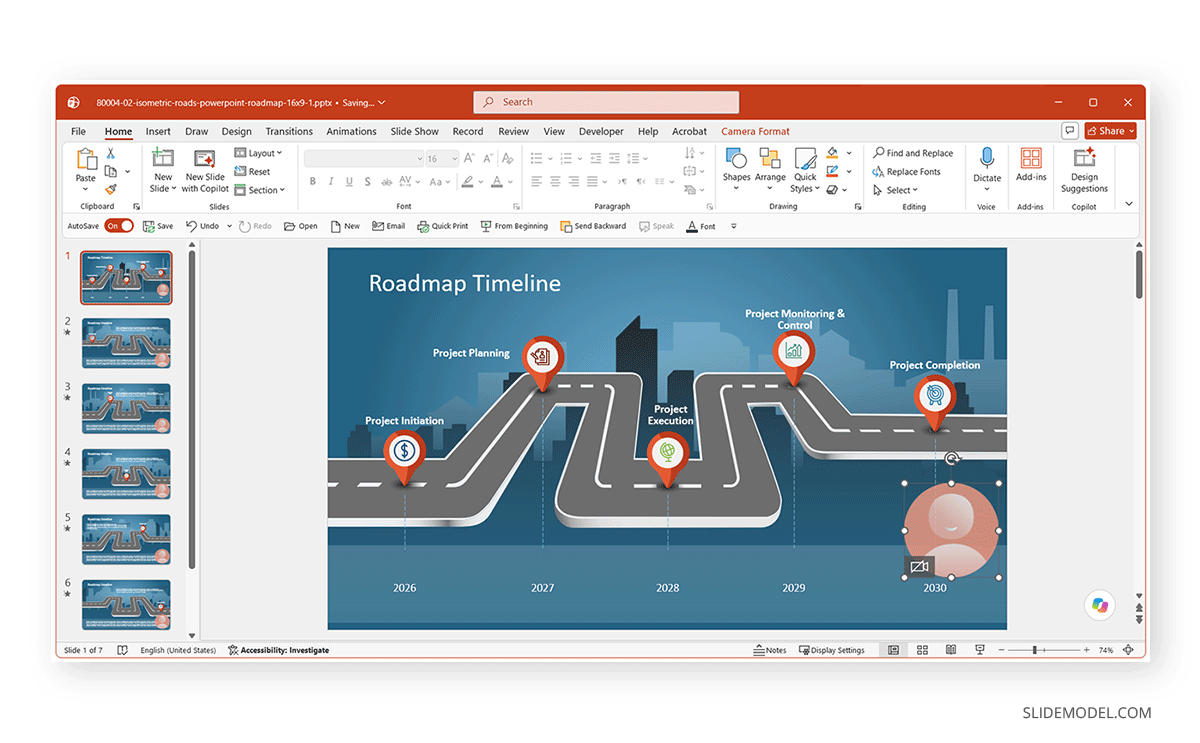
Step 3: After you insert it, Cameo displays a camera placeholder on the slide. Select the appropriate camera and preview how the feed will appear before recording.
How to Resize and Reposition the Cameo Frame
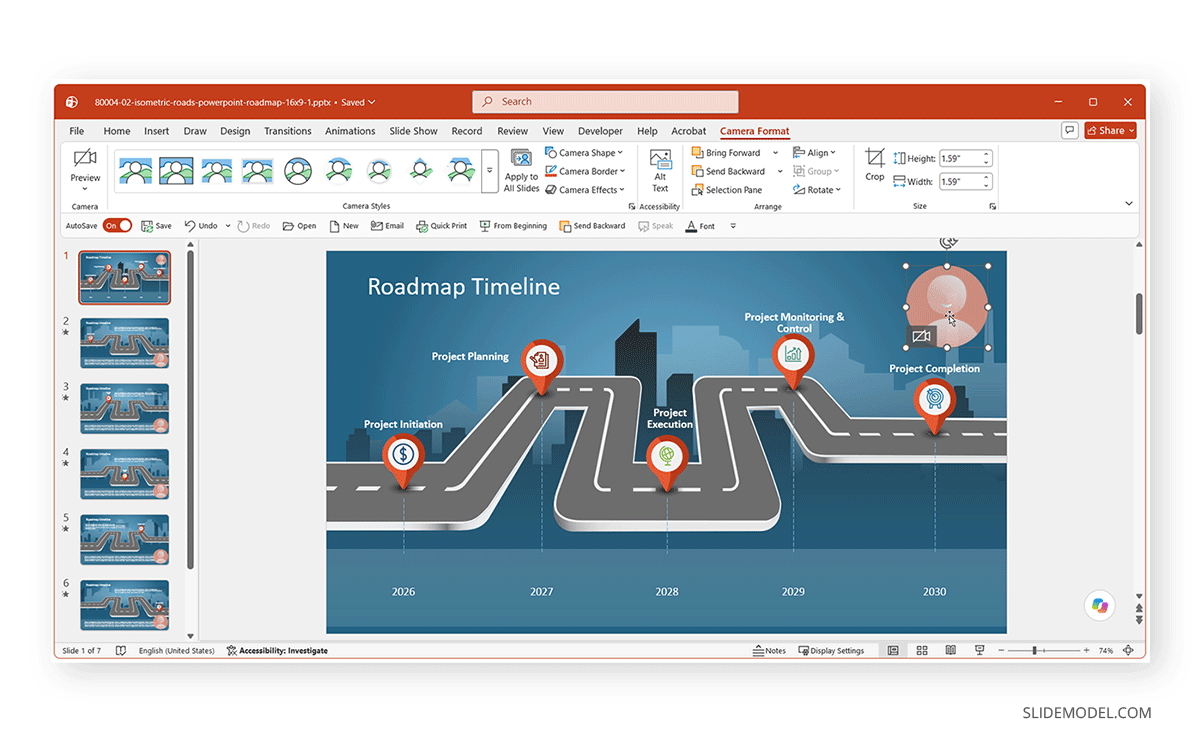
You can resize and move a Cameo object much like another visual object in PowerPoint. Drag the frame to the part of the slide where it does not interfere with text, charts, or other important content. You can also adjust its size depending on how prominent the presenter needs to be.
For a presentation where facial expression and delivery matter, such as a recorded interview or leadership message, a larger camera frame may make sense. For a data-heavy presentation, a smaller Cameo window may be enough.
How to Stylize the Cameo Frame
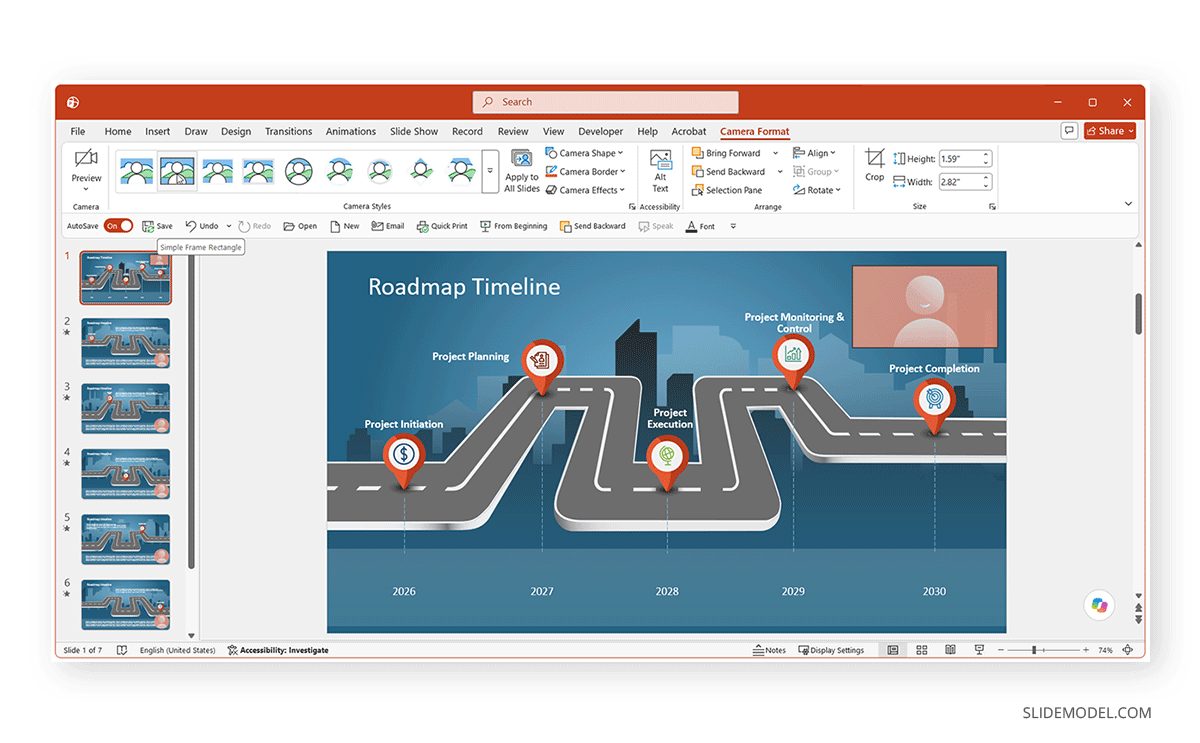
PowerPoint provides formatting options for Cameo, so the camera feed doesn’t have to remain a plain rectangular box. Depending on the version and interface you are using, you can apply available camera styles, shapes, borders, and other formatting options via the Camera Format tab after inserting Cameo into your slides. This lets you match the camera frame to the rest of the presentation rather than treating it as an unrelated overlay.
Use styling with restraint. A highly decorative frame may work for a creative presentation, but a simple shape and consistent placement will usually look more professional in corporate decks.
How to Record Yourself Talking Over PowerPoint Slides
Once Cameo is set up, you can use PowerPoint’s recording workflow to record yourself talking over PowerPoint slides. The goal is to capture the slide content, your voice, and your camera feed simultaneously.
Work through the presentation as you would during a live session. Advance slides normally, speak to the audience rather than reading every line on screen, and allow enough time for charts or diagrams to be understood before moving on. This is essentially how to practice a presentation by recording yourself when you need to assess your delivery.
Cameo works particularly well when the presenter needs to remain visible throughout the recording. This is different from a narration-only recording. If you only need voice-over and do not want to appear on camera, the standard PowerPoint recording workflow is simpler. For that approach, see our guide on how to record a presentation in PowerPoint.
Voice-Only Recording vs. Recording Yourself on Camera
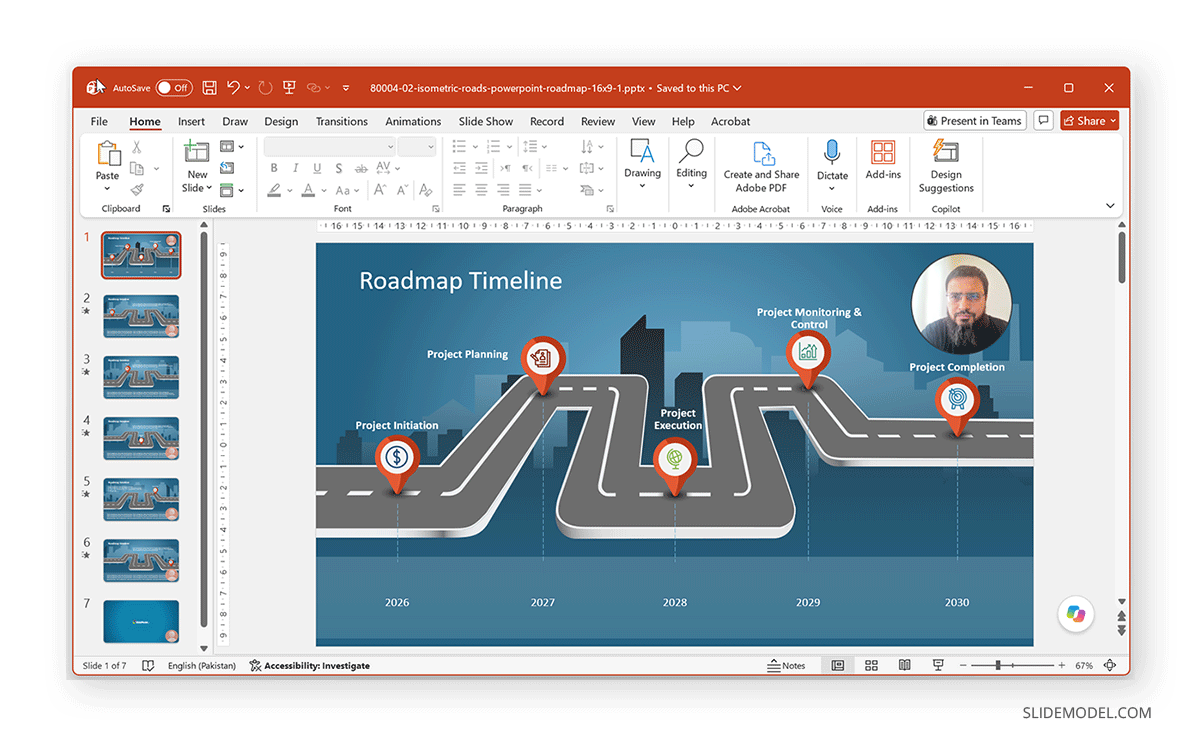
An on-camera presentation adds the presenter’s face to the recording. This can make the presentation feel more personal and is often useful for training, interviews, asynchronous updates, or presentations where body language matters. Cameo goes one step further by making the camera feed part of the PowerPoint slide itself.
A voice-only recording captures the slides and your narration, but your face does not appear on screen. In current versions of PowerPoint, you usually do this through the Record tab rather than a separate Narrate option. Choose Record -> From Beginning or Record -> From Current Slide, keep the microphone enabled, and turn the camera off. PowerPoint will record your voice and slide timings as you move through the presentation.
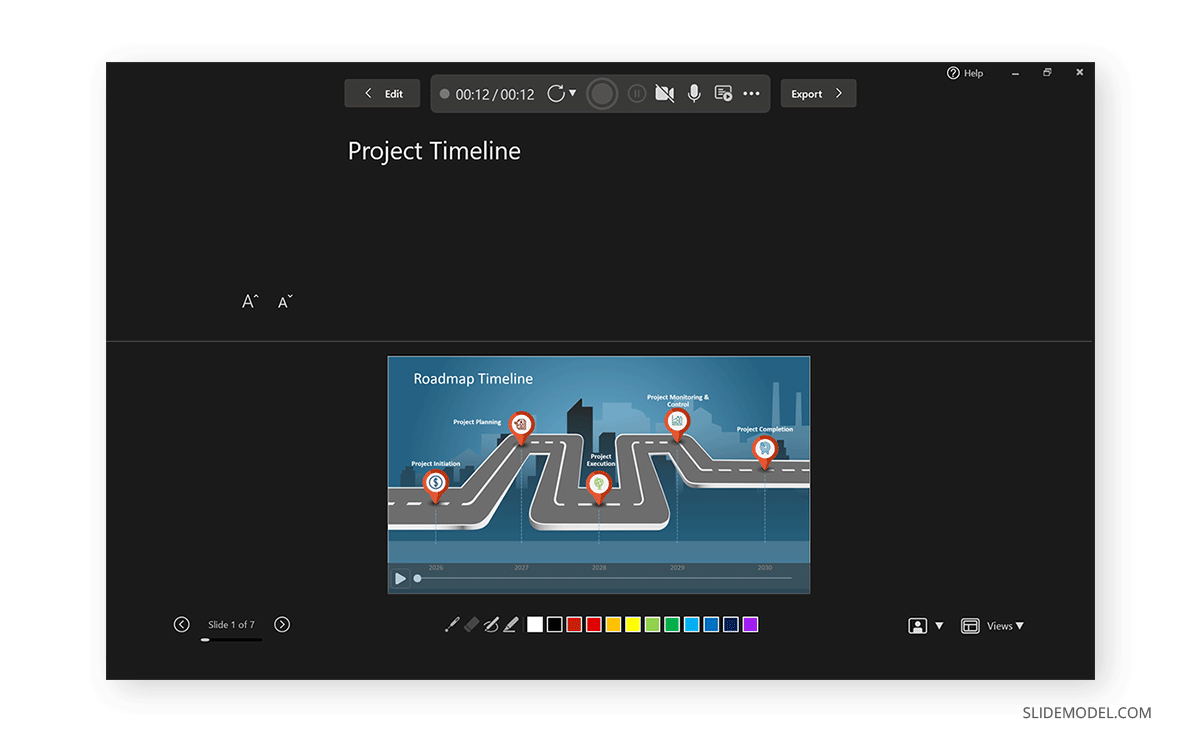
With recording enabled, you can turn on the camera to add a webcam feed while narrating slides. Keep both the microphone and camera enabled, then present the slides while recording. With PowerPoint Cameo, you can place the camera feed directly on the slide and resize or style it as part of the layout.
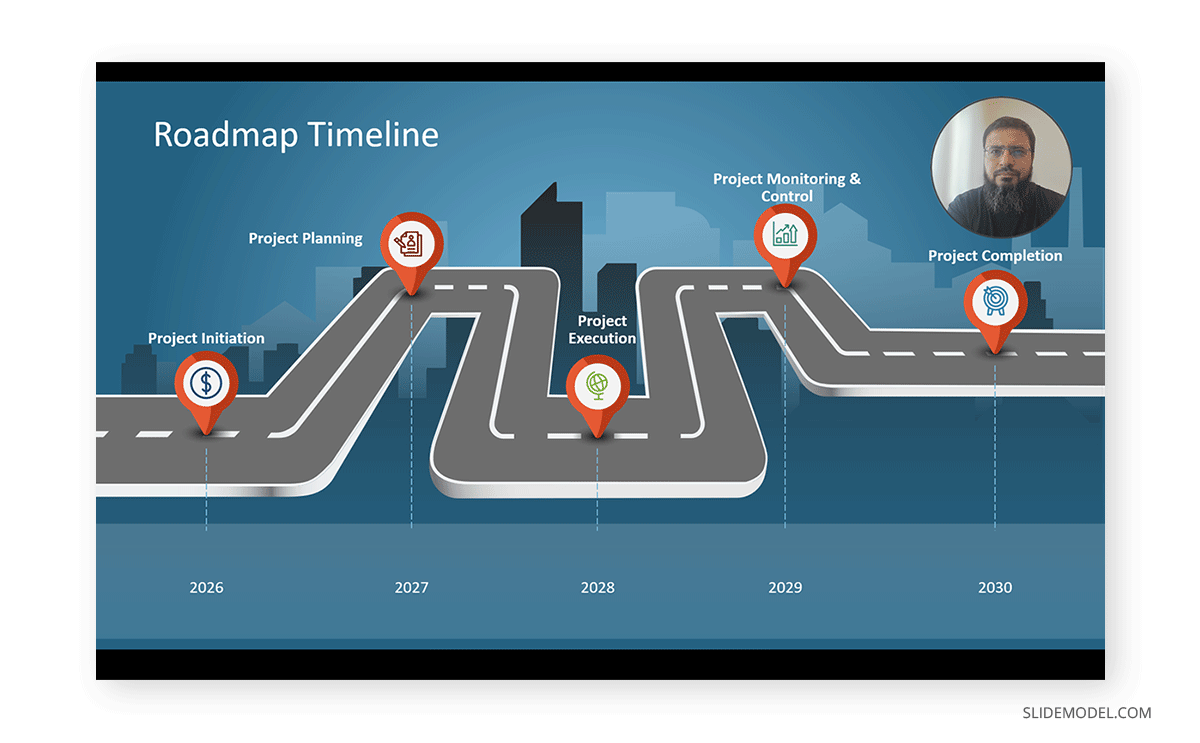
Different Options to Record Presentation with Voice and Video
If you do not need the camera feed built into the slide design, a screen recorder is often the simpler option. Tools such as OBS Studio, Loom, Camtasia, ScreenPal, Flashback Express, and others can capture the presentation window, microphone, and webcam feed at the same time.
Software to Record Yourself Giving a Presentation
Many tools can help you record yourself giving a presentation. Below is a list of some popular tools that you can use to record yourself presenting slides.
PowerPoint: With built-in recording options accessible via the Record tab, PowerPoint is a good choice when the deck is already built there, and you want an integrated workflow. Cameo is particularly useful when the presenter should appear as part of the slide design. The Cameo feature in PowerPoint works on both Windows and Mac OS.
OBS Studio: If you’re looking for free video recording software, OBS Studio provides a comprehensive set of tools that give more control over screen capture, webcam placement, audio sources, and recording layout than conventional tools. While OBS Studio is quite flexible, the setup is less beginner-friendly than simpler tools. OBS Studio is an open-source software available for Windows, Mac, and Linux, with features suited for both video recording and live streaming.
Loom: Better suited to quick business updates, walkthroughs, and asynchronous presentations where speed matters more than detailed editing, Loom is a screen recorder for Windows, Mac, iOS, and Android, with a Chrome extension also available for browser-based recording. It offers basic features for free, with a paid version that provides more advanced features.
Camtasia: Camtasia is useful when you want to record slides and your webcam together and then edit afterward, such as cutting mistakes, adding captions, or adjusting the final video. It is available for both Windows and Mac and offers comprehensive video recording and editing features.
ScreenPal: The free plan lets you record your screen and do basic editing, including recordings of up to 15 minutes at a time. Paid plans add unlimited recording, more editing tools, captions, AI features, and other options.
Flashback Express: Commonly used for tutorials and presentations on PC, Flashback Express offers free screen recording with webcam input, plus editing features to manage your recorded video.
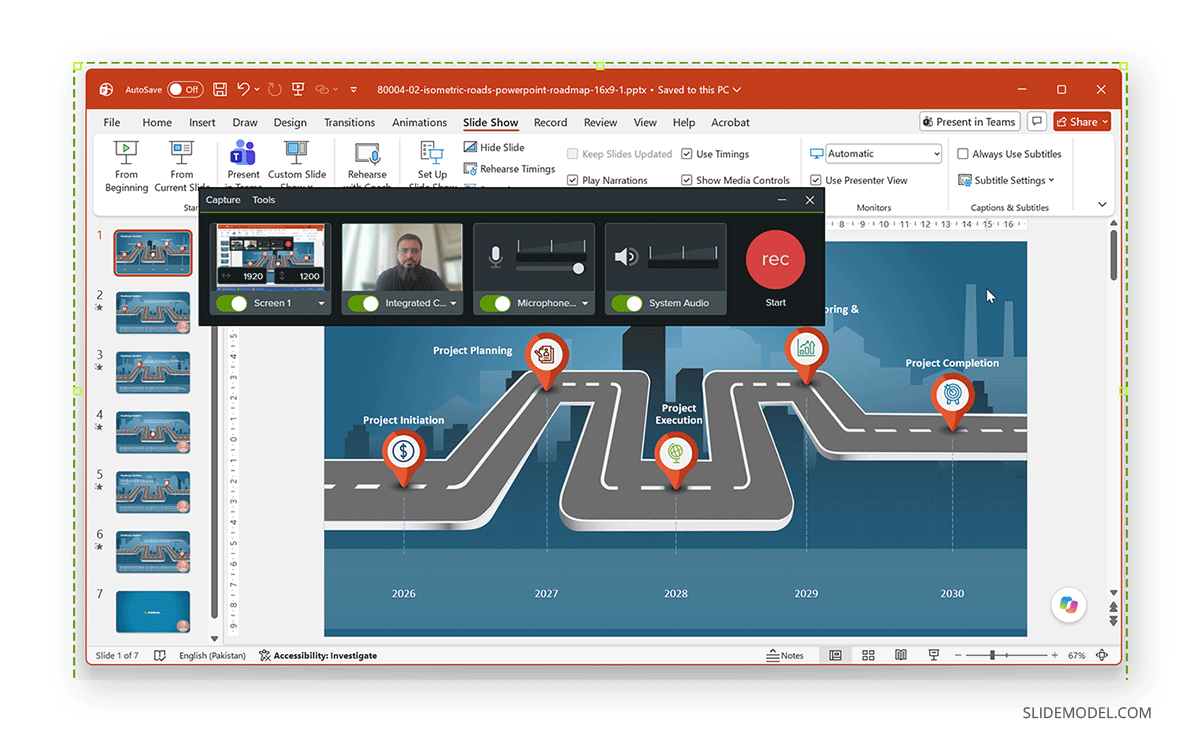
Best Way to Record a Presentation Video
For client presentations, training, or interviews, focus more on framing, audio, and visual consistency. Cameo works well when you want the presenter integrated into the slide design, while dedicated video software is better for polished recordings that need editing.
For rehearsal, production quality matters much less. A simple webcam or presentation recording is enough to identify pacing issues, weak transitions, and distracting delivery habits.
Camera Framing, Lighting, and Audio
Good setup matters as much as the recording software.
Camera Framing: Position the camera near eye level and frame the head and shoulders clearly. If your webcam appears as a small overlay, use tighter framing so facial expressions remain visible.
Lighting: Keep the main light source in front of you or slightly to one side. Avoid a bright window directly behind you.
Audio: Select the correct microphone and record a short sample. Clear audio is generally more important than perfect webcam quality.
Test Recording: Before recording the full presentation, make a 20-30 second test to check framing, lighting, microphone level, slide visibility, and whether the webcam covers important content.
Common Uses for Recorded Presentations
Recorded presentations can serve very different purposes, so the recording method should match the situation.
Asynchronous Team Updates
For internal updates, recorded presentations allow colleagues to review information when convenient instead of scheduling another meeting. This works well for project updates, progress reports, or short management briefings where clarity matters more than production quality.
Training and Onboarding
A recorded presentation can be reused across teams, departments, or onboarding sessions. This makes it useful for explaining standard processes, introducing policies, or delivering recurring training without repeating the same live session each time.
Coursework and Academic Presentations
Students may be asked to submit recorded presentations that include both slides and on-camera delivery. In this case, the recording also demonstrates presentation skills, such as pacing, confidence, and the ability to explain information clearly.
Interviews and Assessment Exercises
Some recruitment and assessment processes require candidates to record a presentation or speech. These recordings can help demonstrate subject knowledge, communication ability, and how effectively the presenter structures and delivers an argument.
Rehearsing for a Live Presentation
You can also use recording yourself purely as a practice tool. Watching the playback makes it easier to identify problems with timing, transitions, body language, or speaking pace before presenting to a live audience.
Final Words
Several ways to record yourself giving a presentation exist, and the best choice depends on how much control you need over the final result. If you already use PowerPoint and want the presenter incorporated into the slide design, Cameo is a practical option. If you simply need to capture slides, webcam, and voice together, a screen recorder is usually more flexible.
Dedicated video software becomes more useful when the finished recording needs substantial editing. Whichever method you choose, the recording setup matters just as much as the software. Good framing, clear lighting, reliable audio, and a short test run can prevent most of the problems that make recorded presentations look or sound less professional.