Text added in PowerPoint slides can often appear out of place and might need adjustment. If you want to wrap text in PowerPoint in a text box or slide element like an image, there are different methods to align your text properly.
How to Wrap Text in a Text Box in PowerPoint
To wrap in a PowerPoint text box, you can use the various alignment options via the Home tab, such as justifying the text to align it. Furthermore, you can also drag and drop the text box to adjust the text in your custom designs or PowerPoint templates.
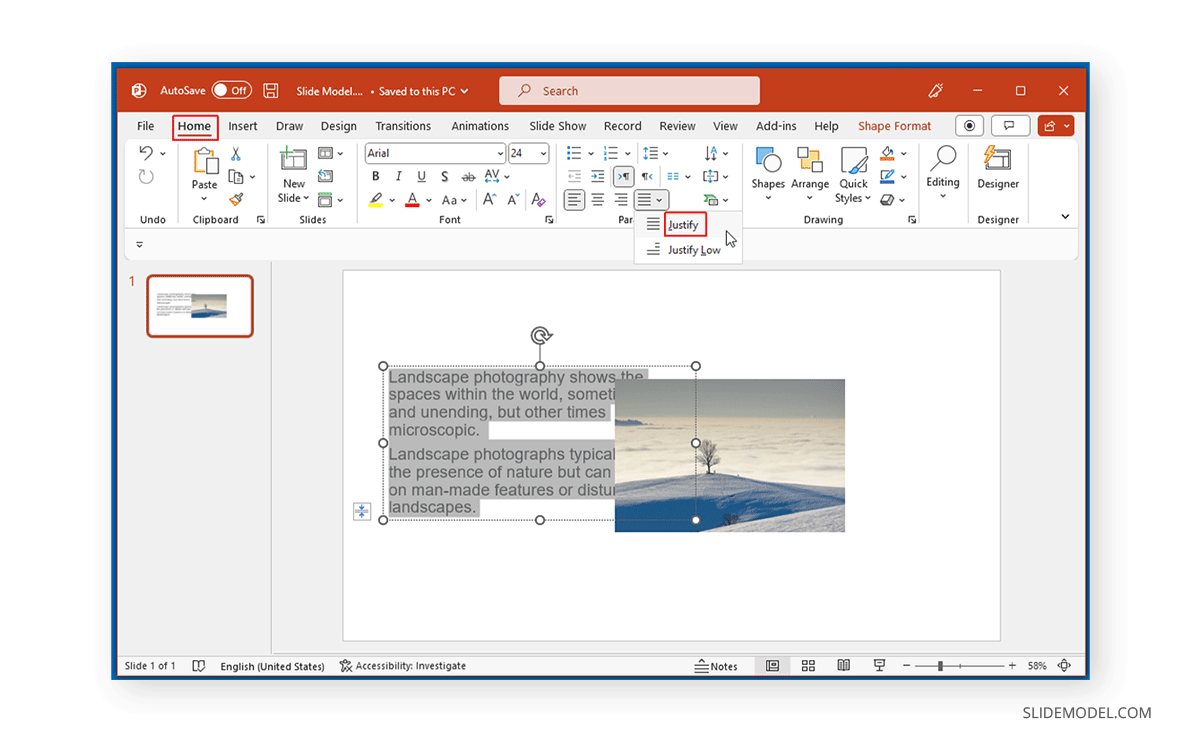
If your text appears out of place, go to the Home tab and use the alignment options via the Paragraph menu. The most common option to use here is Justify to align text properly.
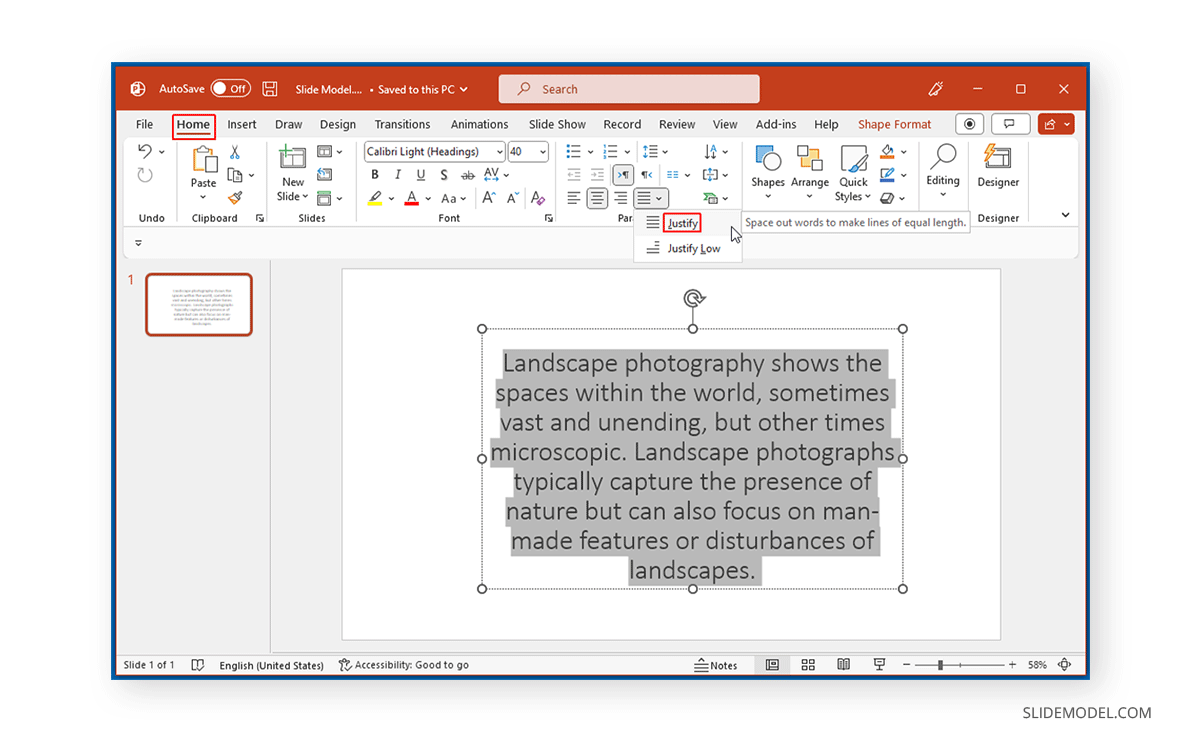
Below is an example of text wrapped via Home -> Justify in PowerPoint.
How to Wrap Text Around an Image in PowerPoint
The most common reason for wrapping text in PowerPoint is to adjust an image to align it with the text. Images and text can often overlap, and it can be hard to adjust slide elements properly. In such a case, you can use alignment options or drag and drop to adjust your slide design.
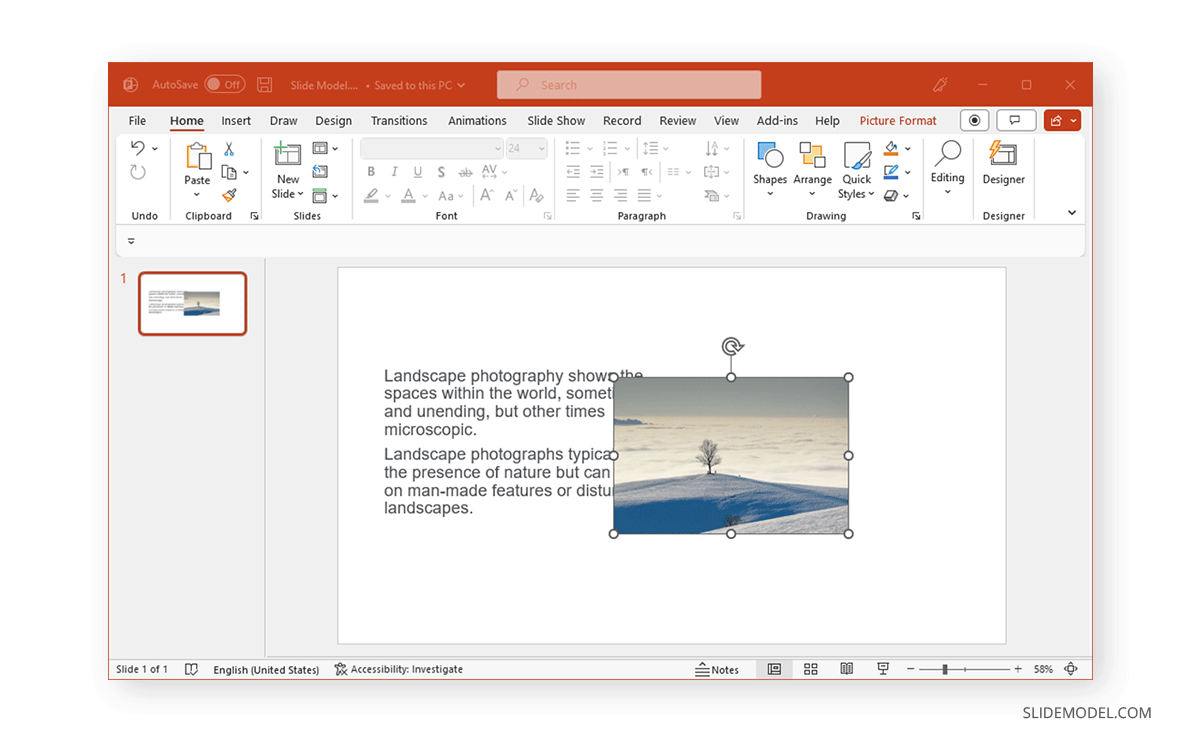
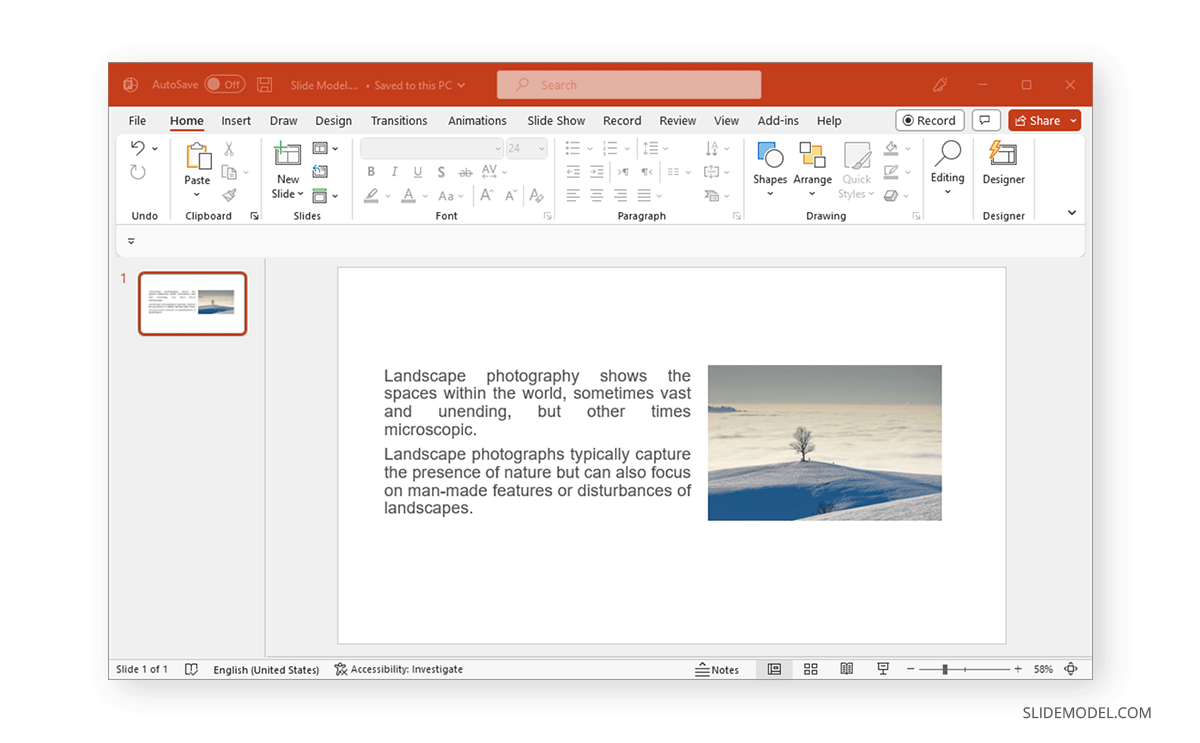
Justify to Wrap Text in PowerPoint Around an Image
Often, using Justify or other alignment options (Right, Left, or Center) via the Home tab is sufficient to wrap text around an image in PowerPoint. However, you can also drag and drop slide objects for further adjustment.
The below image shows text wrapped alongside an image in PowerPoint.
Drag and Drop to Wrap Text Around an Image in PowerPoint
Another method to neatly wrap your text around an image in PowerPoint is to use one or more text boxes and drag them around the image. You can drag the text boxes and image(s) to look properly aligned. The text can also be justified to give it a neat look.

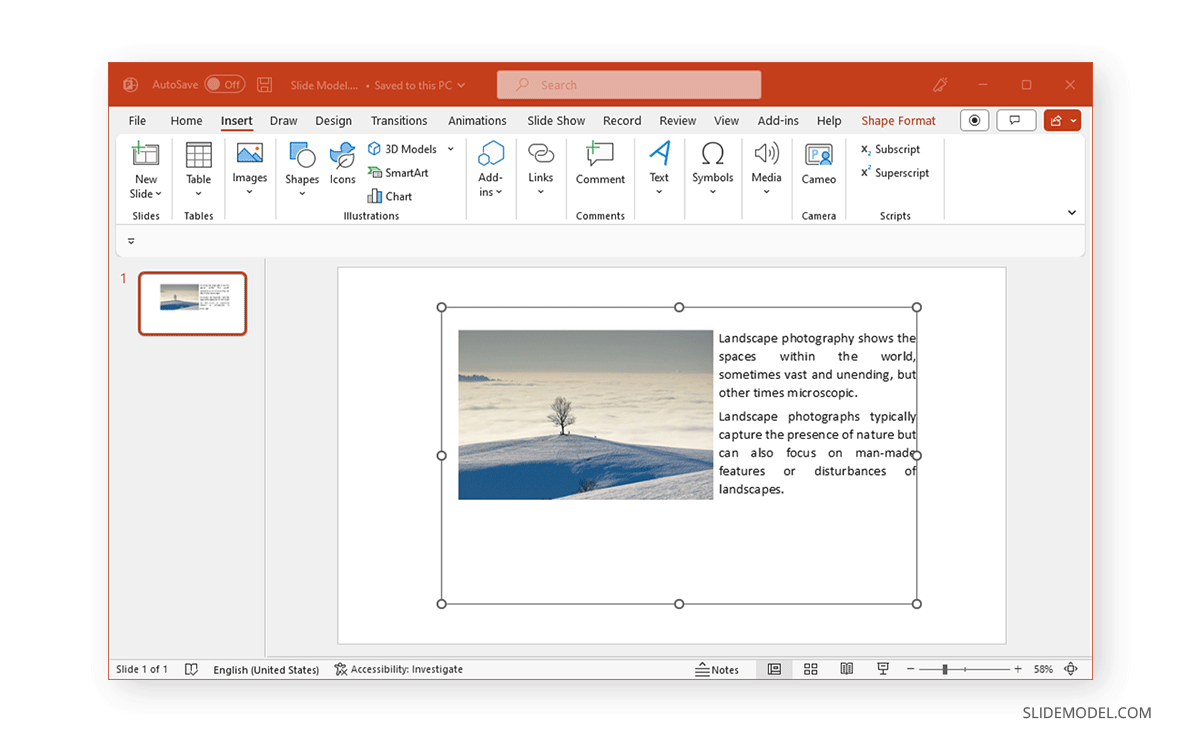
Insert Wrapped Text Around an Image from Word in PowerPoint
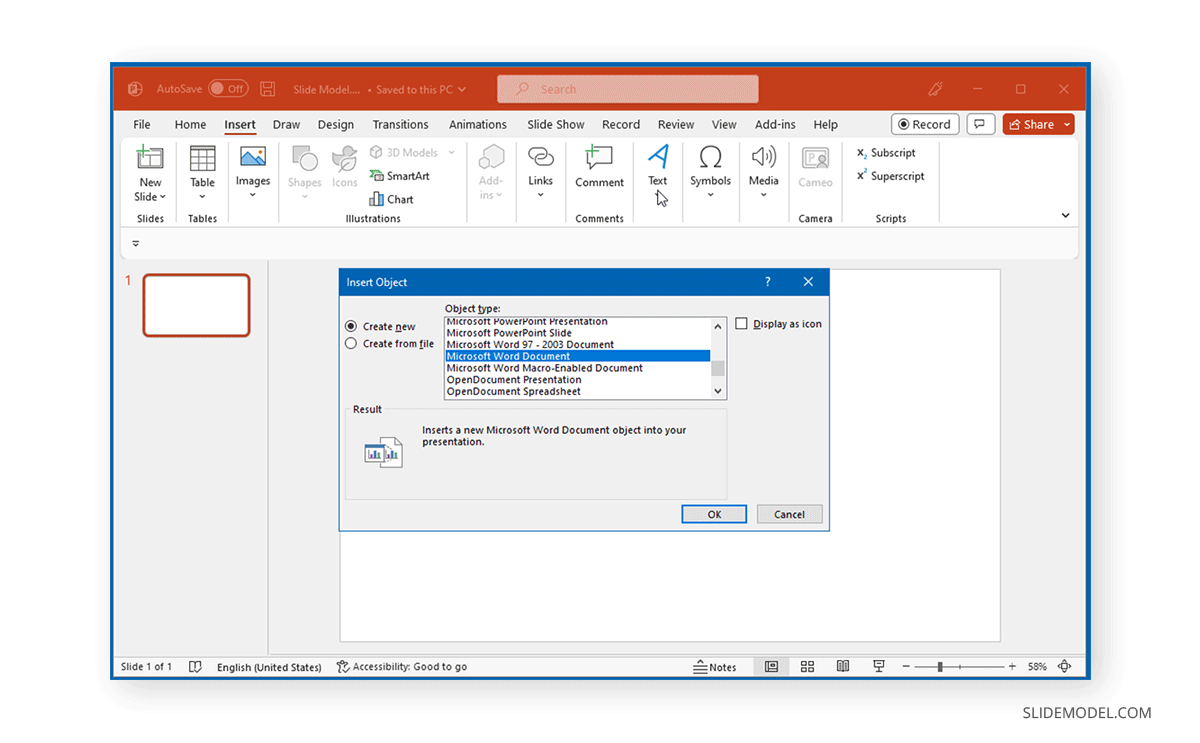
If PowerPoint seems a bit too complex to wrap text, you can use Word to do the job for you and import your wrapped text aligned with an image to PowerPoint. To do this, go to Insert -> Text -> Object.
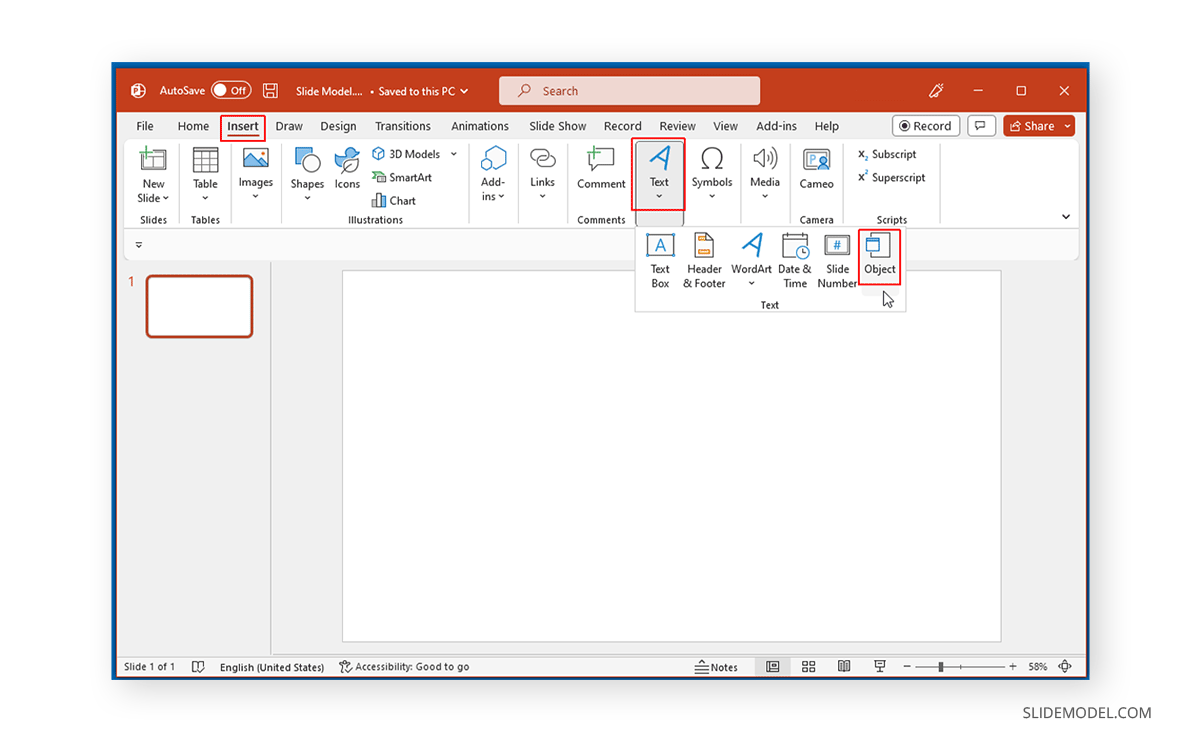
From the dialog box, scroll down, select Microsoft Word Document from the list, and click OK.
This will open a Word document to add and adjust content. Insert your image and text in the document and align it using Wrap Text from the Insert tab. Try various layouts, such as Tight, to adjust your text and image. Close the Word document.

Below is an example of text wrapped around an image created and imported from a Word document to PowerPoint as an object.
FAQs
How do I wrap text in a text box in PowerPoint?
To wrap text in a PowerPoint text box, use the alignment options available via the Home tab. You can justify the text for proper alignment. Additionally, you can drag and drop the text box to adjust the text in your custom designs or PowerPoint templates.
How can I justify text in PowerPoint?
Select the text box and go to the Home tab to justify text. In the Paragraph menu, click on the Justify option to align your text correctly.
Can I wrap text around an image in PowerPoint?
Yes, you can wrap text around an image in PowerPoint. Use alignment options like Justify, Right, Left, or Center from the Home tab, or drag and drop the text box and image to align them neatly.
What are the steps to wrap text around an image in PowerPoint?
– Insert your image and text box.
– Use the Justify alignment option from the Home tab.
– Drag and drop the text box and image to achieve the desired alignment.
– How do I wrap text using multiple text boxes in PowerPoint?
– You can wrap text around an image with one or more text boxes. Insert multiple text boxes around the image and adjust their positions by dragging and dropping them to align the text properly.
Can I use Word to wrap text and then import it to PowerPoint?
Yes, you can use Word to wrap text and then import it into PowerPoint. Insert a Word document into PowerPoint via Insert -> Text -> Object, align your text and image in Word before closing the document, and the wrapped text and image will appear in PowerPoint as an object.
How do I insert a wrapped text object from Word into PowerPoint?
– Go to Insert -> Text -> Object in PowerPoint.
– Select Microsoft Word Document from the list and click OK.
– Insert your image and text in the Word document, and use the Wrap Text option to adjust the layout.
– Close the Word document to see the wrapped text and image in PowerPoint.
What are the alignment options for wrapping text in PowerPoint?
PowerPoint provides alignment options to wrap text, such as Justify, Right, Left, and Center. These options can be accessed via the Home tab in the Paragraph menu.
How do I ensure text and images are neatly aligned in PowerPoint?
Use alignment options like Justify and drag and drop the text boxes and images to adjust their positions to ensure text and images are neatly aligned in PowerPoint. Experiment with different alignments until you achieve the desired look.
Is there an easy way to wrap text if I find PowerPoint complex?
If you find wrapping text in PowerPoint complex, you can use Word to wrap it and then insert it as an object in PowerPoint. This method might be more straightforward for users more familiar with text wrapping in Word.
Can I use these methods for readymade PowerPoint or Google Slides templates?
Yes, you can use the mentioned methods to wrap text in custom PowerPoint slide designs and readymade PowerPoint or Google Slides templates. The alignment options and text wrapping techniques work similarly across different templates.
Final Words
Wrapping text in PowerPoint can be done by aligning text, using Justify to adjust the text, and dragging and dropping slide elements. The alignment can be done using drag and drop to make your image and text look neatly aligned. If you’re comfortable using text wrapping in Word, inserting the wrapped text as an object in PowerPoint might be easy.
You can use the method mentioned above for custom PowerPoint slide designs and even readymade PowerPoint or Google Slides templates.