Track changes is a common feature in Microsoft Word that enables the user to Accept or Reject changes and modification requests. As you do in Word, you can track changes in PowerPoint as well. Let’s take a look at a few simple steps for using track changes in PowerPoint.
How to Use PowerPoint Track Changes
Unlike Microsoft Word, you can’t simply enable track changes and start making amendments to a PowerPoint template or presentation file you wish to check for changes. How to track changes in PPT presentations? To track changes in PPT, follow the steps mentioned below.
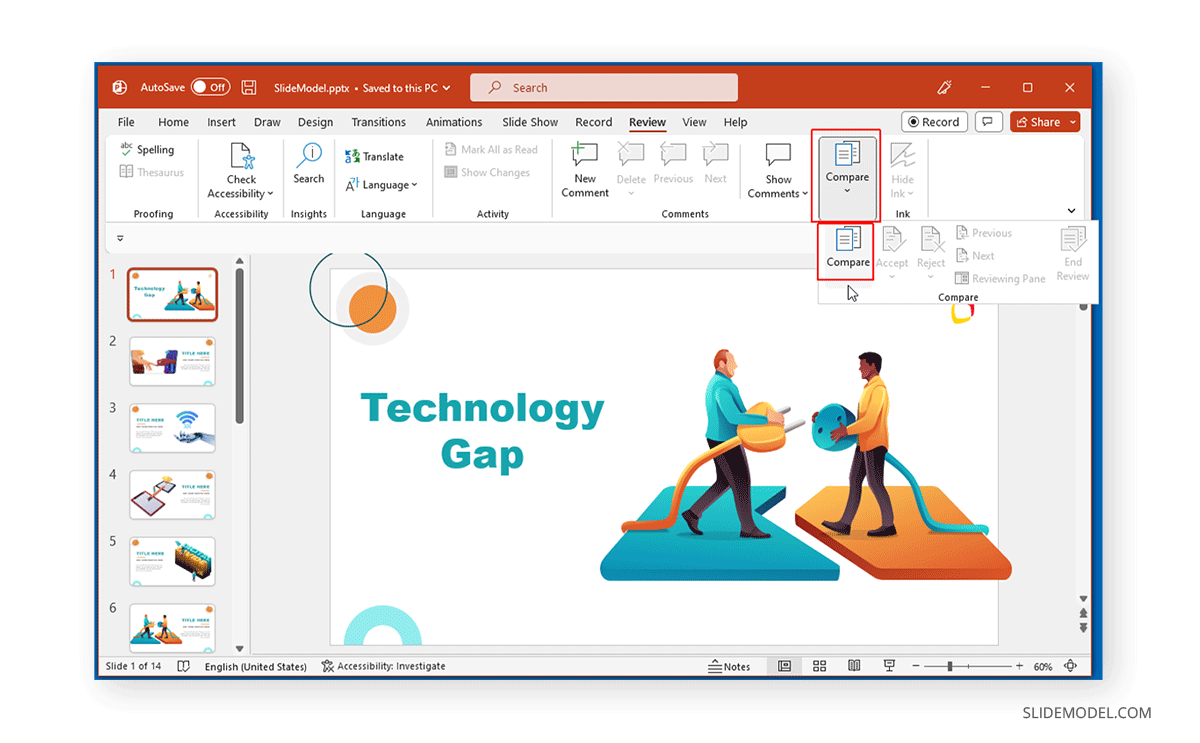
Step 1: Open and Compare a PowerPoint File with an Older Version
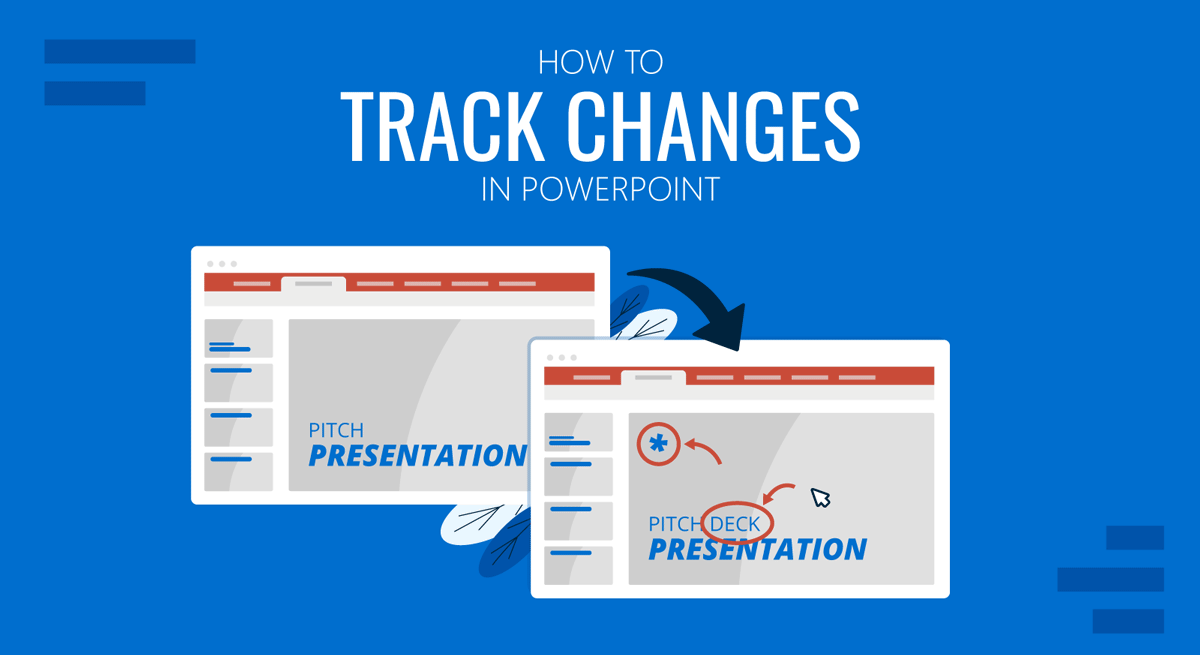
To start tracking changes in PowerPoint, select a different version of the file to make a comparison between the two files. For example, you might have shared a file with colleagues to make changes. Open the original file to compare it with the new one to check for changes made to the file. To do this, open a version of the PowerPoint file (e.g., an old version) and go to Review > Compare.
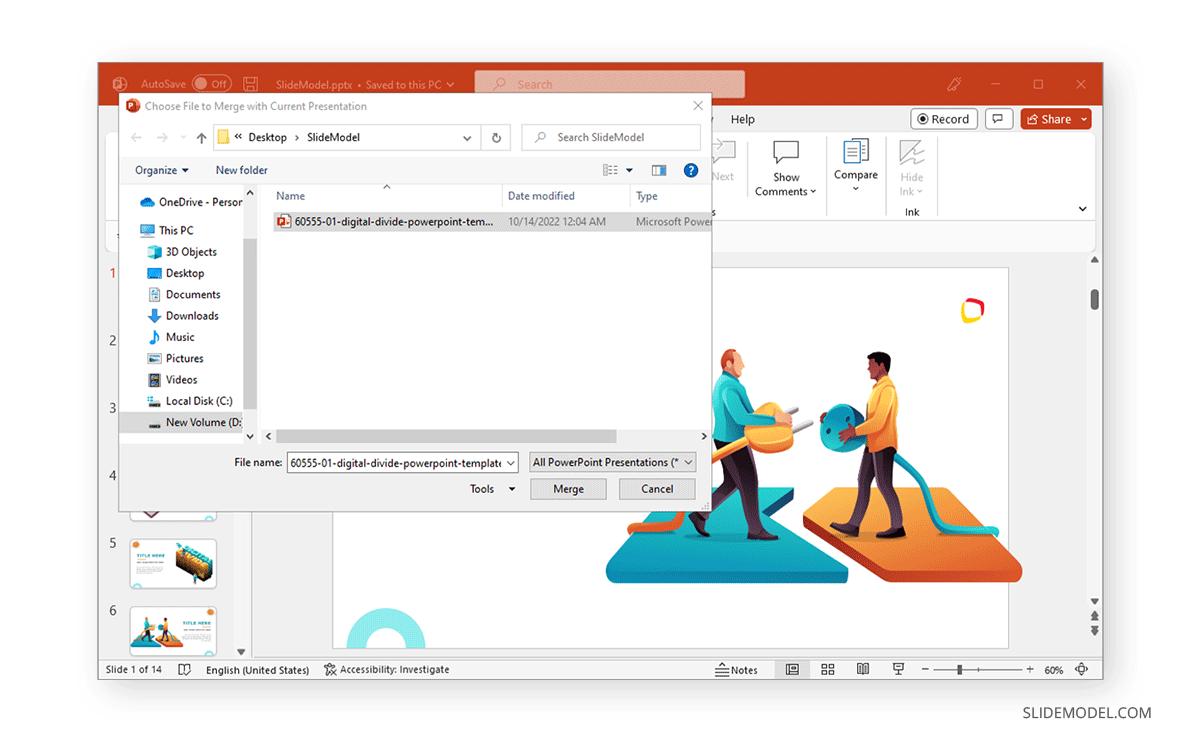
Now, open the same file with changes, such as the new file sent by your colleagues with additions, and select Merge.
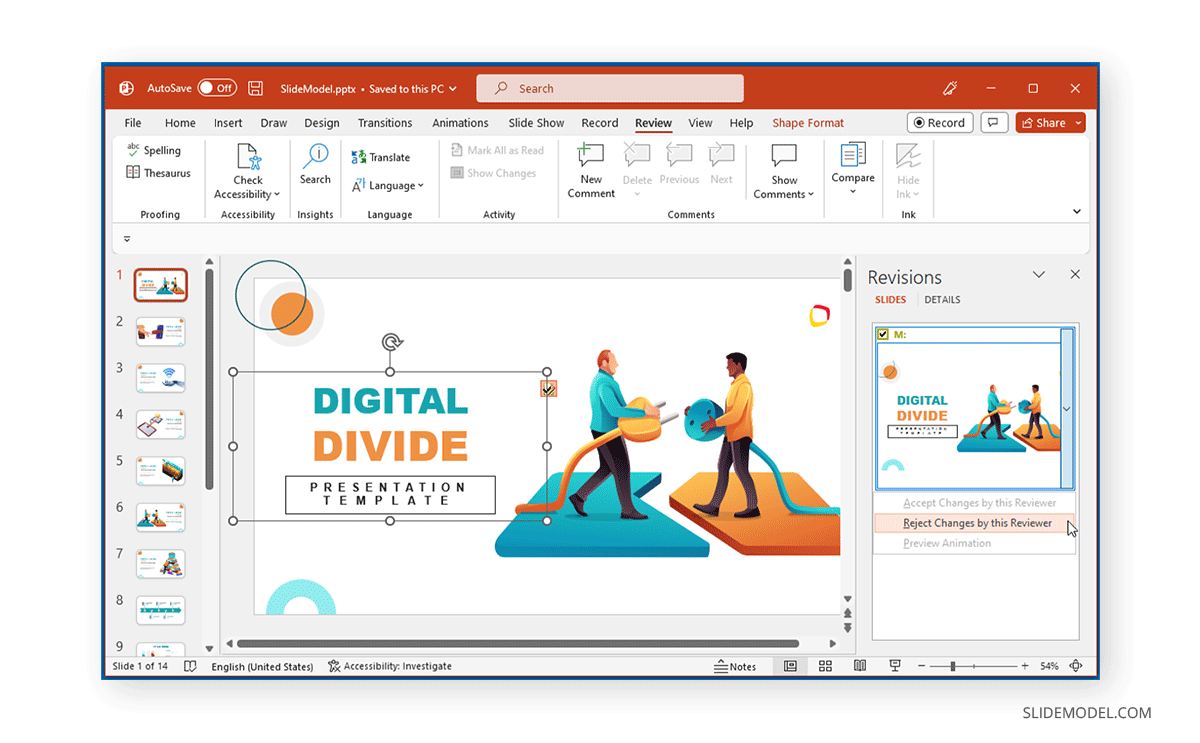
Step 2: Review Changes to the PowerPoint File
You will be able to review the changes made to the PowerPoint file from the right pane, where information about changes made by each user will also be available. The changes can also be reviewed via Review > Compare.
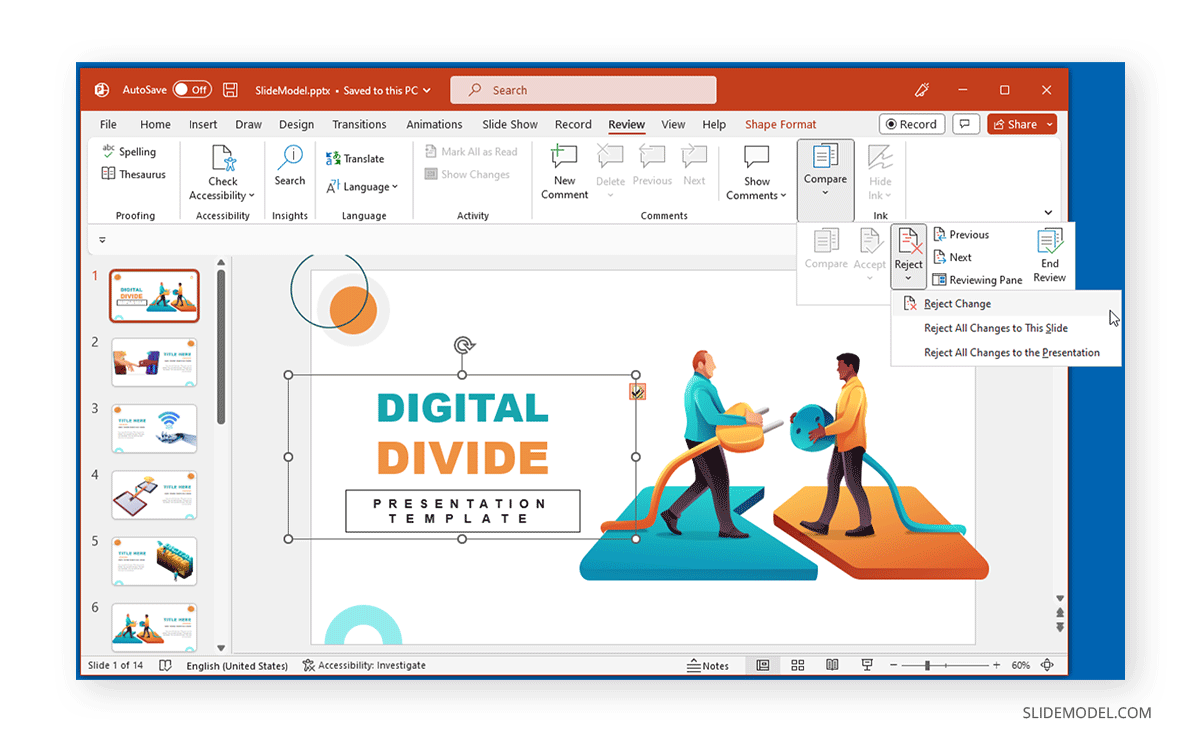
Step 3: Accept or Reject Changes in PowerPoint
During the review, you can accept or reject changes either from the right pane or the Review tab. Once you are done reviewing changes and all changes have been accepted or rejected, click End Review.
Recommended Reading: How to Recover a PowerPoint file
Track changes in PowerPoint with the Compare feature can be used without manually enabling them, in the case of Microsoft Word. This feature is also available for other Microsoft applications such as Word and Excel to compare different versions of files for changes.
FAQ’s
What is the Compare feature in PowerPoint?
The Compare feature in PowerPoint allows users to compare two versions of a presentation to track changes and see differences. It highlights additions, deletions, and other modifications made by collaborators.
How do I access the Compare feature in PowerPoint?
To access the Compare feature:
– Open the original PowerPoint file.
– Go to the Review tab.
– Click on Compare.
– Select the modified version of the file you want to compare with the original.
– Click Merge to view the changes.
Can I track changes made by multiple users in PowerPoint?
Yes, the Compare feature allows you to see changes made by multiple users. Each user’s changes are tracked separately, and you can see who made each change in the review pane.
Does PowerPoint automatically track changes as they are made?
No, PowerPoint does not automatically track changes like Microsoft Word. You need to use the Compare feature to review changes between different presentation versions.
What types of changes can be tracked using the Compare feature in PowerPoint?
The Compare feature can track various types of changes, including:
– Text additions and deletions
– Formatting changes
– Image and object insertions
– Slide order modifications
Can I use the Compare feature for presentations with embedded media?
Yes, the Compare feature can be used for presentations with embedded media. It will track changes related to adding or deleting media files, but it may not compare the content within the media files themselves.
What should I do if the Compare feature doesn’t seem to work?
If the Compare feature doesn’t work, try the following steps:
– Ensure both versions of the presentation are saved properly.
– Check that you are using compatible versions of PowerPoint.
– Restart PowerPoint and try the process again.
If the problem persists, consider updating PowerPoint or contacting Microsoft Support for assistance.
Can I revert to the original version after using the Compare feature?
Yes, you can revert to the original version by saving a copy of your presentation before using the Compare feature. If you want to discard the changes, simply close the presentation without saving after reviewing the changes.
Is the Compare feature available in all versions of PowerPoint?
The Compare feature is available in most modern versions of PowerPoint, including PowerPoint 2013, 2016, 2019, and Office 365. However, the exact steps to access the feature may vary slightly between versions.