Once you are done editing your Google Slides templates, you might want Google Slides auto-advance or play your presentation in a loop when presenting your slides or sharing them online. Below are a few easy steps that you can take to loop Google Slides when presenting your slide deck or publishing it online.
How to Make Google Slides Play on a Loop
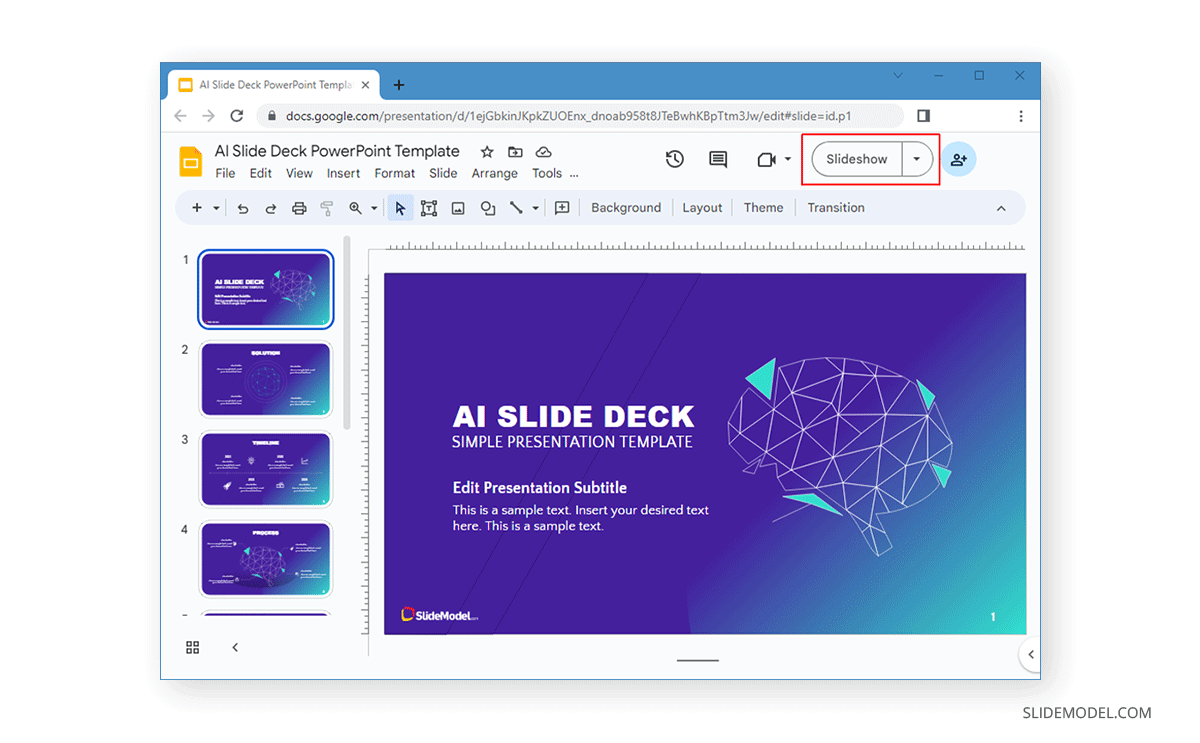
To set your Google Slides presentation to loop, switch to Slideshow mode. You can either click Slideshow from the top menu or use the arrow key to start the presentation in Presenter View or from the first slide.
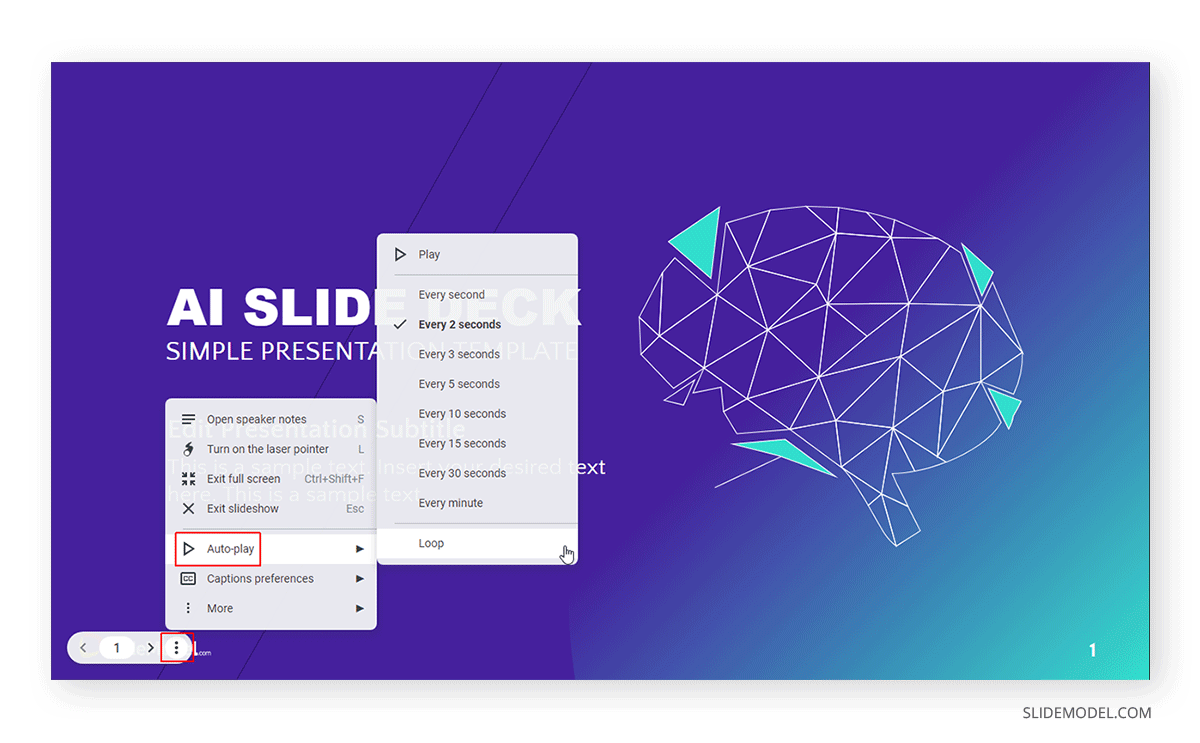
Once in Slideshow mode, click the three dots at the bottom and select Auto-play. You can select Loop to play the slideshow continuously and even select a time for playing the slideshow using a specific time frame (e.g., every minute).
How to Play Google Slides on Loop when Publishing Slide Deck
It is also possible to play Google Slides presentations in a loop when published online. This is regardless of whether you share them via a direct link or use an embed code to embed your slide deck online. To get started, go to File -> Share -> Publish to web to publish your presentation online.
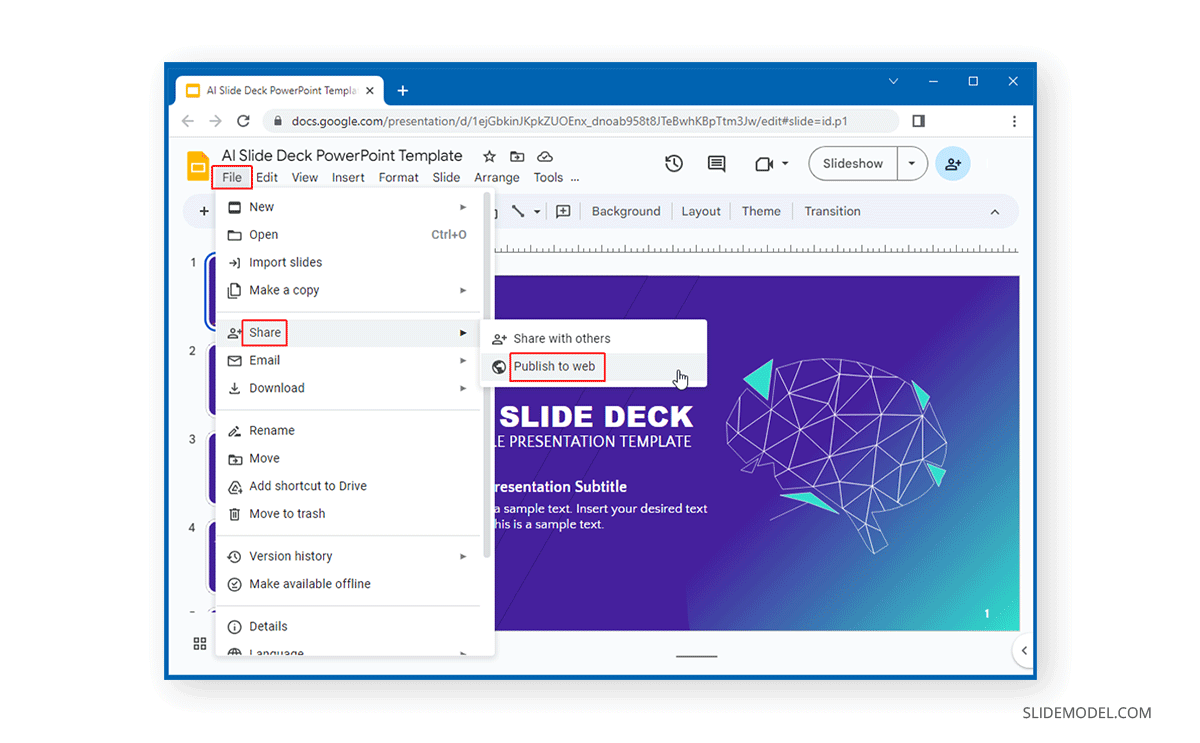
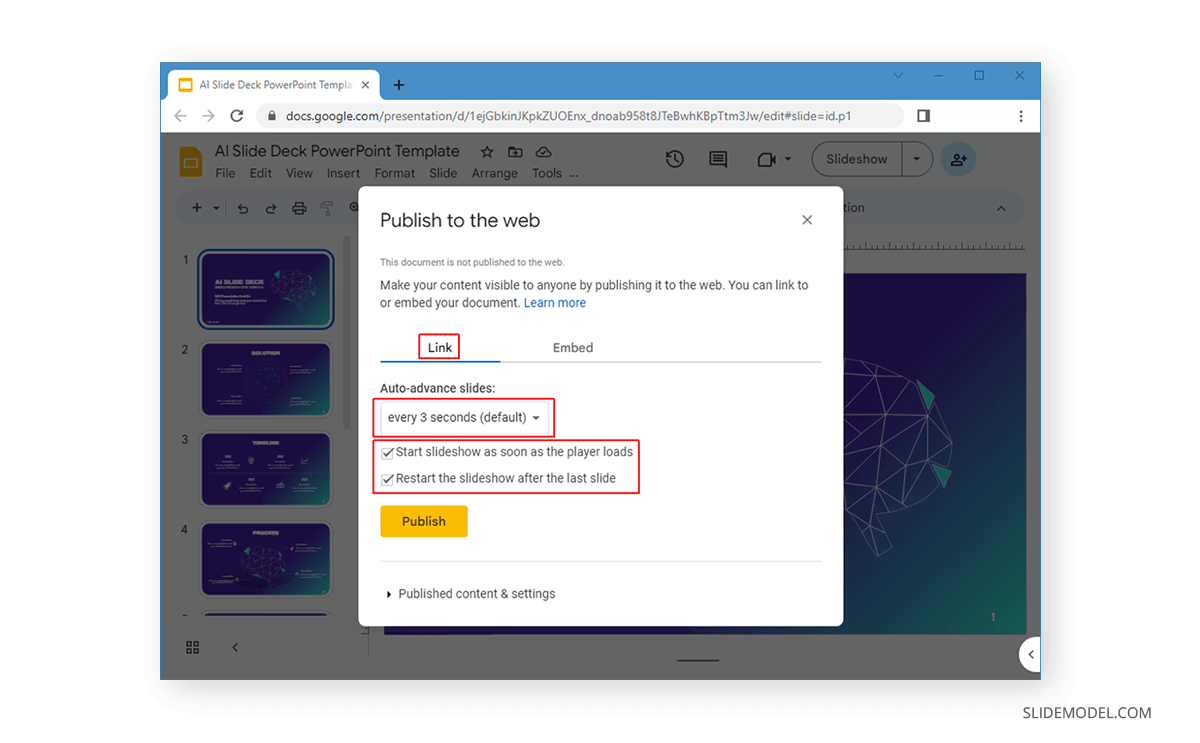
The Link tab can be used to generate a direct link where you can choose a time to loop your slides. You can also enable playing the slideshow when the player loads and restart it after the last slide.
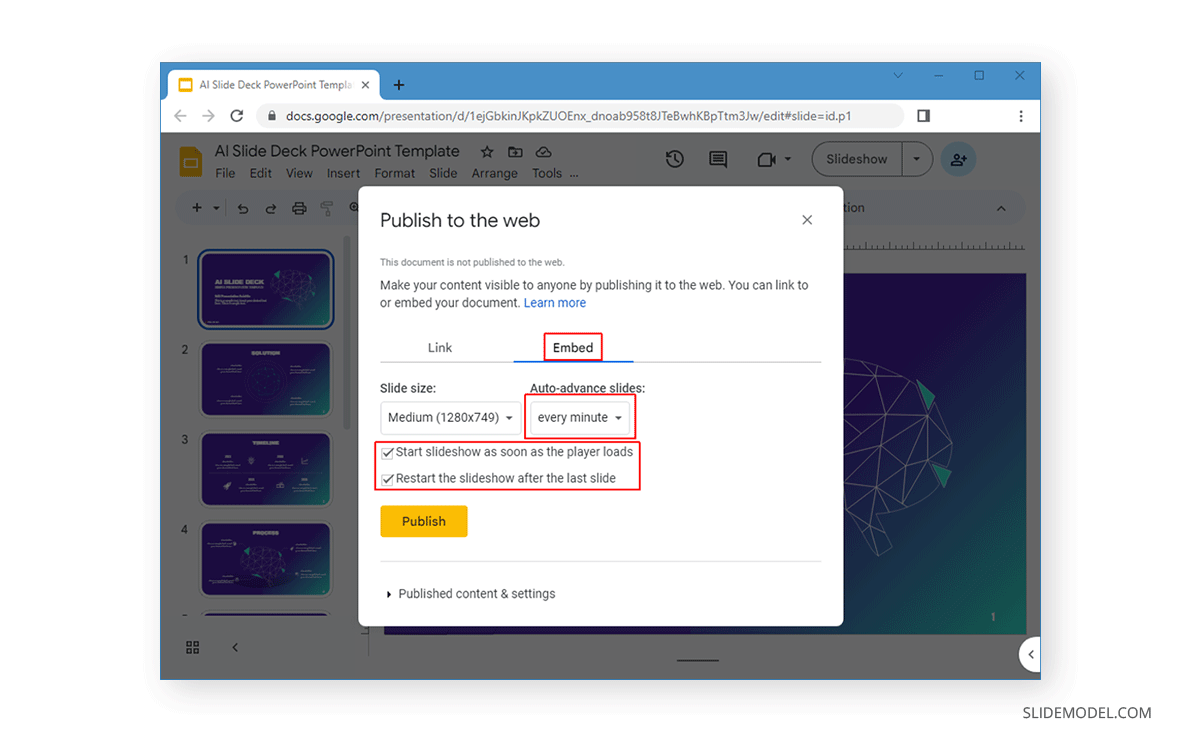
The Embed tab enables picking a size for your slide deck and the time to loop your slides. Similar to the options in the Link tab, you can start the slideshow as soon as the player loads and restart from the first slide when the slideshow ends.
Real-Life Applications of Looping Google Slides Presentations
Looping your Google Slides presentations can be beneficial in a variety of real-life scenarios, allowing you to create visually engaging displays that do not require constant attention. Here are some practical ways to use this feature in different settings:
- Trade Show Displays: At trade shows, looping presentations can showcase your product’s key features, customer testimonials, or highlight services, catching the attention of attendees without needing a presenter. This can create a continuous flow of information that enhances your booth’s appeal and increases visitor engagement.
- Waiting Room or Reception Area: Looping Google Slides presentations can be an excellent way to entertain and inform visitors in waiting areas. Display company achievements, services offered, or even important news updates to keep visitors engaged while they wait.
- Conference or Event Intermissions: Use a looping slideshow during event breaks to display sponsor logos, session schedules, or important announcements. This ensures the audience stays informed and engaged even when the event is not in progress.
- Digital Signage: Restaurants, shops, and corporate offices can use looped presentations as digital signage to promote special offers, menu items, or company news. This provides a dynamic way to communicate with customers and staff.
- Classroom Lessons: Teachers can set slides to auto-advance and loop during class to reinforce key learning points, display project instructions, or showcase educational material while students are working. This creates an ongoing visual aid that helps students stay on track.
- Online Course Content: For e-learning modules shared online, a looping presentation can deliver course content, instructions, or assignment briefs in a self-paced, accessible format. Students can view and review information without the need for manual navigation.
- Product Demonstrations: In sales meetings or product demos, looped slideshows can present product features and benefits, allowing for a seamless flow of information even if the presenter steps away. This enhances the impact of the presentation and ensures the message is clear.
- Virtual Exhibitions: For online galleries or portfolios, a looping slideshow can display artworks, photographs, or project highlights. This allows users to view the content hands-free, creating an immersive experience.
- Event Registrations or Orientation Days: Whether it’s a school orientation or corporate onboarding event, looped presentations can guide attendees by providing directions, showcasing event activities, and introducing key staff members. This helps reduce confusion and creates a welcoming atmosphere.
- Photo Slideshow Presentations: One unique way to use looping slideshows is for personal or professional photo displays. Whether it’s for a wedding, a retirement party, or a company anniversary, creating a looping photo slideshow in Google Slides can add a special touch. Simply upload photos into a presentation, customize the timing for each slide, and loop the slideshow to create a seamless display of memories. This makes it easy to share meaningful moments with an audience without manual interaction.
These examples highlight the benefits of looping Google Slides presentations and how they can be used to enhance both professional and personal events. Whether you are looking to capture attention at a trade show or create a memorable photo slideshow, Google Slides’ looping feature offers an easy solution to keep your presentations running smoothly.
Final Words
Google Slides slideshows can be looped when played in Slideshow mode, shared as a direct link, or when embedded online. You can pick a time to replay the slideshow based on your requirements. It might be worth previewing the loop to ensure that your slides aren’t playing too quickly and that you can create the desired impact for your audience by looping your slides.
