Designing slides with overlay text over images can help highlight important information while adding some visual appeal for the audience. However, some images or slide backgrounds can affect the legibility of the text when editing Google Slides Templates. Making it necessary to adjust image transparency.
How to Make a Picture Transparent in Google Slides
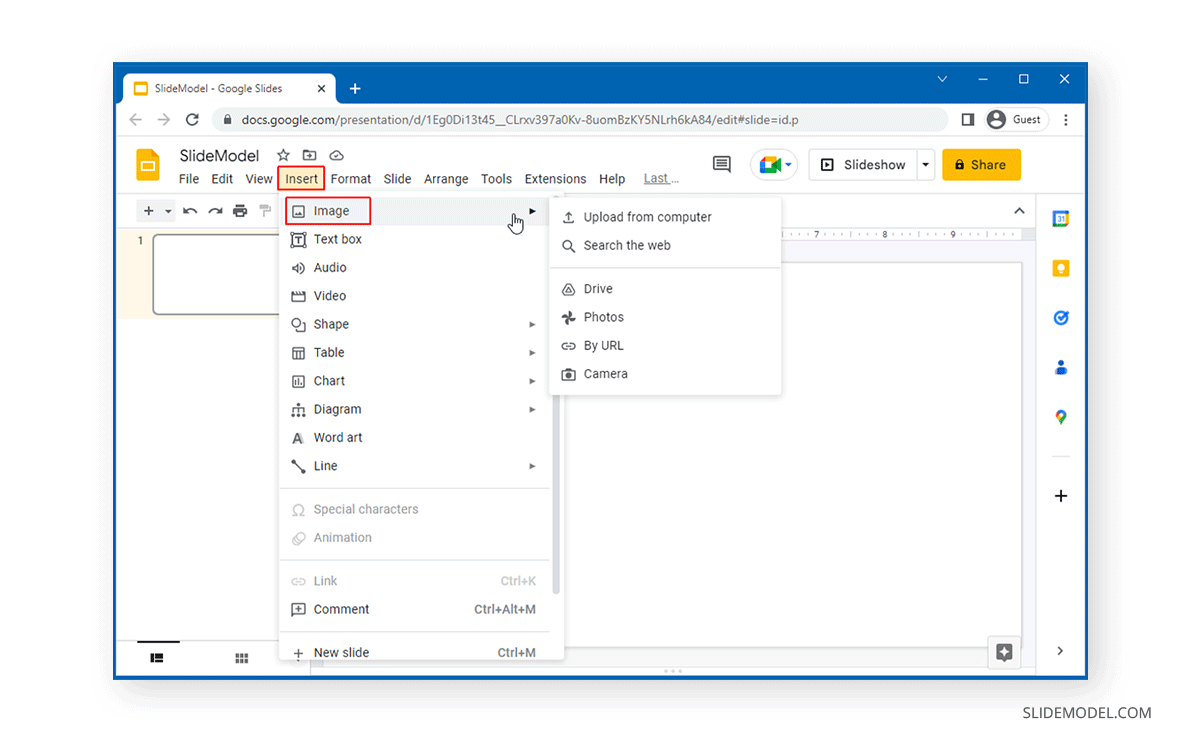
Google Slides image transparency is easy to adjust through Format Options. To get started, add an image to your slide via Insert > Image.
Simply select the image to adjust its transparency and go to Format > Format Options. Alternatively, right-click on the image to select Format Options.
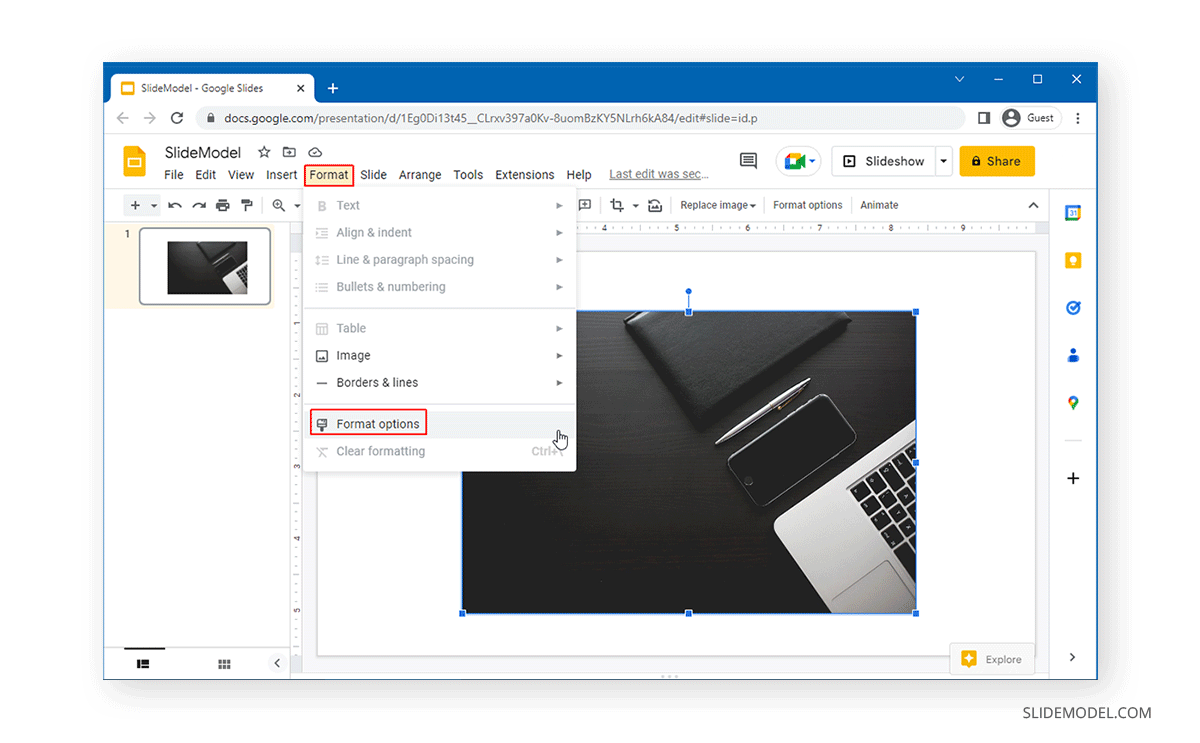
From the right sidebar, expand the Adjustments menu. This will allow you to adjust the image’s transparency, brightness, and contrast by moving the slider for each. To increase transparency, move the slider towards the right. To reduce transparency, move the slider towards the left. You can adjust the brightness and contrast the same way.

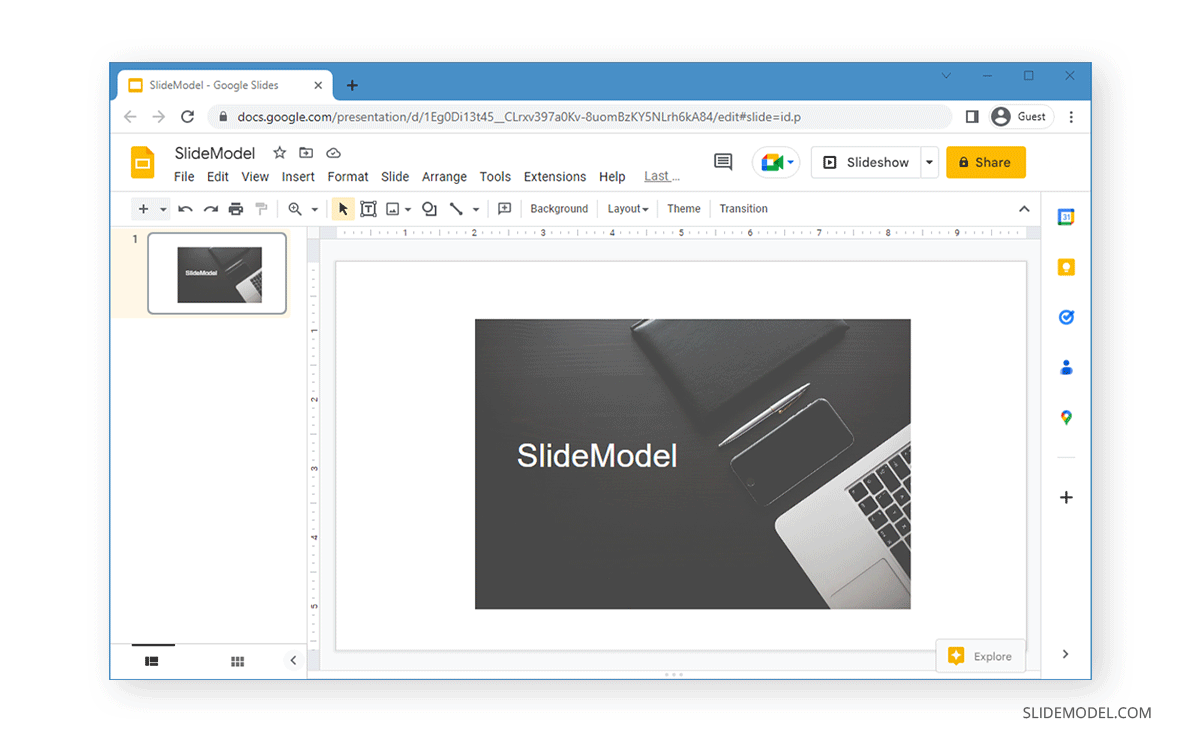
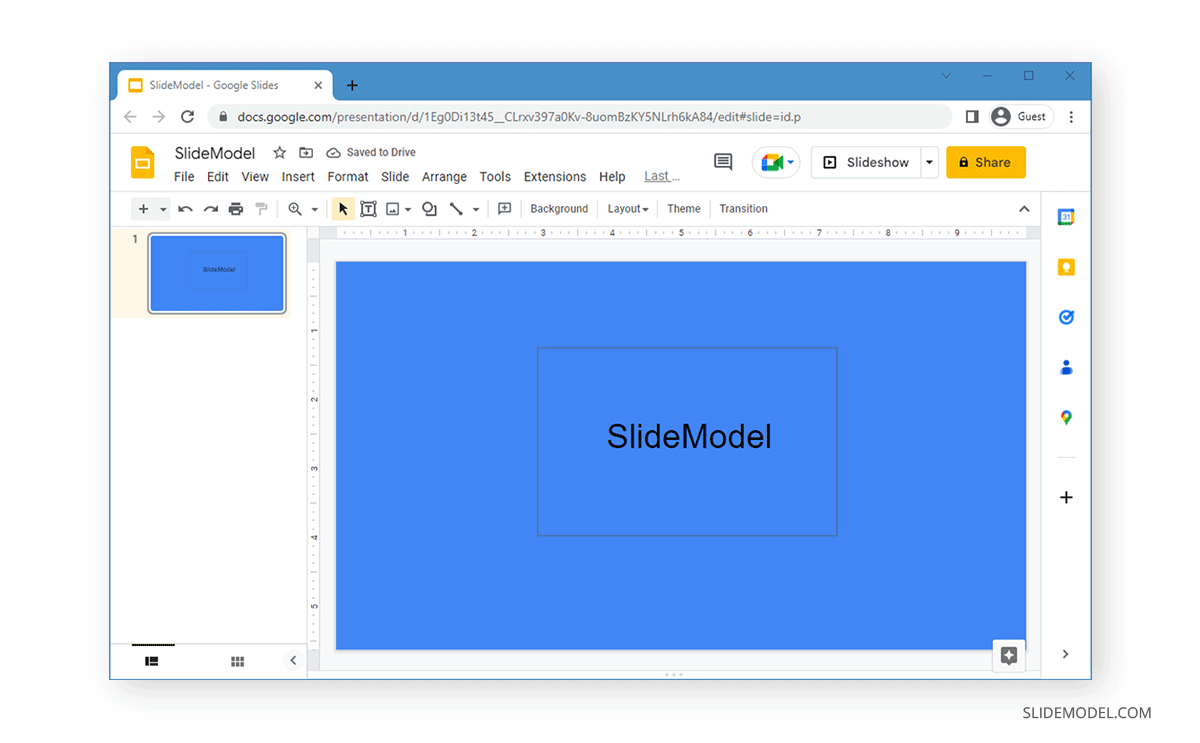
Once your image transparency is according to your liking, you can make the required changes to the slide accordingly. For example, you can insert a text box over the image to add related information, such as your presentation title, subtitle, or other information associated with the image.
Reducing image transparency can help you make your slide designs exciting and provide the space to accommodate more information by using parts of the inserted image or slide background more efficiently, without compromising on legibility.
How to Make a Shape Transparent in Google Slides
You can also make shapes transparent in Google Slides by adjusting the transparency of an added shape or making it completely transparent. How do you change the opacity of a shape in Google Slides presentations? Adjusting the transparency level is the same as adjusting the shape’s opacity in Google Slides.
Custom Shape Transparency in Google Slides
To adjust the transparency level of a shape in Google Slides, follow the steps below:
Insert a shape to Google Slides via Insert > Shape > Shapes.

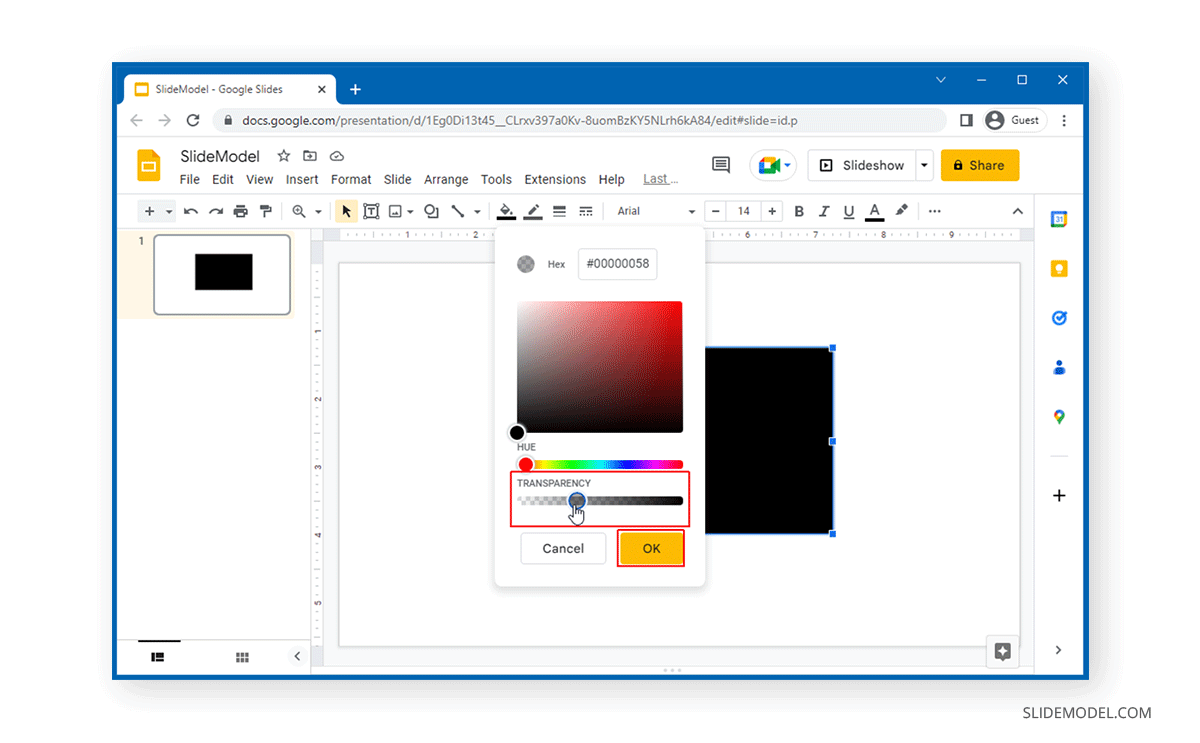
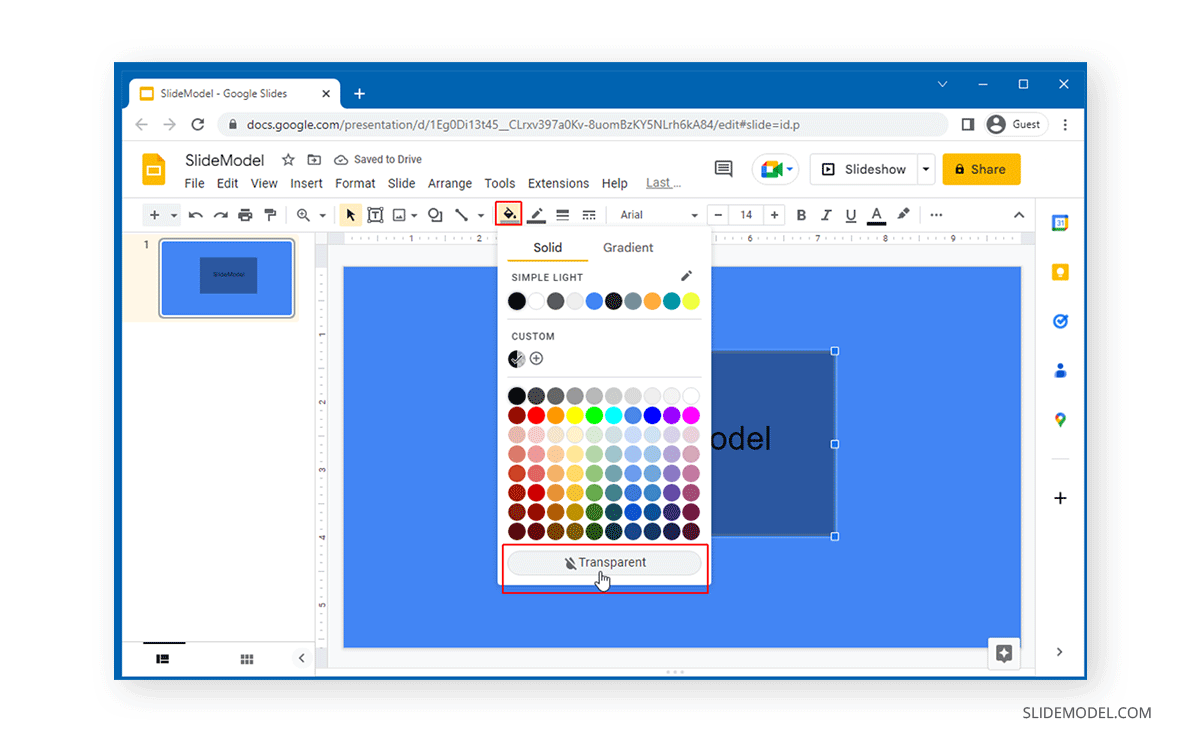
To adjust transparency for a shape, select the shape and click the Fill Color (paint bucket icon) option, and select Custom.
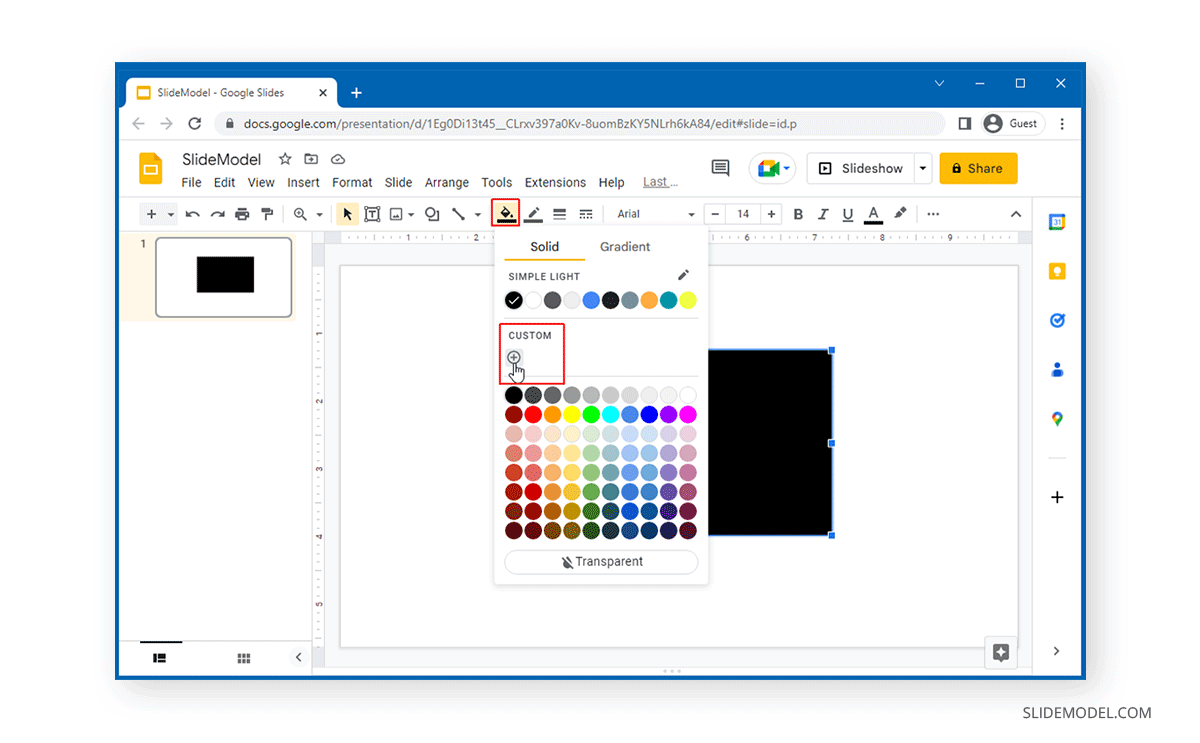
From the menu that appears, move the slider to increase or reduce the transparency. You can also change the color and pick a specific color by adding the HEX color code. Moving the transparency slider towards the right will increase the shape transparency, whereas moving the slider back towards the left will reduce transparency.
Once you have achieved the desired transparency, you can add overlay text to make necessary adjustments to the shape according to need.

Make Shape Completely Transparent in Google Slides
To make a shape completely transparent in Google Slides, such as to adjust it according to the slide’s background color, select the shape, followed by Fill Color > Transparent.
How to make background transparent in Google Slides
Having a transparent background can be particularly useful when you want to blend your slide content with an image without the original background taking away the focus. One way to do this is by using an image as a slide background and then adjusting its transparency. Here’s how to make background transparent in Google Slides:
- Insert an Image as a Slide Background:
- Start by selecting Insert -> Image -> Upload from computer (or any other source where your image is stored).
- Once the image is on your slide, resize it so that it covers the entire slide. You can drag the image corners to ensure it fits the slide perfectly.
- Send the Image to the Background:
- After positioning the image, right-click on the image and select “Order” -> “Send to back”. This will ensure that the image is in the background, allowing other slide elements like text boxes and shapes to appear above it.
- Adjust Image Transparency:
- With the image selected, navigate to Format > Format Options. Alternatively, you can also right-click the image and choose Format Options.
- On the right sidebar that appears, expand the Adjustments menu.
- Find the transparency slider. Dragging the slider towards the right will increase the image transparency, making it more see-through, while dragging it to the left will make it more opaque.
- Adjust the slider until the background image is transparent to your liking.
With the background image now transparent, you can overlay text, shapes, or other objects on the slide and also apply the concepts seen before.
Adjusting the transparency of images and objects in Google Slides can help you make the most of your slides and it is also a way you can make your Google Slides look cool. It can be an excellent method to accommodate more information in fewer slides while making overpowering slide elements transparent or partially transparent.