One of the less used features during a PowerPoint slideshow is annotating slides by drawing on the screen. PowerPoint provides numerous tools for drawing, annotating, and creating custom illustrations. These tools not only include drawing during a presentation for emphasis but also creating visual elements for your slides. PowerPoint offers a variety of tools to achieve your goals.
This tutorial will explore how to draw in PowerPoint, the differences between drawing graphics on slides and drawing during a presentation, and best practices for making your presentations and PowerPoint templates more interactive using drawing tools.
Drawing in PowerPoint: Understanding the Two Approaches
There are two main ways to draw in PowerPoint including drawing graphics and drawing during presentations. This includes doodling or drawing on screen. If you’re wondering how to circle something in PowerPoint or how to draw on slides, these are the two methods to do it.
Drawing Graphics in PowerPoint
This involves using the built-in drawing tools to create shapes, sketches, or illustrations on slides before the presentation. PowerPoint offers several tools to create illustrations and enhance visual appeal. By following the steps below, you can draw graphics on your slides.
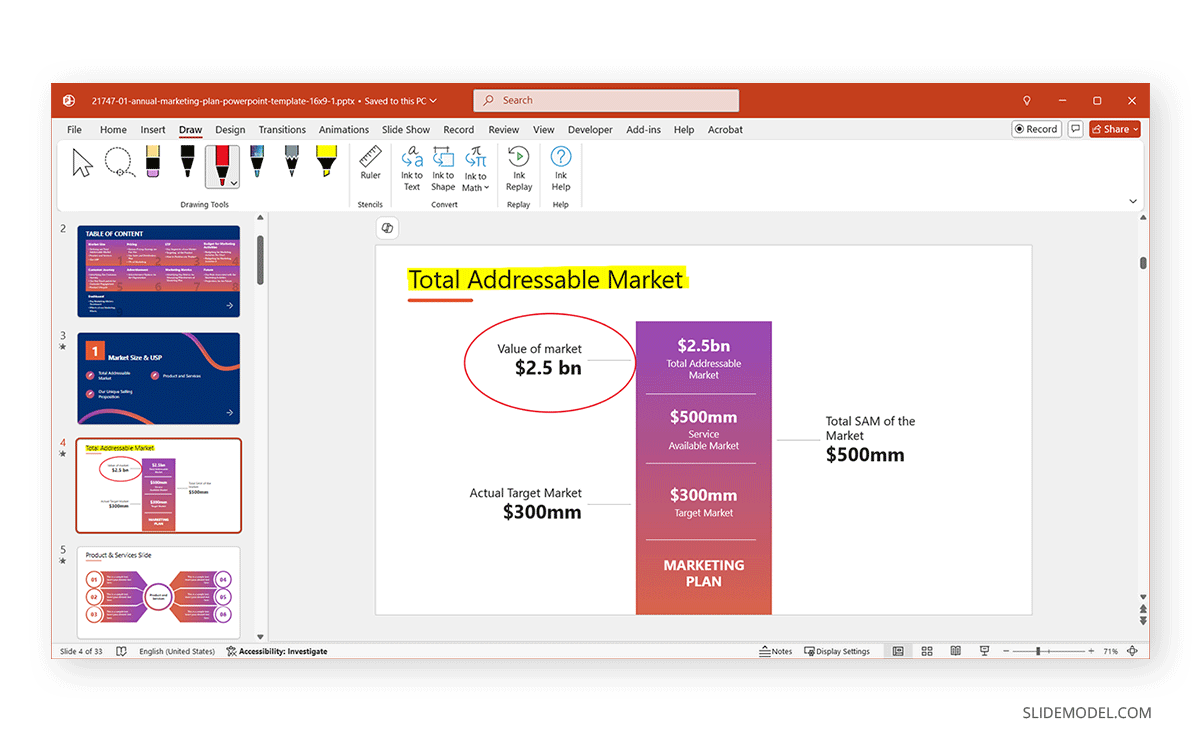
Step 1: To draw on PPT, select the Draw tab and choose from different drawing tools. You can draw directly on the slide using a mouse, touchpad, stylus, or your finger on a touchscreen device.
Step 2: When using drawing tools, you should consider adjusting the color and thickness of the toolbar. The tools available in this section include the following:
Pen and Highlighters
- Pen tool for freehand drawing.
- Pencil tool for detailed sketches.
- Highlighter tool for annotating content on a slide.
- An eraser tool is used to remove content created using a pen, pencil, or highlighter.
Ink Tools
- Ink to Shape tool to convert freehand drawings into perfect geometric shapes.
- Ink to Text tool to Convert handwritten notes to typed text.
- Ink to Math tool to convert handwritten mathematical expressions into formatted equations.
- Ink Replay tool replays the order in which the ink strokes were created on the slide.
Selection Tools
- Lasso Select tool can select drawn elements (ink strokes) to move, resize, or delete them.
- The Select tool can select standard objects like text boxes, images, and shapes.
Drawing Assist Tools
- The ruler tool can be used to draw straight lines at specific angles. You can also rotate the tool for precise alignment.
- Convert Ink tool recognizes and converts ink strokes into formatted objects like text or shapes.
Note: if the Draw tab is not visible in PowerPoint, you can activate it via File -> Options -> Customize Ribbon and use the panel to select and move it to the PowerPoint Ribbon menu.
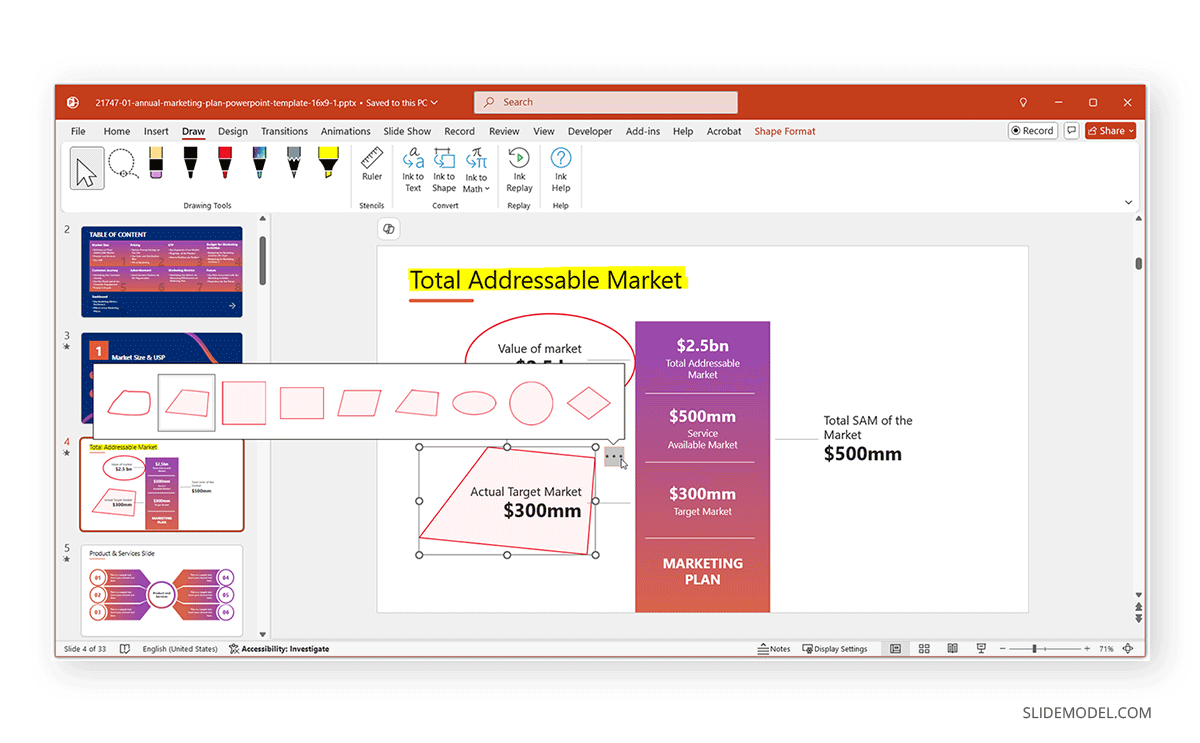
Converting Drawings to Shapes
PowerPoint allows you to convert freehand drawings into precise shapes. You can convert drawings to shapes by selecting the drawing using the Select and Lasso tool, followed by Ink to Shape. PowerPoint refines your drawing into a clean geometric shape. If the drawing does not have a shape close to a specific one, you will get suggestions regarding the type of shape to convert the sketch. This is regardless of whether you use PowerPoint templates, Google Slides templates with PowerPoint, or slides you created from scratch.
Drawing During a Presentation (Real-Time Annotations)
Drawing during a presentation allows presenters to annotate slides in real time using the Draw tab, enhancing interactivity and engagement. You may want to annotate slides to emphasize key points when delivering a presentation. Follow these steps to draw during a presentation:
Step 1: Enter Presentation Mode via F5 hotkey or select the Slide Show button from the bottom of the PowerPoint interface.
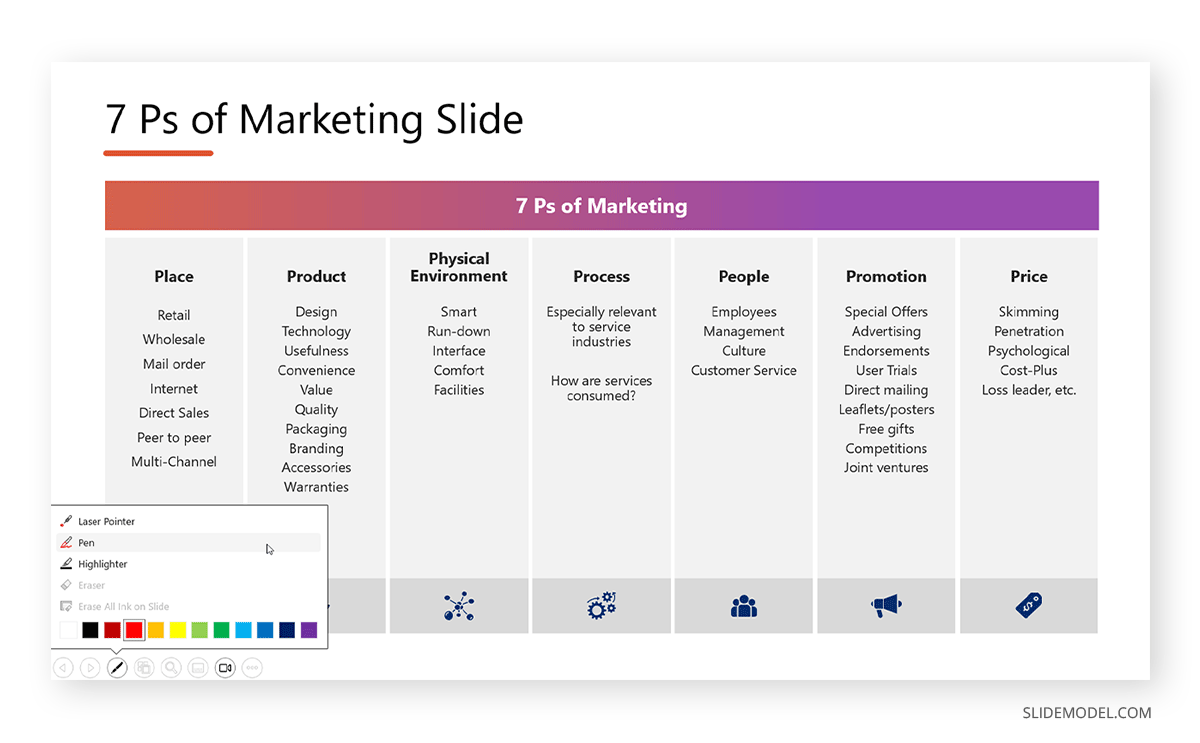
Step 2: Use the Pen or Highlighter tools from the bottom left or via the right-click menu. PowerPoint provides various tools for drawing while presenting, including the following:
- The Pen tool can be used to draw freehand.
- Highlighter can be used to emphasize key areas.
- The Eraser tool removes any unwanted marks.
- The Erase All Ink on Slide option erases all ink annotations.
Note: The drawing options in Slide Show mode can be used to draw directly on the slide using your mouse, stylus, or touch using a touchscreen device.
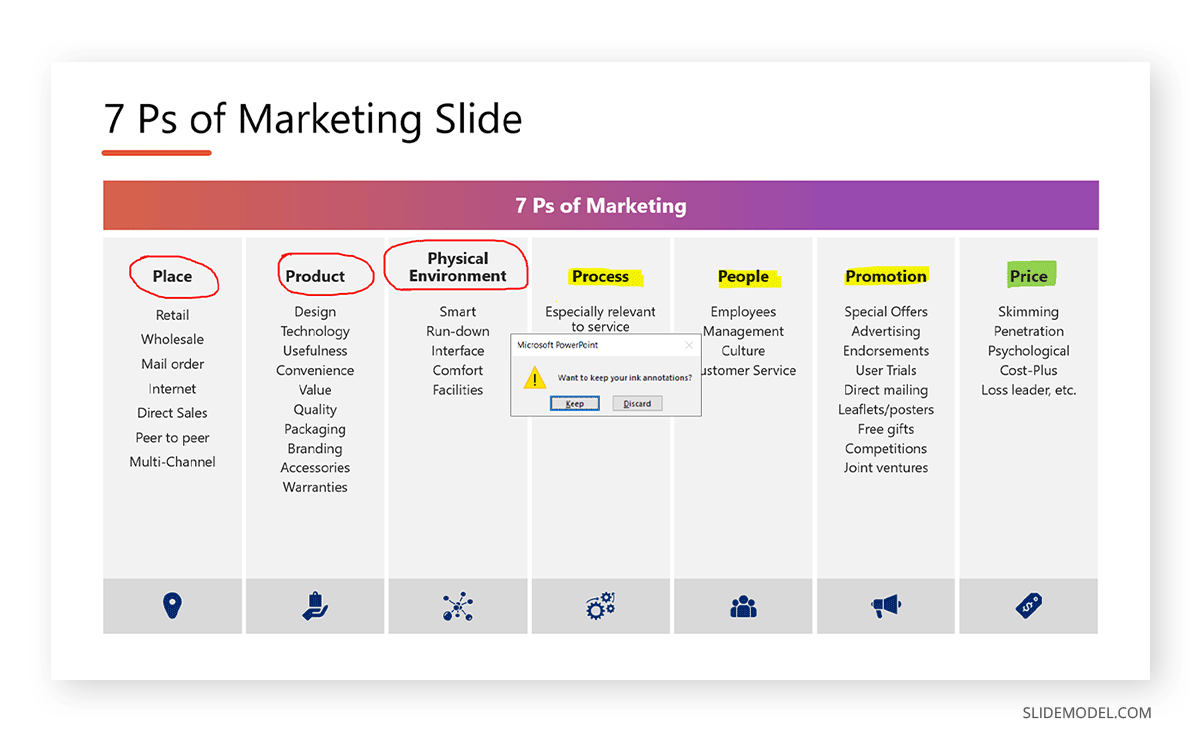
Step 3: After your presentation, PowerPoint will ask if you want to save your annotations. Choose Keep to retain them or Discard to remove them.
Best Practices for Drawing in PowerPoint
When considering how to start a presentation using annotations or how to end a presentation slideshow with concluding remarks using information highlighted on screen, you should consider a few best practices to present like a pro.
Use Different Pen Colors for Clarity
Using contrasting colors can help distinguish different points during a live presentation. For example, use red for critical points, blue for supporting details, and green for positive highlights. Similarly, yellow is often used with the highlighter tool for emphasis, which can be useful for conveying key points. Your audience might even find the yellow color familiar, as it is commonly used for highlighters on paper.
Keep Drawings Simple and Relevant
One way to ensure an engaging presentation session using drawing tools is to avoid excessive doodling to maintain professionalism. Focus on essential elements that enhance understanding rather than cluttering your slides with unnecessary sketches.
Practice Before Presenting
Familiarize yourself with the drawing tools to ensure smooth annotations. Practice switching between tools and adjusting pen thickness to improve your workflow.
Utilize a Stylus for Precision
A stylus offers more control than a mouse when drawing on slides, especially for intricate details. If you’re using a touchscreen device, a digital pen can significantly enhance accuracy. This can be better than using a mouse or finger on a touchscreen device.
Combine Drawings with Other Visual Elements
Enhance your slides by integrating drawings with SmartArt, images, and icons. This approach creates a more engaging and informative presentation. For example, you can use the Drawing PowerPoint templates to add visuals related to education and learning for relevant topics.
Erase Unnecessary Markings Immediately
Use the eraser tool to remove mistakes or outdated notes during live presentations. Keeping slides clean ensures that your audience remains focused on the key points. By erasing annotations for points discussed, the audience can better focus on the new subtopic and not get distracted by old annotations visible on the screen.
Use Drawing to Encourage Audience Engagement
Invite participants to contribute by using drawing tools interactively. For instance, you can annotate slides based on audience input during training sessions to foster discussion.
Real-World Applications of Drawing in PowerPoint
Business Meetings and Presentations
During board meetings, executives often use live annotations to emphasize financial trends and key insights. Drawing tools help illustrate market trends, revenue projections, and organizational strategies in real time. This enables slides to be presented properly, focusing on key aspects of the topic under discussion.
Educational Lectures
Teachers and professors use drawing tools to illustrate concepts in subjects like math and science. For example, an instructor can sketch diagrams in a geometry class to explain theorems and shapes. Using drawings as visual aids can also help keep students engaged and account for short attention spans.
Training and Workshops
Trainers can draw workflows and diagrams in real-time to clarify processes. In corporate training, drawing tools are often used to visualize business strategies, workflows, processes, organizational structures, etc.
E-Learning and Demo Videos
Drawing tools in PowerPoint can be helpful for e-learning and demo videos. This might include presentations about features of a product or service, educational videos, or just-in-time learning videos created for employees to learn new skills or to understand processes, procedures, and SOPs. Additionally, interactive whiteboard-style lessons can be created using PowerPoint drawing tools, making complex topics easier to grasp. This approach is widely used in online education platforms, where instructors annotate and explain key concepts visually.
Another practical application of drawing in PowerPoint is for product demonstrations and explainer videos. Marketing teams can leverage these tools to create engaging content highlighting key product features. By drawing directly on slides, presenters can visually connect with their audience and make technical explanations more accessible.
Final Words
PowerPoint’s drawing tools allow users to create engaging, interactive presentations by adding real-time annotations and custom illustrations. By leveraging these features effectively, you can enhance your storytelling and improve audience engagement. Whether you are wondering how to make a presentation easy to understand for an audience by sketching graphics or looking to simply highlight key points, mastering these tools will elevate the impact of your PowerPoint presentations.
Adopting best practices such as using color contrasts, practicing with tools beforehand, and integrating drawings with other visual elements ensures a seamless experience. Embracing these features enhances clarity and fosters a dynamic, compelling presentation style that resonates with your audience. Investing time mastering PowerPoint’s drawing capabilities can significantly boost the effectiveness of business meetings, educational sessions, and training programs. Making it easy to present and explain key concepts using visual aids from PowerPoint drawing tools.