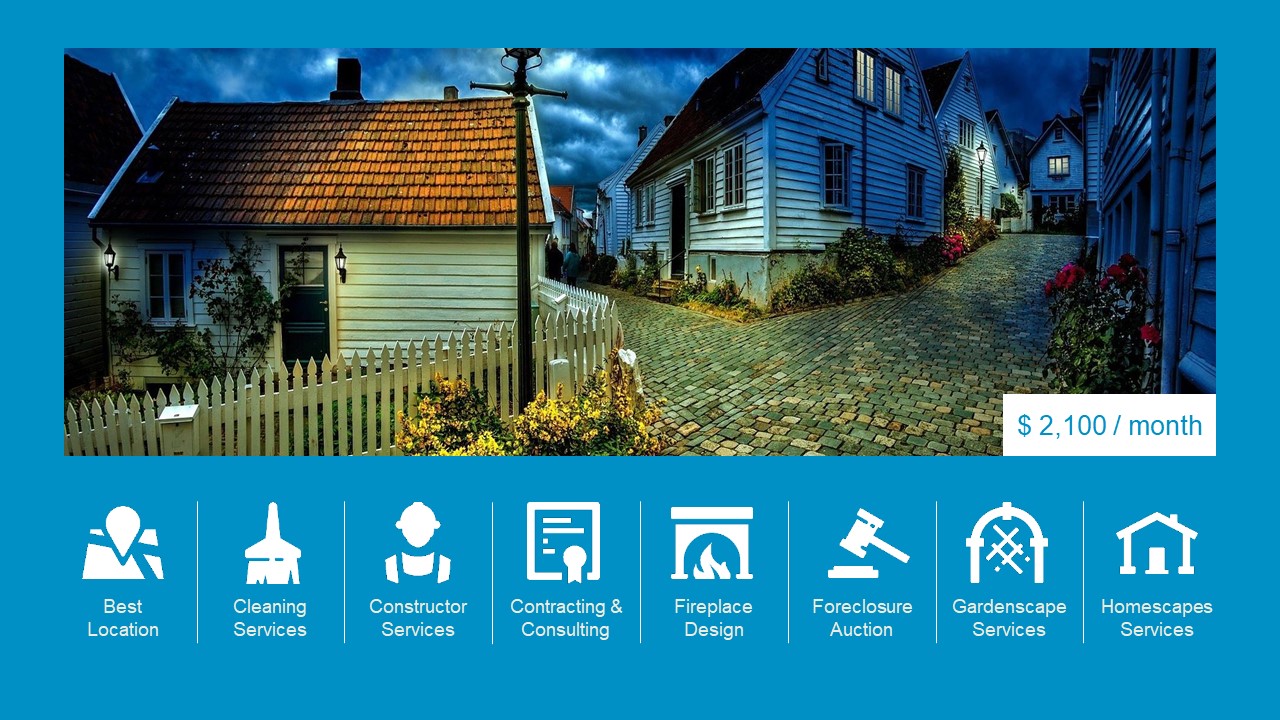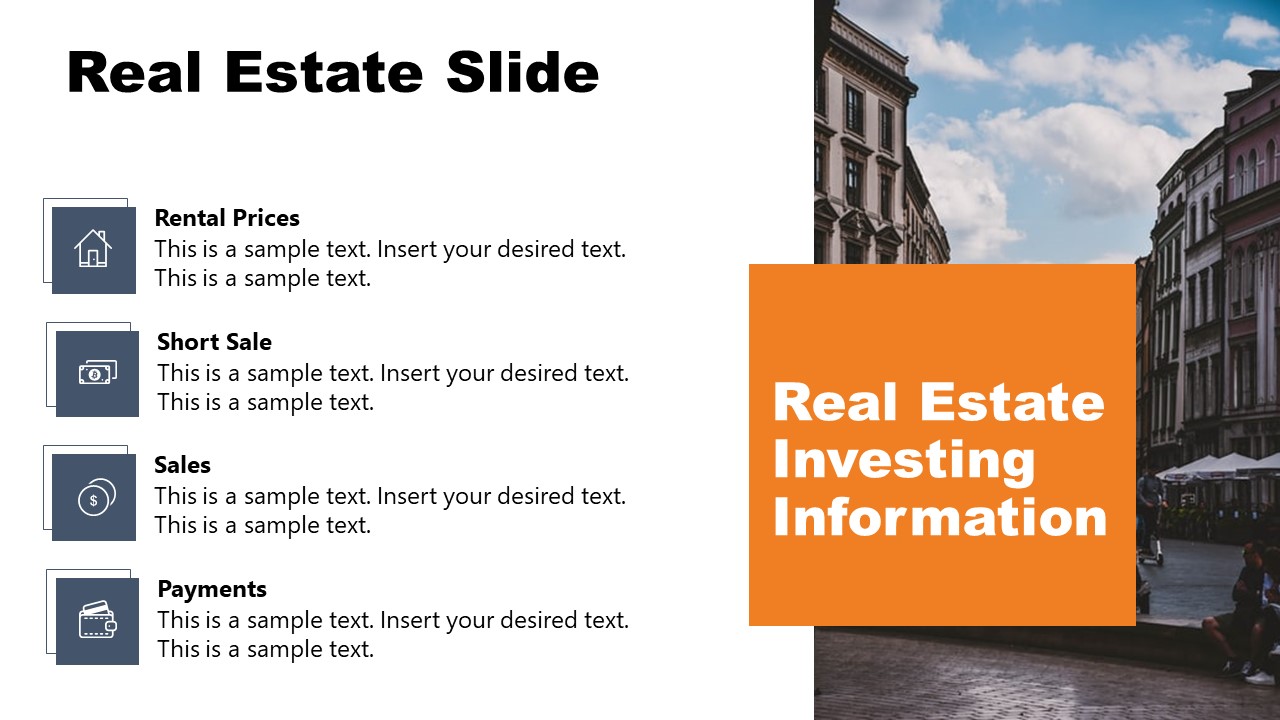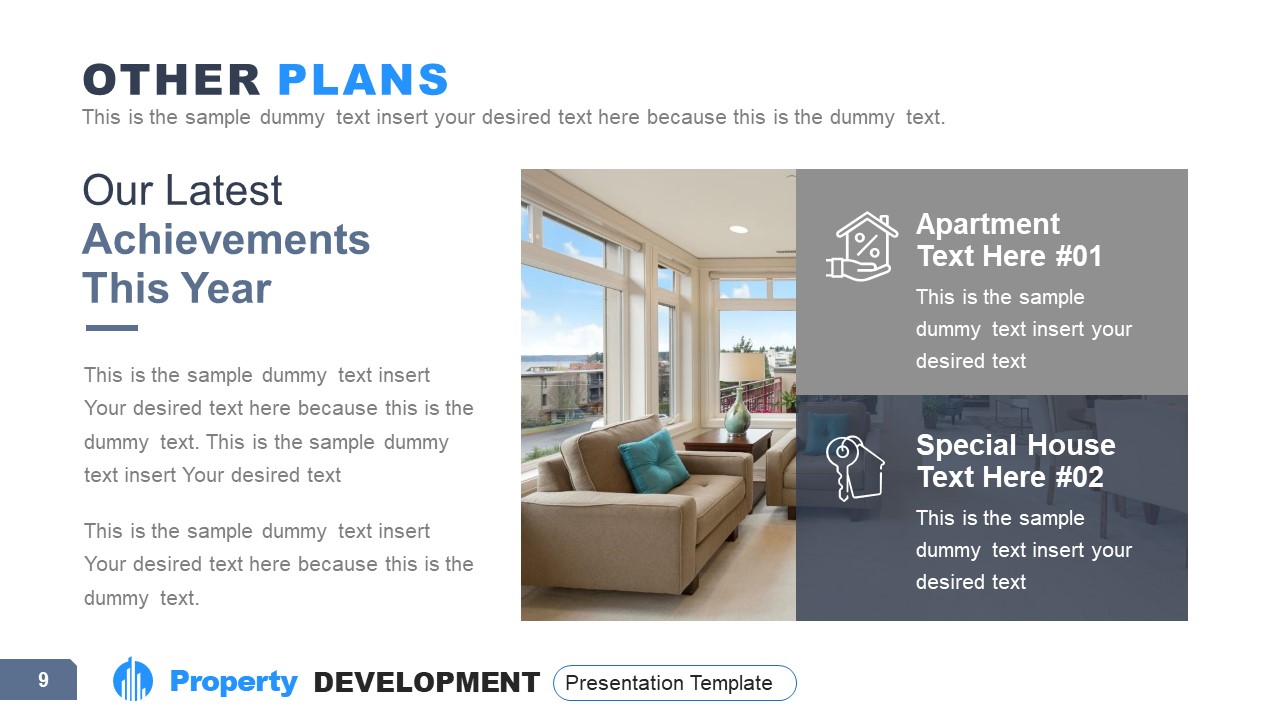
Presentation skills and aesthetics can make or cut business deals and significantly impact other industries like Real Estate, Architecture, Interior Design, or Construction. How do professionals in these industries prepare to share their insights and ideas with prospective buyers? Is it through drawings, real-time 3D imaging, or with presentation slides showcasing images of the said project?
In this article, we want to share an entirely different approach for Architects, Realtors, Interior Designers, and Contractors – we will learn how to create a professional-quality PowerPoint presentation that features an animated 3D floor plan, also known as isometric 3D view or axonometric 3D view, how to craft custom infographics from it, and how to deliver engaging presentations in a refreshing format.
Table of Contents
- Why Should Professionals Make a 3D PowerPoint Presentation?
- Isometric vs. Axonometric View – Are they the same thing?
- Potential Use Case Scenarios of Animated 3D Floor Plan Presentations in PowerPoint
- Assets Required to Make a 3D Floor Plan Presentation in PowerPoint
- Preparing your Floor Plan for PowerPoint
- How to Integrate 3D Floor Plans into PowerPoint
- Case Study: Presenting a Housing Project for Real Estate
- Case Study: Kitchen Renovation Project Presentation
- Conclusion
Why Should Professionals Make a 3D PowerPoint Presentation?
Although some concepts can be easily explained with words or simple 2D graphics, speaking about spatial design, understanding the relationships between elements in spaces that shall be cohabited for – maybe – simultaneous functions is not an easy feat.
To simplify this, let’s say you buy a house, a house you intend to be your home, and your office where you plan to meet with customers. Maybe in 2D dimensions, you can get an idea of what the spaces would look like, but only after furniture is arranged into that space can you get a clear picture of how “livable” that ambient would become.
3D graphics and their usage in architecture signified a before and after for professionals, as they can bring a closer experience to their customers of what their projects would look like after they are completed. For this reason, hyperrealism is a sought-after technique many interior designers and contractors apply to attract customers into buying their services. But where does this stand in terms of PowerPoint presentations?
Experience tells us the fancier the graphics, the higher the customer retention rate, and such a statement fits to a T to Real Estate Marketing. Since it is not easy to show 3D images of buildings in live time (mostly due to hardware requirements), professionals sought methods that can create presentations using those 3D graphics and be repurposed as many times as required. PowerPoint bridges as a convenient tool for this adventure, as we can curate the content into impactful presentation slides or help ourselves using Real Estate PowerPoint templates. A 3D PowerPoint template can be streamed on any device, becoming a simplified resource for professionals on the go or as a shareable document between team members working on the same project.
Isometric vs. Axonometric View – Are they the same thing?
During the introduction, we mentioned two terms: Isometric and Axonometric View. Although the terms are often used interchangeably, we must clarify this difference before creating our 3D models.
Both Isometric and Axonometric Views are terms to define 3D representations of objects in perspective. An Isometric View is a representation method that showcases an object in the three spatial axes (X, Y, and Z, respectively) at equal angles. The angles between axonometric axes sum 120 degrees, which means each view is made at a 30-degree angle. As a result, we get an image without any kind of deformity in terms of size but limited to depicting depth. In real-case usage, it is the simplest 3D view we can get and the preferred choice in technical drawings and 3D view aerial images.
On the other hand, an Axonometric View is a broader category that encompasses different methods of representing three-dimensional objects in 2D mediums. Since the degrees between axes can vary, this signifies the differentiated depth quality of those 3D views.
The types of axonometric views are:
- Dimetric Projection
- Trimetric Projection
- Oblique Projection
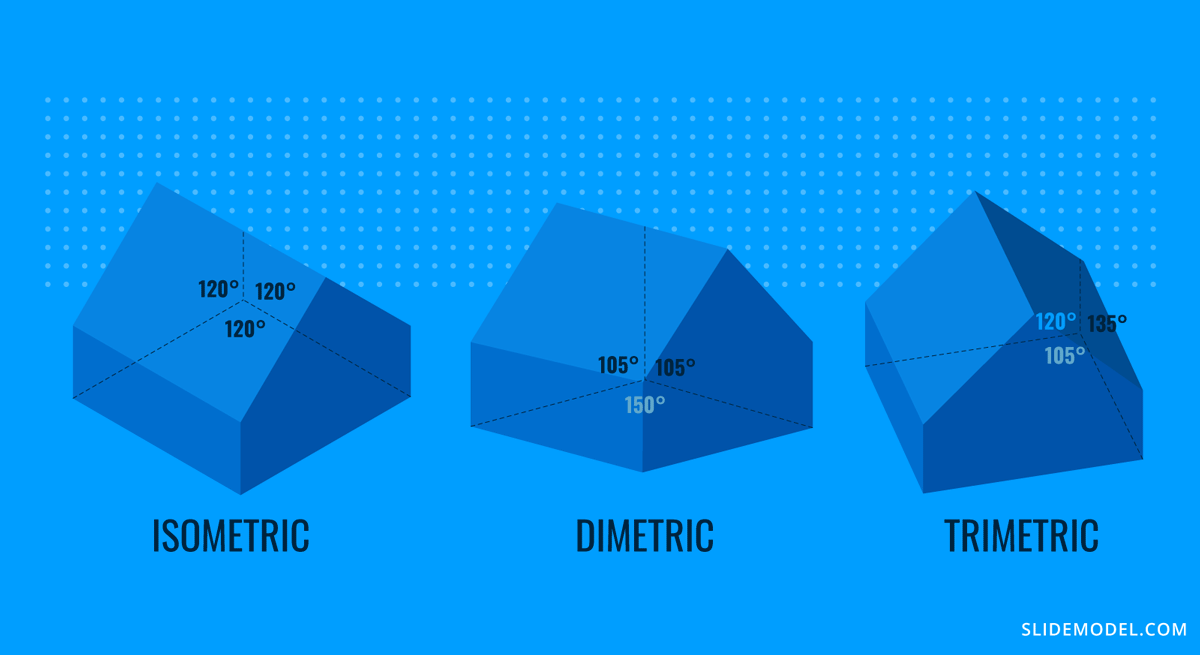
Define which view style suits your interests best before creating a 3D model. Although professional-quality software will allow you to present the image in any projection format you desire, that’s not always the case with free 3D tooling.
Potential Use Case Scenarios of Animated 3D Floor Plan Presentations in PowerPoint
Presenters can benefit from animated 3D floor plan views when customers must understand the spatial relationship between elements.
Say you are a contractor hired by a family that wants to renew their 20-year-old kitchen. You can put into words the area requirements or a percentage of how much space they will gain if a wall is moved to turn an old kitchen layout into a contemporary open-space concept. Still, it generally doesn’t bring a sense of “completeness” to the consumer. However, presenting an animation where the family can turn the model and visualize how the furniture will fit into the area, how much light will enter the room, or how that kitchen interacts with other rooms in the same house can make consumers much more receptive to hiring the services of that contractor. And no, no 2D plan can make people without a technical background understand the actual livable space of that project. That’s just the way our brain is wired to comprehend spatial relationships.
Another set of viable scenarios are architecture or interior design students who are required to present their projects at university, architectural contests, and Real Estate projects where you want to sell an unbuilt housing unit to a prospective buyer – that same concept also applies to other usages like commercial buildings, factories, etc.
Assets Required to Make a 3D Floor Plan Presentation in PowerPoint
The main asset required is a 3D house plan model, which can be built using free 3D software like Blender, a web-based application such as Sweet Home 3D, or professional tools such as AutoCAD, 3ds Max, Revit, SketchUp, Rhino, Cinema4D, etc. Hand-drawn floor plans can be scanned to help us build the 3D model, or you can work from scratch on any of those 3D modeling tools.
Remember that Microsoft PowerPoint can support *.obj format for 3D objects.
Preparing your Floor Plan for PowerPoint
Once you have built your 3D Floor Plan, you need to consider these three aspects:
- Which viewing mode do you plan to use: Isometric or Axonometric.
- Detailing of your 3D model.
- Which views are modeled for your project.
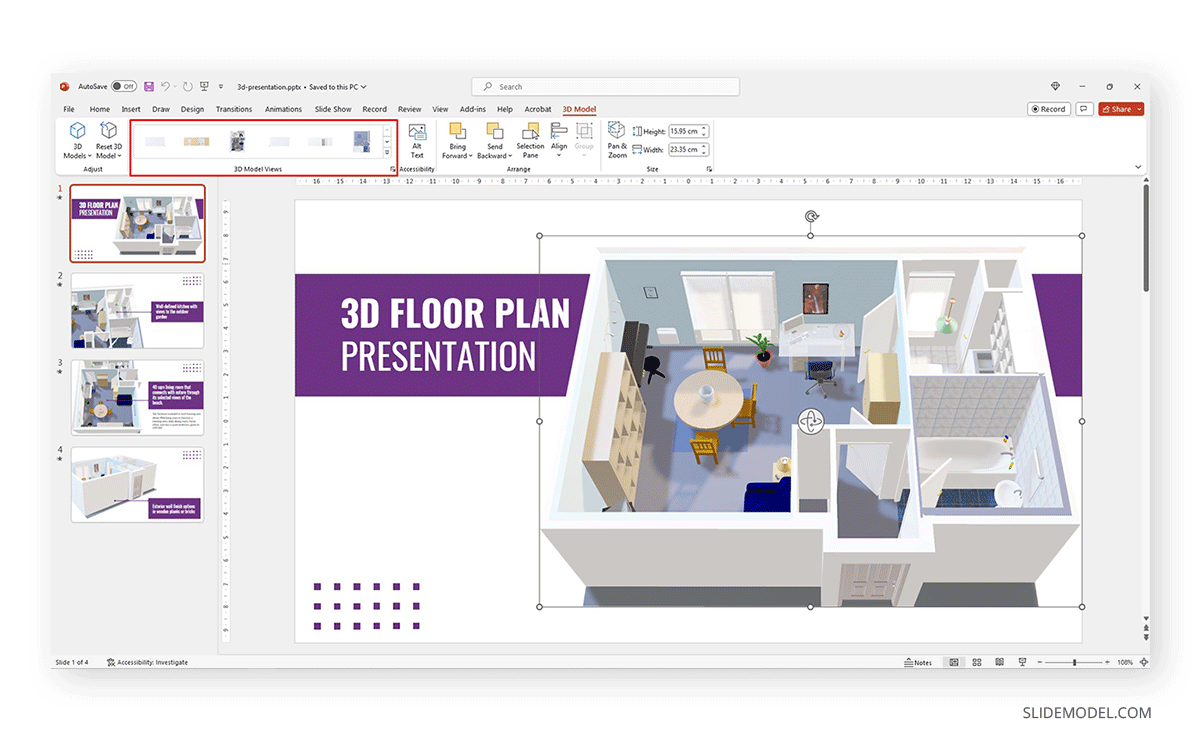
We would like to emphasize that final one since PowerPoint allows us to have pre-established views of 3D objects using Top, Bottom, Left, Right, Front, and Back views. If any of those views isn’t modeled and we want to use the view, it would be either non-existent or incomplete, and we cannot go back and forth integrating the 3D model with the presentation file as it doesn’t sync changes in live time.
How to Integrate 3D Floor Plans into PowerPoint
Exporting the .obj File from 3D Software
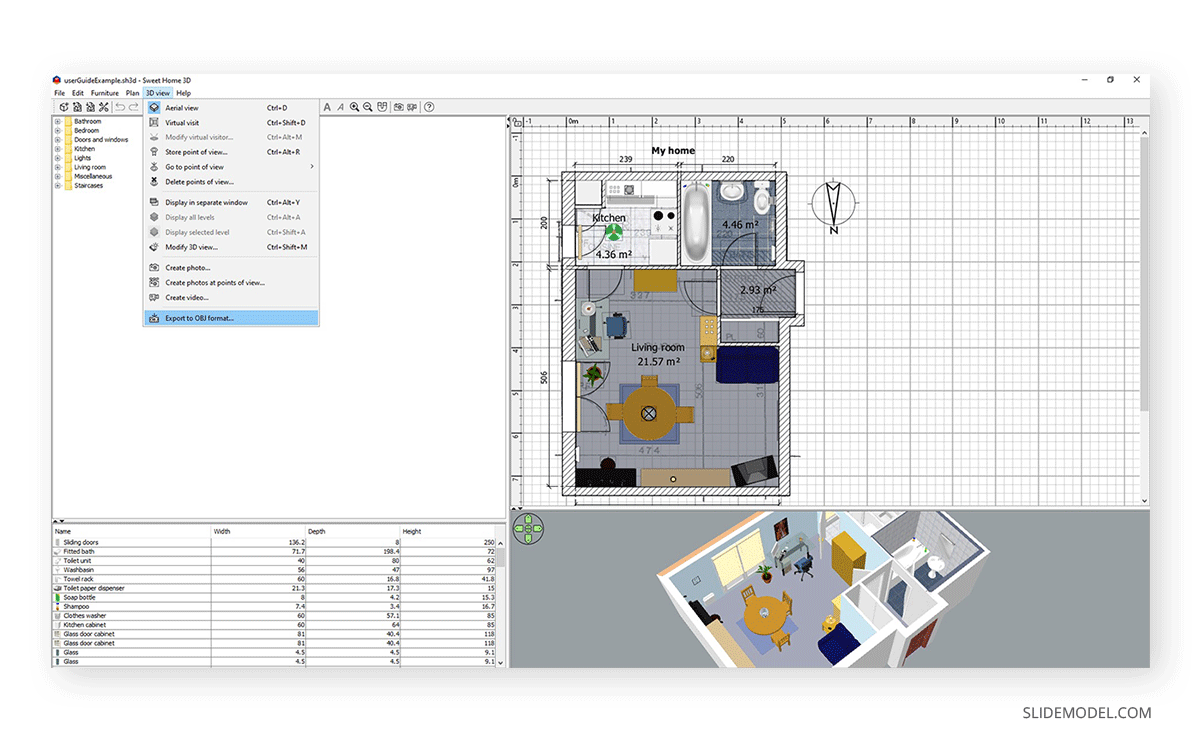
To simplify our process, we will use Sweet Home 3D to create the 3D model for this presentation. Instructions on how to export a 3D model to obj format may vary depending on the software used.
In Sweet Home 3D, go to 3D View > Export to OBJ format. Select the location to save your 3D model and file name, then click Save.
Blender exports to OBJ by going to File > Export > Wavefront (.obj).
SketchUp works by going to File > Export > 3D Model – then you select .obj as the file format.
BIM software like Revit can also export high-detailed 3D models to obj format. Go to your desired 3D view, File tab > Export > CAD Formats > OBJ.
Importing the .obj File into PowerPoint
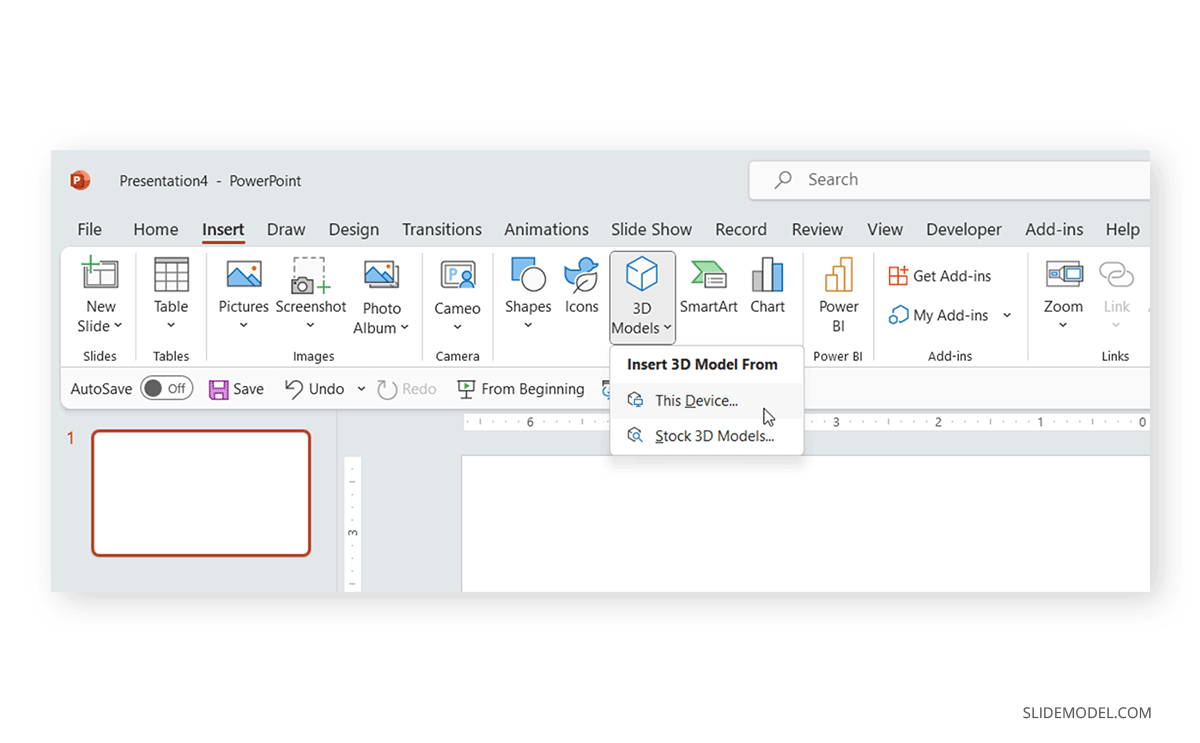
Open your presentation slide and switch to the Insert tab. Then, on the Ribbon, locate Insert 3D Model From > This Device.
Check our article on how to insert 3D objects in PowerPoint for further information on 3D object handling in PowerPoint.
Duplicating Slides + Animating or Rotating 3D Objects
Depending on what you want to present, you must duplicate slides to create multiple animation effects or infographics for your project.
A 3D gizmo allows us to rotate the 3D floor plan to any desired point. We can select the object and upscale its size if it doesn’t look pixelated.
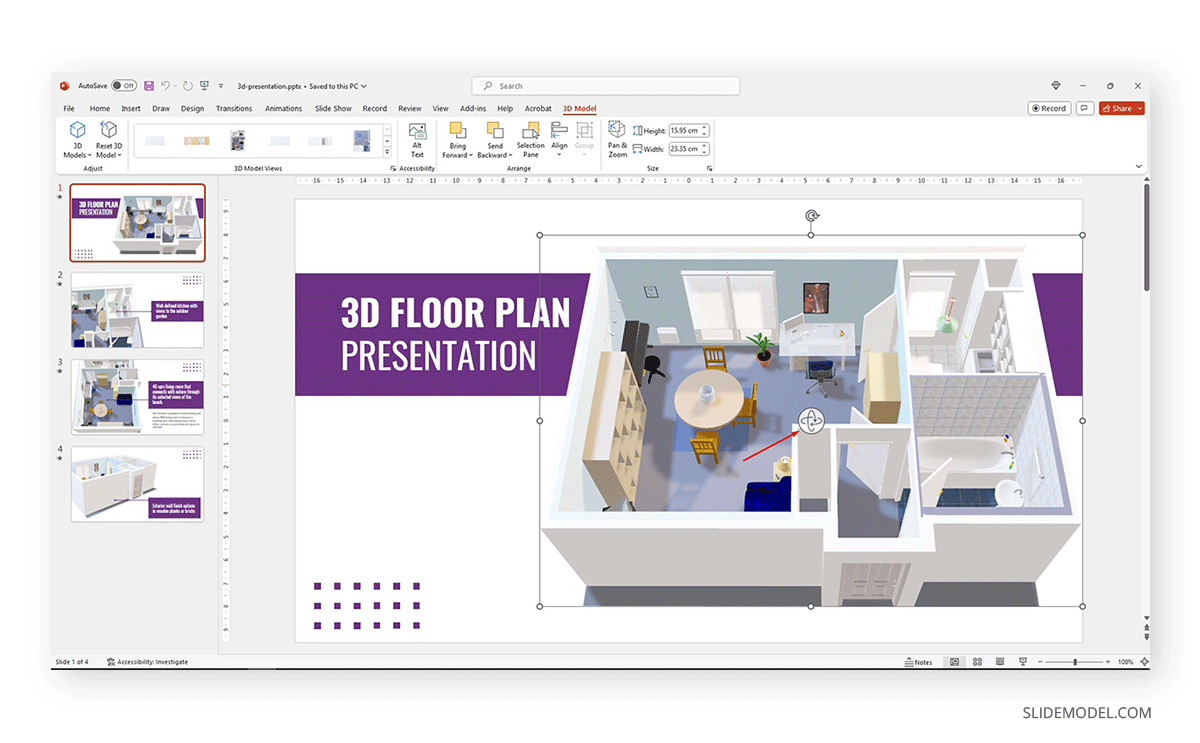
There are multiple animation effects you can use to present the 3D model:
- Morph Transition
- Appear
- Zoom
- Swivel
- Motion Paths
Creating Infographics from 3D Floor Plan Views in PowerPoint
Infographics can be built out of 3D floor plan views as we can extrude elements to create new graphics or displace parts of our 3D model, then use visual aids in PowerPoint to create meaningful slides that help our audience understand the concept we want to convey.
Any of these processes require creating a spare copy of the 3D model, applying the required changes to create the 3D infographic, and then saving it with another name (so there are no file conflicts when importing the second 3D model into the presentation). Typical applications of this technique are:
- Showing the material structure of a wall, floor, or window.
- Moving partition walls to present new enhanced spaces.
- Replacing finishing material.
- Adding/removing furniture to a space.
Exporting the 3D Presentation to HD Video Format
After completing the presentation design, we can play the presentation as a slideshow, or we can use it to create a high-quality video output. This helps us connect with prospective customers via social media or as a shareable that customers can check as many times as they like.
Go to File > Export > Create a Video to export the presentation to a video format. Select the required definition for your video, and remember to assign it to include Use Recorded Timings and Narrations if you added notes or voiceover to your PowerPoint presentation.
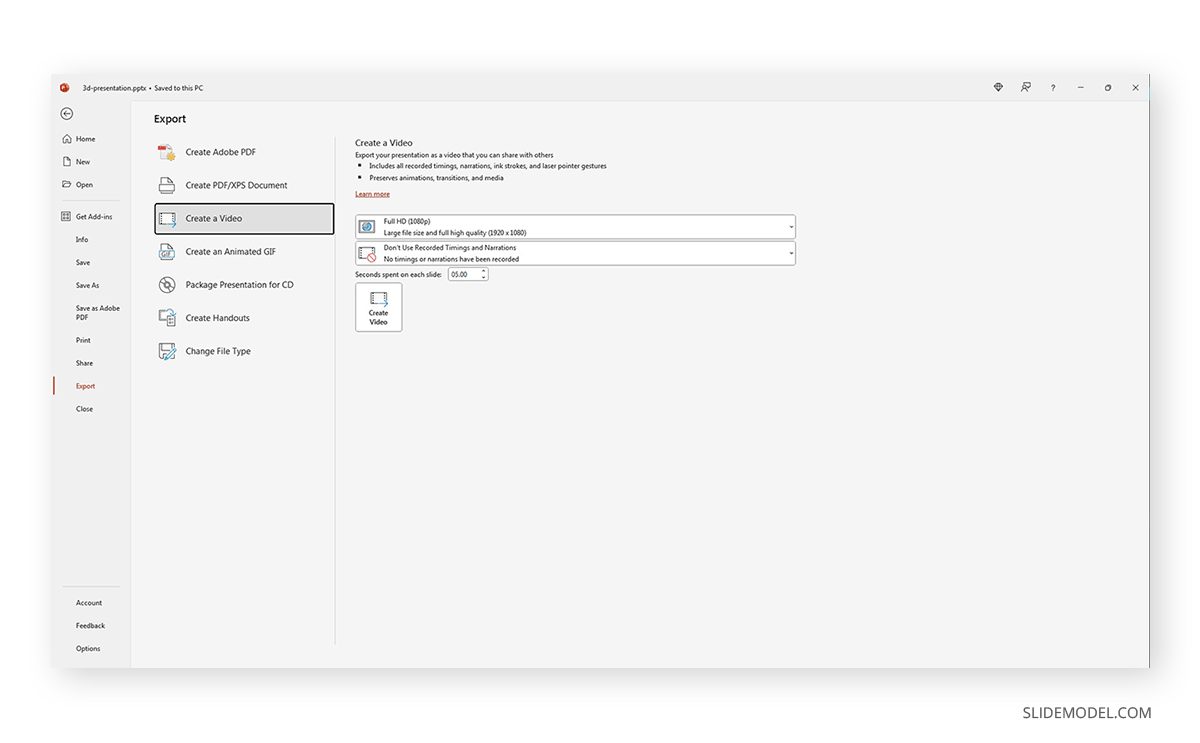
We highly recommend you check our guide on how to convert PowerPoint to video for further information.
Case Study: Presenting a Housing Project for Real Estate
For this initial case study, we will showcase a presentation for a housing project in Real Estate. The target audience is investors who are interested in purchasing a property in a new beachside private neighborhood. The presenter must highlight the importance of connecting with nature, infrastructure services (high-speed optic fiber internet, grocery stores, party room, laundry, kindergarten, and gym), private security, and distance from nearby cities. Also, the presenter wants to introduce their prototype units, the different configurations available, and the required investment while retaining a highly visual format that removes friction from the buying process.
Our presentation designer selected a template to deliver this presentation and worked with a 3D housing model made in Sweet Home 3D. The title slide contains a rendering made out of the 3D model – an exterior view.
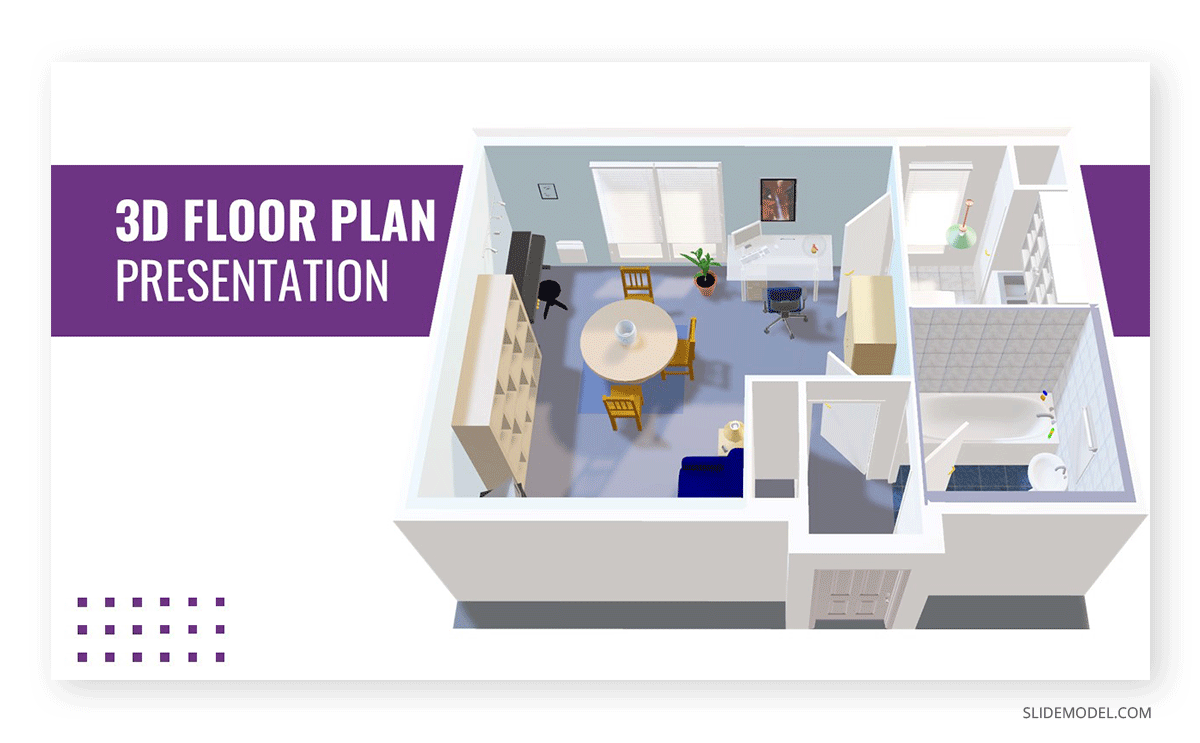
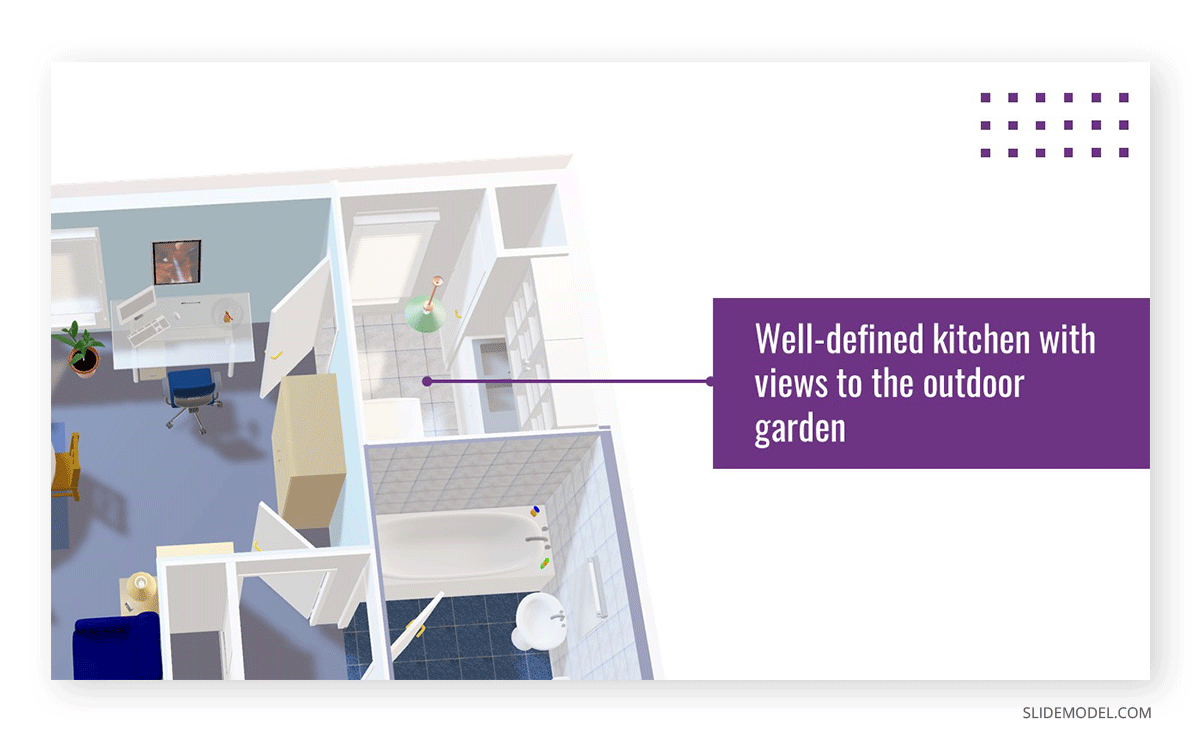
After introducing the agenda slide, relevant data for the project, and speaking about the location, the presenter now shows the 3D floor plan infographic view in a series of slides. First, speaking about selected views from the kitchen area.
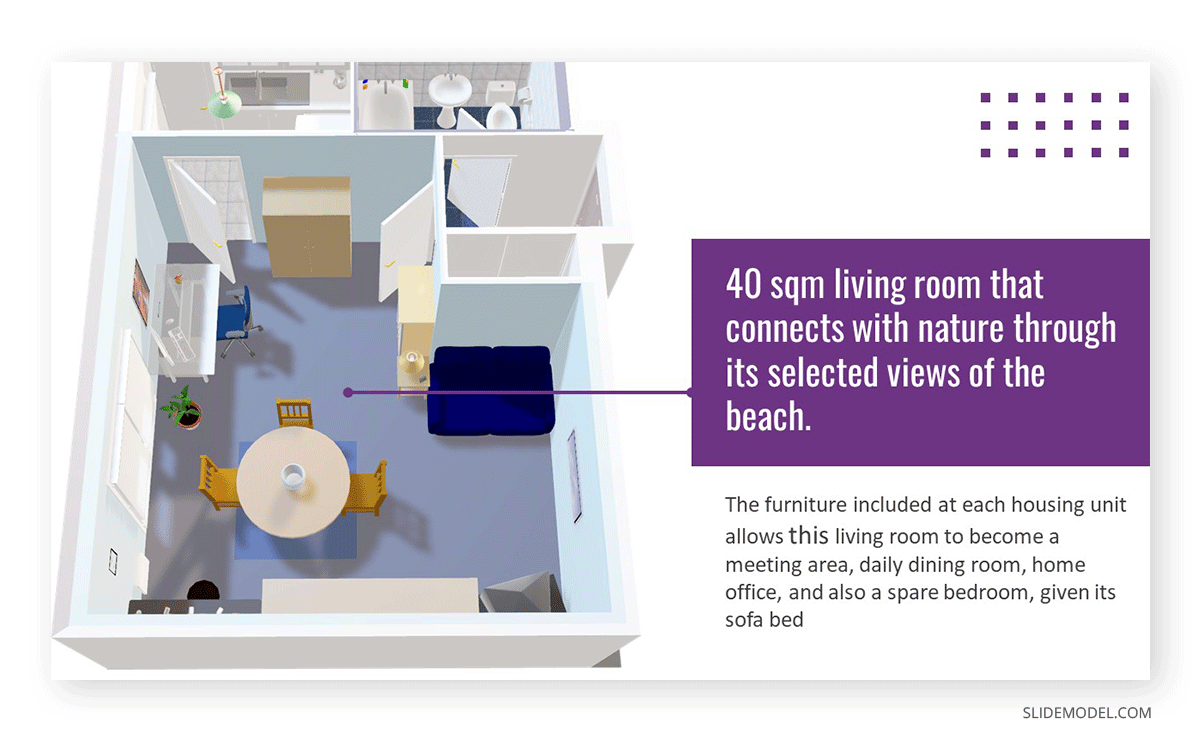
Next, the speaker discusses how the living room can serve as a multi-purpose area and also as a spare bedroom. It is possible for the audience to understand these concepts as the 3D furniture gives clear hints about the total livable area.
Finally, the slide discusses the exterior finishing material options since the housing units are customizable.
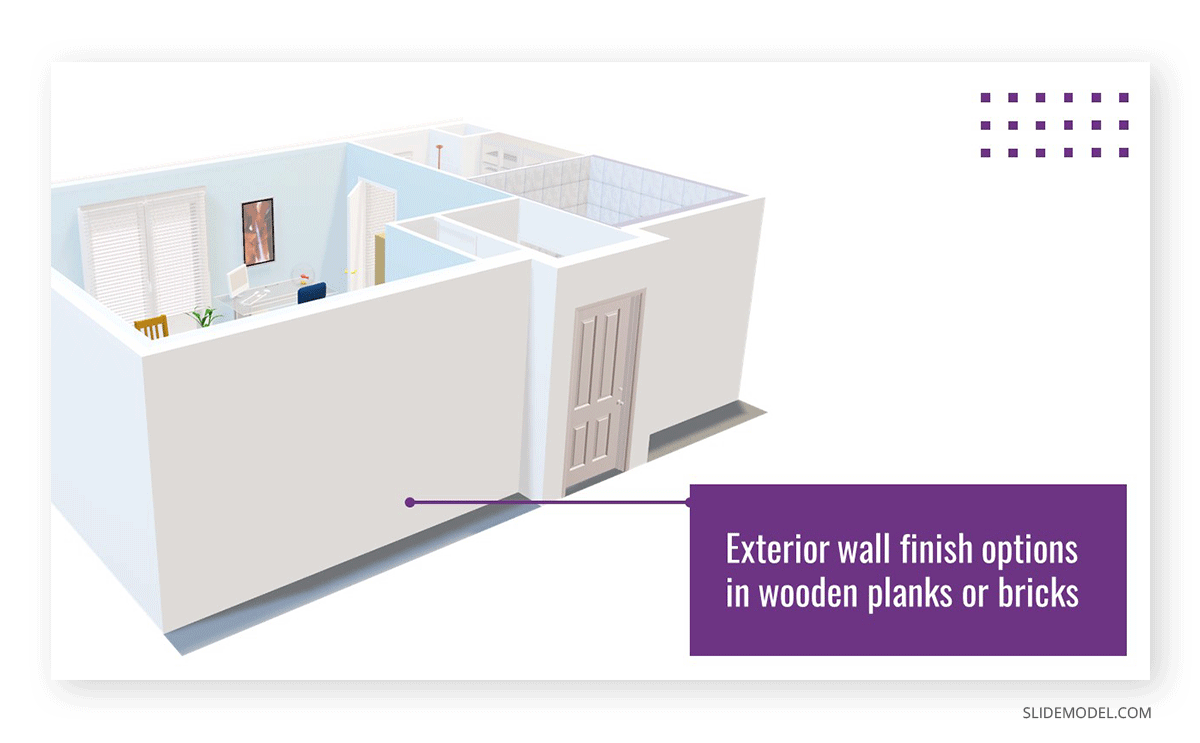
We can also appreciate the full impact of this presentation in this animated GIF shown below.

Case Study: Kitchen Renovation Project Presentation
For our second case study, we will take from the abovementioned idea: a contractor delivering a kitchen renovation project to a married couple who purchased an old home. The couple wants to move in ASAP, but the house requires a full kitchen renovation, which involves tearing down a partition wall separating the kitchen from the living room to create an open space concept and renewing material finishes, furniture, and appliances.
As the contractor acknowledges the importance of remaining within budget for this young couple, he meets with his customers. He delivers a presentation on what the project is going to be about. The first slide in this presentation is a breakdown of the tasks required to complete the kitchen renewal process.
Then, a Gantt Chart is shown so the couple can see whether the delivery date aligns with their moving plans and when payments should be made to complete each renovation phase.
Finally, the presenter delivers the core slide: a 3D floor plan view of the kitchen’s appearance once finished. This visual element amazes the couple as they can move inside the space and “live” the project they envisioned. Using the 3D images for PowerPoint helped this contractor secure the deal in contrast with another, lower-pricing option the couple also contacted.
Conclusion
As we’ve seen, using 3D models in construction or architectural presentations is vital, as presenters can put visuals into what they envisioned rather than confusing customers with tons of irrelevant data.
Working with the methodology presented in this article simplifies the process of presenting properties or projects, which used to involve creating animated 3D renderings that took countless hours to craft. Animated 3D floor plan presentations can be handled using a tablet and a projector, two resources presenters have at bay, and not lose quality in the process. Pairing that 3D model with a professional-quality Real Estate presentation template is your ticket to success.
We hope this guide can trigger some ideas on how to build your 3D floor plan presentation. See you next time!
