Animations can make a presentation more engaging, but only when they’re used correctly. Among the various options for adding animations to slides, the most flexible PowerPoint animations are motion paths, which, unlike basic entrance or exit effects, let you control where and how an object moves across a slide.
This guide explains how to use motion paths effectively, including extending them, applying them to text, and combining multiple paths for advanced effects.
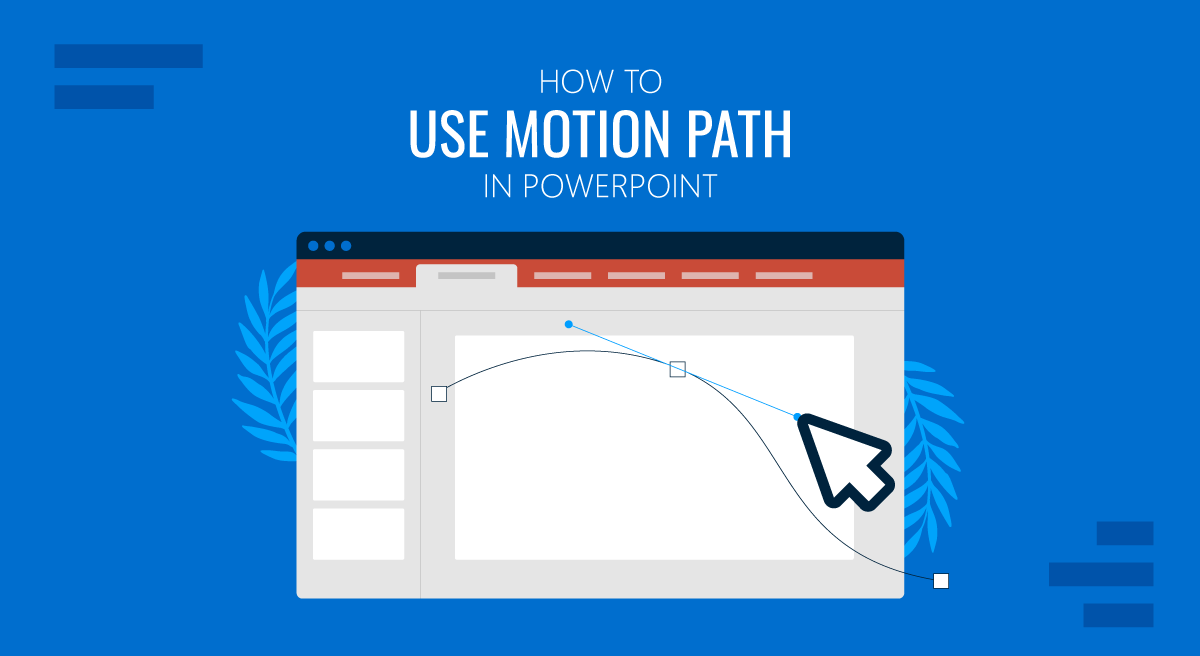
What is a Motion Path in PowerPoint
A motion path is an animation effect that moves an object, such as text, shapes, icons, or images. Using motion path animations, the object is moved along a defined route on a slide. With motion paths, you can create slides with animations that move as lines, arcs, turns, shapes, as custom paths, or in a loop.
A motion path for animations is commonly used to show direction or flow, illustrate processes or sequences, animate diagrams and maps, and guide audience attention to a specific location on the slide. As they rely on movement rather than appearance alone, motion paths work best when they reinforce the message in slides. A motion path animation can be quite useful for directing the audience’s attention to a specific section of the slide or for making a subtopic stand out.
How to Add a Motion Path in PowerPoint
Adding a motion path is straightforward and can be done via the Animations tab in PowerPoint.
Step 1: Select the object you want to animate, go to the Animations tab, and click on Add Animation.
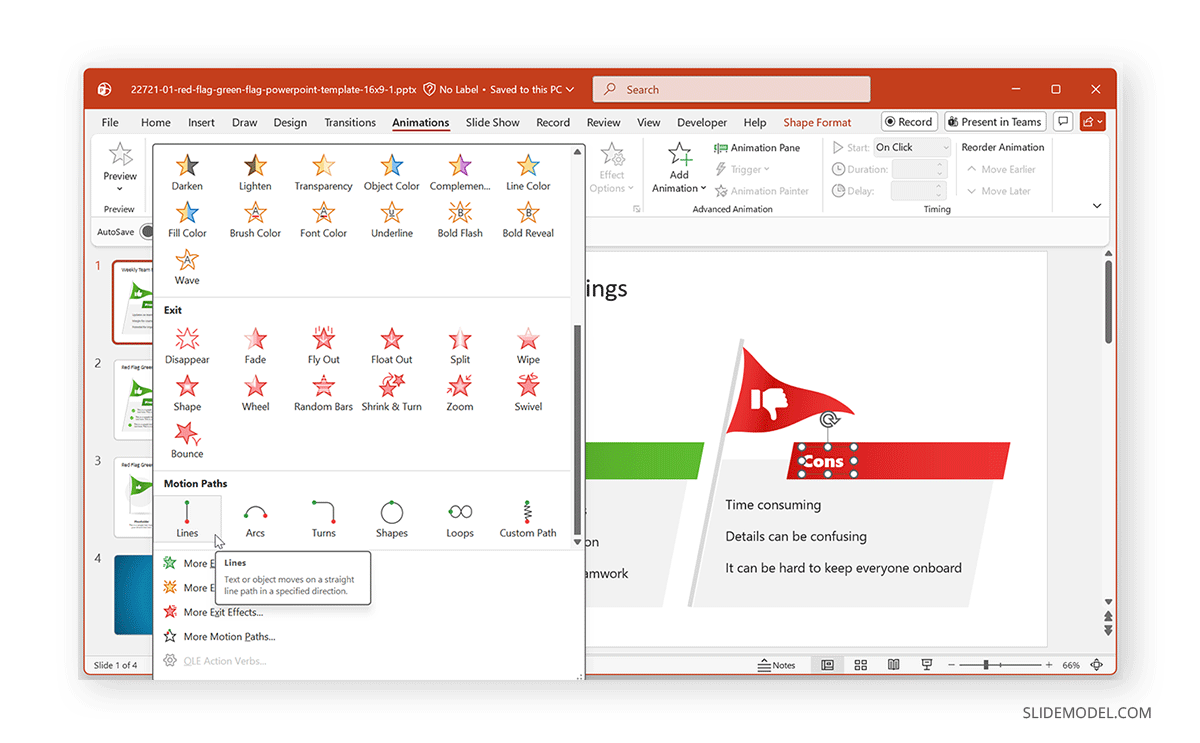
Step 2: Scroll down to the Motion Paths section and choose a preset path (Lines, Arcs, Turns, Shapes, or Loops), or select Custom Path, which enables dragging the cursor to create custom animated paths.
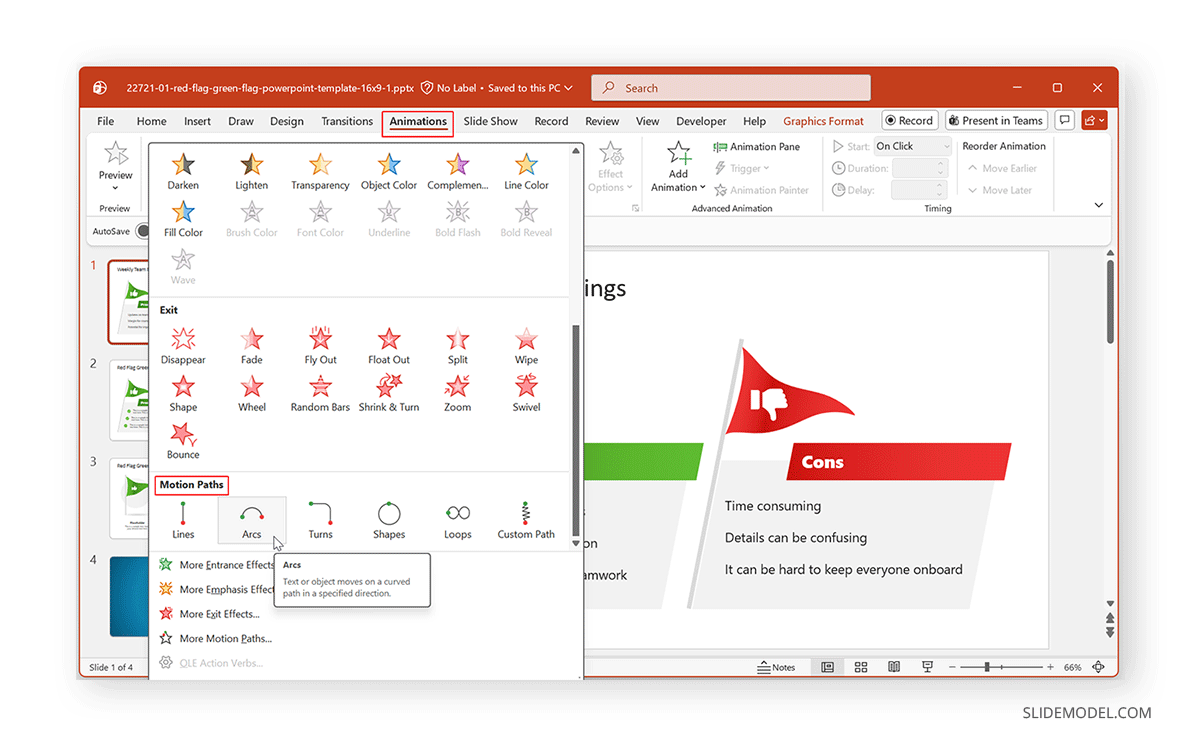
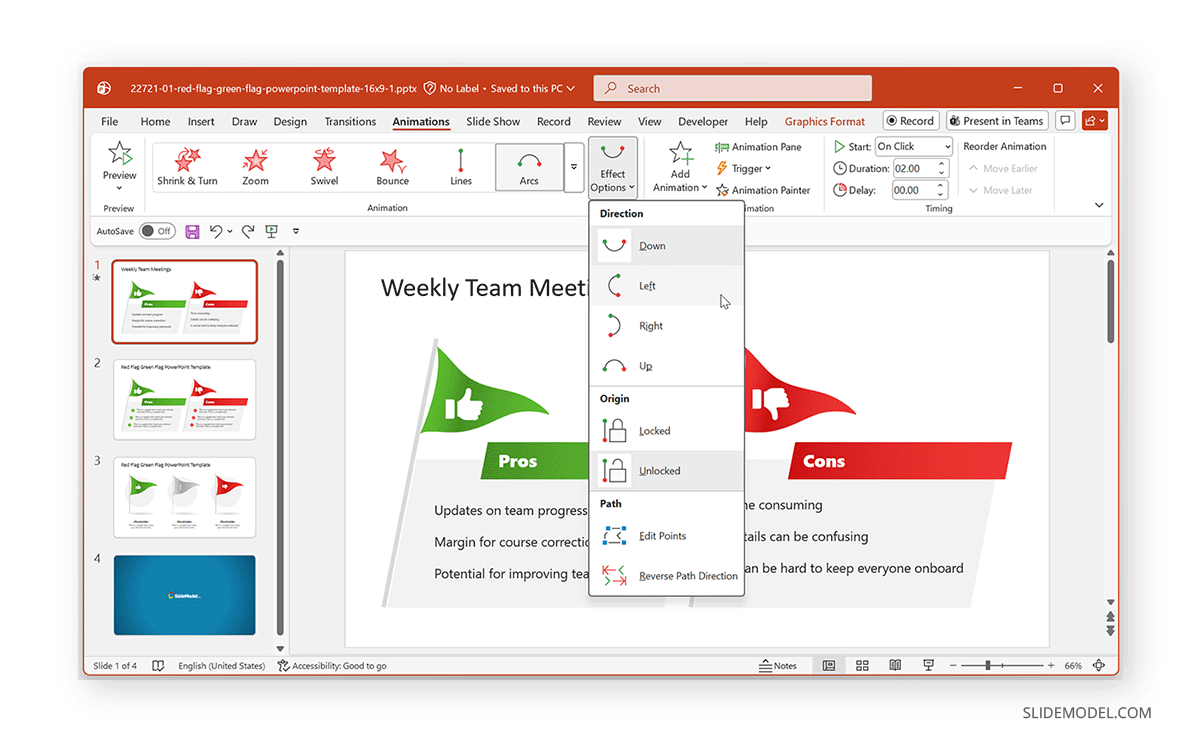
Step 3: Once applied, PowerPoint shows the motion line directly on the slide, with arrows indicating direction and start/end points. You can go to Animations -> Effect Options to lock, edit, or set a different direction for the path.
Note: If you would like to learn about how to remove motion paths, see our post about how to remove animations from PowerPoint and Google Slides.
Extending and Adjusting a Motion Path
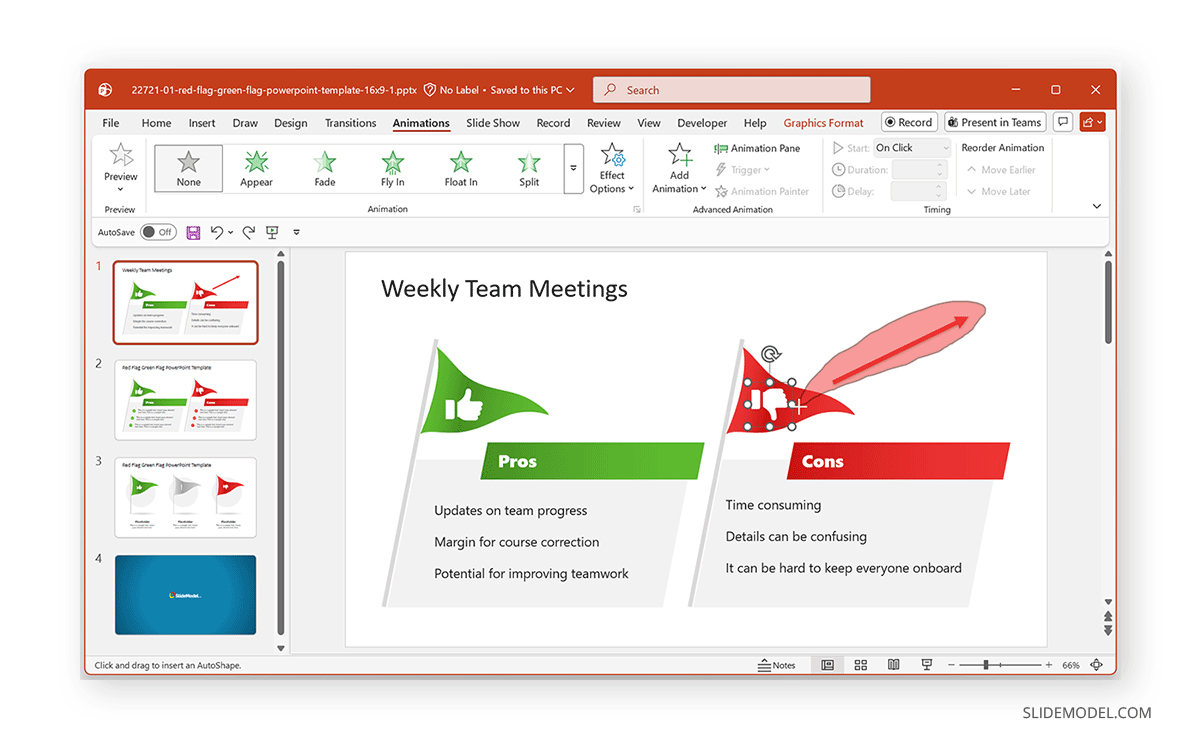
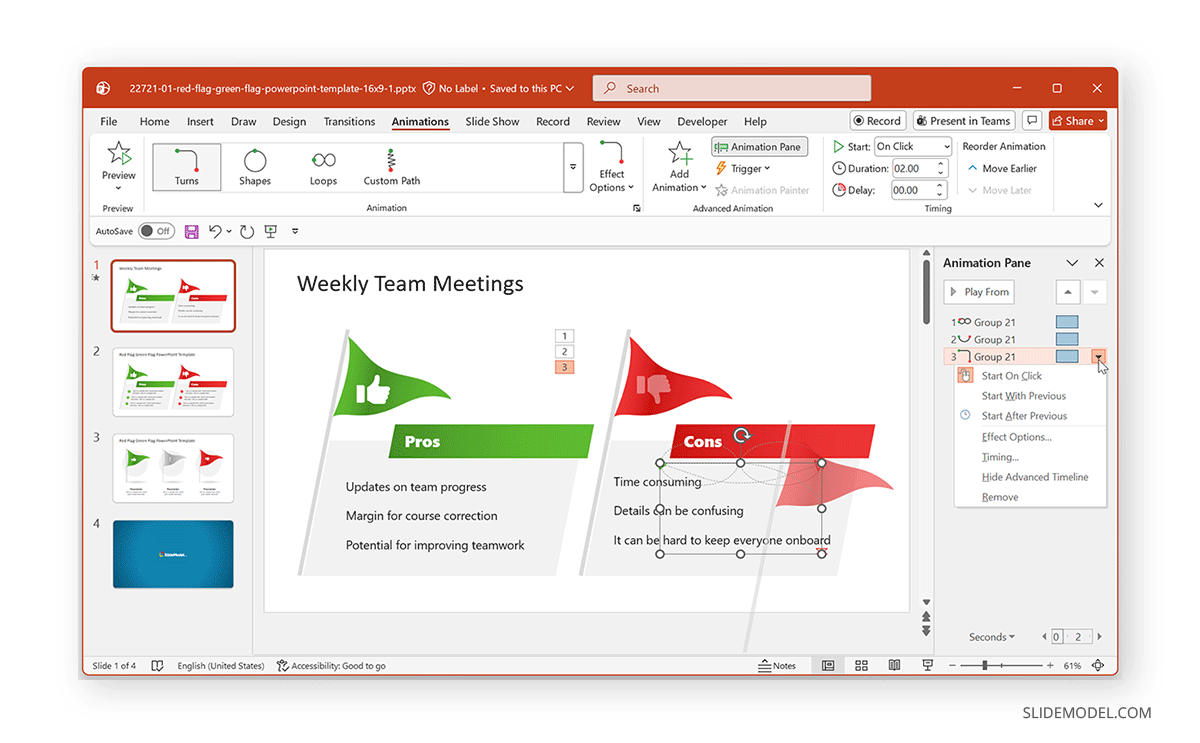
One of the most common questions users ask is how to extend motion path in PowerPoint. After adding the path, you can modify it by clicking the motion path line to reveal adjustment handles, dragging the endpoints to lengthen or shorten the path, and moving control points to refine curves. You can also fine-tune the movement via Animation Pane -> Timing, where you can adjust duration, delay, and trigger options. Slower paths often feel more natural and are easier for audiences to follow. The image below shows the adjustment of a custom path using the Red Flag Green Flag PowerPoint Template.
How to Set a Custom Text Path in PowerPoint
Text can be animated with motion paths just like shapes or images, but it works best when used selectively. To apply a motion path to text, select a text box (not individual letters) and add a motion path as you would for any object. Text motion paths are useful for:
- Moving labels into place on diagrams
- Guiding attention across a visual
- Creating subtle emphasis for titles
Note: It is recommended to avoid excessive movement for paragraphs using motion paths. Since short phrases or keywords work best when animating text.
How to Set a Custom Motion Path
Preset paths are helpful, but custom paths offer maximum control. As mentioned earlier, you can drag to create a custom animated path for the selected object using custom paths. This can help create custom animations using existing slide objects to draw the audience’s attention to a specific point on the slide. To create a custom motion path, select the object, go to Custom Path via the Animations tab, and draw the path directly on the slide using clicks or freehand lines. Double-click to finish the path. Custom paths are especially useful for:
- Non-linear diagrams
- Maps in slides or Map Templates for PowerPoint
- Visual storytelling sequences
Note: You can redraw or refine the path until it aligns perfectly with your slide content.
How to Add Multiple Motion Paths in PowerPoint
You can apply multiple motion paths to the same object to create more complex movement. Since this can be tricky, we would recommend following the method below:
- Add each motion path separately using Add Animation (do not replace them).
- Control the order using the Animation Pane to drag and drop animations into the correct order.
- Use timing and delays to avoid abrupt transitions.
For example, an object might use PowerPoint loop animation and then horizontal animation to simulate a step-by-step process.
When to Use Motion Paths in PowerPoint
Presenters should think of motion paths as a visual storytelling tool that helps explain relationships and creates a sequence. This can help prevent them from looking out of place.
1. Use Motion Paths to Clarify Movement and Flow
Motion paths are most effective when they visually represent movement that would be difficult to communicate with static elements. This includes showing how a process progresses from one step to another, illustrating direction in diagrams or maps, or demonstrating how elements relate spatially. In these cases, the added motion adds meaning and helps the audience follow the narrative naturally.
2. Use Motion Paths to Guide Attention
A well-timed motion path can direct the viewer’s focus exactly where it’s needed. By animating one object at a time, presenters can control the order in which information is revealed, reducing cognitive overload. This is particularly useful for explaining layered concepts or walking an audience through complex visuals.
3. Avoid Motion Paths When Slides Are Already Complex
If a slide contains dense information, detailed charts, or multiple visuals competing for attention, adding motion paths can make it harder to understand. In such cases, simplifying the slide or using static highlights often yields greater clarity than introducing movement.
4. Manage and Refine Motion Paths as Content Evolves
As presentations are edited or repurposed, motion paths should be reviewed to ensure they still serve a purpose. The Animation Pane makes it easy to see all applied effects, adjust their timing, or remove animations that no longer add value. For slides intended for printing or static sharing, motion paths should be removed entirely.
5. Be Subtle and Consistent with Motion Paths
To maintain a polished look, motion paths should be subtle and consistent. Animation direction should follow natural reading patterns, such as left to right or top to bottom, and similar animations should use consistent speeds across slides. Always preview animations in Slide Show mode to ensure they feel smooth and supportive rather than distracting.
Final Words
Using a motion path in PowerPoint gives presenters precise control over how elements move on a slide. This can be used, for example, when animating text, illustrating a process, or guiding attention through a complex visual. When thoughtfully combined with other PowerPoint animations, motion paths become a powerful tool for visual storytelling, helping your audience follow not just what you’re presenting, but also how ideas connect and progress.
When used thoughtfully, motion paths can enhance clarity and audience engagement. However, when overused, they can have quite the opposite effect. The key is to ensure every animated movement has a clear reason for being included on the slide.