PowerPoint is widely used for crafting presentations that are visually engaging and informative. While it excels in visual storytelling, it lacks traditional margin settings like those in Microsoft Word. However, understanding how to set margins in PowerPoint can significantly enhance your slides’ visual balance and readability. In this guide, we’ll walk you through various ways to set or adjust margins on slides, textboxes, notes pages, and more.
Why Margins Matter in PowerPoint
Margins help define the visual space within your slides. They act as buffers that prevent your content from being too close to the edges of the slide, keeping text and visuals legible, well-aligned, and aesthetically balanced. But their importance goes beyond just aesthetics. Here is a list of a few key benefits of adjusting margins in PowerPoint.
- Improves Readability: When text is too close to the edge of a slide or a text box, it can look cluttered and be hard to read. Proper margins ensure that your content looks neat.
- Supports Visual Hierarchy: Margins help distinguish different content sections, allowing you to build a structured layout that guides the viewer’s eye.
- Ensures Compatibility Across Devices: Screens may crop slide edges when sharing or projecting presentations in meetings. Margins help ensure nothing critical is cut off.
- Facilitates Better Printing: If you’re printing your slides, margins prevent content from being clipped by the printer’s safe print area. Learn more from this post about how to print PowerPoint without margins.
- Professional Appearance: Presentations with consistent margins look more polished and intentional, leaving a better impression on your audience.
- Enhances White Space Usage: White space is crucial in slide design. Adjusting margins allows you to use white space effectively, reducing clutter and enhancing focus.
- Improves Accessibility: Consistent margins support better formatting when using accessibility tools like screen readers. Margins are not just about appearance—they influence how well your message is delivered and perceived.
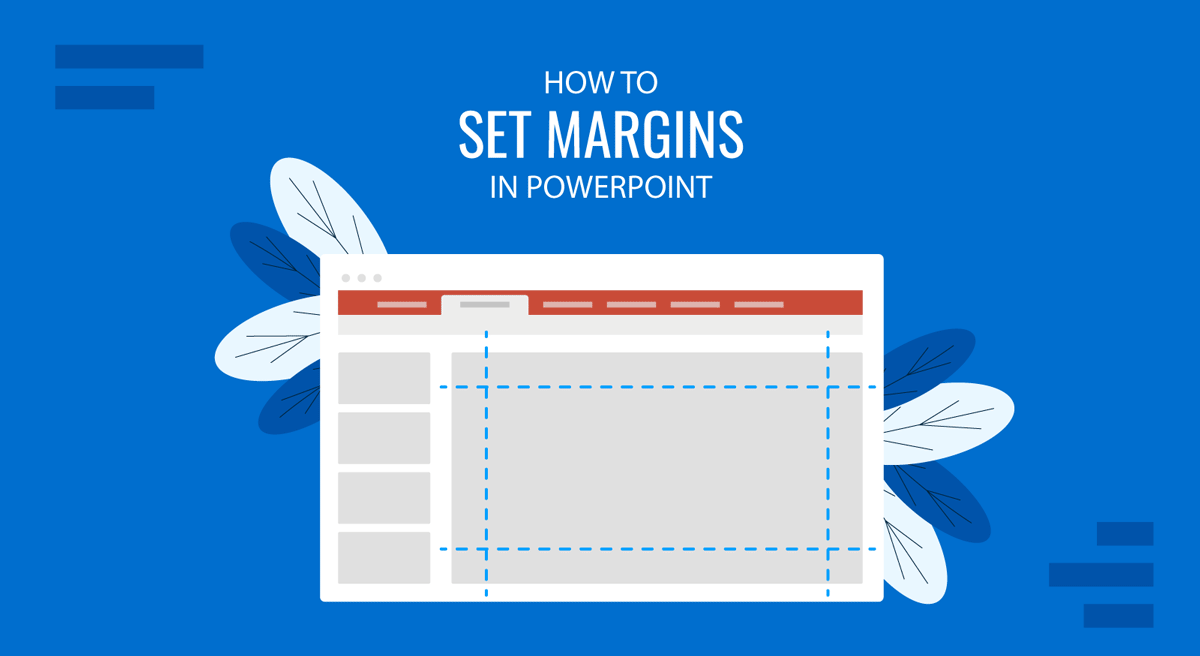
PowerPoint: How to Set Margins on Slides
PowerPoint slides don’t have traditional page margins, but you can manually create margin-like spacing using guides and placeholders.
How to Manage Margins Using Guides in PowerPoint
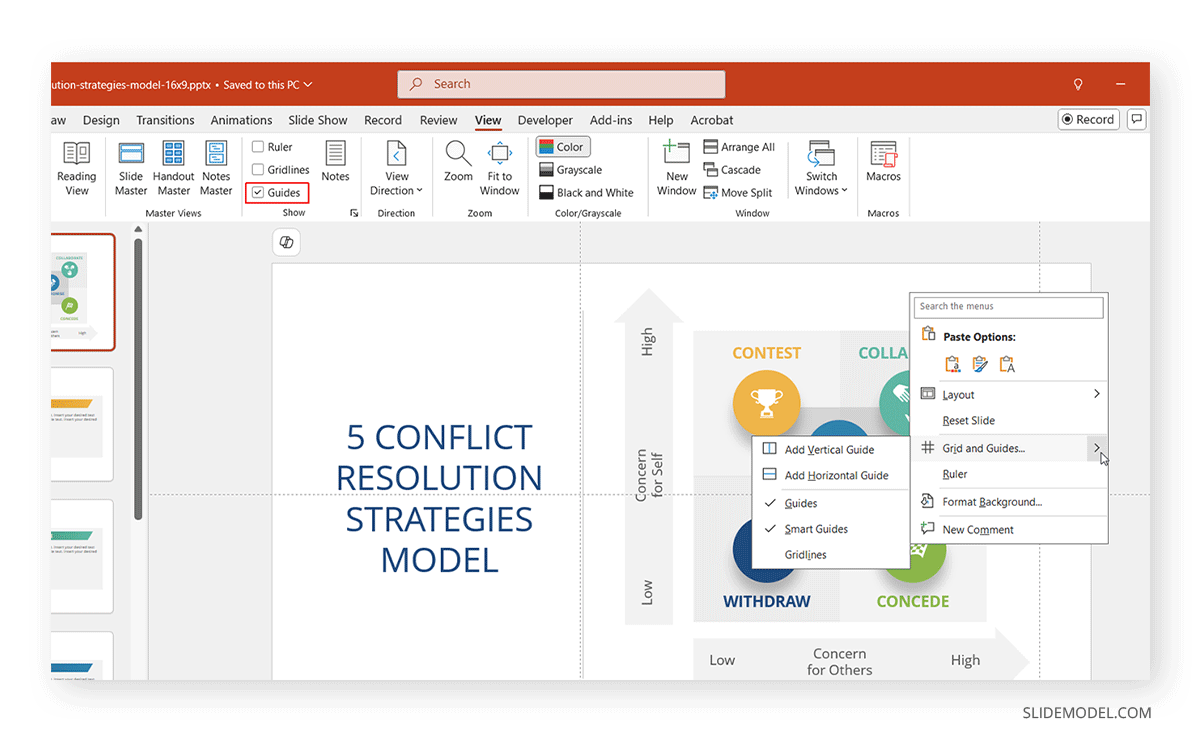
Step 1 – Enable Guides: By enabling Guides, you can view and adjust PowerPoint margins easily. To enable it, go to the View tab and check Guides. You will see vertical and horizontal guides appear on the slide.
Step 2 – Adjust Guides to Create Margins: Drag the guides inward from the edge of the slide. Use these as visual boundaries to keep content within a defined space.
Step 3: Align Your Content: To align your content to margins, place text boxes, images, and other elements within these visual boundaries.
Add Additional Guides (Optional): Right-click on the slide, choose Grid and Guides to add vertical or horizontal guides just like we added to the diagram below in the 5 Conflict Resolution Strategies PowerPoint Template to demonstrate how you can manage the guides to suit your needs.
Pro Tip: Use this method across all slides for a consistent layout. To apply settings across all slides, adjust guides in the Slide Master view.
How to Change Margins in PowerPoint Textboxes
One of the most practical ways to control margins is by adjusting the textbox margins in PowerPoint.
How to Set Textbox Margins
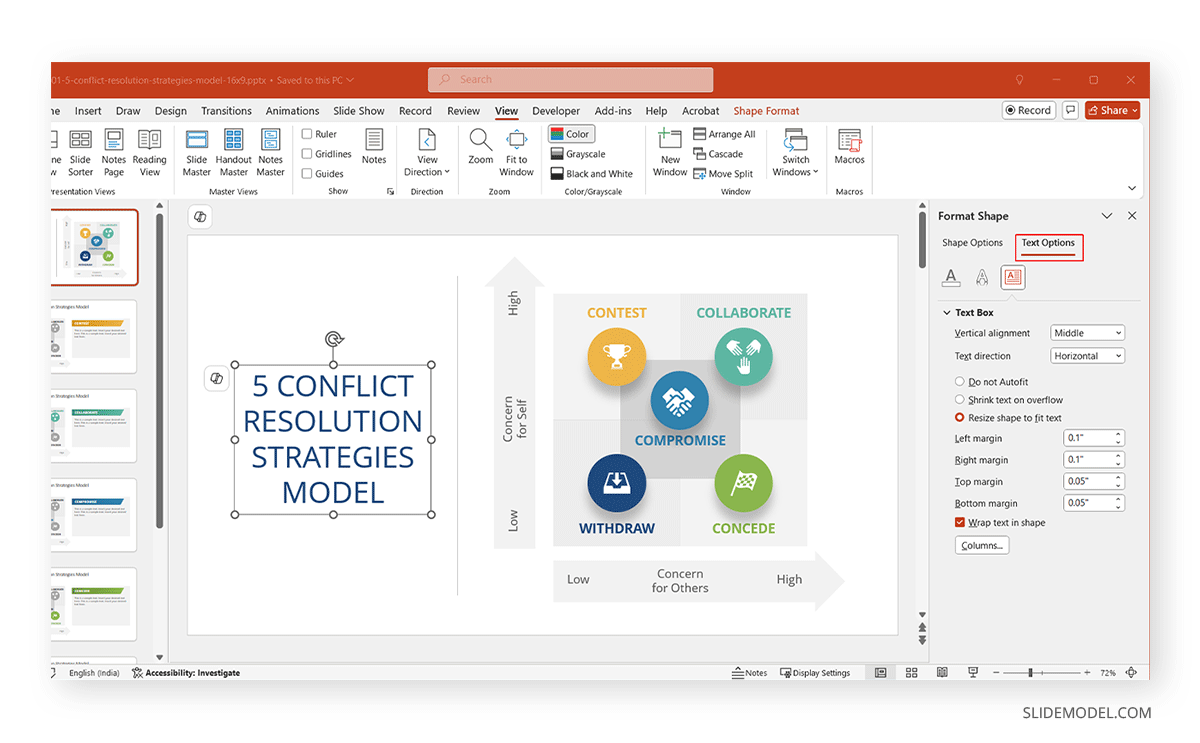
Step 1: Go to Format Shape, select the textbox, right-click, and choose Format Shape.
Step 2: Head over to Text Box Options -> Text Box.
Step 3: Adjust the Left, Right, Top and Bottom internal margin, and add space inside the textbox. You can set values in inches, points, or pixels depending on your preference.
Adjusting text box margins might be ideal for bullet points, titles, or paragraphs. Preventing text from touching the edges of the box can help improve legibility.
Related: Learn how to change line spacing in PowerPoint to further enhance text readability for your PowerPoint slides.
How to Change Margin for All Slides in PPT at Once
While PowerPoint lacks a one-click margin feature, here’s how to apply consistent margin spacing across all slides:
Use the Slide Master
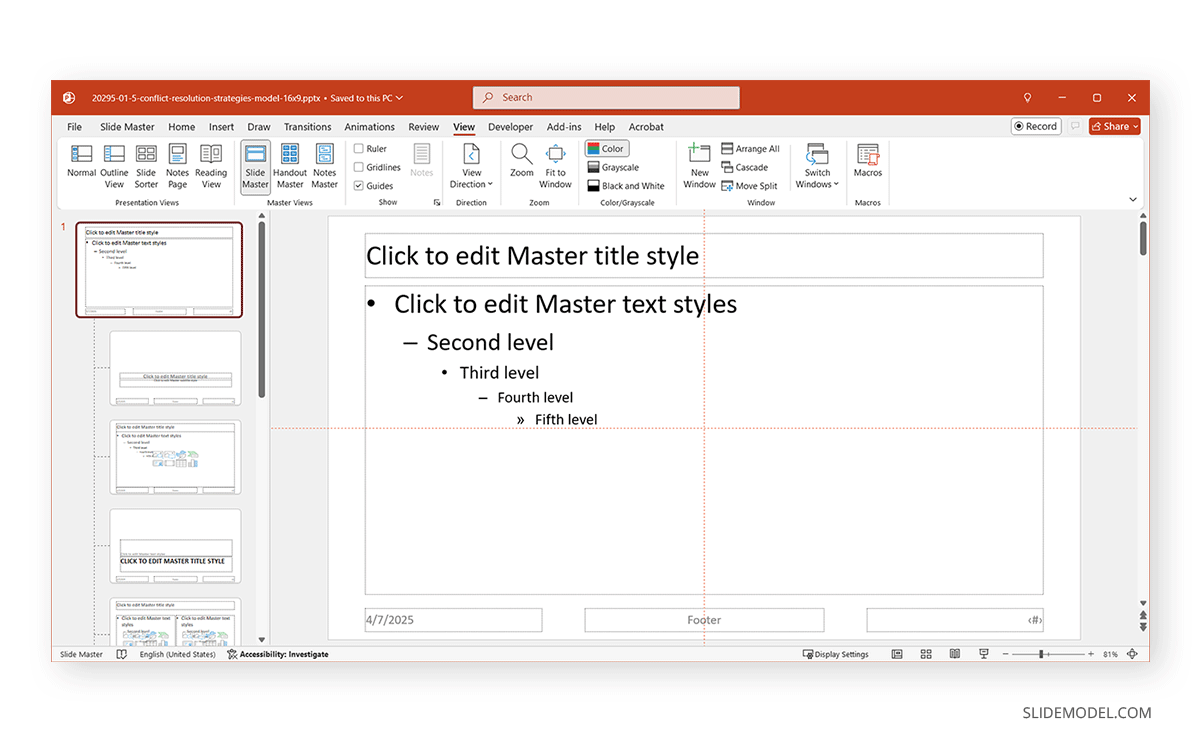
By using the Slide Master, you can change the margins for all slides in a PPT at once. To do this, follow the steps below.
Step 1: Go to View -> Slide Master, click on the layout(s) you use most frequently.
Step 2: Add guides or modify placeholders to simulate margins.
Step 3: Adjust the internal margins of the text box from within the Slide Master.
Step 4: Close the Master View to apply changes globally. This will ensure a unified layout and consistent margins across your entire presentation.
Modify Margins When Printing Notes in PowerPoint
If you print your slides with speaker notes, you might want to adjust margins for better print results.
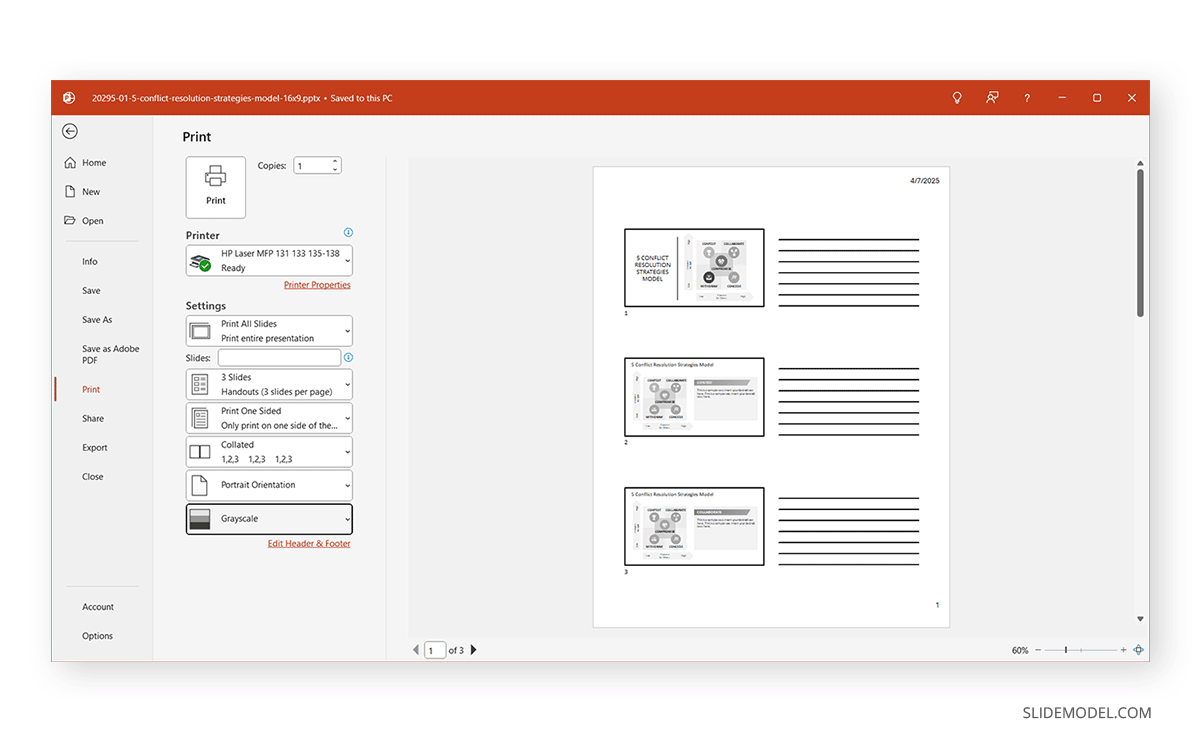
Step 1: Go to File -> Print and choose Notes Pages under Print Layout.
Step 2: Click on Edit Header & Footer to adjust spacing manually.
Step 3: To customize the layout, select View -> Notes Page. Here, you can resize and reposition the slide and notes boxes.
Tip: Learn how to print notes in PowerPoint to improve speaker support during presentations.
Use Margins to Enhance Printed Handouts
If you’re creating handouts, consistent spacing becomes even more crucial.
Step 1: Go to File -> Print -> Handouts.
Step 2: Select the number of slides per page.
Step 3: Click on Printer Properties to adjust orientation and spacing.
Although you can’t change actual margins in the handout’s layout, you can manually adjust content within slides using guides and spacing.
Want better results? Explore how to design PowerPoint handouts that are both functional and attractive.
Common Challenges When Working with Margins in PowerPoint
While setting margins can enhance your presentation, PowerPoint users often face a few challenges:
1. No Default Margin Settings
Unlike Microsoft Word, PowerPoint doesn’t have default page margin settings. This means users must manually adjust margins within text boxes or layout guides.
2. Inconsistent Margins Across Slides
If you’re manually setting margins, it’s easy to end up with inconsistent slide spacing. This inconsistency can break the visual flow and reduce the overall professionalism of your deck.
3. Limited Control Over Slide Edge Content
PowerPoint allows content to be placed very close to the slide edges, resulting in overcrowded layouts or elements that get cut off during printing or projection.
4. Difficulties in Printing Notes
When printing speaker notes, users may find that text runs too close to the edge. This often leads to problems in formatting or readability.
5. Text Box Margin Confusion
Many users overlook the internal margins of text boxes. These padding settings affect how close text sits to the edges of the box, impacting legibility and appearance. You must manually adjust these values to create space inside each text box.
6. Content Shift During Theme Changes
When changing themes or templates, margin settings often don’t transfer consistently. This can result in unwanted adjustments that affect your slide layout.
7. Difficulty with Master Slides
Setting consistent margins using the Slide Master can be confusing for new users. Improper setup in the Slide Master can lead to margin errors that repeat across your presentation.
8. Printing Without Cropping
If your slides are too close to the edge, they may be cropped by default printer settings. To avoid this, consider printing PowerPoint without margins.
9. Responsive Design Limitations
When sharing PowerPoints via web platforms or on different devices, slide content may shift based on screen resolution or aspect ratio, altering the visual effect of margins.
10. Lack of Margin Indicators
PowerPoint doesn’t show visual rulers or margin indicators by default, making it harder for users to precisely space out content. This can result in uneven spacing, especially when building from scratch.
Best Practices for Working with Margins in PowerPoint
To ensure consistent and high-quality results when managing margins, consider the following best practices:
1. Establish a Visual Grid
Before adding content, use PowerPoint’s built-in guides and gridlines to create a visual framework. This helps maintain uniform spacing across slides.
2. Set Default Text Box Margins
If you regularly use text boxes, consider setting up a default template with optimized internal margins. This will save time and promote consistency.
3. Align Content Strategically
Use alignment tools to keep text and objects evenly distributed. This helps simulate margin boundaries even if they aren’t defined by default.
4. Create and Use Slide Master Layouts
Customize your Slide Master to include predefined placeholder positions with appropriate margins. This is especially helpful for larger presentations or team projects.
5. Test Print Layouts
Always run a test print when creating handouts or speaker notes. Printers may crop edges differently, so adjusting your margins ahead of time prevents surprises.
6. Limit Edge-to-Edge Elements
Avoid placing text or visuals directly against slide edges. Leave breathing room to maintain clarity and avoid overlap during projection or printing.
7. Use Consistent Padding in Shapes and Tables
In addition to text boxes, shapes, and tables often need internal padding adjustments. Keeping these consistent improves the visual flow of your slides.
8. Keep Mobile and Display Variations in Mind
If your presentation will be viewed on different screen sizes or devices, test your layout to ensure margin effectiveness remains intact.
9. Pair Margins with White Space
Combine margin settings with effective use of white space to draw attention to key content and avoid overwhelming your audience. White space is a visual cue that helps highlight important elements, making your slide more readable and appealing. Thoughtfully adjusted margins support this effect. To learn more, see our tutorial about PowerPoint slide size for optimal scaling.
In modern presentation design, “margins” often translate to how you use white space.
- Avoid overloading slides.
- Create breathing room between elements.
- Let your content speak without clutter.
10. Preview Changes in SlideShow Mode
By previewing your slides in SlideShow mode, you can ensure that your content is aligned and displayed correctly for end users. This can help you eliminate any missing elements that might not show up in the slideshow due to incorrect placement when designing slides.
Final Words
While PowerPoint doesn’t offer a straightforward way to set margins like a word processor, you can still create consistent, professional-looking spacing using a combination of guides, Slide Master, and textbox formatting. Understanding how to set margins in PowerPoint allows you to optimize screen and print layouts, enhancing your audience’s experience.
Whether you’re fine-tuning the layout of a “Meet the Team” slide, printing speaker notes, or preparing handouts, thoughtful margin management ensures clarity, impact, and design balance.