Text wrapping adjusts text around other slide elements. Wrapped text appears clean and easier to read, as compared to text that might not appear aligned or might seem out of place. If you are a Google Slides user wondering how to wrap text around images in google slides or other slide elements, see the simple instructions given below.
How to Wrap Text Around an Image in Google Slides
For the purpose of this post, we will show you how to wrap text around an image in Google Slides. To get started, add a text box via Insert > Text Box.
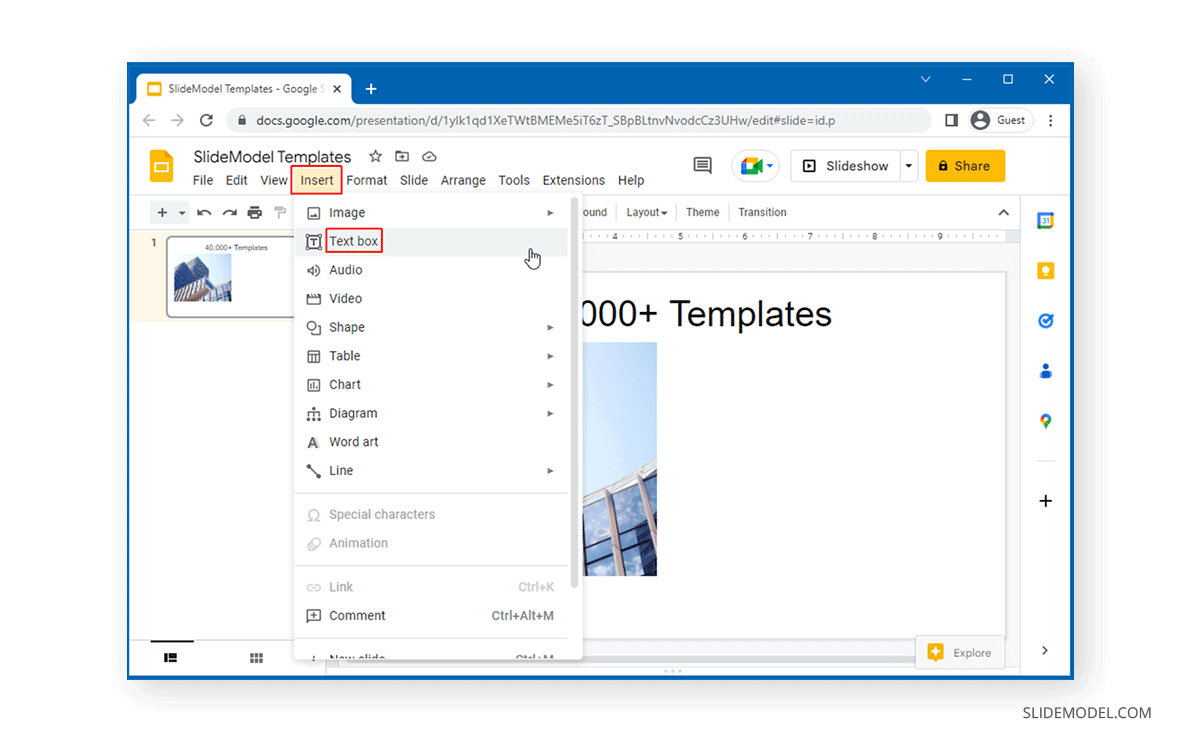
Drag the text box to place it according to need in your slide. You can choose to add your text box around an image and even use more than one text box according to need. You can begin typing text in respective textboxes or paste text using CTRL+V.
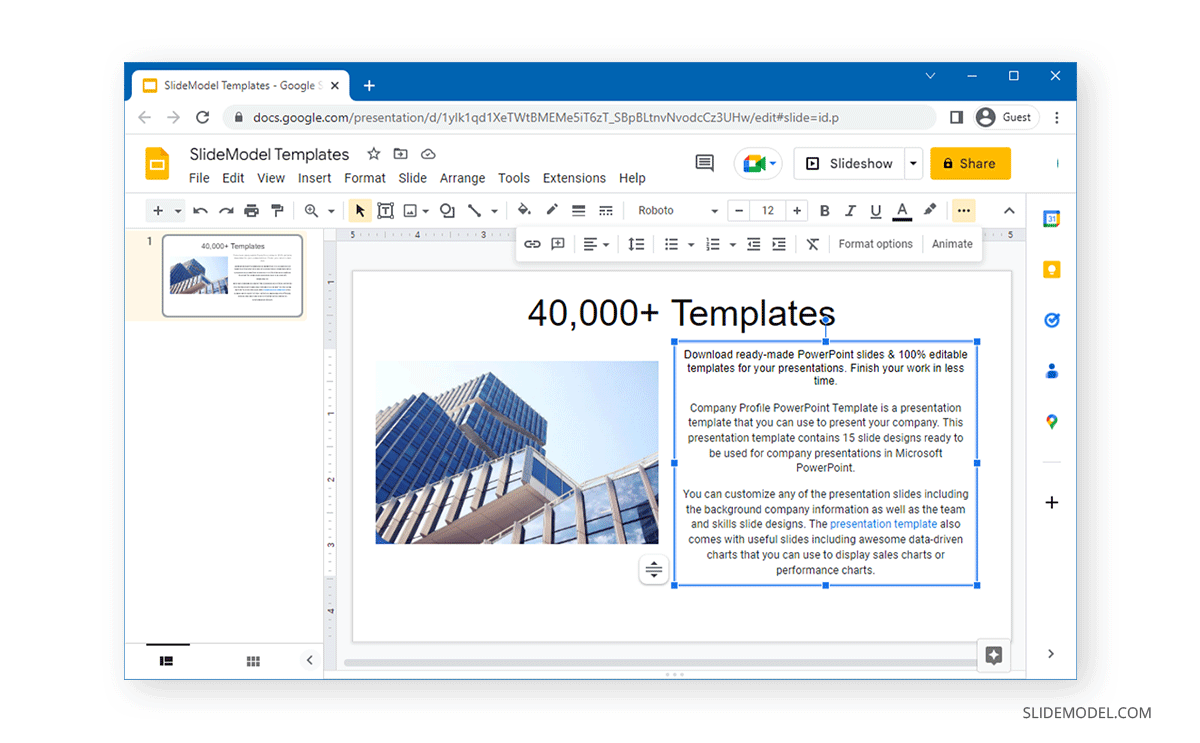
Once all placeholders have been added, and you have inserted the required text, select the text to align it and select Align > Justify from the top toolbar.
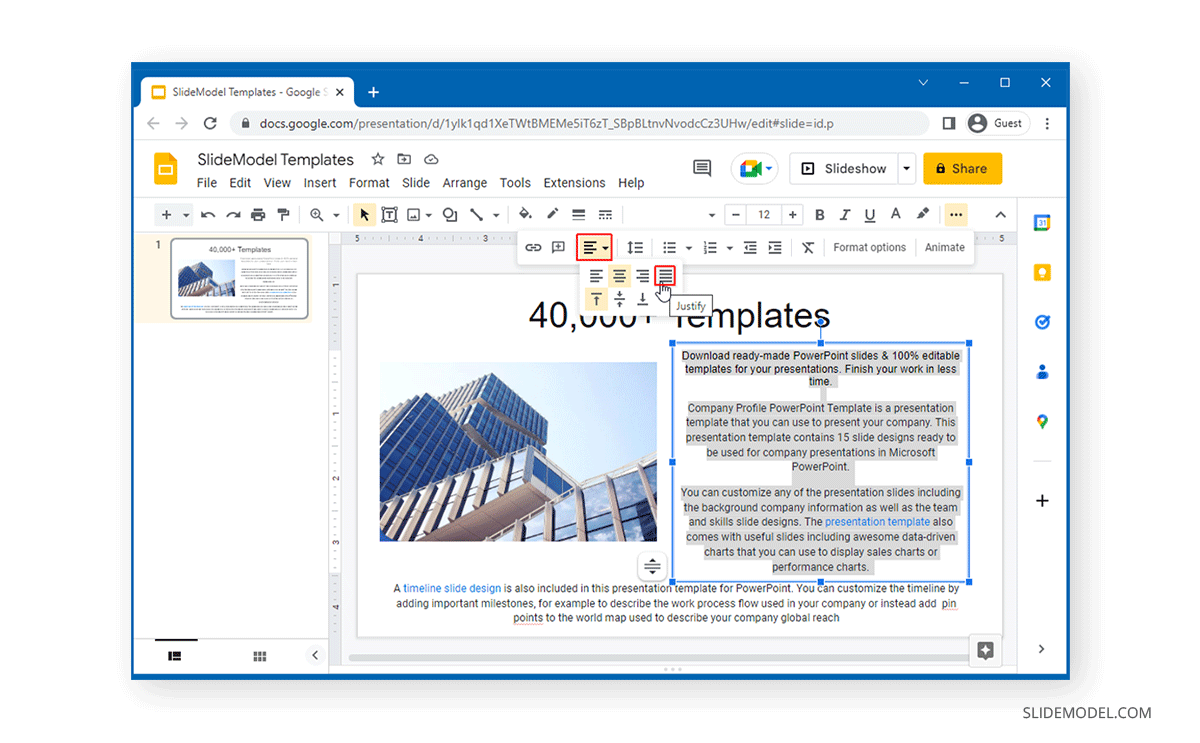
This will align your text and enable you to wrap text around the image. In case you think the alignment needs further adjustment, drag the placeholders to further adjust the text boxes.
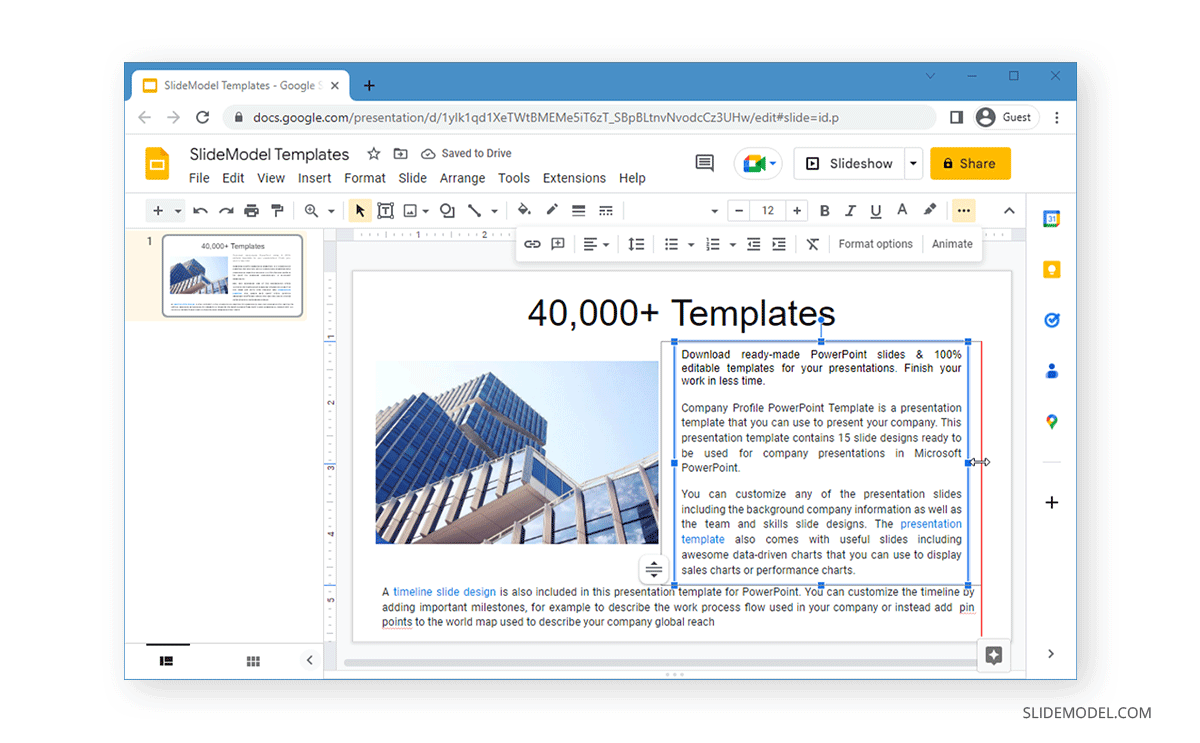
The below image shows wrapped text around an image in Google Slides. Using this simple method, you can easily adjust text around images, and other placeholders in Google Slides Templates and presentations you might design yourself.
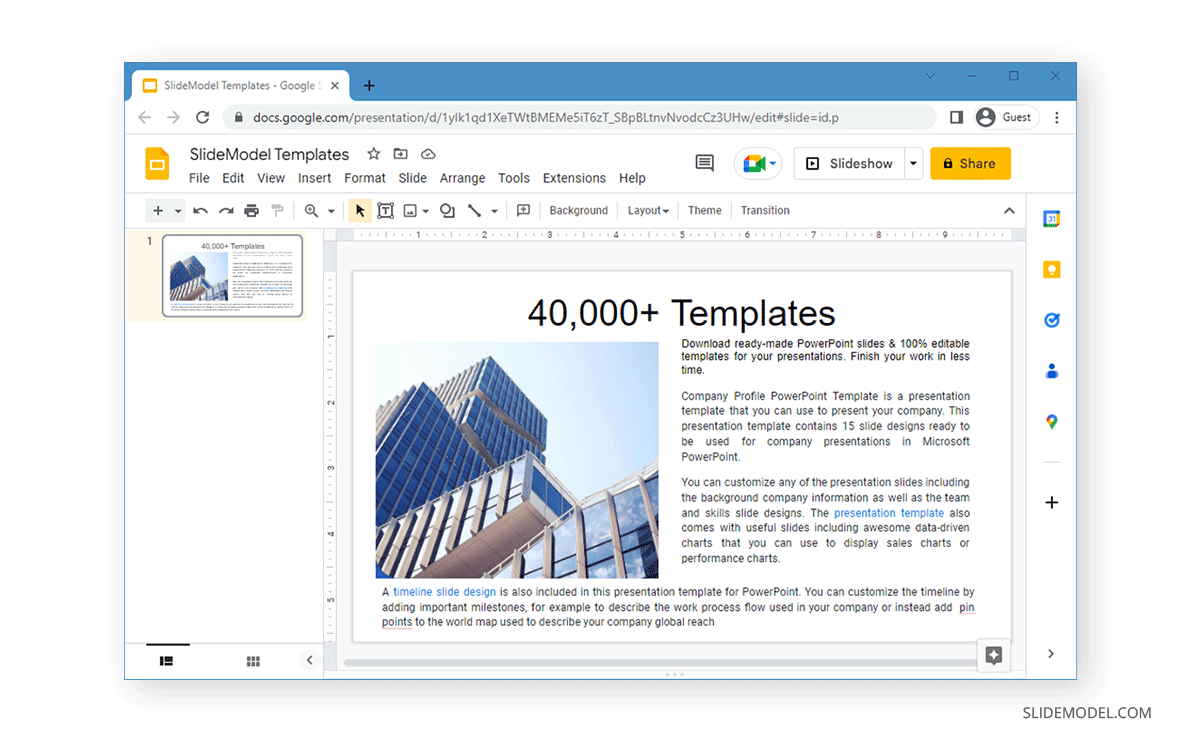
You can wrap text in Google Slides by justifying the text and adjusting the alignment of slide elements using drag and drop. Furthermore, you can also use other alignment options such as Right / Left Align and Increase / Decrease Indent to make further adjustments.
FAQs
Can I use multiple text boxes to wrap text around an image?
Yes, you can add multiple text boxes around an image and adjust each box’s position to achieve the desired text-wrapping effect.
How do I justify text in Google Slides?
Select the text within the text box, then go to the top toolbar and select Align > Justify. This will align the text evenly across the box, helping it wrap more naturally around images.
Can I adjust the alignment further after justifying the text?
Yes, you can further adjust the alignment by dragging the text box to reposition it or using the Increase / Decrease Indent options for more precise adjustments.
What are the best alignment options for wrapping text in Google Slides?
Alongside Justify, you can use Left Align, Right Align, and Center Align depending on your design needs. Additionally, Increase Indent and Decrease Indent can be used for fine-tuning the text position within the text box.
Is there a way to make text wrap automatically in Google Slides?
Currently, Google Slides doesn’t have an automatic text wrap feature like some word processors. You’ll need to manually adjust text boxes around images or other elements by positioning and justifying the text.
How do I add a text box in Google Slides?
Go to Insert > Text Box and then click and drag to create a text box on your slide. You can then type or paste text into this box.


