Shapes play a major role in designing PowerPoint slides. Many presentation templates use PowerPoint shapes to create eye-catching layouts in the blink of an eye, and the trend seems consistent with other presentation platforms, including the use of shapes in Google Slides templates.
Working with shapes implies that complex design decisions are simplified for the common-day user who may or may not be aware of graphic design concepts. But what about applying effects to those shapes? For example, what if we intend to make a shape transparent? Among the advantages of making a shape transparent is that you can use it as a text box or picture frame-like element or in other ways to design your slides.
In this article, we will teach you how to apply transparency effects to shapes in PowerPoint. Without further ado, let’s get started!
How to Make Shape Transparent in PowerPoint
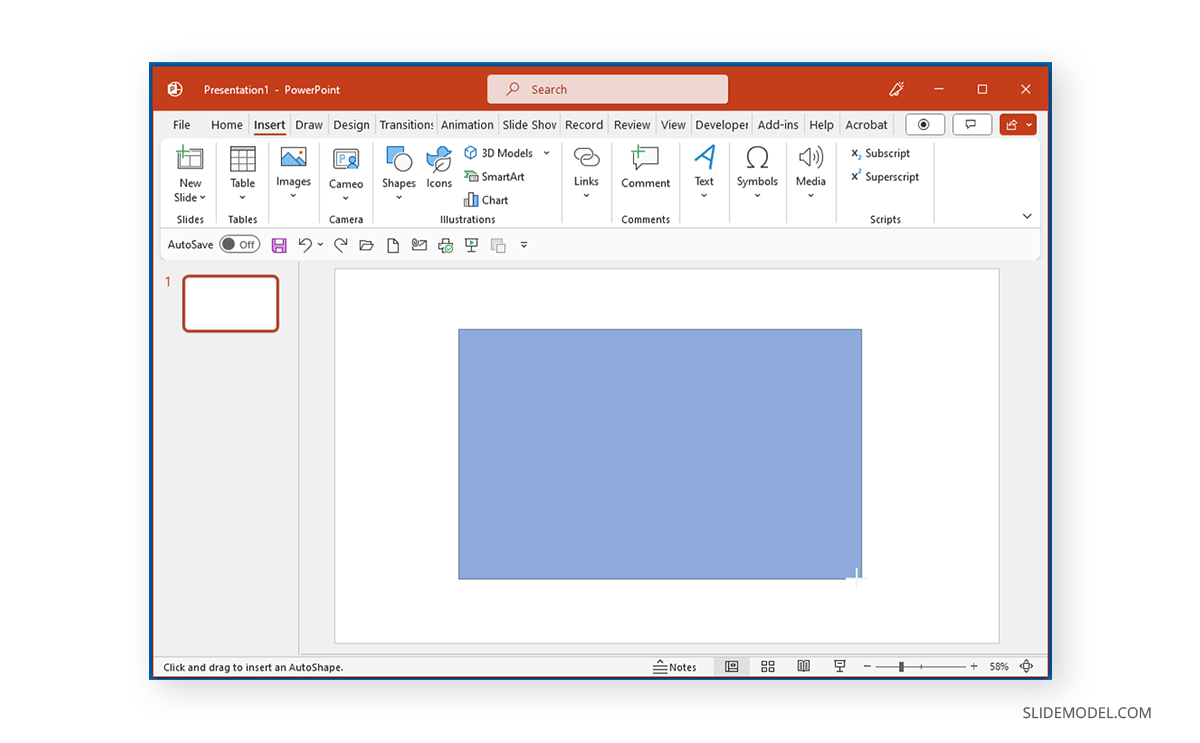
To add a shape in PowerPoint, go to Insert -> Shapes and select the shape you want to add to a PowerPoint slide.
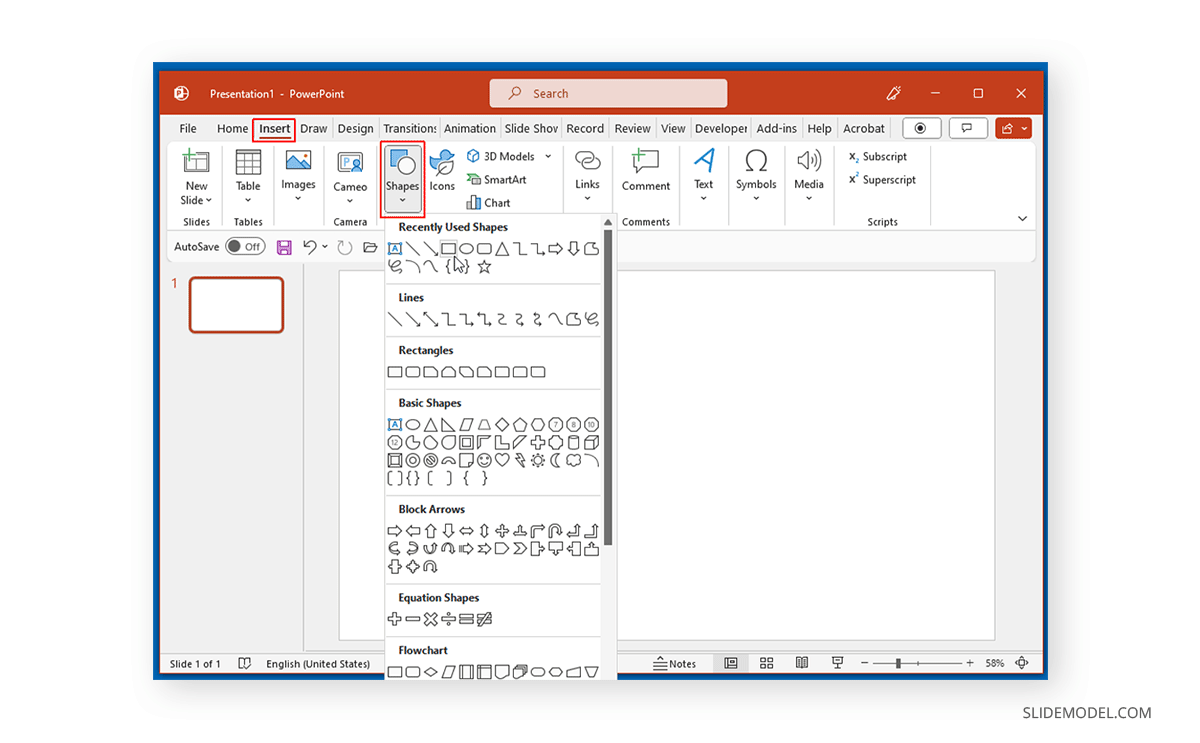
Drag to draw the shape. You can also change the color of the shape and its outline from the Shape Format tab by selecting a color via Shape Fill and Shape Outline.
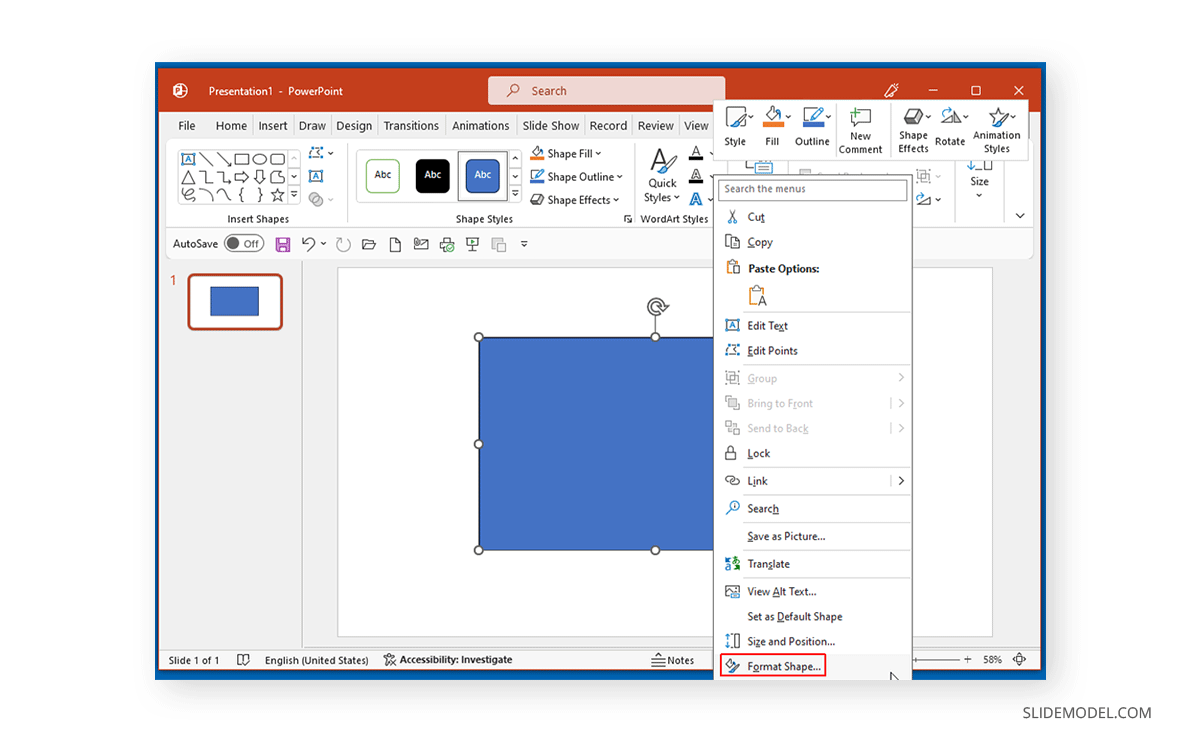
Right-click the shape and select Shape Format to open the settings to change its transparency.
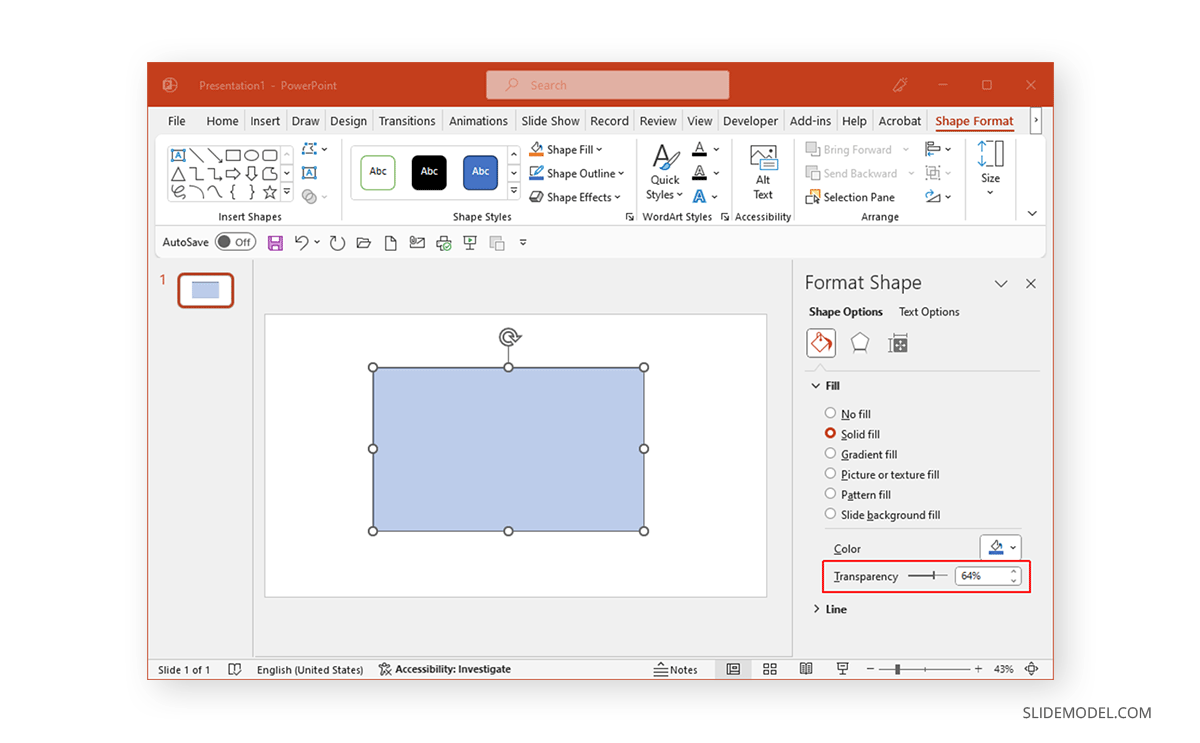
Expand Fill in the Format Shape menu in the sidebar and use the slider to adjust transparency. You can also add a percentage (e.g., 50%) to adjust the shape transparency.
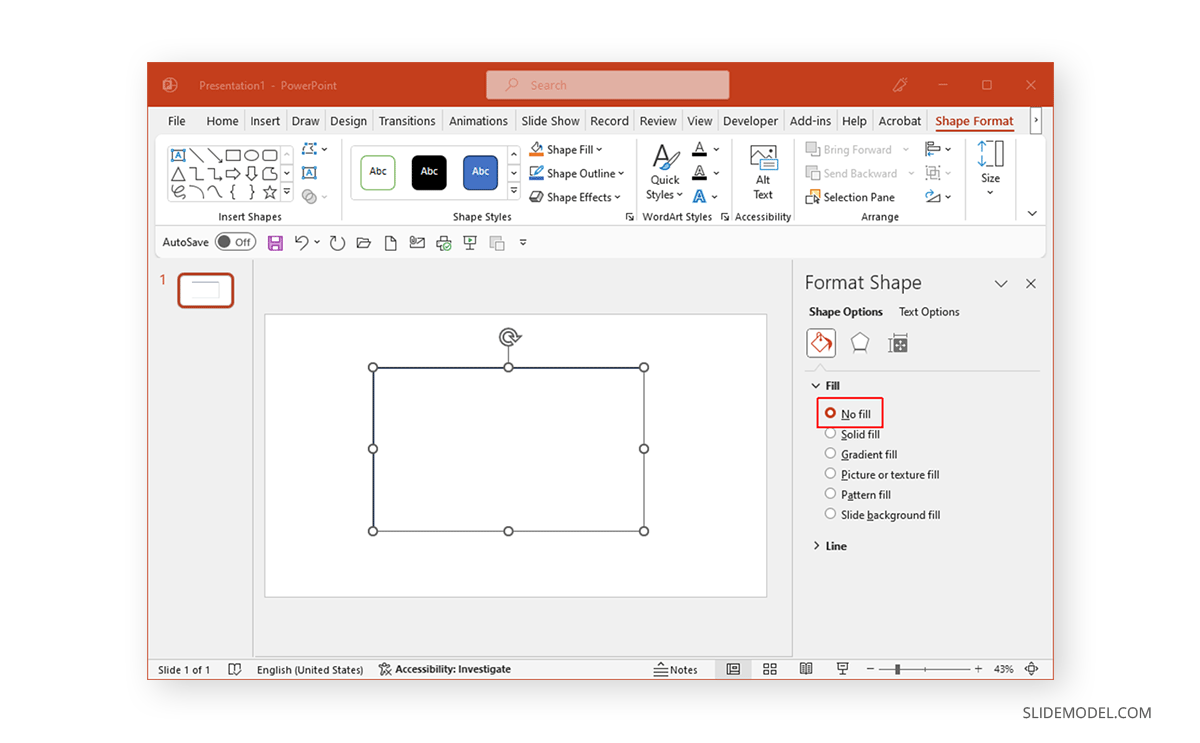
To make the middle of the shape completely transparent, you can also select No Fill.
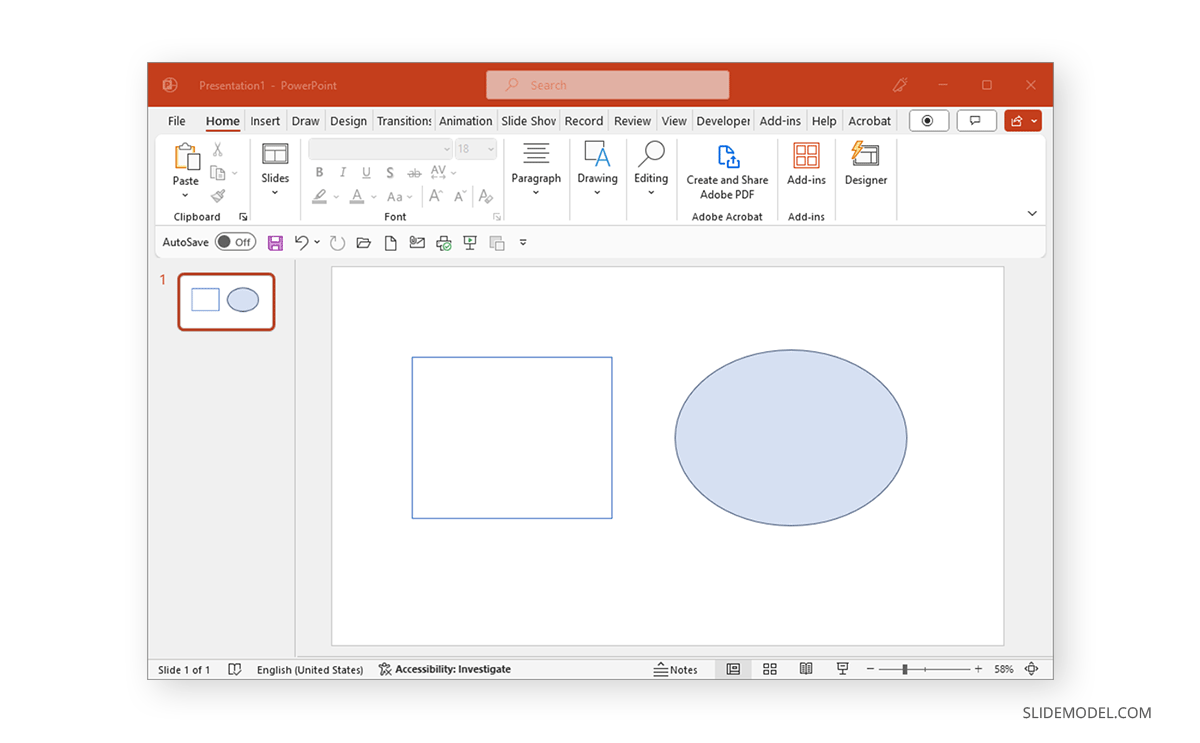
Below is an example of two shapes, one with No Fill used for the shape (on the left) and one with custom transparency selected via Solid Fill (on the right).
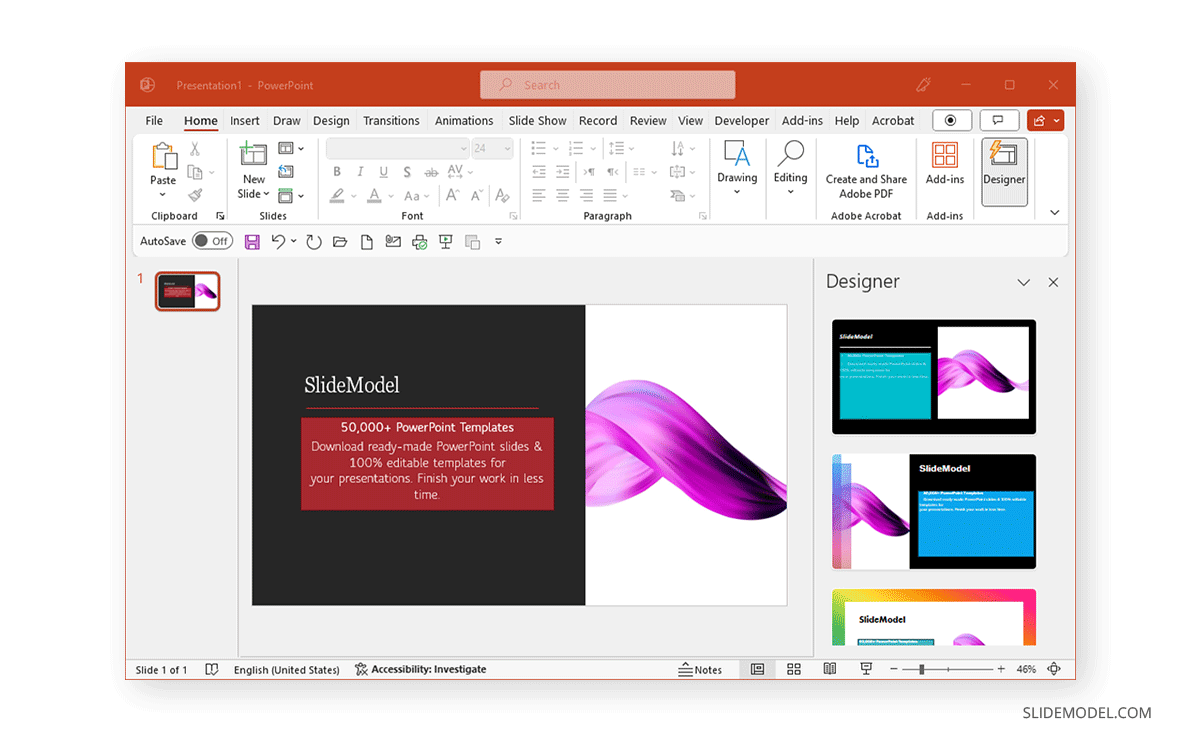
To efficiently use shapes for making visually appealing designs, you can also use PowerPoint Designer and adjust the shape transparency to suit your design needs for the added shapes.
Below is an example of a square shape used as a text box with custom transparency. You can also check our selection of PowerPoint templates to find slides with pre-applied shape transparency effects.
FAQs
What does making a shape transparent in PowerPoint mean?
Making a shape transparent involves adjusting its opacity so that it becomes partially or fully see-through, allowing background elements to be visible through the shape.
How can I make a shape transparent in PowerPoint?
To make a shape transparent:
– Insert a shape via Insert > Shapes.
– Right-click the shape and select Format Shape.
– Expand the Fill option in the sidebar and use the transparency slider to adjust the shape’s opacity.
Can I make the inside of a shape completely transparent?
Yes, by selecting No Fill in the Fill menu under the Format Shape options, the inside of the shape will be completely transparent.
Can I adjust the transparency of just the outline of a shape?
No, the transparency settings only affect the fill of the shape, not its outline. However, you can adjust the outline color or set it to No Outline for a similar effect.
How do I use a semi-transparent shape as a text box?
– Add a shape and adjust its transparency via the Format Shape menu.
– Type text directly into the shape or overlay a text box on it.
– Adjust font size and color for visibility.
What are some practical uses for transparent shapes in PowerPoint?
Transparent shapes can be used for:
– Highlighting text or images without fully blocking the view.
– Creating overlays or callout boxes.
– Designing picture frames or borders.
– Enhancing visual appeal in charts and infographics.
Is it possible to adjust the transparency of an image within a shape?
Yes, insert an image into the shape as a Picture Fill under Format Shape > Fill and adjust the transparency slider for the image.
Final Words
Shape transparency can help create interesting designs in PowerPoint. You can use a semi-transparent or completely transparent shape as a text box, overlay, picture frame, and other uses. If you’re looking for interesting templates with shapes used in a cool way, see these templates with cool shapes for PowerPoint.
