Transparent images in PowerPoint presentations can help add visual appeal and make it easier to adjust to suit branding needs. If you want to make an image transparent in PowerPoint, you can reduce its transparency or remove the background to give it a look that best suits your needs.
How to Make an Image Transparent in PowerPoint
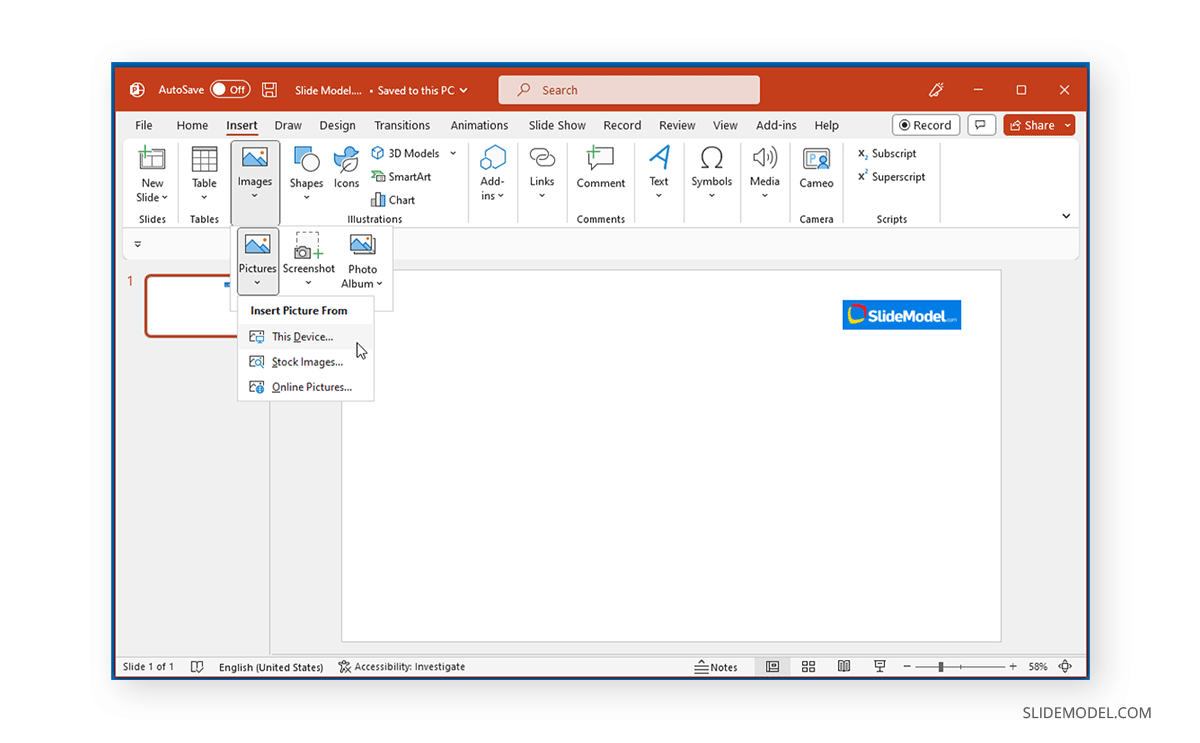
To make a picture transparent in PowerPoint, first go to Insert -> Images -> Pictures and add an image to your PowerPoint slide.
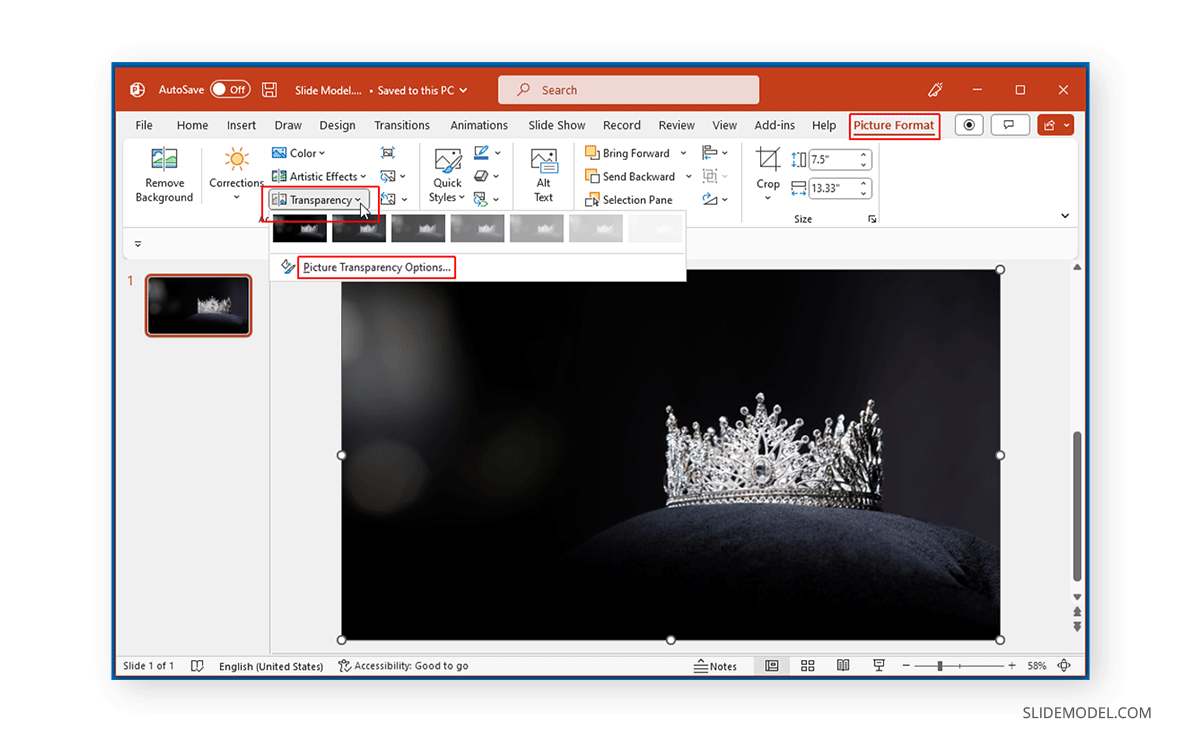
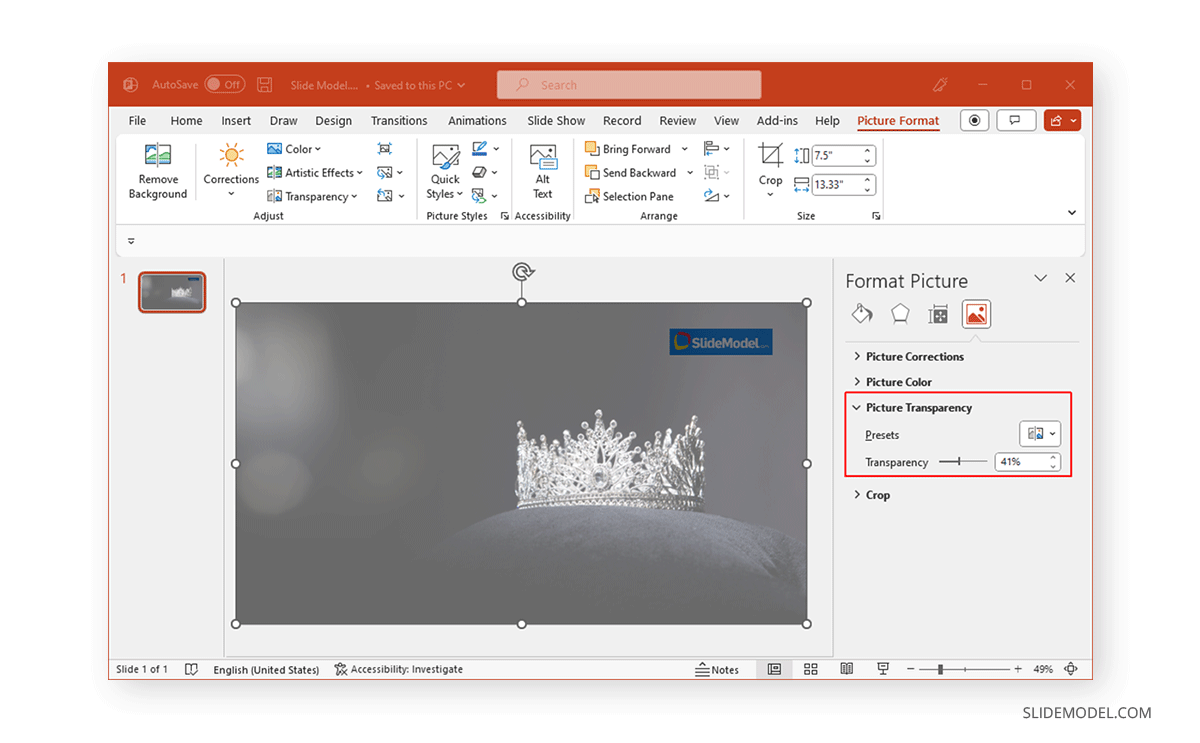
Select the image and go to Picture Format -> Transparency. From here, you can pick a preset to make your image transparent or use a custom transparency level via Picture Transparency Options.
Using Picture Transparency Options, you can adjust the image’s transparency to a custom level from the menu in the right pane.
When making an image transparent, you might want to consider what you intend to achieve visually. For example, when using PowerPoint templates or Google Slides templates in PowerPoint, you might want to see which slide elements you intend to emphasize by making an image transparent. In the example below, we made the image transparent to make the underlay logo pop out. Additionally, you might use a free logo maker tool to create a unique and eye-catching logo, then leverage the transparency technique to make it stand out in your presentation.
How to Make Shape Transparent in PowerPoint
Overlay slide elements like shapes can be made transparent to add text or emphasize certain slide parts. In our example below, we added a shape for this purpose via Insert -> Shapes.
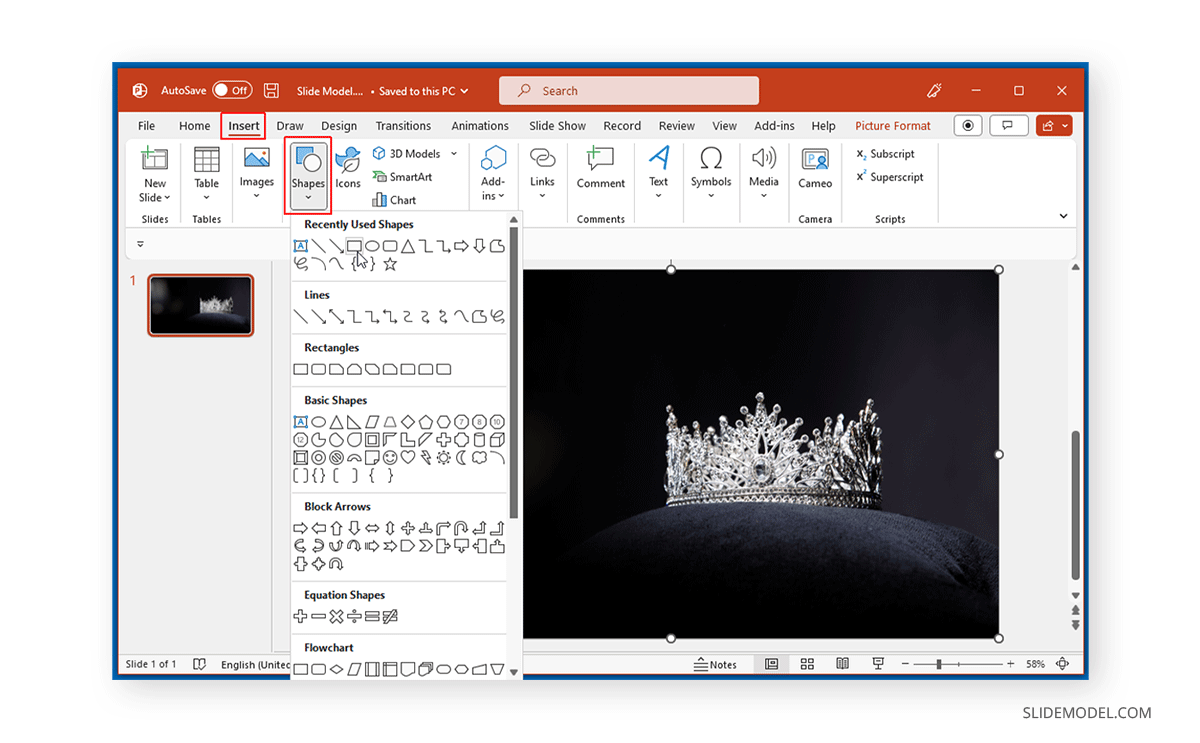
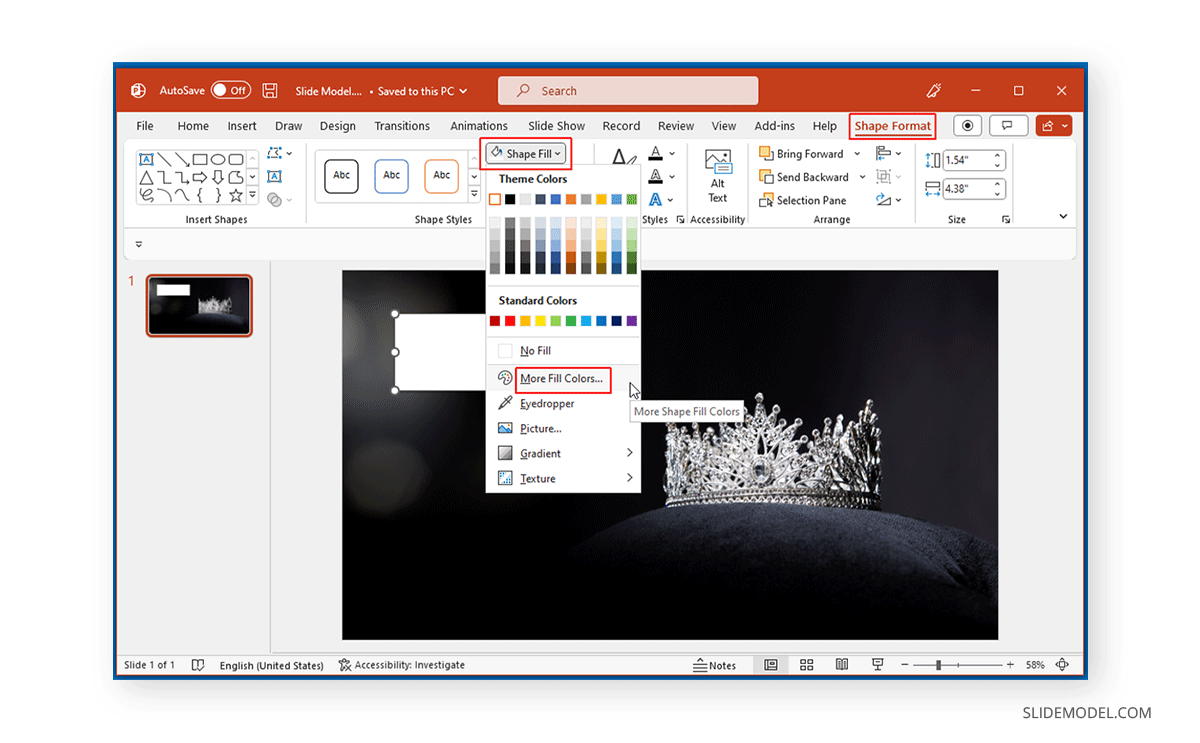
Once added, go to Shape Format -> Shape Fill -> More Fill Colors.
Now, adjust transparency to a desired level to make the shape transparent.
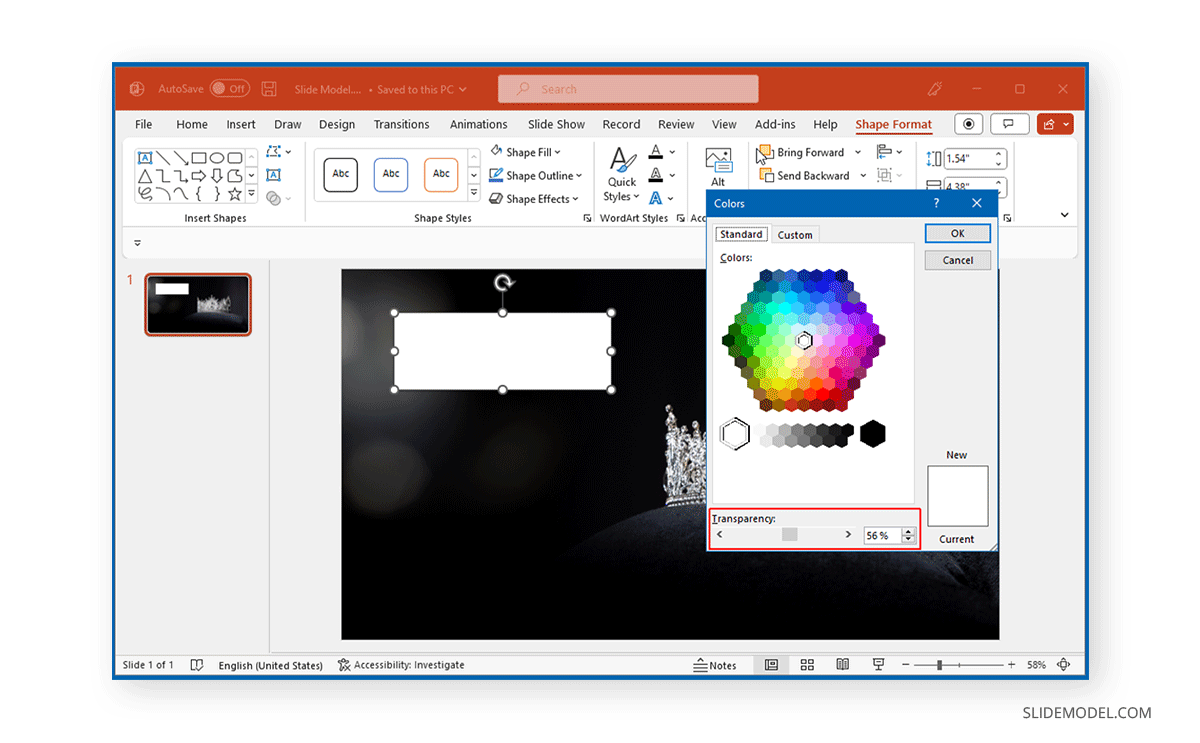
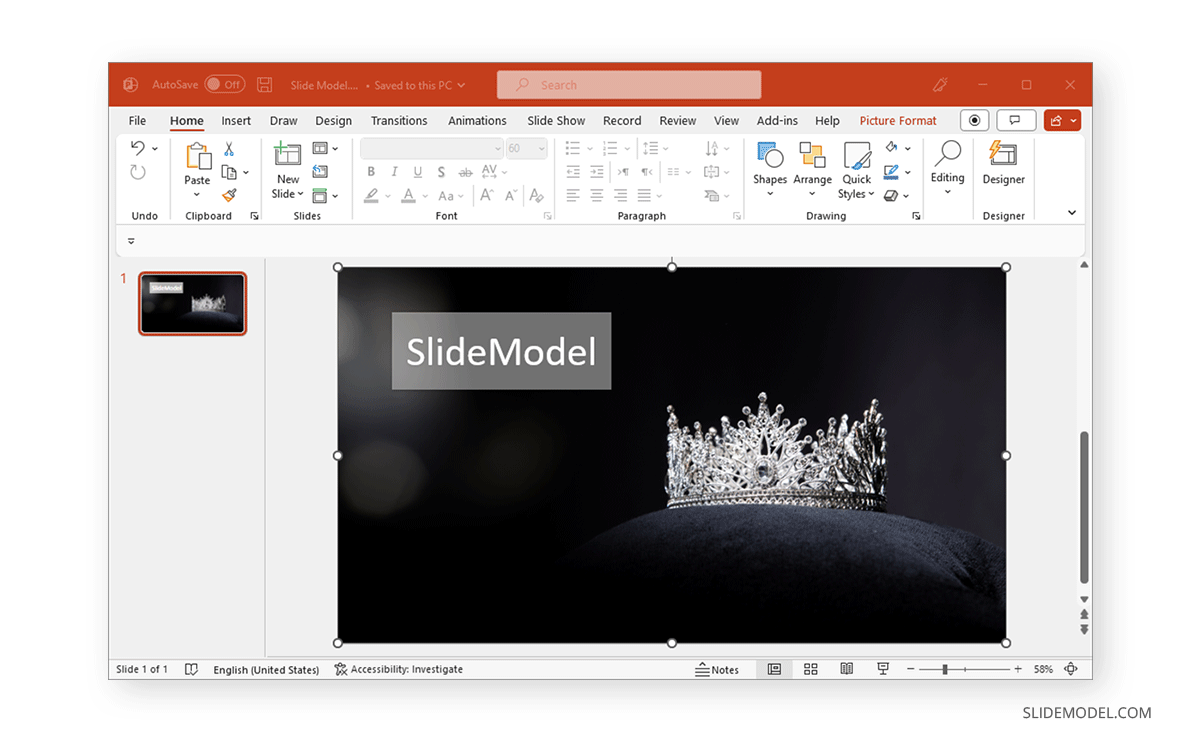
By making shapes transparent, you can stylize your slides, such as by adding text within the added shapes to create title slides, subheadings, or infographics.
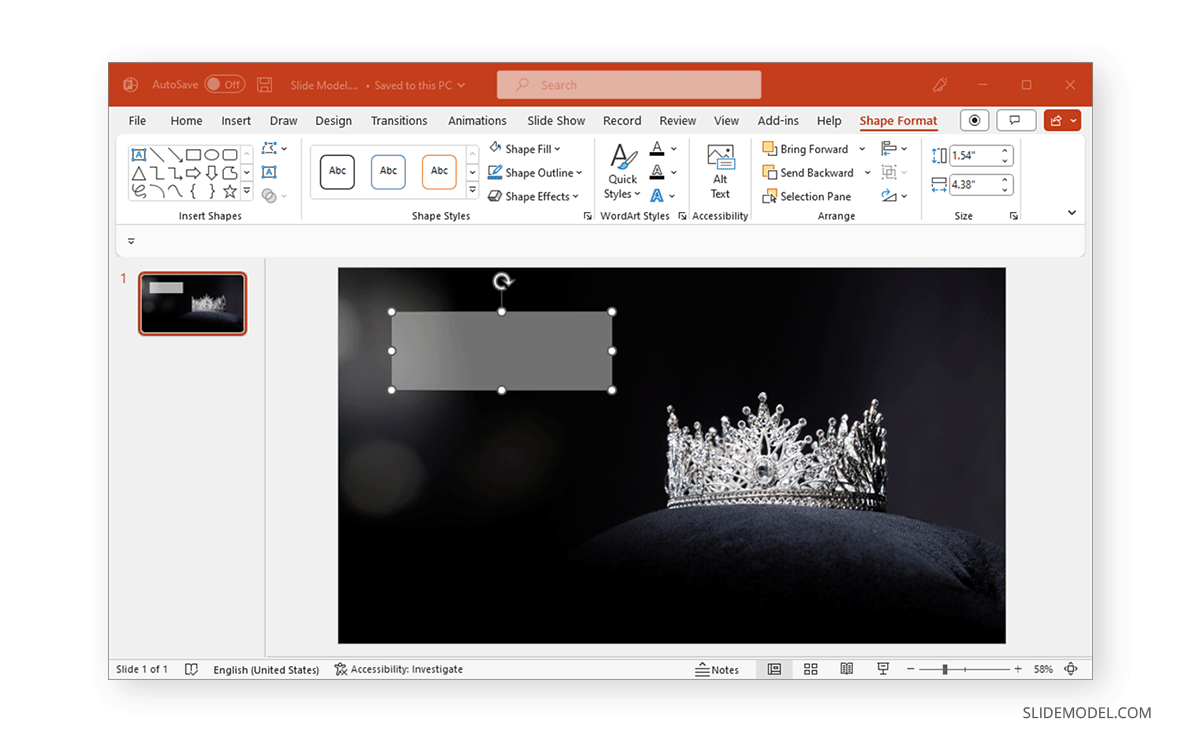
The below example shows a rectangle shape made semi-transparent with overlay text added using a text box.
How to Remove Image Background to Make it Transparent in PowerPoint
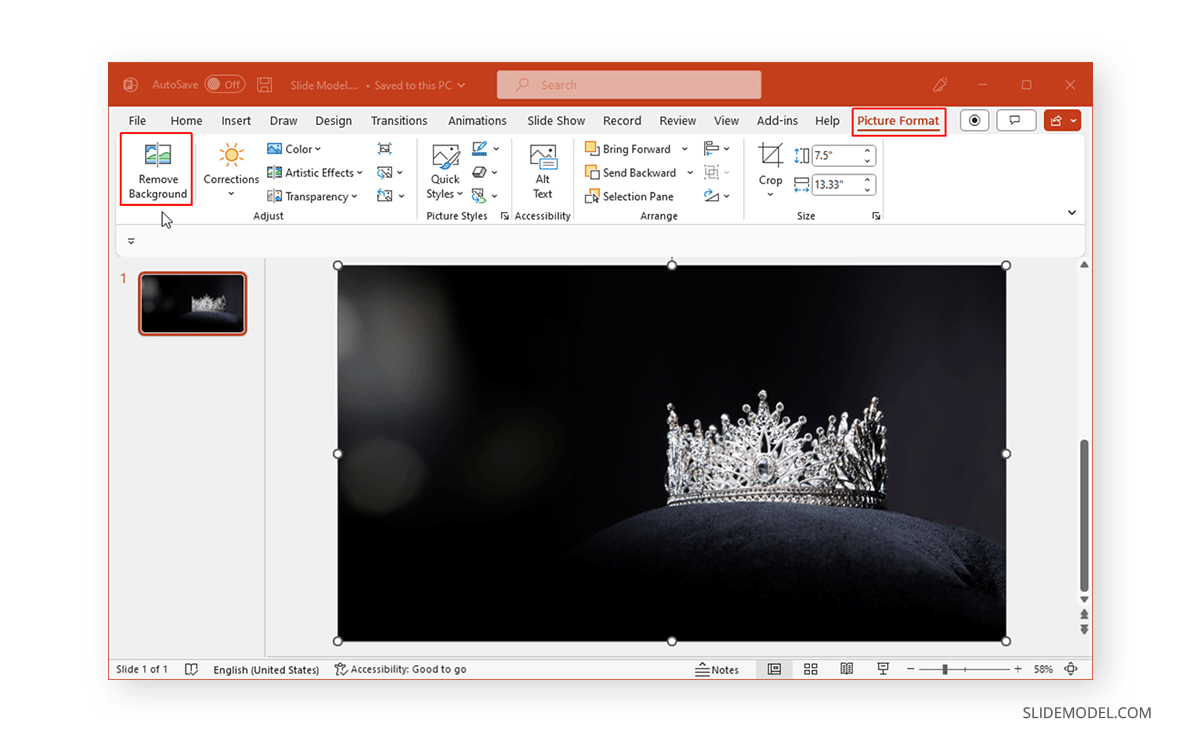
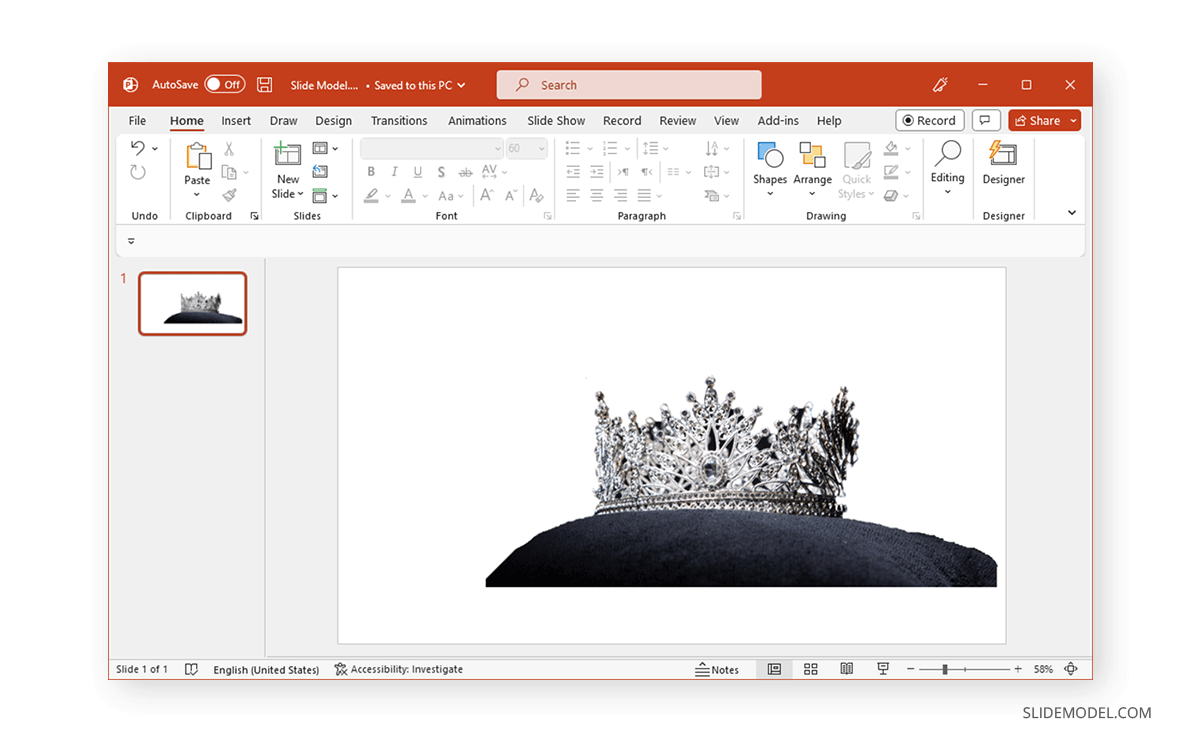
To remove the background of an image in PowerPoint to make it transparent, select Remove Background via the Picture Format tab.
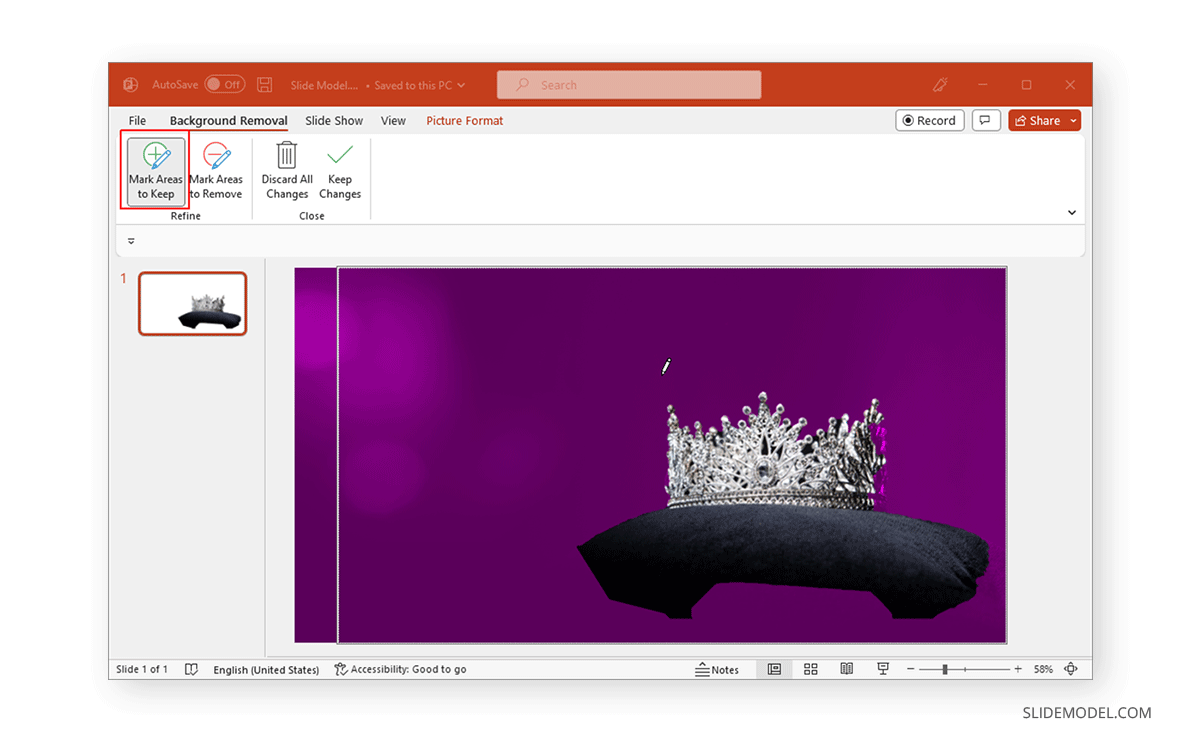
Remove Background allows two options to make the picture transparent on PowerPoint. You can select Mark Areas to Keep and pick the parts of the image to keep or select Mark Areas to Remove and select parts of the picture you want to discard. You can adjust to make the image transparent using any of the two options. Once you are satisfied, select Keep Changes.
Once the image background is removed, you can make further adjustments to your slide design to match the image to your design requirements.
FAQs
How do I make an image transparent in PowerPoint?
To make an image transparent, go to Insert -> Images -> Pictures to add your image. Then, select the image and navigate to Picture Format -> Transparency. In the right pane, you can choose a preset or adjust the transparency level via Picture Transparency Options.
Can I adjust the transparency of a shape in PowerPoint?
Yes, you can make shapes transparent in PowerPoint. Insert a shape via Insert -> Shapes, then select the shape and go to Shape Format -> Shape Fill -> More Fill Colors. Adjust the transparency level to achieve the desired effect.
How do I remove the background of an image in PowerPoint to make it transparent?
To remove an image’s background, select the image and go to Picture Format -> Remove Background. Use Mark Areas to Keep or Mark Areas to Remove to adjust the background, then select Keep Changes to finalize.
What are the steps to insert an image in PowerPoint?
To insert an image in PowerPoint, go to Insert -> Images -> Pictures and select the image you want to add to your slide.
Can I use custom transparency levels for images in PowerPoint?
Yes, you can use custom transparency levels. After selecting the image, go to Picture Format -> Transparency -> Picture Transparency Options to adjust the transparency to your desired level.
How can I make text appear over a transparent shape in PowerPoint?
To add text over a transparent shape, insert the shape and adjust its transparency. Then, add a text box over the shape and type your text. This can be used to create title slides, subheadings, or infographics.
Is it possible to make only certain parts of an image transparent in PowerPoint?
Yes, you can make parts of an image transparent by using the Remove Background feature in the Picture Format tab. Select the areas to keep or remove and adjust accordingly.
What is the benefit of making images or shapes transparent in PowerPoint?
Making images or shapes transparent can enhance the visual appeal of your slides, help to focus on specific slide elements, and prevent slides from appearing too crowded.
Can I make a logo transparent in PowerPoint?
Yes, you can make a logo transparent by inserting it as an image and then adjusting its transparency using Picture Format -> Transparency options.
What should I consider when making an image transparent in PowerPoint?
Consider what you intend to achieve visually. Use transparency to emphasize certain elements, avoid crowding the slide, and ensure important information remains clear and readable.
Final Words
Making an image of a PowerPoint slide element transparent can help make visually pleasing designs and to emphasize parts of the slide. When an image appears to make a slide crowded, you can remove its background or part of the background design to adjust your slide design.

