One unique design you can add to your PowerPoint presentations is 3D or three-dimensional models. These can be a great way to illustrate a point or catch your viewers’ attention. This guide will show you how to work with PowerPoint 3D models.
Method #1: Insert a 3D Model in PowerPoint Via Online 3D Models
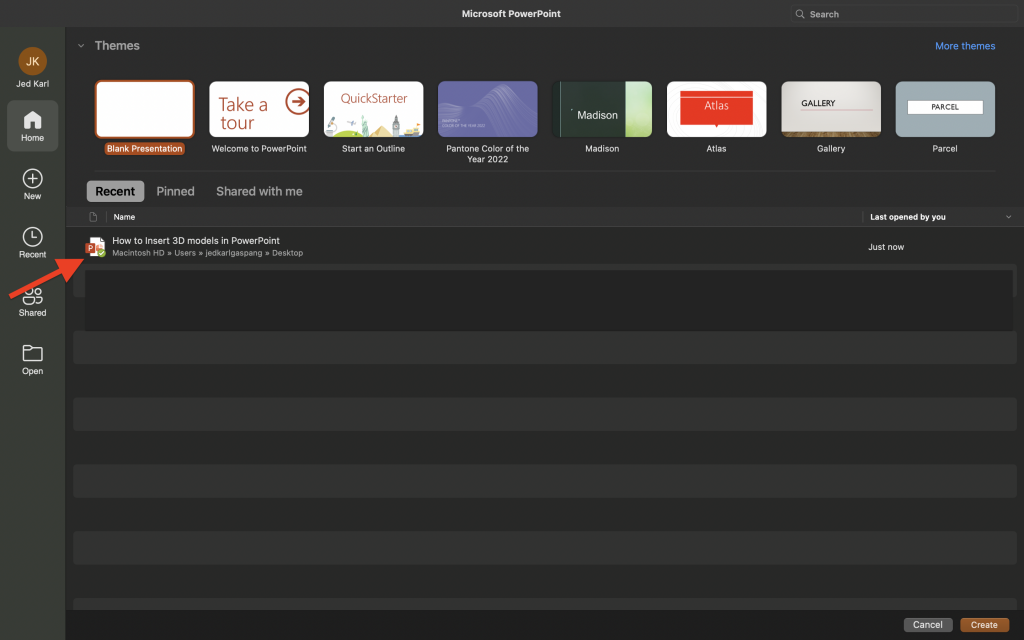
1. To insert a 3D Model in PowerPoint via the online 3D models catalog, open your slide presentation saved on your computer.
2. Select the slide you want to insert a 3d model for PowerPoint into.
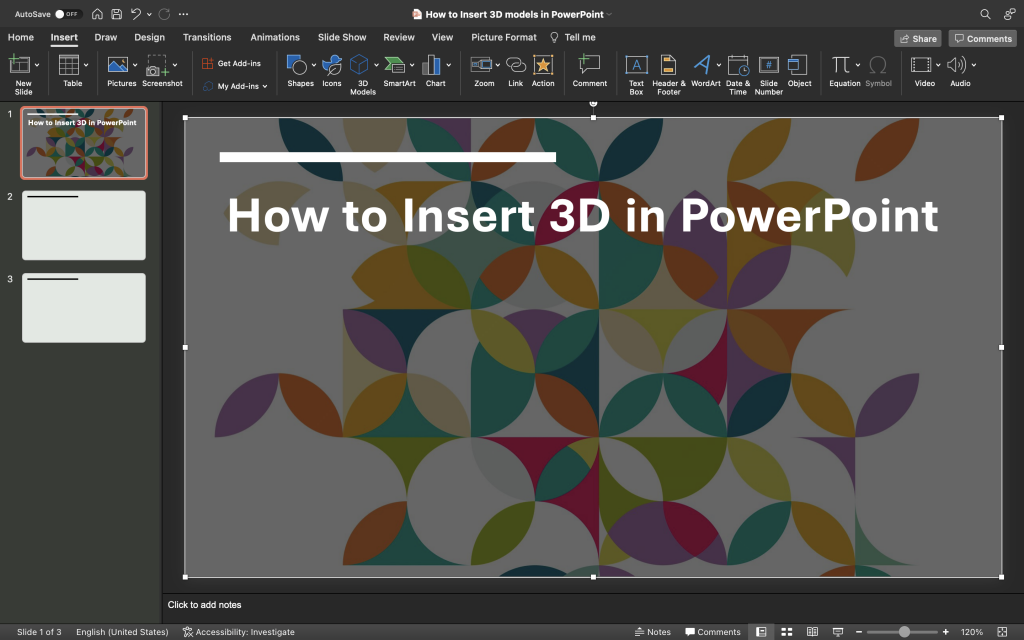
3. From the ribbon, click the Insert tab and choose 3D Models. Click the 3D icon (Cube icon) or the down arrow to open the dropdown menu and choose Stock 3D Models.

4. The Online 3D Models window will open on the right side of your screen.
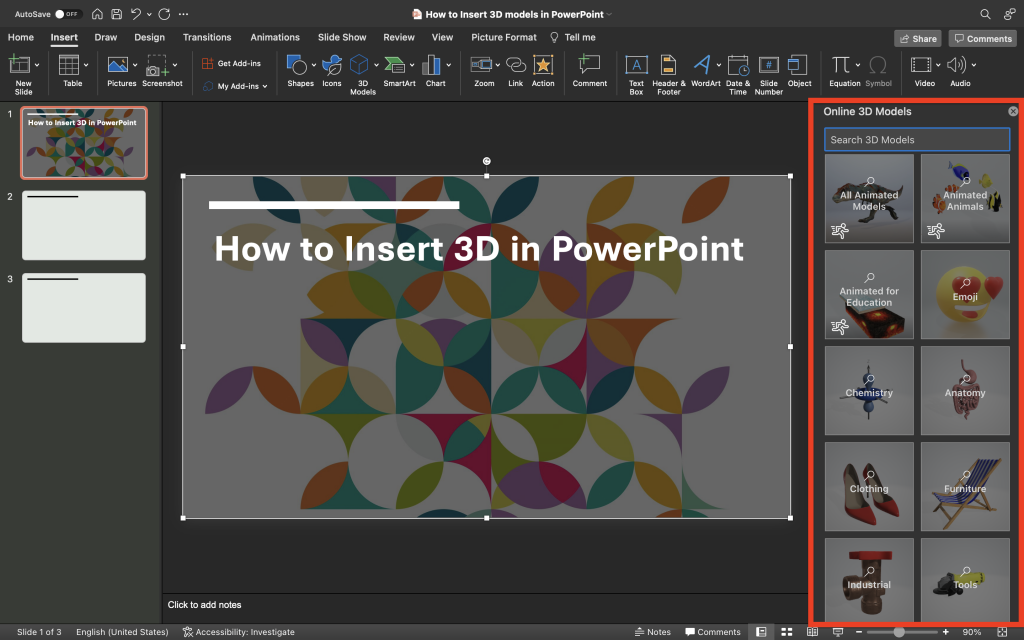
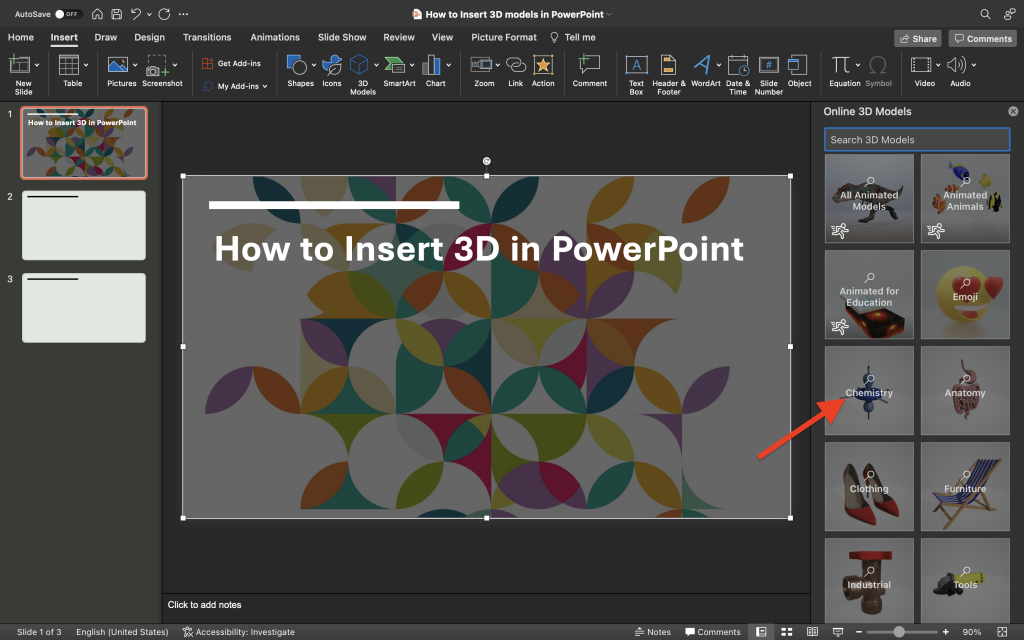
5. Here, you can select from a wide selection of 3d shapes for PPT. Depending on your chosen theme, you can click and select the 3D model that’s suited for you. In this guide, we’ll pick a Linear 3D Model, under the Chemistry theme.
6. Select the 3D model that you like and click the Insert button. If you want to insert more than one 3D model, select them all and click Insert. Your selected 3D models will appear with an orange checkmark on the model’s thumbnail.
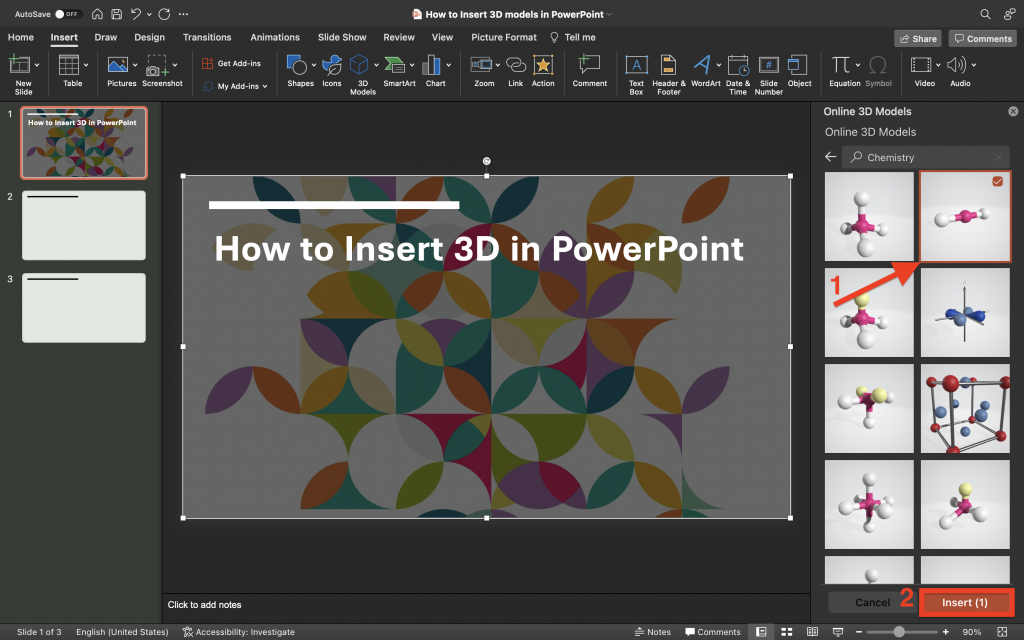
Note: Alternatively, you can search for a 3D model by using the search function.
7. Once inserted, you can resize the 3D model using the border points. You can also rotate it using the 3D Control icon to tilt and rotate the 3D model in any direction. Just click the icon and drag it to your desired direction.
Method #2: Insert a 3D Model in PowerPoint Via a Saved 3D Model on your Computer
In this case, we’ll work our way to insert a 3D model in PowerPoint from either a generated 3D file, a downloaded element from a 3D library, or any stock 3D models for PowerPoint.
1. Download a 3D model on your preferred site. In this guide, we’ll download a free human 3D model via a third-party website.
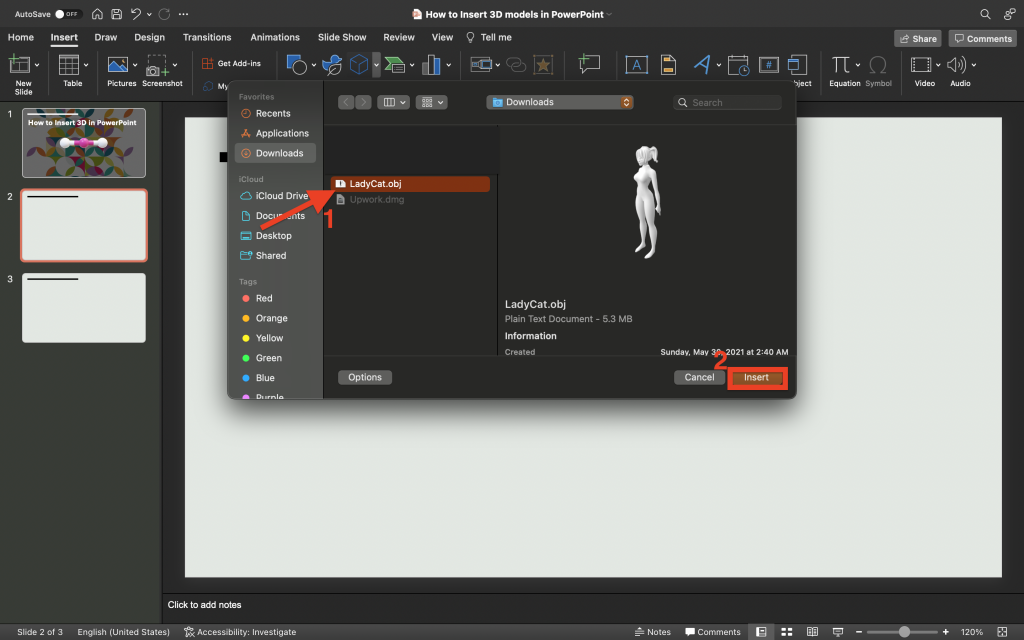
2. After downloading, you’ll be given either a .BMP (Bitmap), .FBX (Autodesk Filmbox), or .OBJ (Standard 3D file format). You’ll need the .OBJ version of the 3D image for PowerPoint.
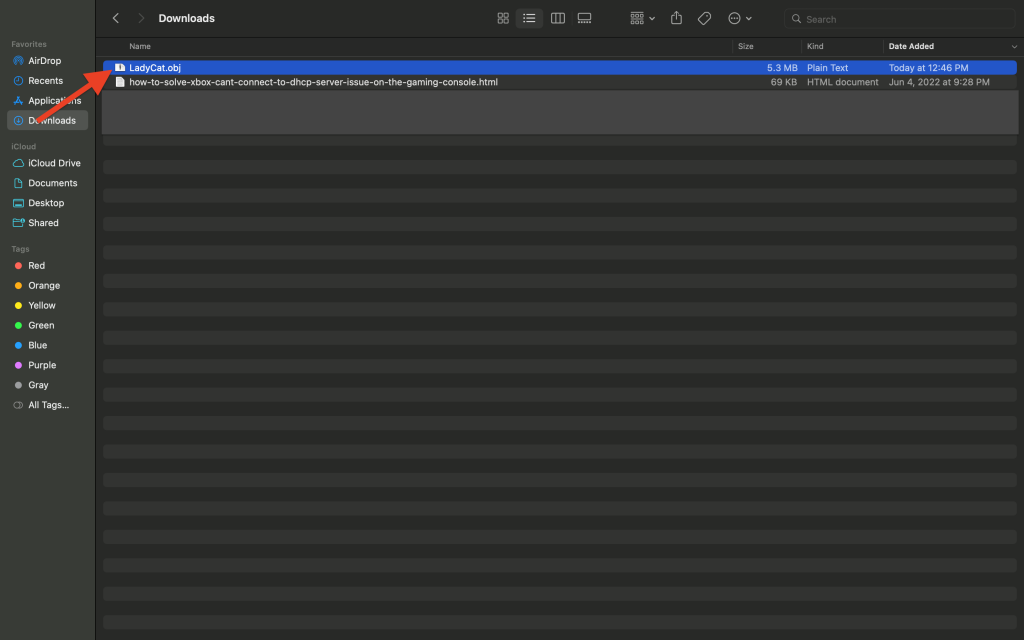
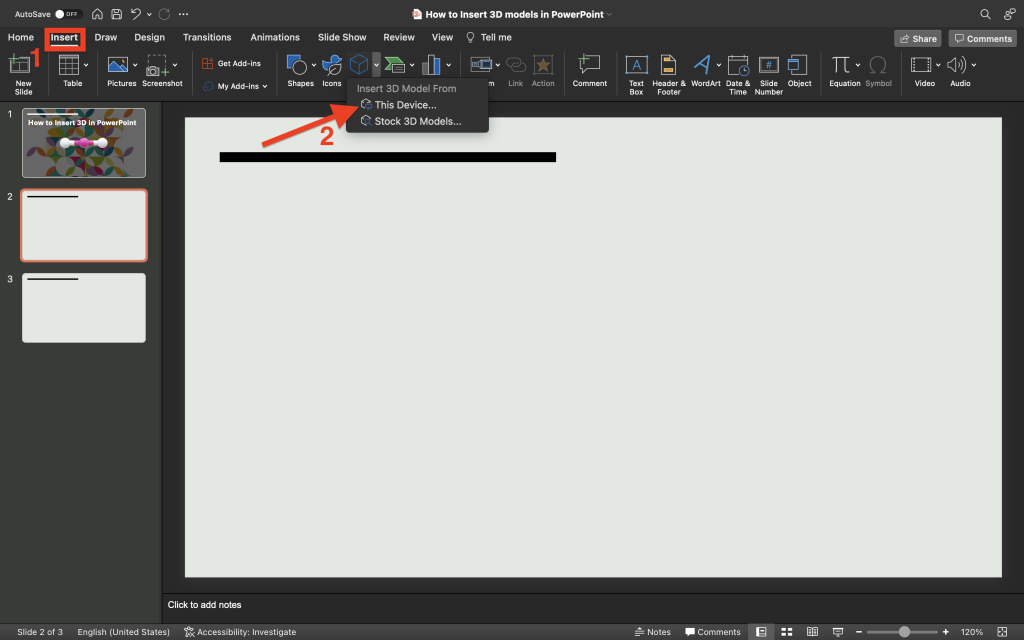
3. Open your PowerPoint presentation and click the Insert tab from the ribbon. Select the down arrow and choose This Device…
4. Select the .OBJ version of the 3D file and click Insert.
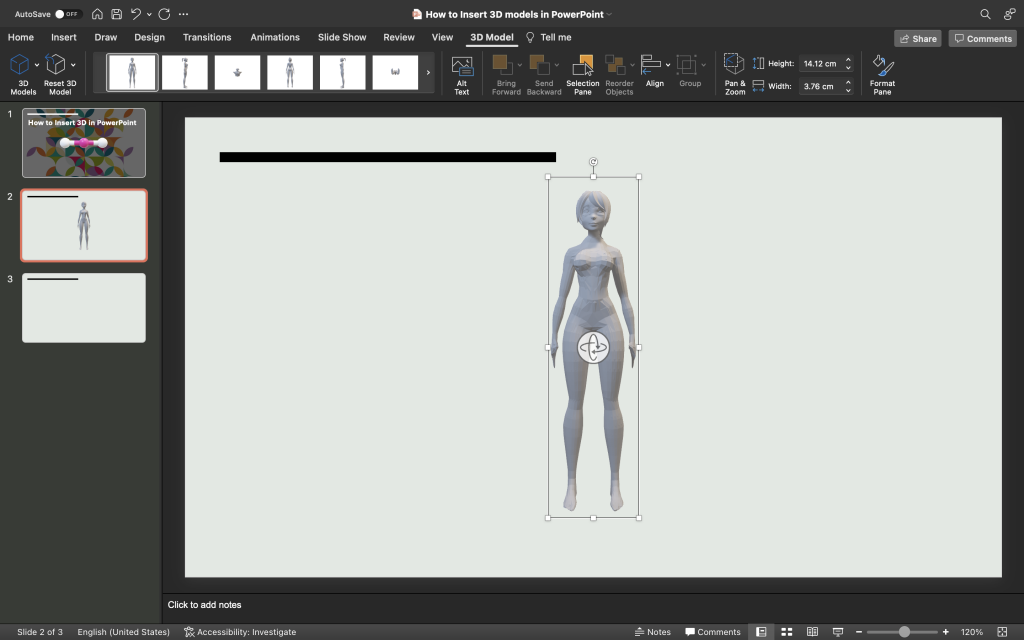
5. The 3D image will now appear on the slide. Like the last method, you can also resize and rotate the slide using the border points and the 3D Control icon.
Final Thoughts
As you can see, the process of how to insert 3D model in PowerPoint is very straightforward. This awesome feature is a lifesaver for quality academic presentations, for people in the 3D modeling industry, and way more. If you want to explore other ways to insert 3D Models into PowerPoint, you can check out our article on how to create a 3D floorplan presentation in PowerPoint.