How many times did we have to share an advance on an in-progress presentation? Or what if we created different slides to brief on different situations when presenting a topic? If that’s the case, let’s assume you questioned yourself whether to create a different version of the “final” presentation that didn’t include the mockup slides.
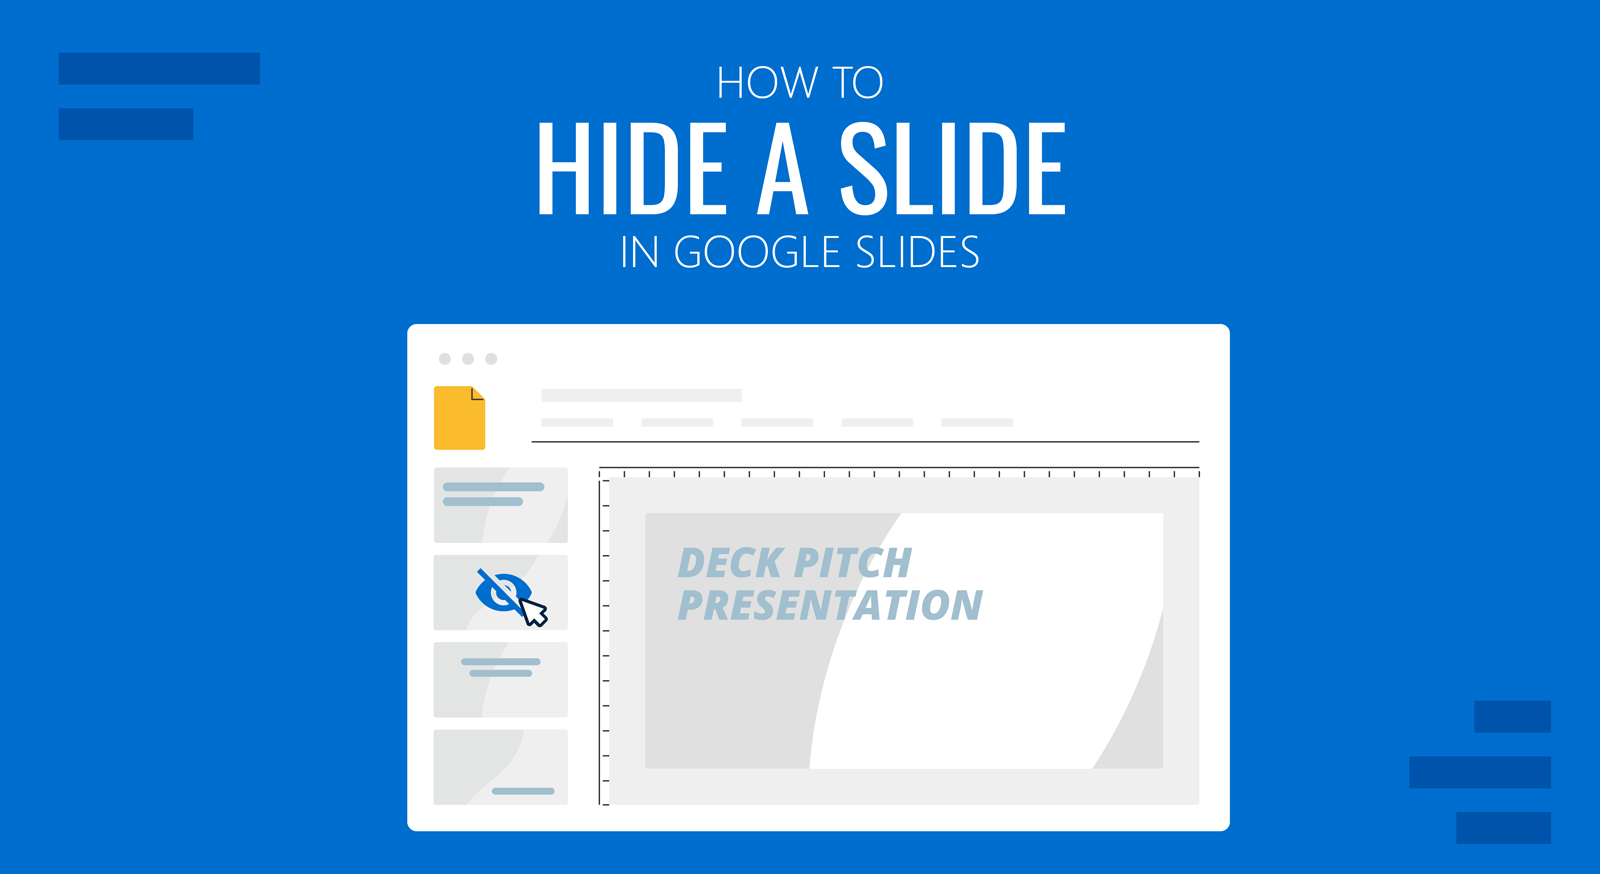
Today, we will show a different method to avoid such hassle. Let’s discover how to hide a slide in Google Slides presentations:
Method #1 – How do you hide a slide on Google Slides without right-clicking?
Many users prefer a quick shortcut on lengthy presentations to avoid right-clicking and mixing up which slide to hide. Unfortunately, Google Slides doesn’t grant that option. For more information, check our article about PowerPoint presentation shortcuts.
What you can do instead is to follow these next steps to hide a slide without right-clicking.
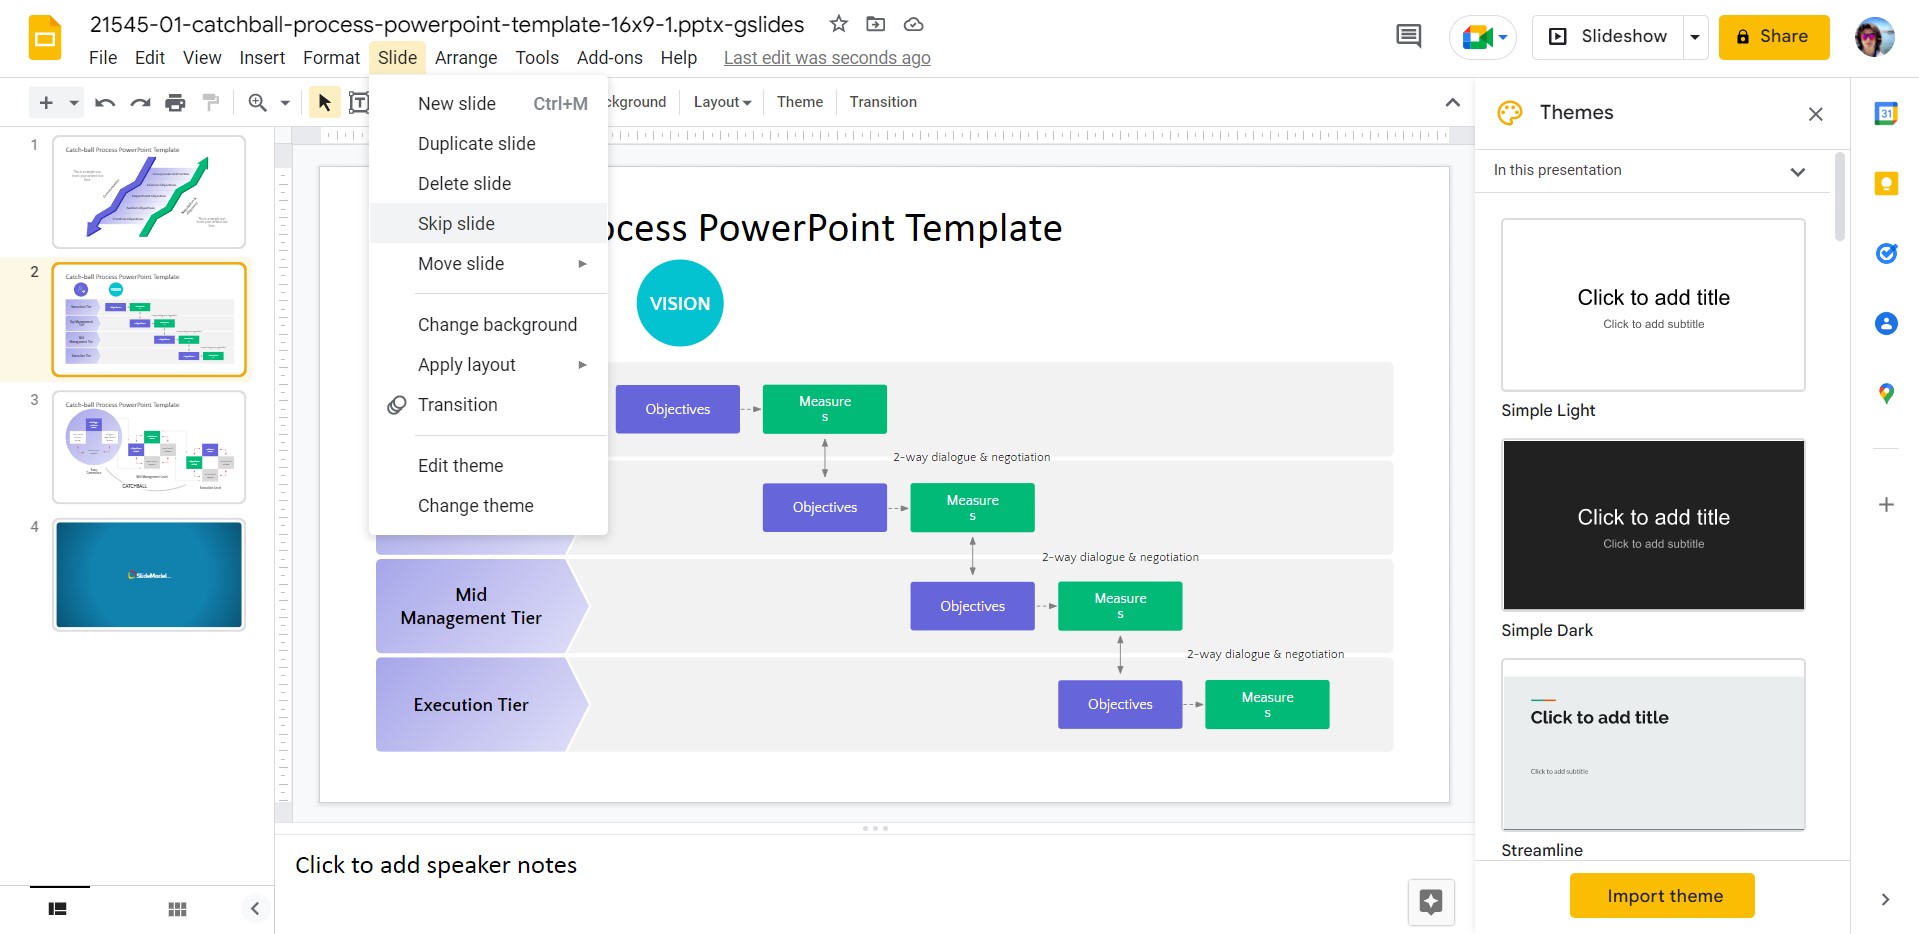
Start by selecting the slide you wish to hide. In my case, it’s going to be the 2nd slide.
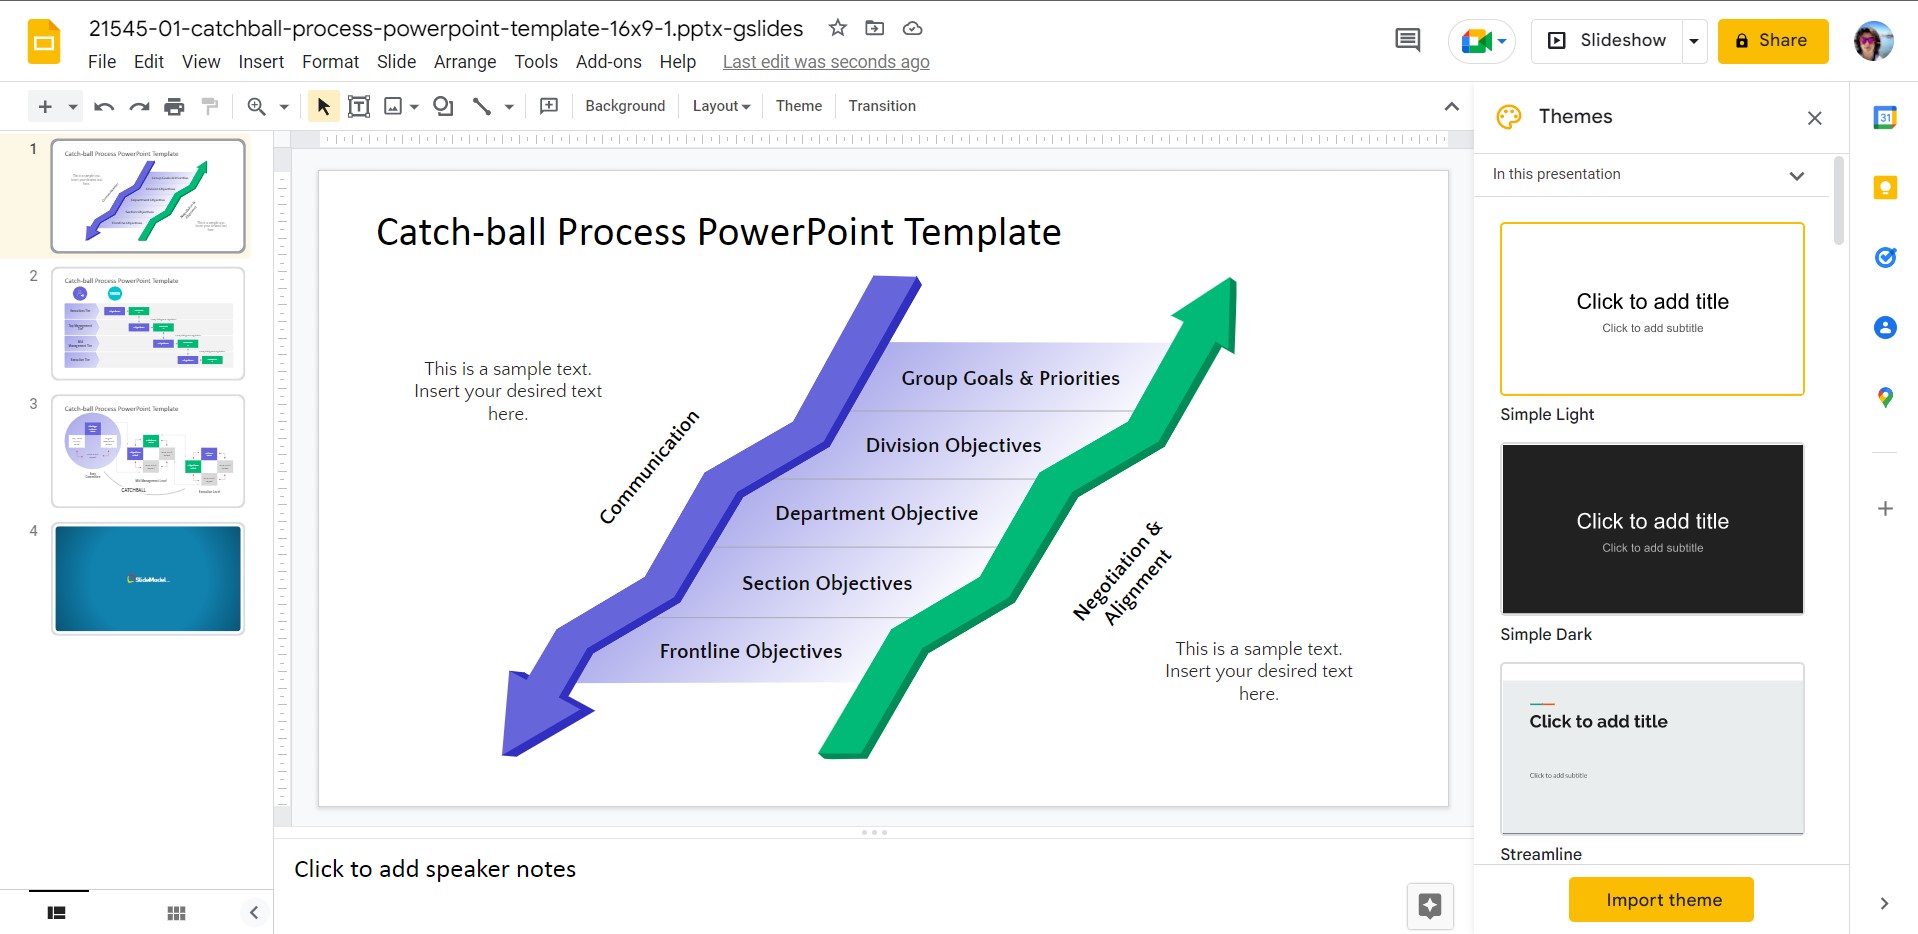
Go to the Slide menu > Skip Slide.
The hidden slide will now show an eye with a bar crossing it, implying it will remain hidden under Slideshow mode.
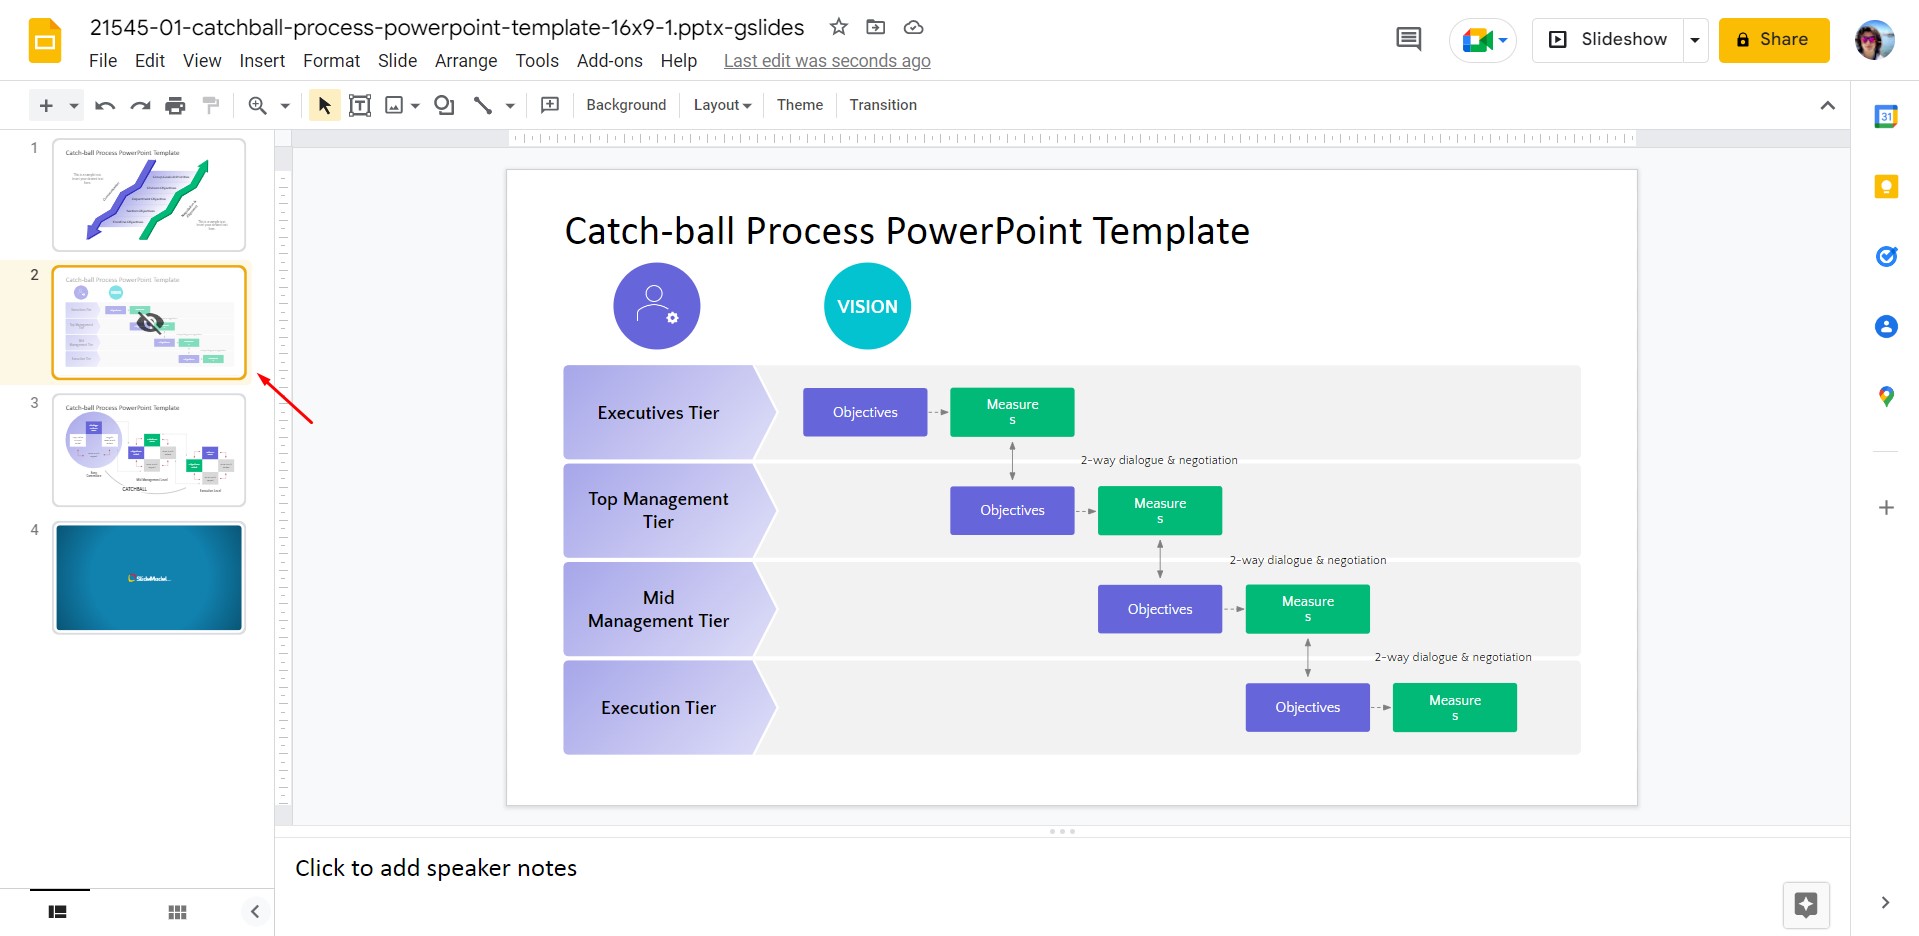
If you want to make it visible again, repeat the steps as follows, unselecting the Skip Slide (the tick has to disappear from the menu).
Method #2 – Hiding a slide on Google Slides using right-click
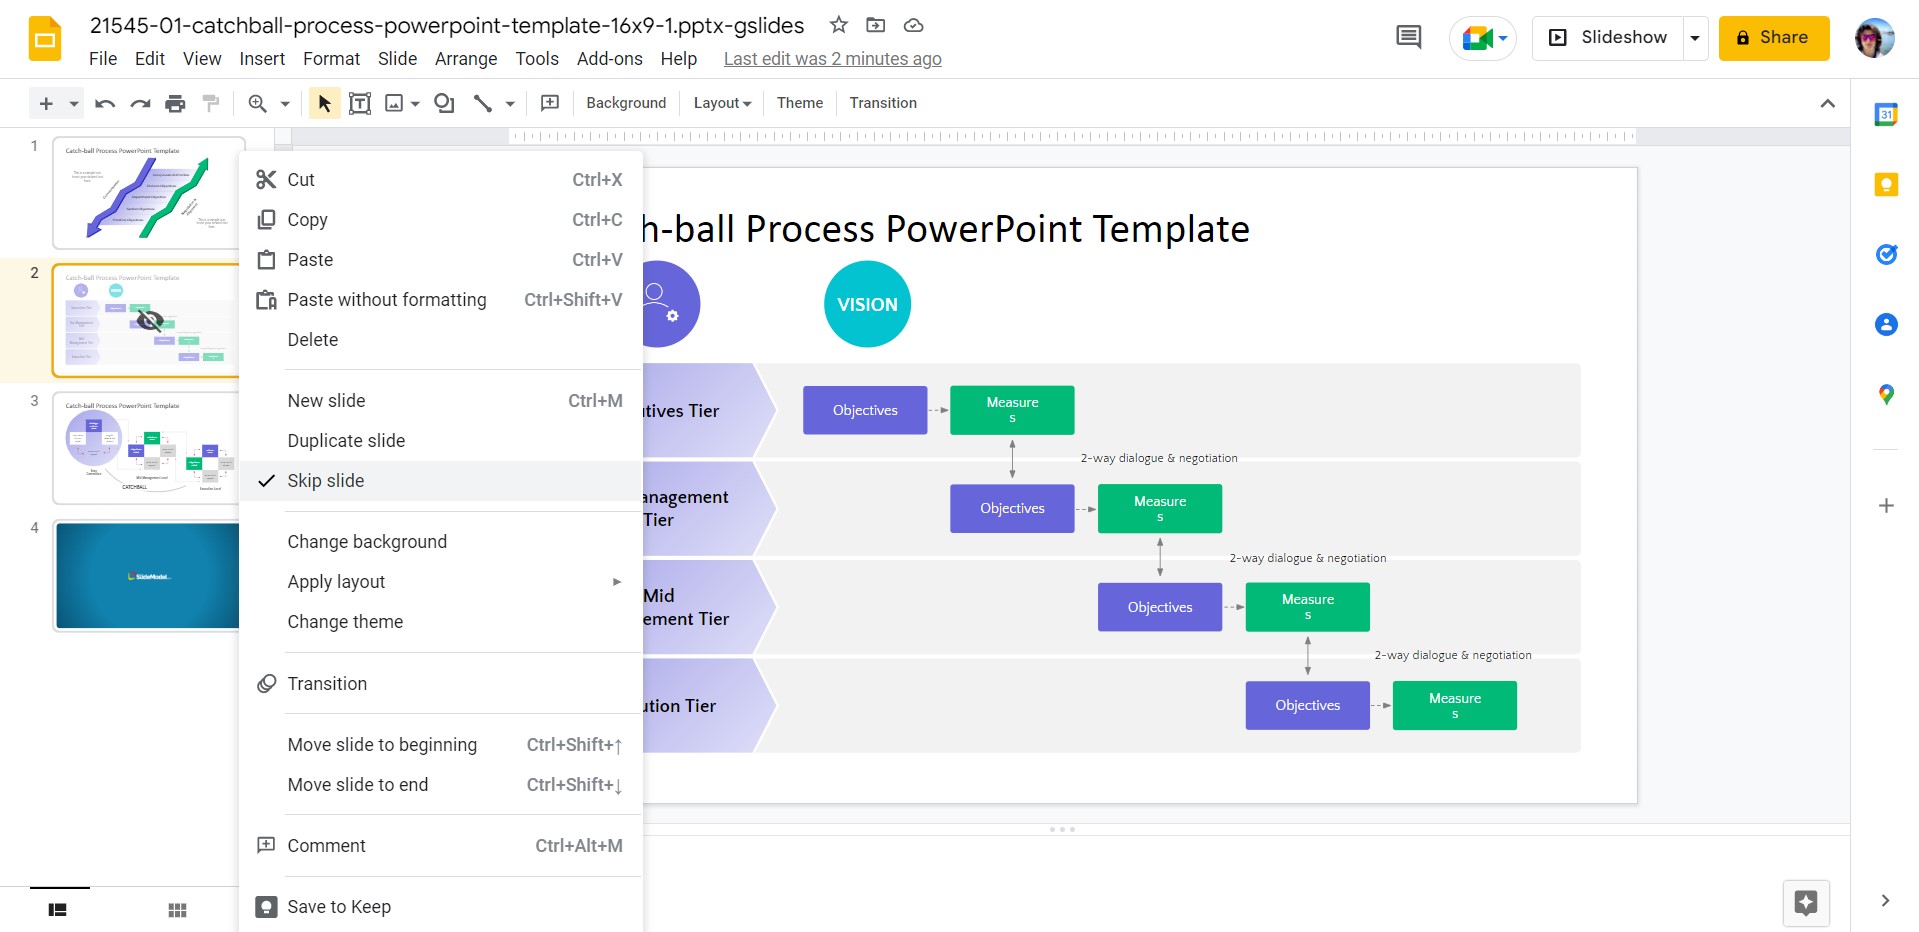
How to hide slides in Google Slides using right-click? The classic method for hiding a slide on Google Slides is by simply right-clicking over it (above the slide, not on the white area) and selecting the option Skip Slide.
Our hidden slide will show the same eye with a bar crossing over it. To undo this config, right-click again and uncheck the Skip Slide option.
How to print a presentation in Google Slides with hidden slides
This is another commonly asked question we wish to answer as well. Say you want to deliver a printed copy of the presentation you are about to introduce to your audience, but your presentation contains hidden slides that shouldn’t be printed.
Whereas you could work your way with the printer settings to skip certain page numbers, it’s a tedious task that can be optimized with just a couple of clicks.
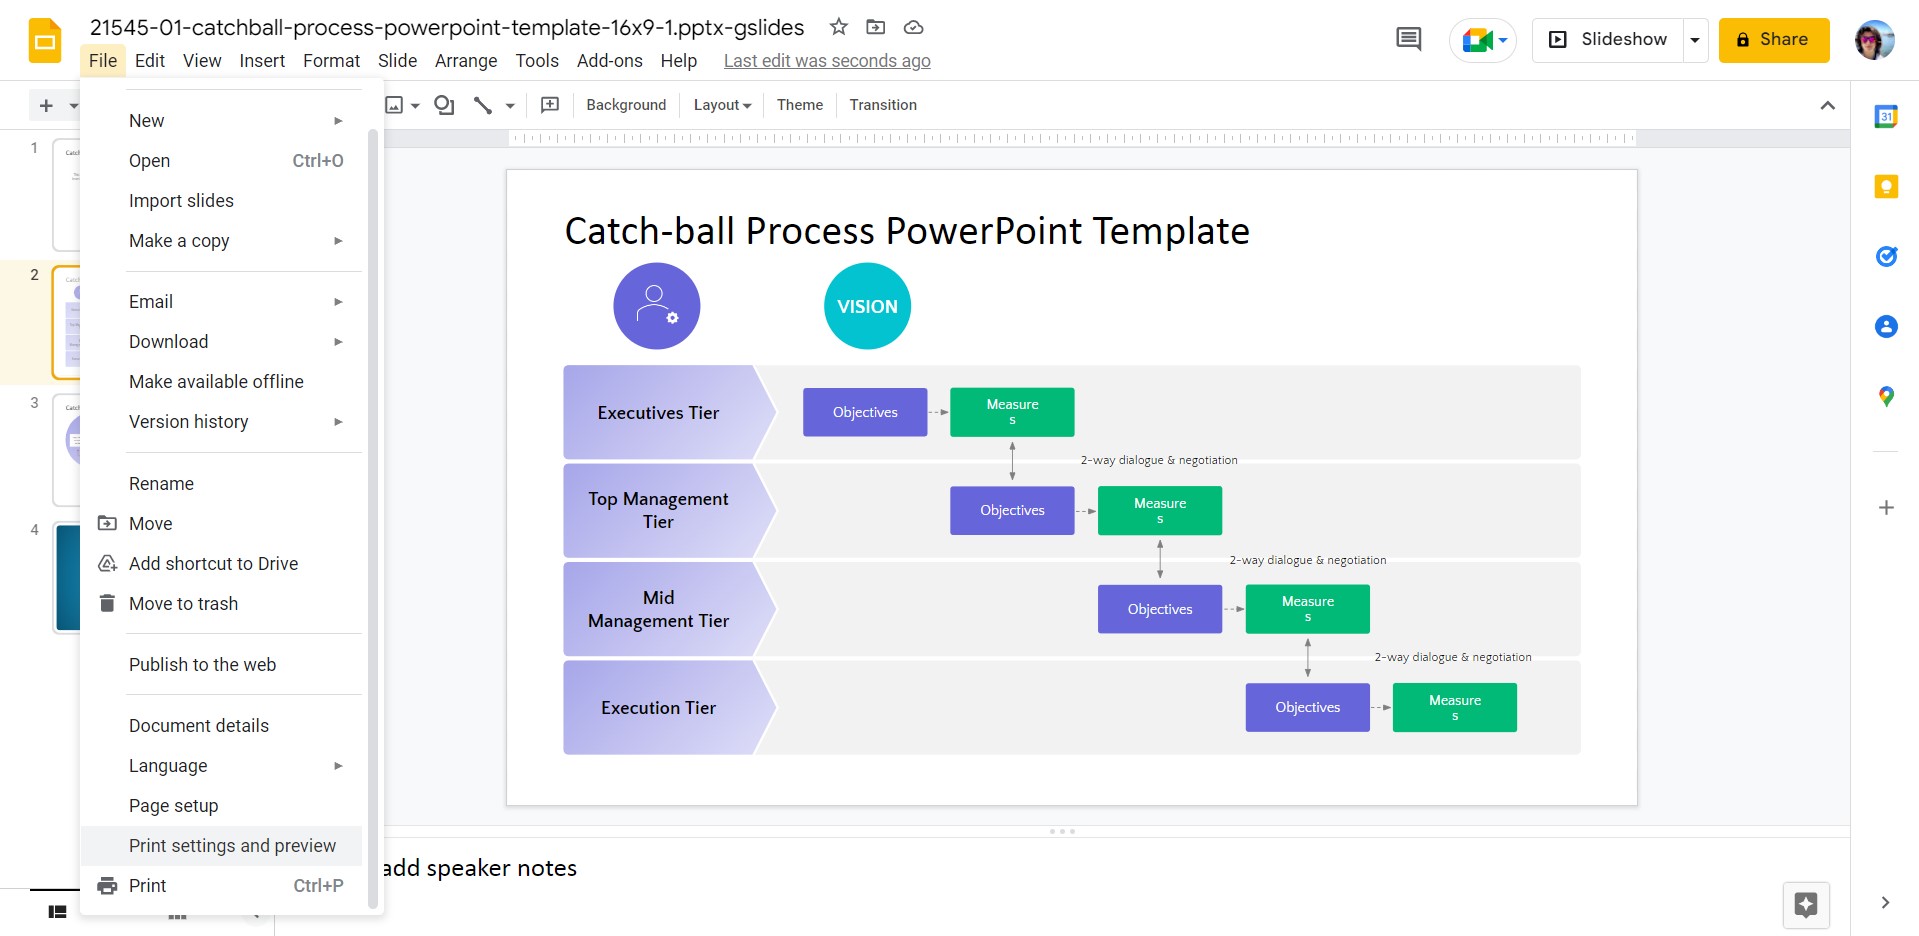
Access the File menu. In there, select Print settings and preview.
The window will change its layout to present the printing preview mode. But what interests us is to locate a button that says Include skipped slides. By default, the option is turned on.
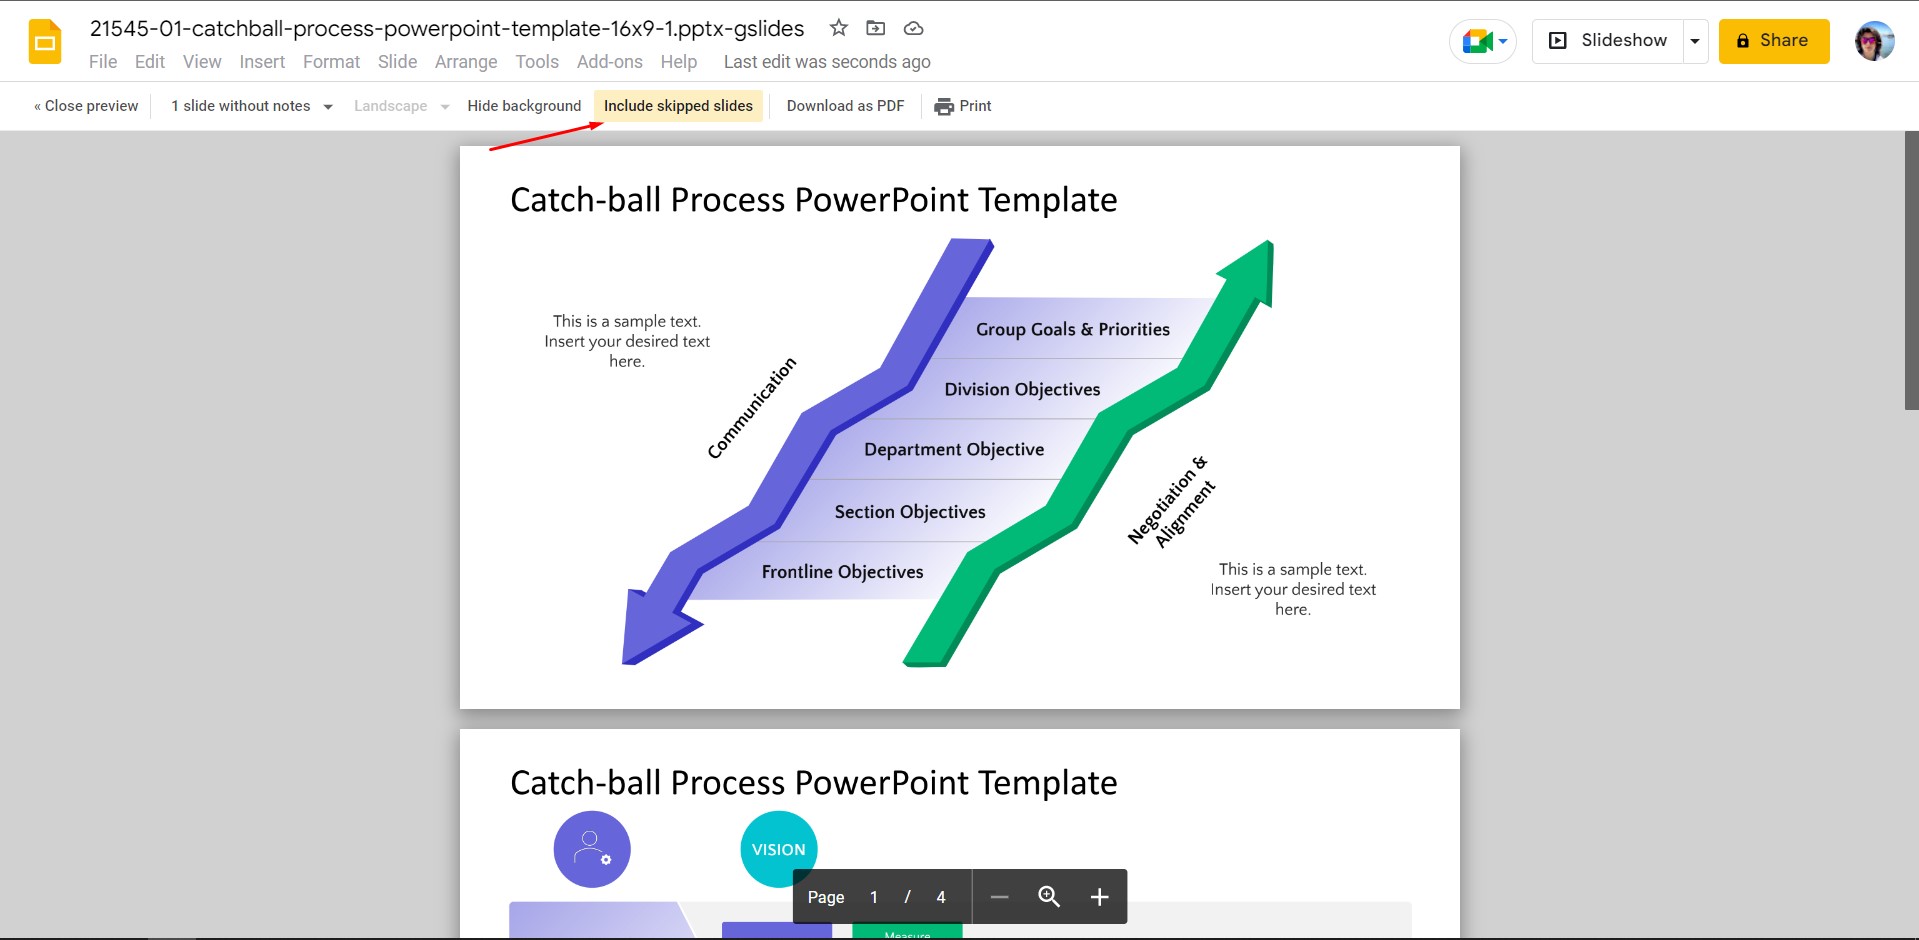
To avoid printing those hidden slides, click on that button, and you’ll see that the page number is reduced after the page refreshes.
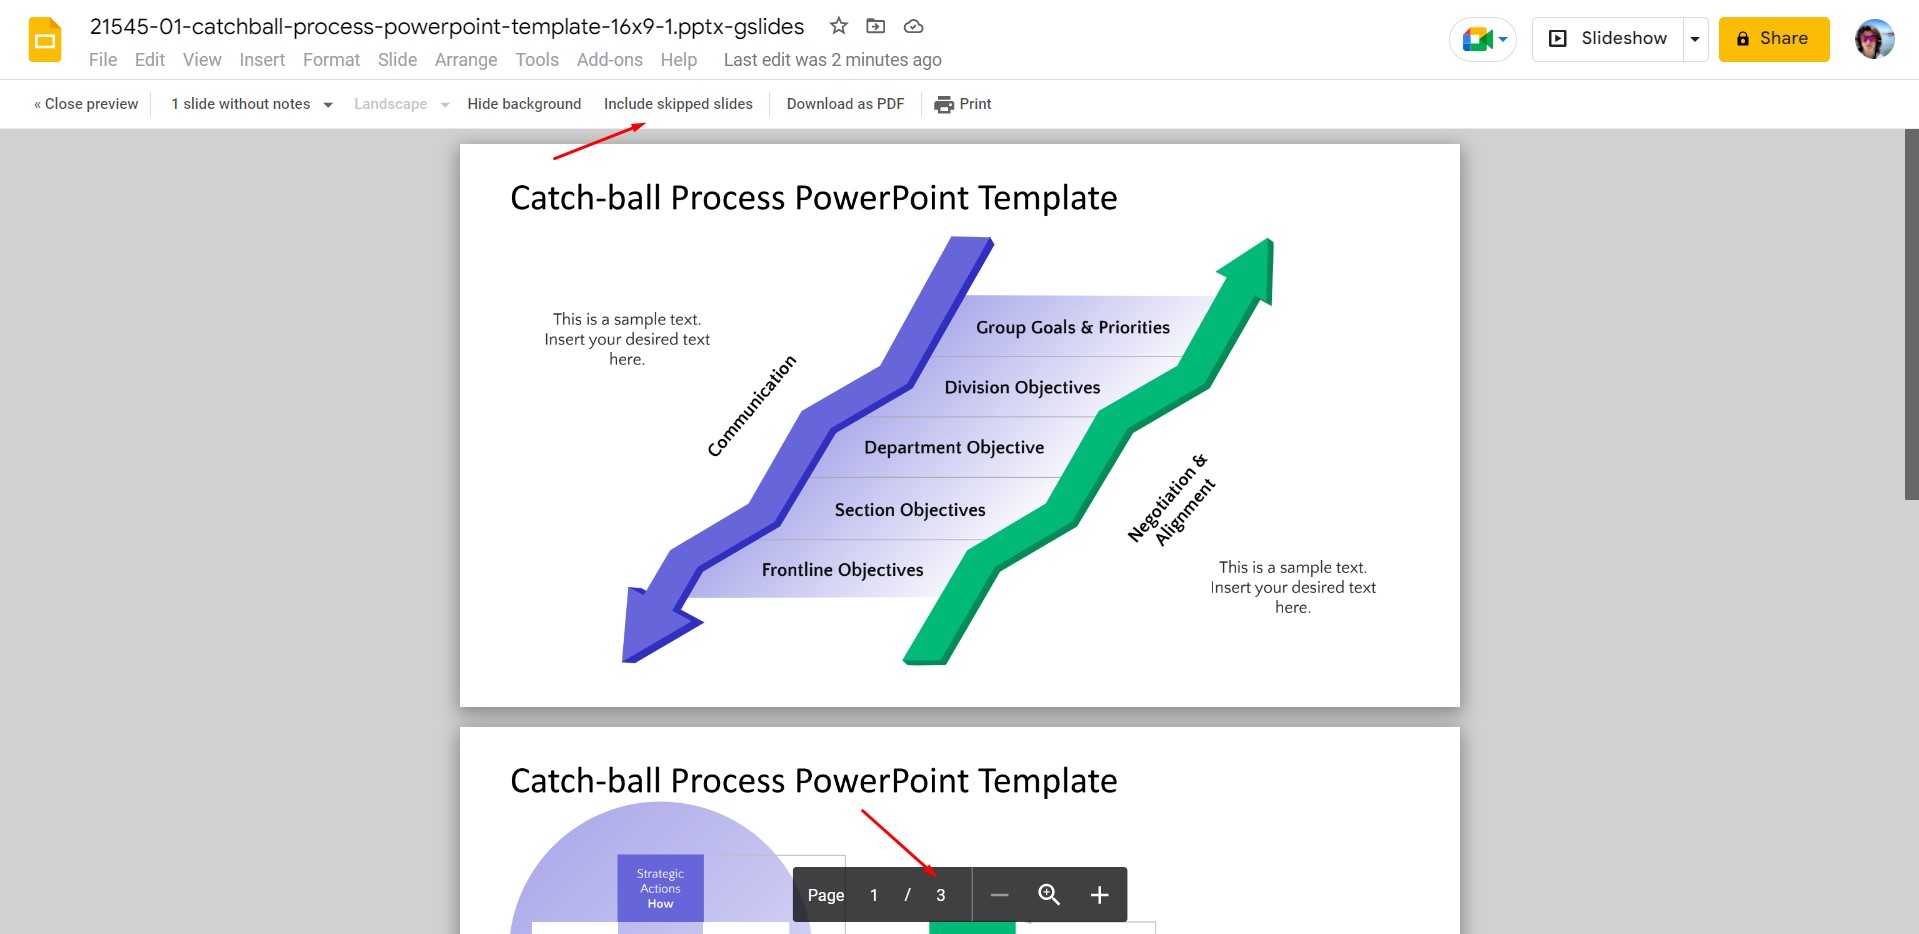
In this article, we explained how to quickly hide a slide in Google Slides for slideshow and print options. If you use PowerPoint instead of Google Slides, you can also learn how to hide a slide in PowerPoint instead.
FAQs
How can I hide a slide in Google Slides without using the right-click option?
To hide a slide without right-clicking, select the slide you want to hide, go to the Slide menu, and choose “Skip Slide.” The slide will then be marked with an icon showing an eye with a bar across it, indicating it is hidden in Slideshow mode.
Is there a keyboard shortcut to hide a slide in Google Slides?
No, Google Slides does not provide a keyboard shortcut for hiding slides. You need to use the Slide menu or right-click on the slide to hide it.
How do I hide a slide in Google Slides using the right-click method?
To hide a slide using the right-click method, right-click on the slide you want to hide and select “Skip Slide.” The slide will be marked as hidden with an icon of an eye with a bar across it.
How can I unhide a slide in Google Slides?
To unhide a slide, either go to the Slide menu and uncheck “Skip Slide” or right-click on the slide and uncheck “Skip Slide.” The slide will no longer be hidden and will appear in Slideshow mode.
Will hidden slides be printed when I print my Google Slides presentation?
By default, hidden slides are included in printouts. To exclude them, go to the File menu, select “Print settings and preview,” and click the “Include skipped slides” button to turn it off.
How can I exclude hidden slides from being printed in Google Slides?
To exclude hidden slides from printing, go to the “Print settings and preview” mode from the File menu and click the “Include skipped slides” button to deactivate it. This will reduce the total number of slides printed.

