Images play a crucial role in enhancing the visual appeal of your PowerPoint presentations. Whether you’re trying to highlight a specific part of a photo, remove unnecessary elements, or create custom shapes, the cropping tool can be helpful to enhance the presentation design. In this article, we’ll explain you how to crop images in PowerPoint, from the very basic technique to advanced options.
Why Crop Images in PowerPoint?
Cropping images can significantly improve your presentation by improving visual focus, eliminating unnecessary parts, creating custom shapes and effects, and enhancing overall design aesthetics.
By carefully cropping images, you can draw attention to the most important parts, remove distractions, and ensure that your visuals align perfectly with your slide design. You can use crop to align the pictures perfectly with the aesthetic of your slide design, or when creating presentation templates for your company. Some advanced uses of the Cropping feature in PowerPoint can help you to place a picture in an organic shape or make an image circular in your presentation.
Preparing to Crop in PowerPoint
Before you start cropping, you need to insert and select an image in your PowerPoint slide.
To insert an image, go to the Insert tab, click on Pictures, and choose This Device (for local images) or Stock Images or Online Pictures to find the perfect image for your presentation.
Select the image you want to insert and click Insert. Once the image is in your slide, select it. You’ll see sizing handles around the image, indicating that it’s selected and ready for cropping.
Now, how to crop the picture in PowerPoint? Let’s follow the steps below:
1. Open the Crop Tool
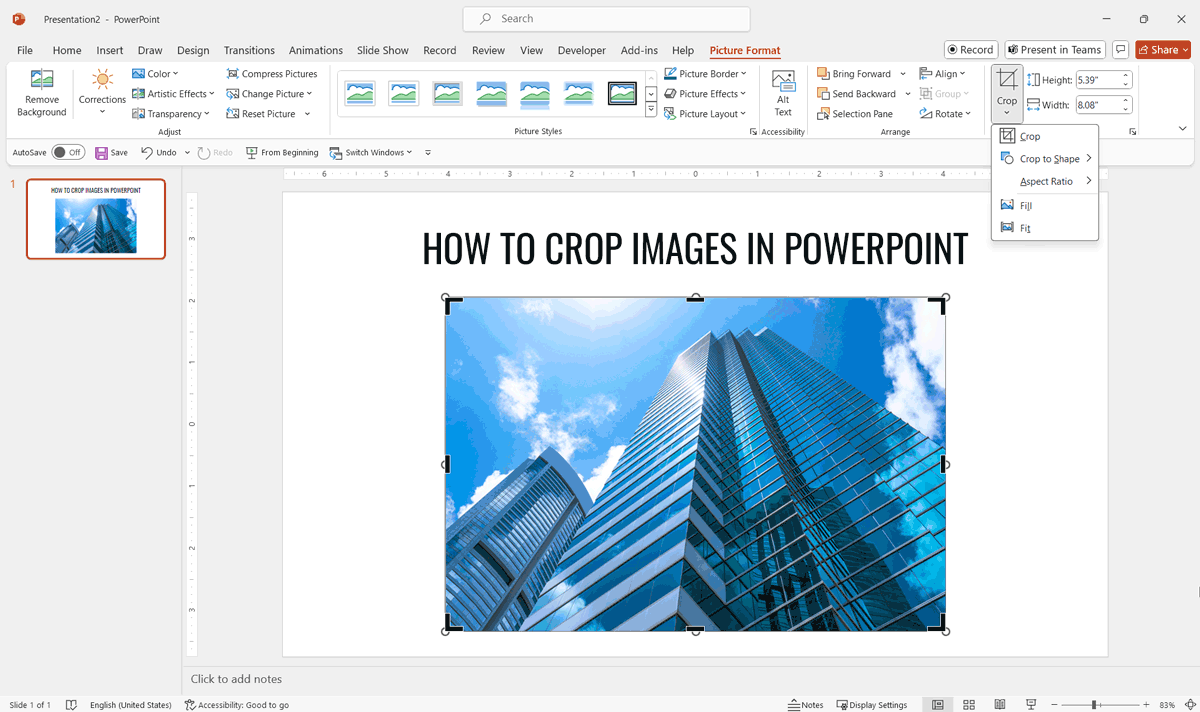
With the image selected, go to the Picture Tools Format tab. This tab only appears when an image is selected.
In the Size group, click on the Crop button. Black cropping handles will appear on the corners and edges of the image.
2. Adjust the Crop Handles
Click and drag the black cropping handles to adjust the cropping area. The image outside the cropping area will be dimmed to show the part that will be removed.
You can drag the corner handles to crop the image while maintaining its aspect ratio. Drag the side handles to crop the width or height independently.

3. Move the Crop Area
If you want to reposition the cropping area without changing its size, click and drag the image itself. This will move the image within the cropping frame, allowing you to focus on a specific part of the image.
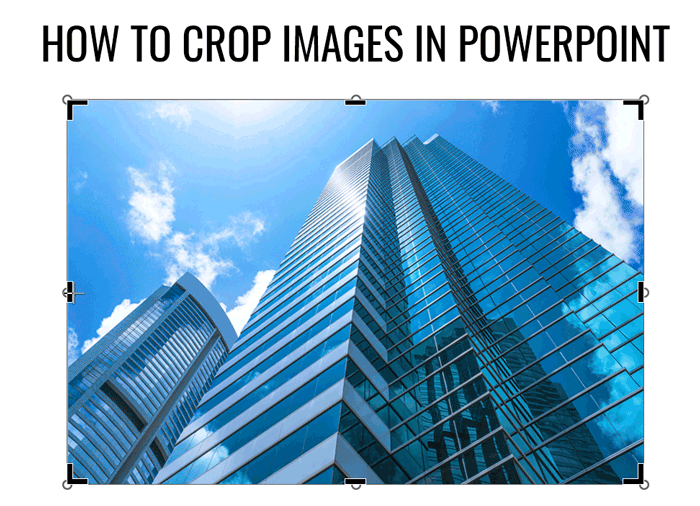
4. Apply the Crop
Once you’re satisfied with the cropping area, apply the crop by clicking outside the image. Alternatively, you can press Enter to confirm the crop.
Advanced Cropping Options in PowerPoint
PowerPoint offers more advanced cropping options to enhance your images.
One useful feature is cropping to a specific shape. To crop a picture to fit in a shape, you can follow the steps below:
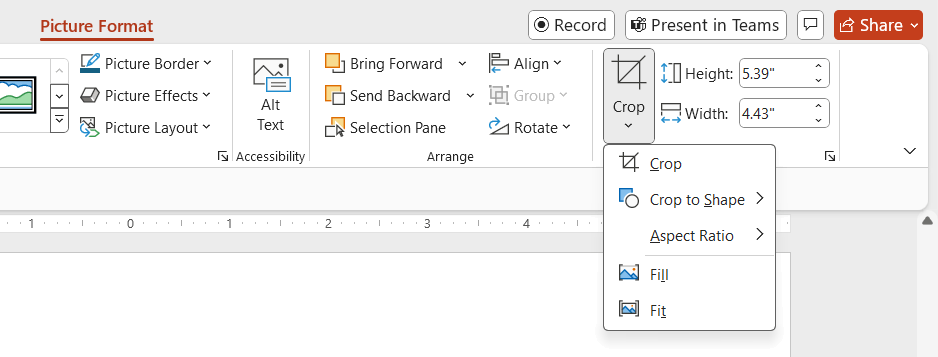
With the image selected, go to Picture Tools Format > Crop dropdown > Crop to Shape, and choose a PowerPoint shape from the gallery, such as a circle, star, or triangle.
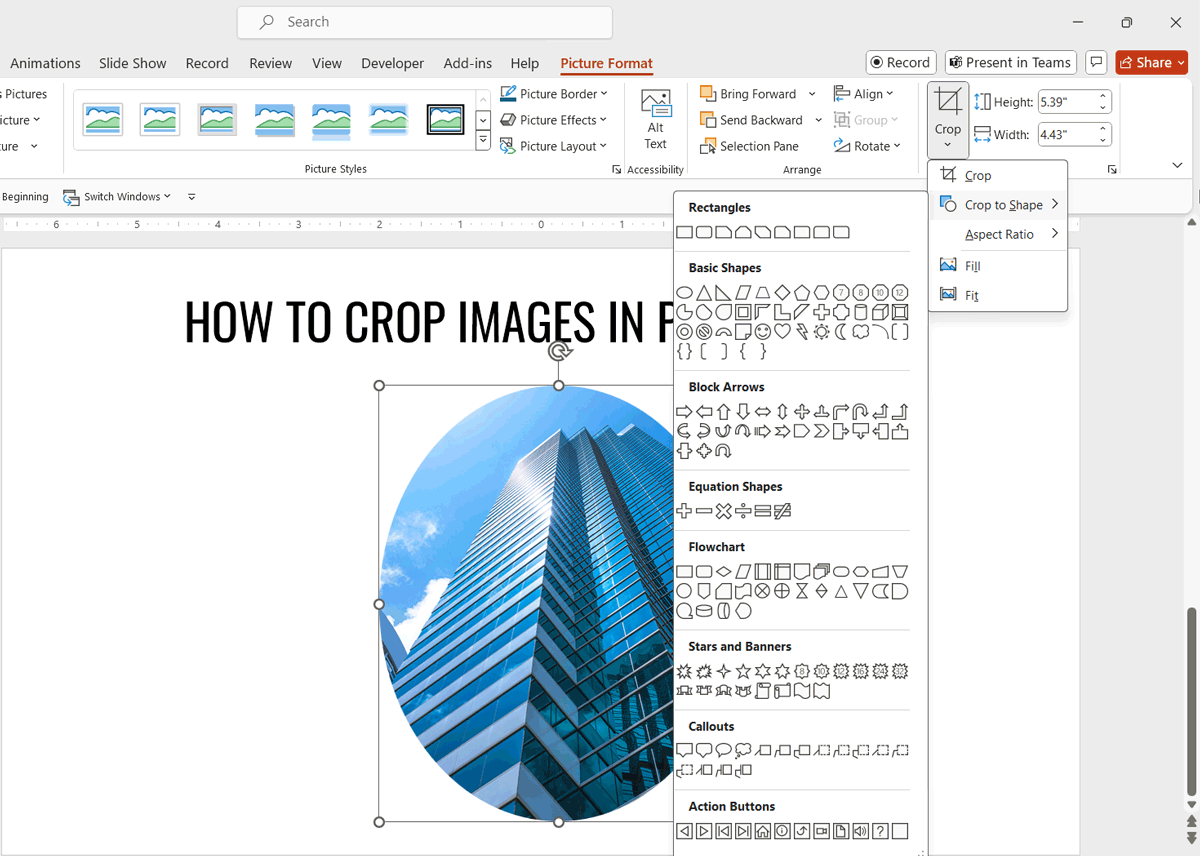
The image will be cropped to fit the selected shape, and you can adjust the size and position as needed.
Another advanced option is Aspect Ratio cropping in PowerPoint. To crop an image and fit to a specific aspect ratio, follow the steps below:
Select the image and go to Picture Tools Format > Crop dropdown > Aspect Ratio, then choose a predefined aspect ratio, such as 16:9 or 4:3.
The image will be cropped to fit the selected ratio, ensuring that it maintains the correct proportions. For instance, cropping an image to a 16:9 ratio can make it fit perfectly within a widescreen slide layout.
You can also use the aspect fill and aspect fit options for more precise control. Aspect Fill fills the shape with the image, possibly cropping some parts, while Aspect Fit fits the entire image within the shape, possibly leaving some empty space. These options are available under Picture Tools Format > Crop dropdown.
Tips and Tricks for Effective Cropping
To maintain image quality while cropping, avoid excessive cropping that reduces the resolution and quality of your image.
If you’re unhappy with the crop, you can use the reset option to undo the changes.
To undo the crop entirely, go to Picture Tools Format > Reset Picture to revert to the original image.
Combining cropping with other adjustments, such as brightness and contrast, can further enhance your image. Experiment with different cropping techniques to find what works best for your presentation.
Be mindful of overcropping, which removes too much of the image and loses important details. On the other hand, cropping too little may retain unwanted elements that distract from the main focus. Also, ignoring aspect ratios can lead to distorted images, so always consider the aspect ratio when cropping.
Conclusion
Cropping images in PowerPoint is a simple yet powerful technique to improve the visual impact of your presentations. Whether you’re using basic or advanced cropping methods, these tools can help you create more engaging and professional slides. Experiment with the techniques discussed in this article, and don’t hesitate to explore other image editing options in PowerPoint. Also, check our article about how to mirror an image in PowerPoint.