A half-circle or semi-circle is a useful design element in PowerPoint presentations. It can be used for diagrams, infographics, and creative visual elements. This guide will walk you through the simple steps to create a half-circle in PowerPoint using built-in shape tools and formatting options.
How to Create a Semi Circle in PowerPoint
There are different methods for creating a semi-circle or half-circle in PowerPoint, including using a Partial Circle shape or merging two shapes together. For the purpose of this post, we will add a semi-circle to a slide in the Data Science Shapes PowerPoint Template.
Method 1: Create Semi Circle Using a Partial Circle Shape
To create a semi-circle using the Partial Circle shape edit method, follow the below-mentioned process.
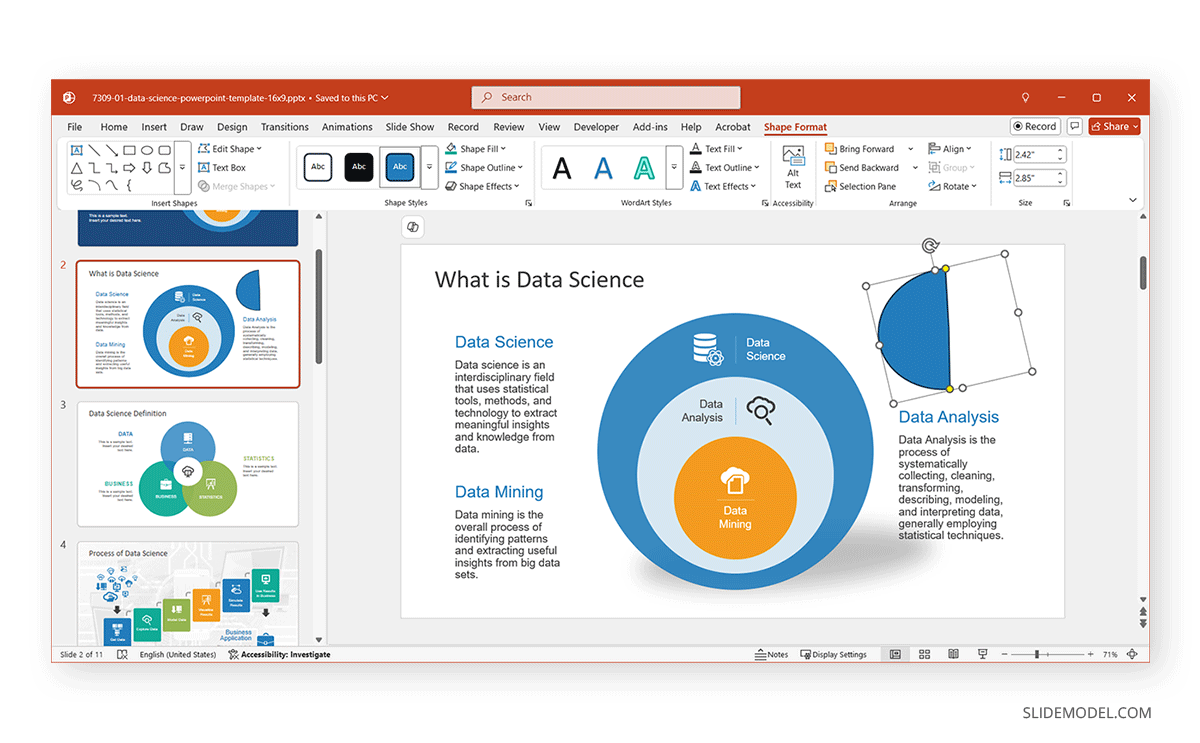
Step 1: Open the slide to which you want to add the semi-circle and insert a partial circle shape via Insert -> Shapes.
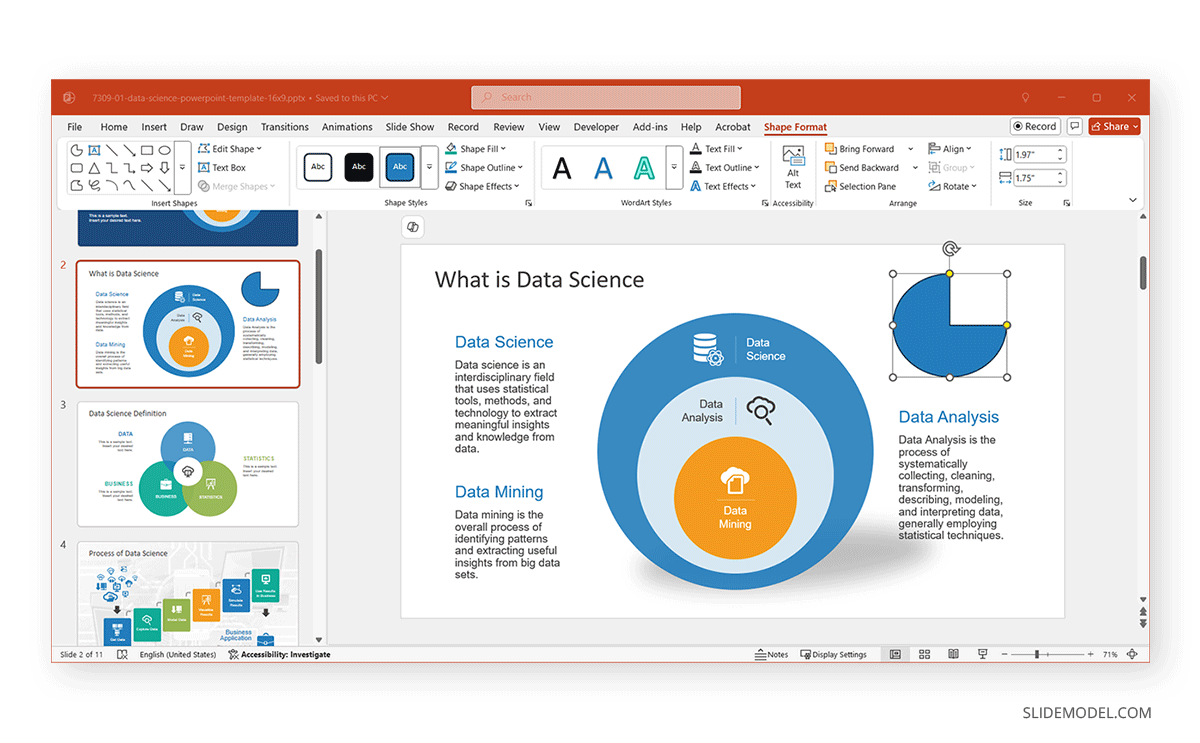
Step 2: Click on the circle to select it and adjust the yellow handles to form a perfect semi-circle. You can move the yellow lines to create a half-circle shape that best suits your needs. This method can be used to create circles with different variations of a semi-circle or a partial piece of a circle (e.g., showing one-fourth of a circle).
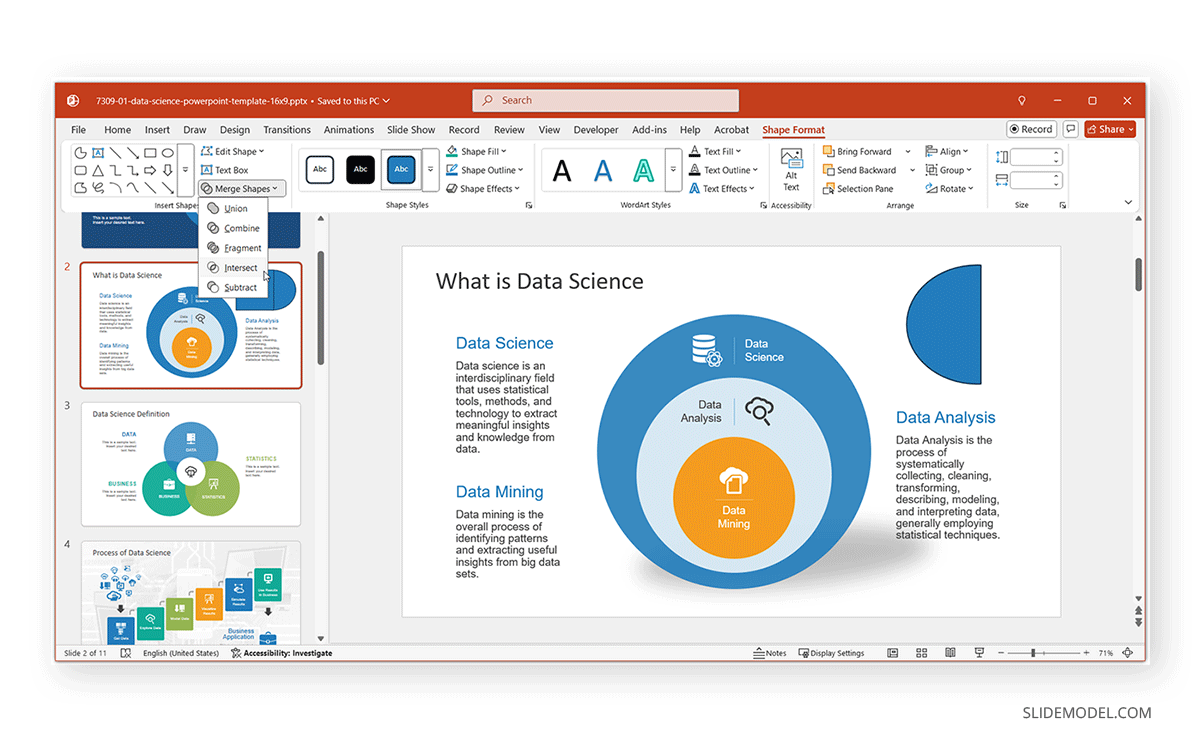
Method 2: Create Semi Circle Using Merge Shapes
Step 1: Open PowerPoint and navigate to the slide where you want to add the half-circle. Click on Insert -> Shapes and add an oval shape, followed by a rectangle shape on top of it.
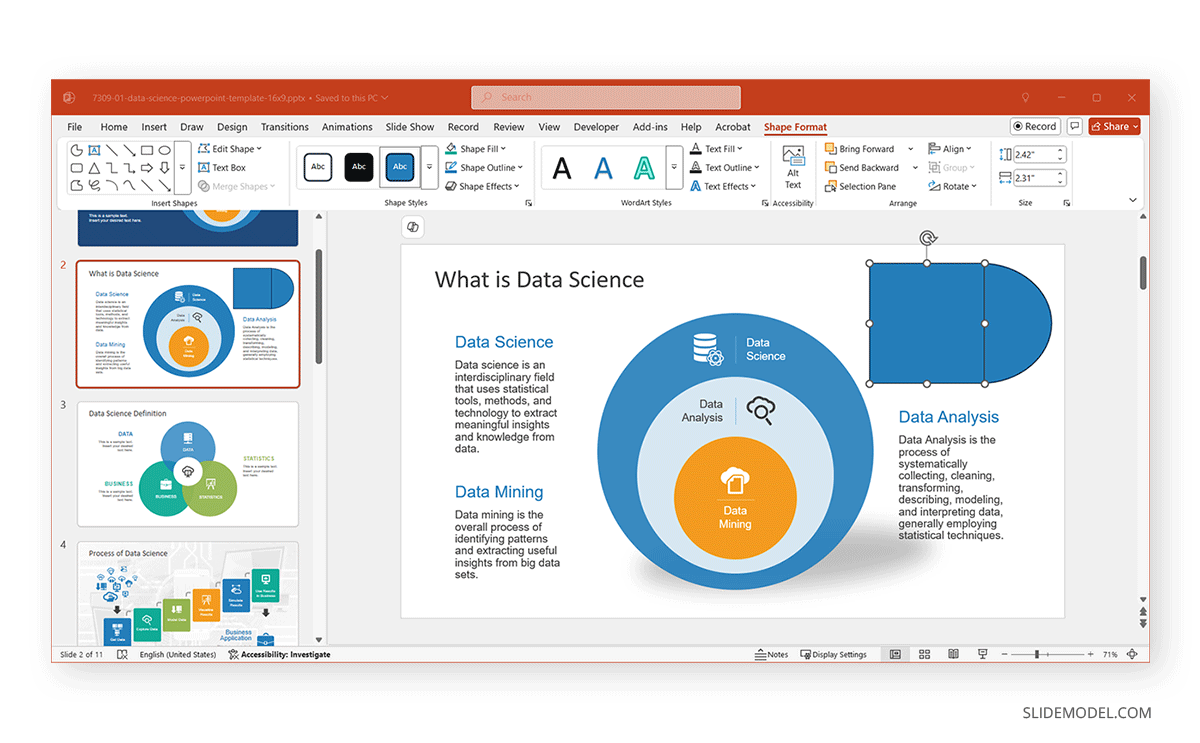
Step 2: Go to Shape Format -> Merge Shapes -> Intersect. This will remove one-half of the circle, leaving a precise semi-circle.
Customizing the Half Circle Created in PowerPoint
Different options in PowerPoint can be used to customize the half-circle shape.
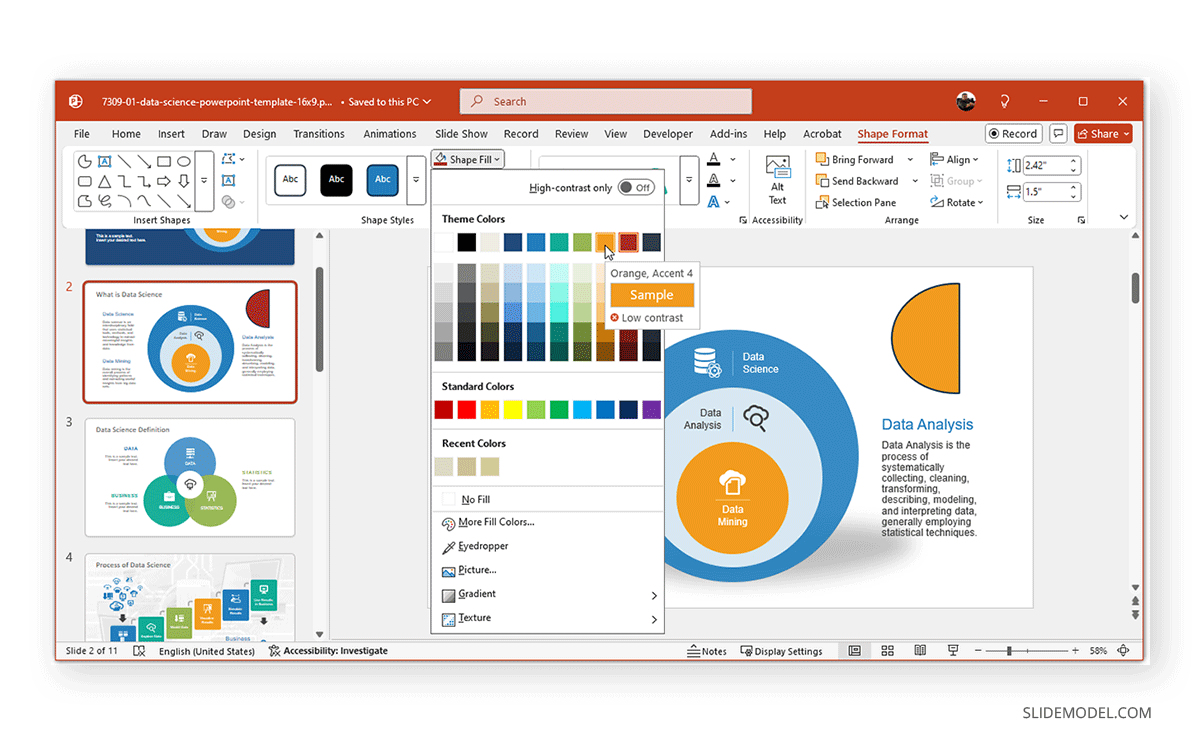
1. Change the Fill and Outline: To change the fill and outline to give the half-circle a custom look, click on the half-circle to select it, and go to Shape Fill to change the color. Use Shape Outline to adjust the border thickness or remove it entirely.
2. Rotate the Half Circle: Click on the shape and use the Rotate option to position it as needed.
3. Apply Effects for Better Visibility: Use Shape Effects like shadow or glow to make the half-circle stand out. Adjust transparency for layering effects.
4. Align and Distribute for Consistency: Use Align tools to position the half-circle precisely on your slide. If using multiple semi-circles, distribute them evenly for a professional look.
Bonus Tip: Use the Half Circle in Diagrams
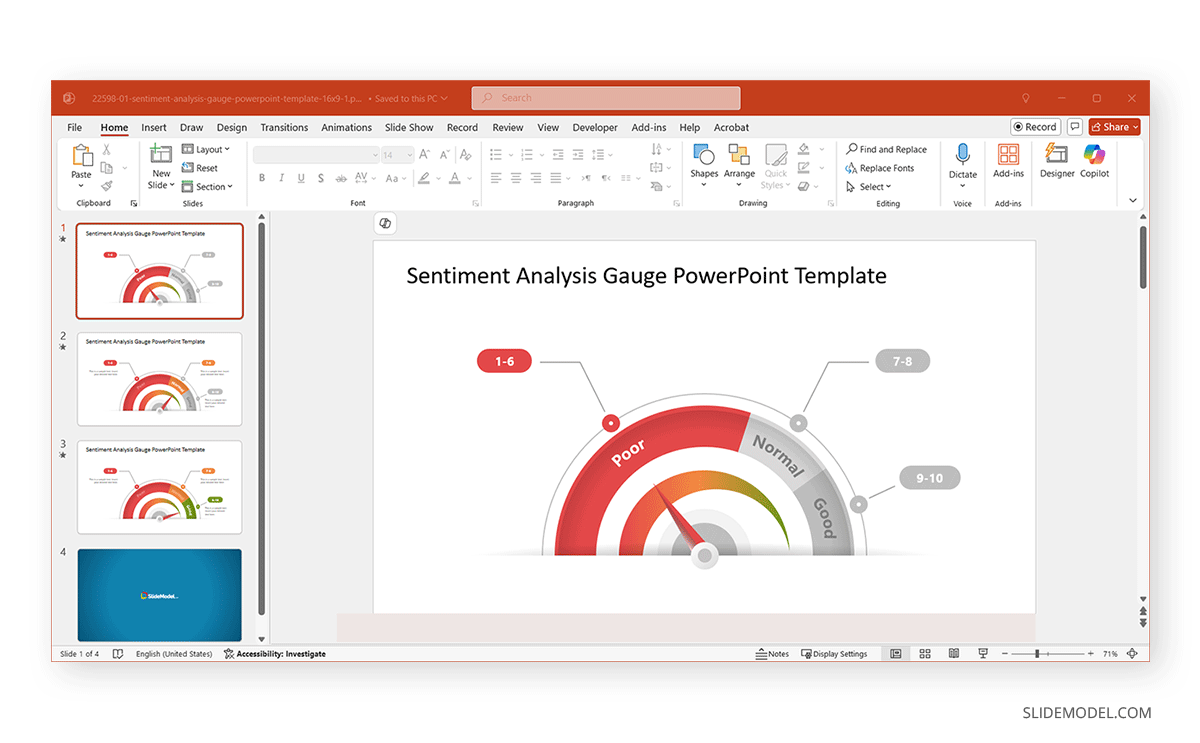
Half-circle diagrams can add great value to your slides. You can create such diagrams by Combining them with text, icons, or other shapes for visually appealing slides. Using multiple half-circles to create pie charts, progress indicators, or creative layouts. Half circles can represent different stages in a process, making them useful for flowcharts and business infographics. They can act as visual dividers in a presentation, breaking up content into easy-to-present sections. Use a half-circle to frame or highlight key data points, directing the audience’s attention to important information. To make your job easy, you can also use Circular Diagram Templates for PowerPoint and customize professionally designed slides such as the Sentiment Analysis Gauge PowerPoint Template shown below.
Final Words
Creating a half-circle in PowerPoint is easy with built-in PowerPoint tools. Whether you use the Partial Circle shape edit or Merge Shapes function, you can quickly design a semi-circle to enhance your presentation visuals. Experiment with colors, rotation, and placement to achieve the best results. You can create visually engaging designs that fit your corporate or creative needs by customizing the half-circle with different colors, effects, and alignments. Mastering this simple shape modification can enhance your PowerPoint slides, making your presentations look more dynamic and professional.