Some Google Slides templates don’t have a border or lack cohesion in the design, making the slide content look less tidy. Google Slide borders can be added using Shapes by making the shape’s center transparent.
How to Add a Border for Google Slides
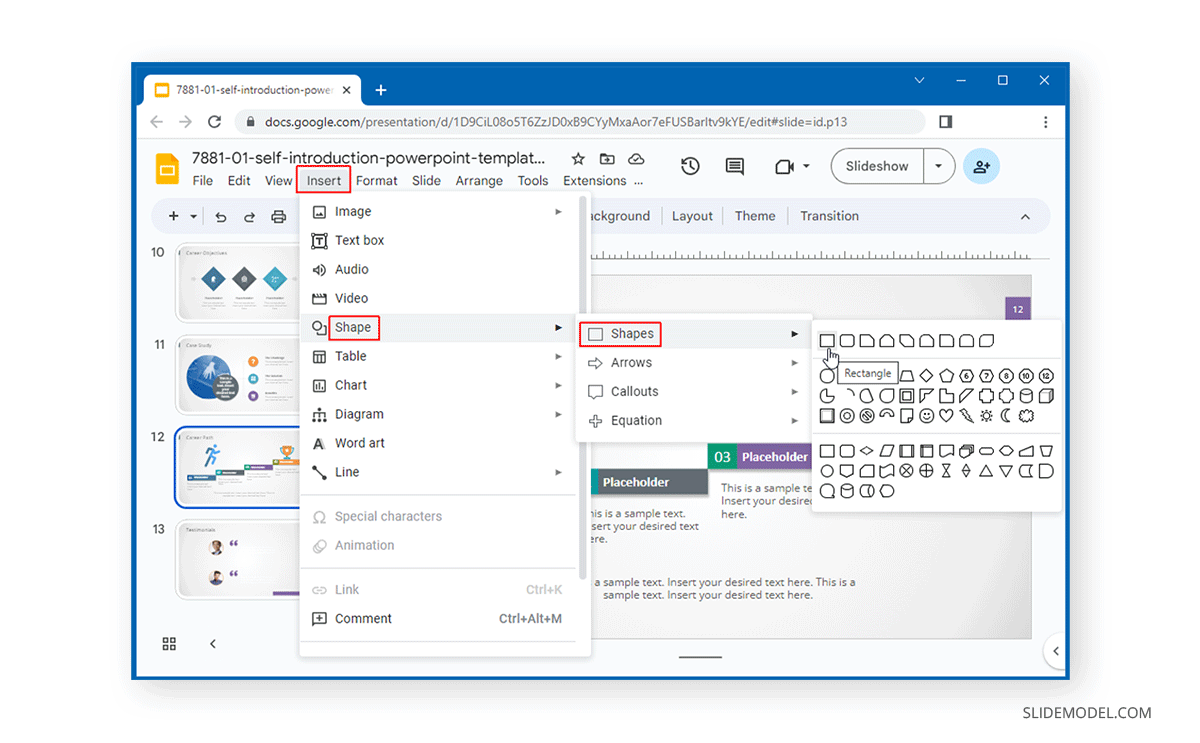
To add a border in Google Slides presentations, go to Insert -> Shape and pick a shape to add the border. You can also create borders out of arrows, callouts, and equations. However, for the purpose of this post, we will use a rectangle shape as the border of the slides.

Once the shape is selected, drag the shape across the slide to create a border.

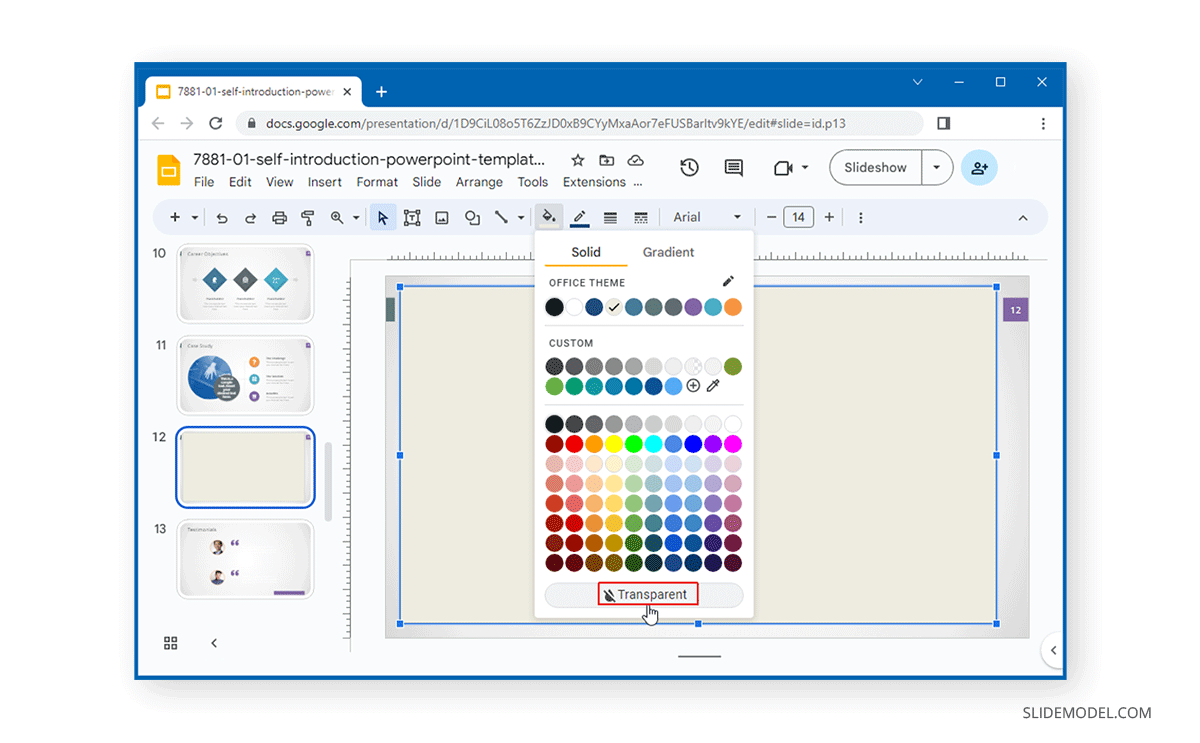
Since the shape will likely appear opaque, you must adjust the transparency to convert the shape into a border. To do this, select the shape, head over to Fill Color, and select Transparent.

This will generate a border for the selected shape based on your chosen color. If the border appears too thin, adjust the weight of the border.

By making the border weight bigger or smaller, you can adjust its size via the Border Weight dropdown menu.

While adjusting the border weight can enable making a proper-looking border, you can also change how the border appears by changing the Border Dash settings.

To make your border dotted, go to Border Dash and select a desired border style.

The below example shows a dotted border created by adjusting the Border Dash settings in Google Slides.

Final Words
Using the method mentioned above, you can create borders in Google Slides for slide decks and even give a border to individual slide elements. This can help stylize your slides by enabling you to create stylish presentation slides and adjust existing designs for your Google Slides templates.


