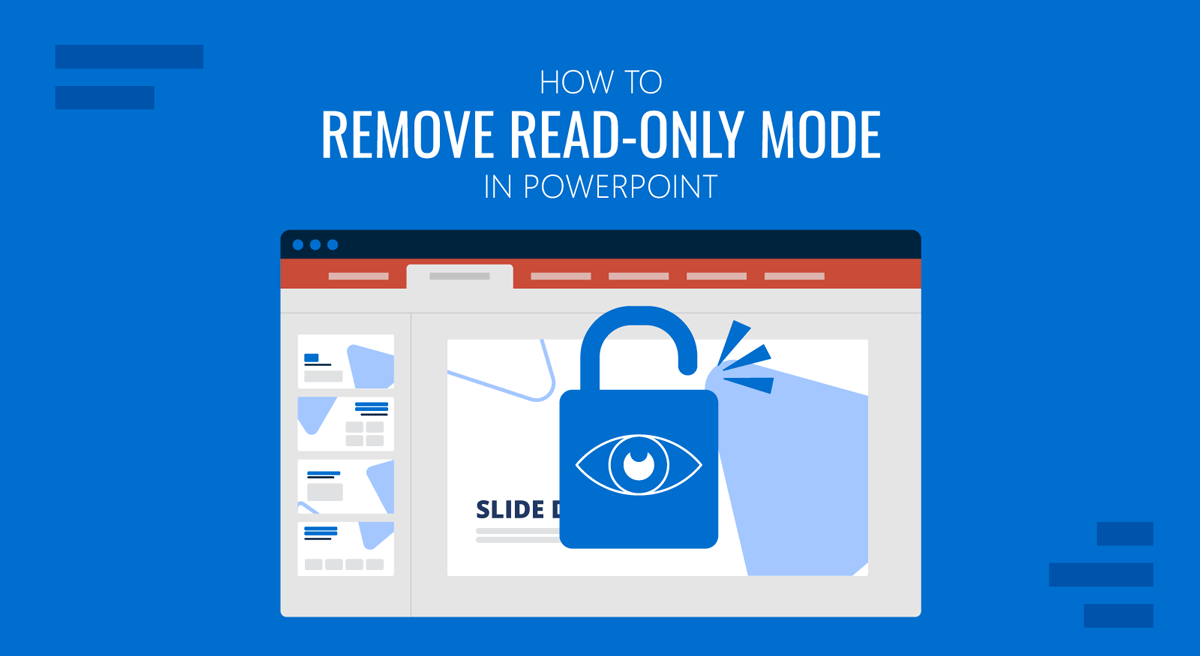
A user can restrict PowerPoint files to control further edits to the file. This can help mark the presentation as ‘final’ or to lock changes made after hours of hard work and collaboration with colleagues. This read-only mode in PowerPoint can be enabled manually. However, under certain conditions, it might also be enabled automatically.
In this tutorial, we will walk you through the process that will show you how to remove read-only mode in PowerPoint, unlock PowerPoint presentations, and address related issues on both PC and Mac.
What Does the “Read-Only” Mode Mean in PowerPoint?
A read-only PowerPoint file is a presentation you can only view and not modify. This setting helps preserve content, especially when presentations are shared across teams. However, it can become an obstacle if you’re the one who needs to update or edit the presentation. In other words, PowerPoint’s ‘read-only’ mode is like a digital safety lock. It’s there to prevent unintended changes. Depending on the source of the restriction, you can bypass it using various methods. This includes various techniques, from a simple click to enable editing to entering a password to edit the file.
Common Reasons PowerPoint Opens in Read-Only Mode
Before enabling a PowerPoint file for editing from the read-only mode, or how to make a PowerPoint read-only, it’s essential to understand the various types of restrictions that limit file access. Below is a list of reasons that might lead to PowerPoint read-only mode, followed by a section explaining the various methods to bypass each type of restriction.
1. File Properties Restriction: When a PowerPoint file is marked as read-only in the operating system, it will not open directly for editing.
2. Opened from Email Attachments: PowerPoint files opened directly from emails often open in Protected View. When opened, these files lock PowerPoint from editing them.
3. Presentation is Password-Protected: Only viewers with the password can change a password-protected PowerPoint presentation. In such a case, a dialog box to enter the password will appear on the screen once the file is opened.
4. Permissions from Shared Drives: Shared files may carry edit restrictions, where the one previewing them cannot edit the file due to restrictions by the author. Sometimes, these files might be edited once downloaded, or the author might disable downloading and share the files only in read-only mode. This applies to Microsoft-compatible platforms like OneDrive or SharePoint and third-party services with support for PowerPoint files, such as Google Drive and Box.
5. PowerPoint Settings or File Metadata: Settings within PowerPoint or the file’s metadata may prevent editing.
6. Cloud Sync Issues: If you’re using cloud services like OneDrive or Google Drive, syncing errors can cause temporary read-only access.
7. Digital Signatures: Files signed digitally may restrict edits to maintain content integrity.
How to Turn Off Read-Only PowerPoint Mode (PC and Mac)
1. Click “Enable Editing” in PowerPoint
For people new to PowerPoint and wondering how to change it from read-only mode, the most common method is to look for the Enable Editing option. In most cases, PowerPoint files locked automatically can be edited by simply using this option. The Enable Editing or a similar button, e.g., Edit Anyway, is usually available from a yellow bar below the Ribbon menu. In most cases, this is all you will need to do to enable editing in PowerPoint.
Such a restriction usually comes in the form of the Protected View, which is Microsoft’s way of shielding users from potentially harmful content, especially when files are downloaded from the Internet or opened as email attachments. This restriction is also applied to macro-enabled files. The restriction is meant to prevent any potential harmful scripts or malware from automatically enabling once the file is opened. In such a case, a button to enable editing is shown, which a user can use cautiously.

2. Uncheck the Read-Only Attribute
This is a quick fix when a user sets the restriction at the file level. To bypass this restriction, go to File -> Info -> Protect Presentation and select ‘Always Open Read-Only’. This option is meant to enable/disable read-only mode manually. This restriction applies only to a selected file, not all files on the operating system or device.
Note: If you want to limit file access and make a PowerPoint read-only, simply use the same settings to disable default editing. For more elaborate restrictions, see section 4 below on password protection.

3. Check for Marked as Final Status or Digital Signatures
Marking a file as final or with a digital signature is often used to signal that no more changes should be made to the presentation. These settings simply discourage further edits, and you can edit the file by enabling editing from the given option. If the file is marked as final, you’ll see a button below the Ribbon menu that says “Edit Anyway.”
A yellow outline will highlight the Protect Presentation menu when this option is enabled. To disable marked as final, go to File -> Info -> Mark as Final. This option is meant to enable/disable the file from being marked as final by the author and discourages editing.

In the example below, we applied the restriction to the New Product Launch PowerPoint Template to enable the file to open in read-only mode by marking it as final.

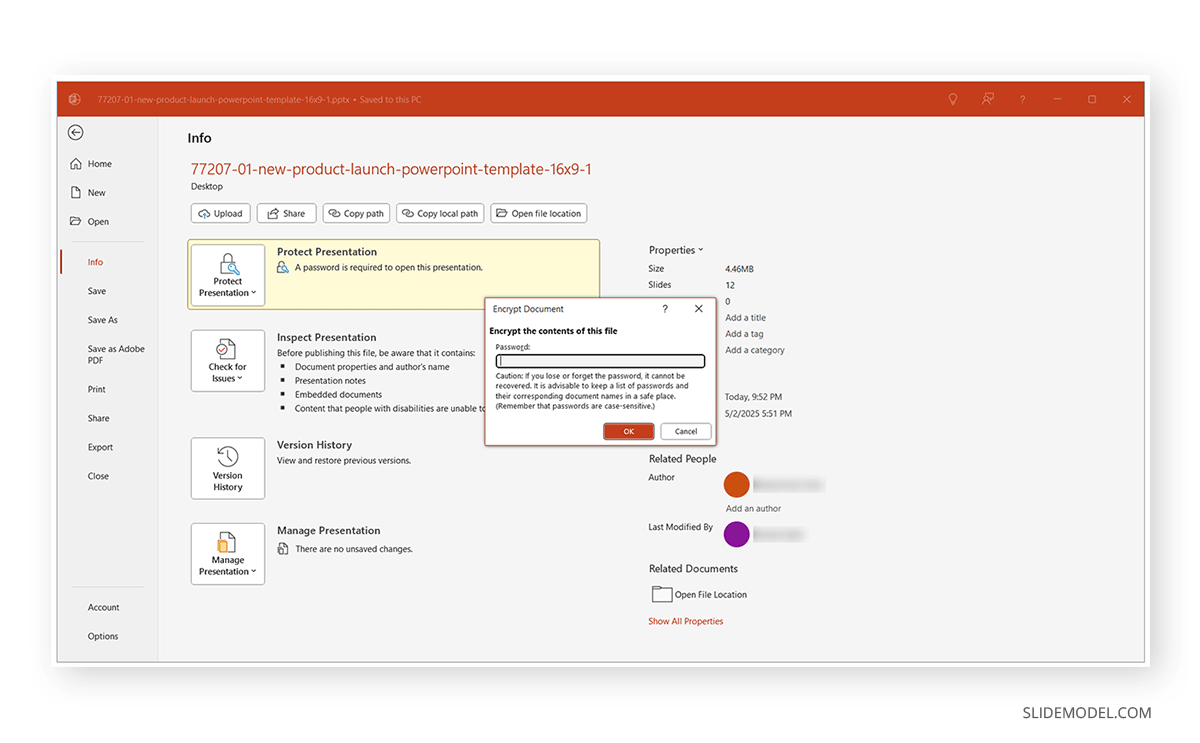
4. Remove Password Protection
If a file is password protected, you must enter the password to access it. To remove the password, you can change the file settings via File -> Info -> Protect Presentation -> Encrypt with Password.
Note: If you are not the creator of the file, removing a password without authorization may violate professional or legal standards.
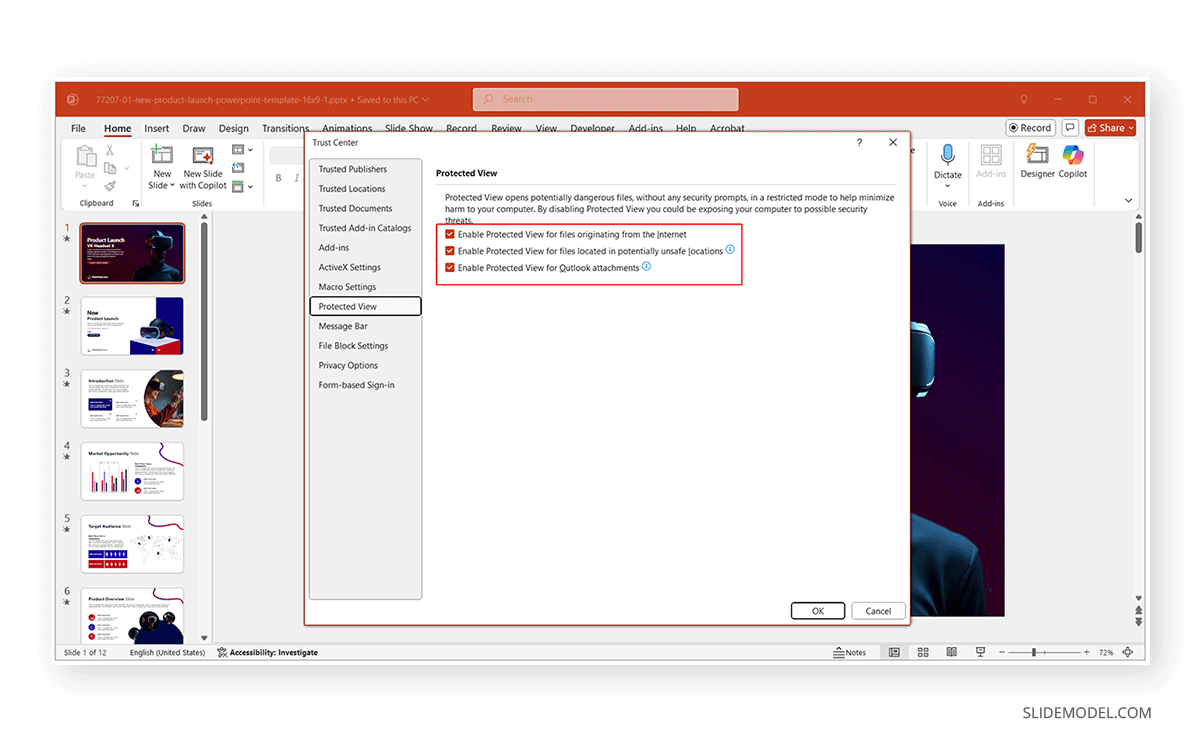
5. Check Trust Center Settings
Numerous Trust Center Settings can affect the file’s readability. For example, by going to File -> Options -> Trust Center -> Trust Center Settings, you can disable Protected View or enable macros automatically for files to ensure you can easily edit files without PowerPoint restricting access due to pre-enabled settings.
6. Save PowerPoint as a New File
If a PowerPoint file is locked due to network policies or inherited restrictions from its original source, you can save it as a separate file via File -> Save As to create an editable version.

7. Turn Off Read-Only Mode in PowerPoint via File Properties on Mac
On Mac, read-only flags are often applied through system-level file properties rather than within the PowerPoint application. If you’re a Mac user who needs to turn off Read-Only mode, locate the file in Finder, Right-click and choose Get Info, uncheck the Locked box under General, close the info window, and open the file.
Additional Tips to Unlock PowerPoint Presentations
Since PowerPoint files can be accessed not only via desktop but also via online apps, including third-party web apps that support PPT and PPTX files, consider the following tips to troubleshoot access-related issues and learn how to lock PowerPoint from editing.
1. Check Sharing Permissions
If you’re accessing a presentation from a shared location (like OneDrive, Box, or Google Drive), ensure you have editing permissions. Ask the file owner to upgrade your access rights.
2. Use Save As
Sometimes, simply saving a new copy resolves the issue. This method creates a local version that might not carry over existing restrictions.
3. Check Settings for Protected View and Macros
Disabling Protected View should be done with caution. It’s a safety feature to reduce the risk of malware or other embedded threats.
4. Ask the File Owner for Access
Always verify whether the file owner intended to restrict access in collaborative workspaces. A simple request may be all that’s needed to gain editing privileges.
5. Consider Organizational Restrictions
Some organizations might restrict the use of files on a network drive or apply operating system restrictions using user access control features via a corporate server. For example, Microsoft’s Active Directory service can be used to restrict access and usage of computers comprehensively using Windows Server by applying specific restrictions on users, even down to their ability to use sections of the operating system or files.
Final Words
It is recommended to always verify access settings before sharing a file, especially in collaborative environments. Some organizations prefer user access limitations related to file access, editing, copying, etc. If you want to learn how to know who edited what on PowerPoint, consider reviewing information via File -> Info, including checking the file version history.
To access a file due to default PowerPoint or device settings, you can use the tips mentioned above to learn how to change PPT from read-only mode to an editable version. Removing read-only mode in PowerPoint can be a quick fix or a multi-step process, depending on the source of the restriction. From file properties to password protection, understanding each restriction type ensures you can regain access and control over your content. To avoid these issues, it’s best to maintain a version-controlled system for your presentations to bypass common file metadata and PowerPoint settings and ensure your Trust Center settings align with your needs.