In addition to presentations, many users use PowerPoint as a lightweight design tool. Some users like to export charts, tables, photos, and entire slides as image files for reuse. One of the most valuable ways to repurpose these visuals is to export PowerPoint graphics as transparent PNG files. Unlike JPEGs, which always have a solid background, PNG files can preserve transparency. This makes them perfect for overlaying graphics on different backgrounds, inserting them into documents, or integrating them into web and video projects without worrying about awkward white boxes.
If you want to learn how to export a PowerPoint as a PNG with transparency and the benefits of doing so, follow the tips and methods listed in this guide. For the purpose of this post, we will use the Country Flag Button Shapes PowerPoint Template to demonstrate how to export PowerPoint graphics.
Why Export Graphics as Transparent PNG
If you’re wondering how PNGs with transparency can be helpful to you, here are a few reasons why you might want to consider converting PowerPoint graphics to transparent PNGs.
1. Clean Branding
Logos, wordmarks, and icons created in PowerPoint can be exported as transparent PNGs. This ensures they look professional whether placed on a white background in a report, a colored background on a website, or overlaid on a textured social media graphic.
2. Professional Presentation
Transparent PNGs prevent the white box effect that often makes visuals look odd. A clean export gives the impression of a polished, custom-designed asset, even if it was created within PowerPoint.
3. Reusable Assets Across Platforms
Instead of redesigning icons or charts for every platform, a single high-quality PNG export can be reused in Word documents, PDFs, websites, and even video editing software.
4. File Quality
Unlike JPEGs, PNGs are lossless and preserve sharp edges, making them ideal for text, icons, and diagrams where clarity is essential.
5. Ease of Sharing
Unlike PowerPoint files, PNG files can be easily shared as lightweight, high-resolution assets that integrate with multiple file types and are used across documents, presentations, websites, and more.
Practical Use Cases
Transparent PNG exports from PowerPoint aren’t just for convenience; they unlock creative opportunities. Here are some typical applications for PowerPoint-based transparent PNGs:
1. Logos: A company logo designed in PowerPoint can be exported as a clean PNG with transparency. This allows you to place it on websites, brochures, or videos without an awkward border.
2. Icons: Custom icons, arrows, callouts, buttons—can be saved as PNGs and embedded into mobile apps, websites, or dashboards.
3. Social Media Graphics: Transparent overlays can be exported from PowerPoint and layered onto photos or branded backgrounds for Instagram posts, LinkedIn updates, or Twitter banners.
4. Video Overlays: Content creators can use transparent PNGs in software like Adobe Premiere Pro, OBS Studio, or Camtasia for lower-third graphics, watermarks, or callouts.
5. Infographics: Complex diagrams from SlideModel or custom designs can be exported as PNGs, then repurposed into reports, fact sheets, or presentations without needing to rebuild visuals in applications like Adobe Illustrator.
Preparing Your Graphic in PowerPoint Before Exporting
A successful export begins with proper preparation inside PowerPoint. Before we discuss the method for exporting PowerPoint graphics or slides as a PNG file, let’s look at a few steps you can take before saving the file.
- Remove Backgrounds: If your graphic is on a colored slide, make sure the background is set to ‘No Fill’ or transparent.
- Group Elements: Select all parts of your graphic (shapes, icons, text) and group them (Ctrl+G on Windows or Command+G on Mac). This ensures that everything exports as a single unit.
- Check Alignment: Use the alignment tools in the ribbon to center or balance your design so it doesn’t appear cut off after export.
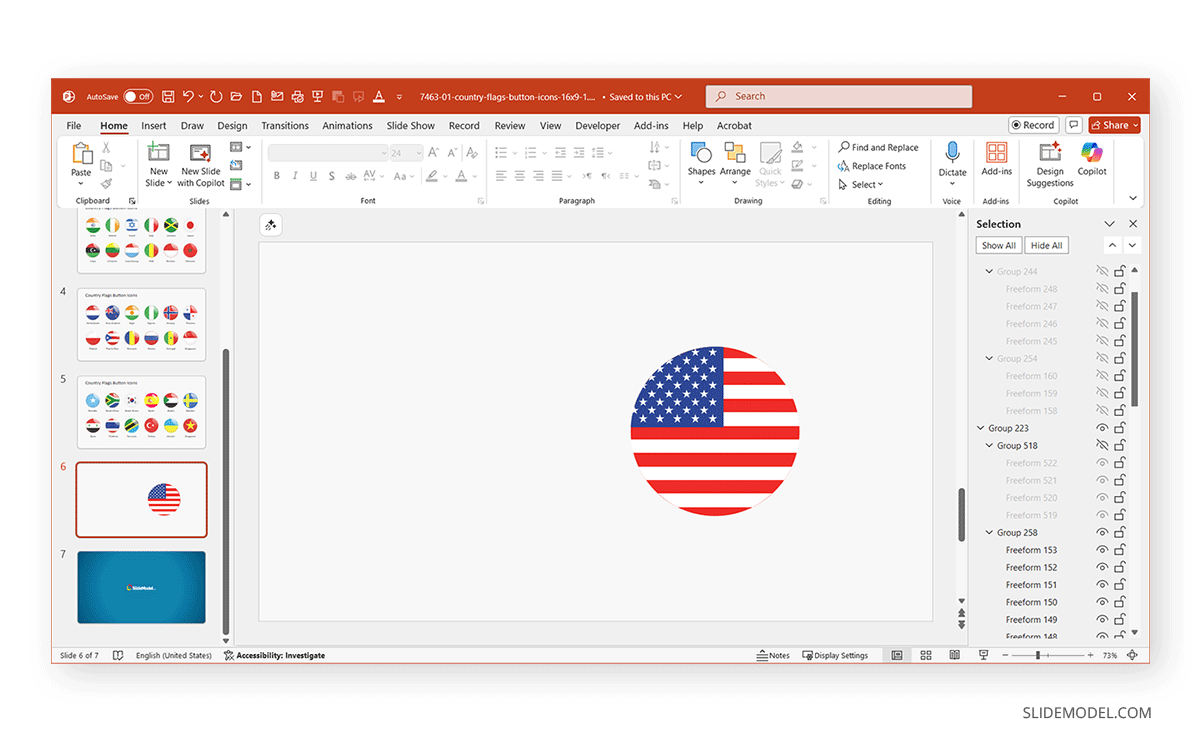
- Clean up Layers: Open the Selection Pane (Home -> Arrange -> Selection Pane) to hide any elements you don’t want exported.
- Batch Export: Duplicate slides with individual graphics and export them simultaneously for faster processing.
- Use SlideMaster: Design logos or icons in SlideMaster, then export the PPT to PNG with transparency and consistent branding.
- High-quality Diagrams: Combine PowerPoint exports with SlideModel’s PowerPoint templates for polished, editable assets for making diagrams.
Consistent branding: Create a folder of transparent PNGs for your organization, logos, icons, and arrows that can be reused across projects.
How to Export PPT Graphic as Transparent PNG
Method 1: Export Shapes or Icons as PNG with Transparency
If you only need to export a single shape, chart, or icon from your slide, follow this simple method. By default, this method exports the object with a transparent background, provided your slide background is set to ‘No Fill’.
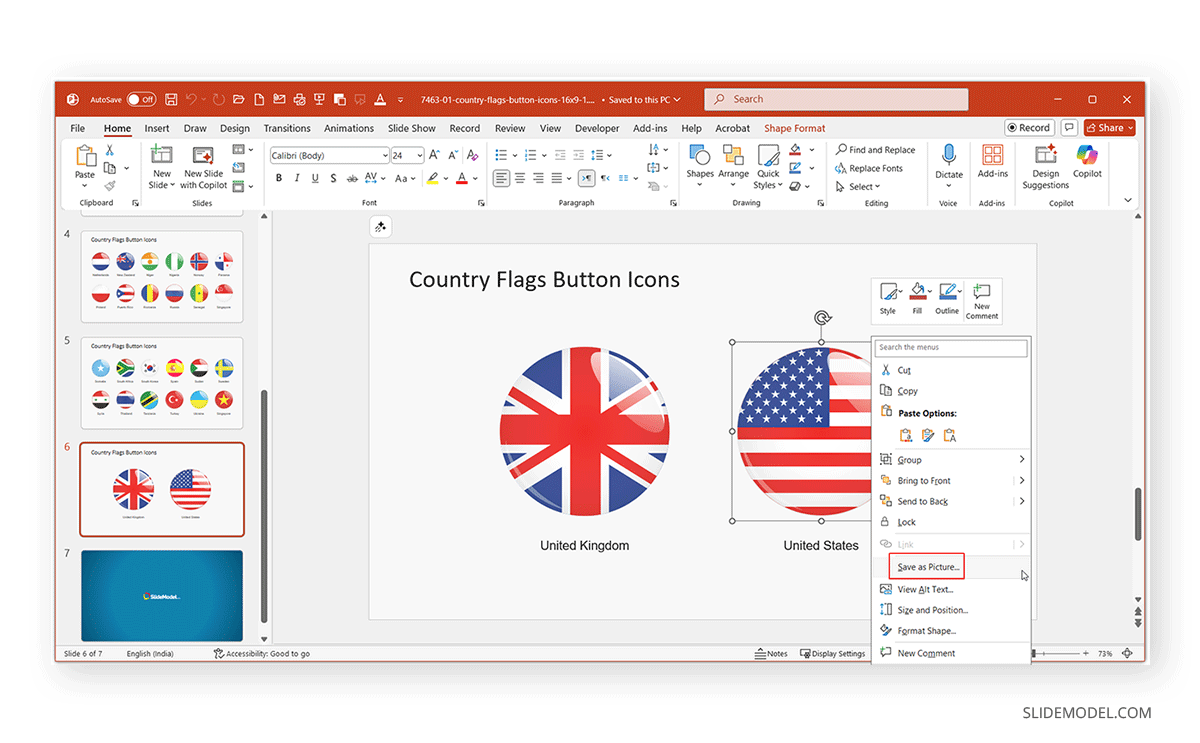
Step 1: Right-click on the object and select Save as Picture.
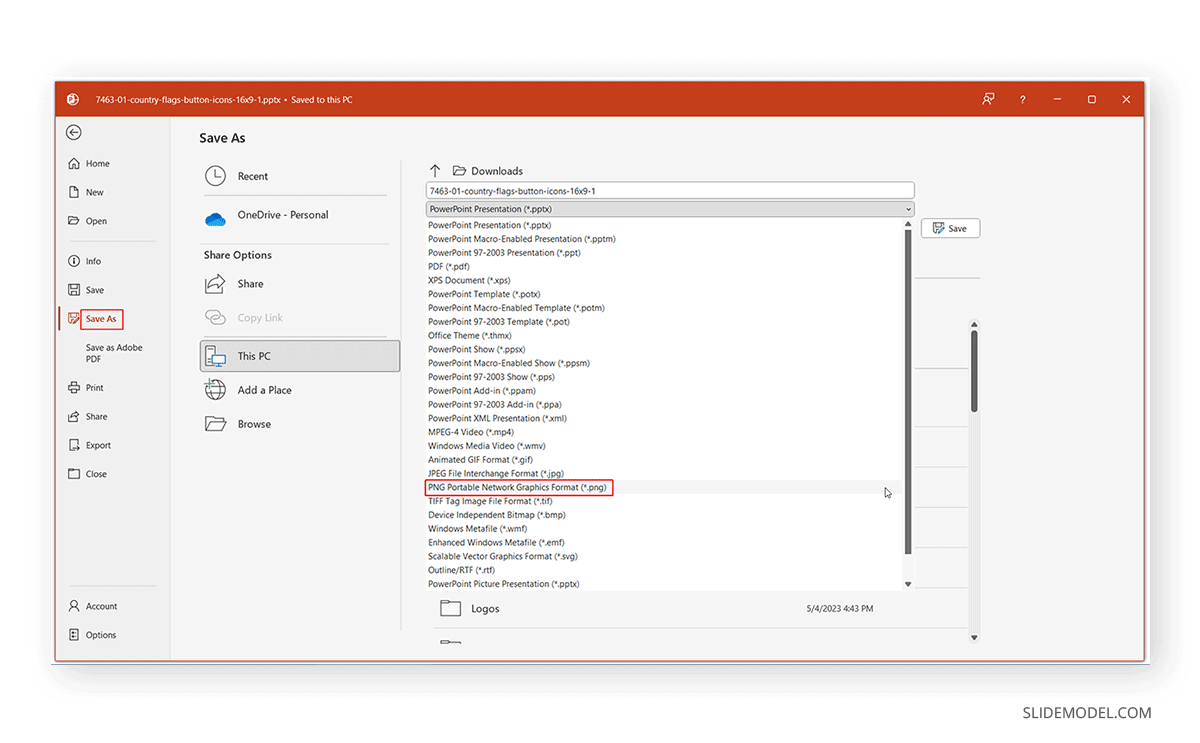
Step 2: In the dialog box that appears, select PNG (Portable Network Graphics Format).
Step 3: Select a location to save the file to export the PowerPoint shape to PNG.
Method 2: Export the Entire Slide as a Transparent PNG
Sometimes you’ll want to export the entire slide as a PNG. This is useful for infographic sections or diagrams spanning slide as the whole. The exported PNG using this method preserves transparency. This allows you to overlay the entire slide on another background without a white rectangle blocking the view.
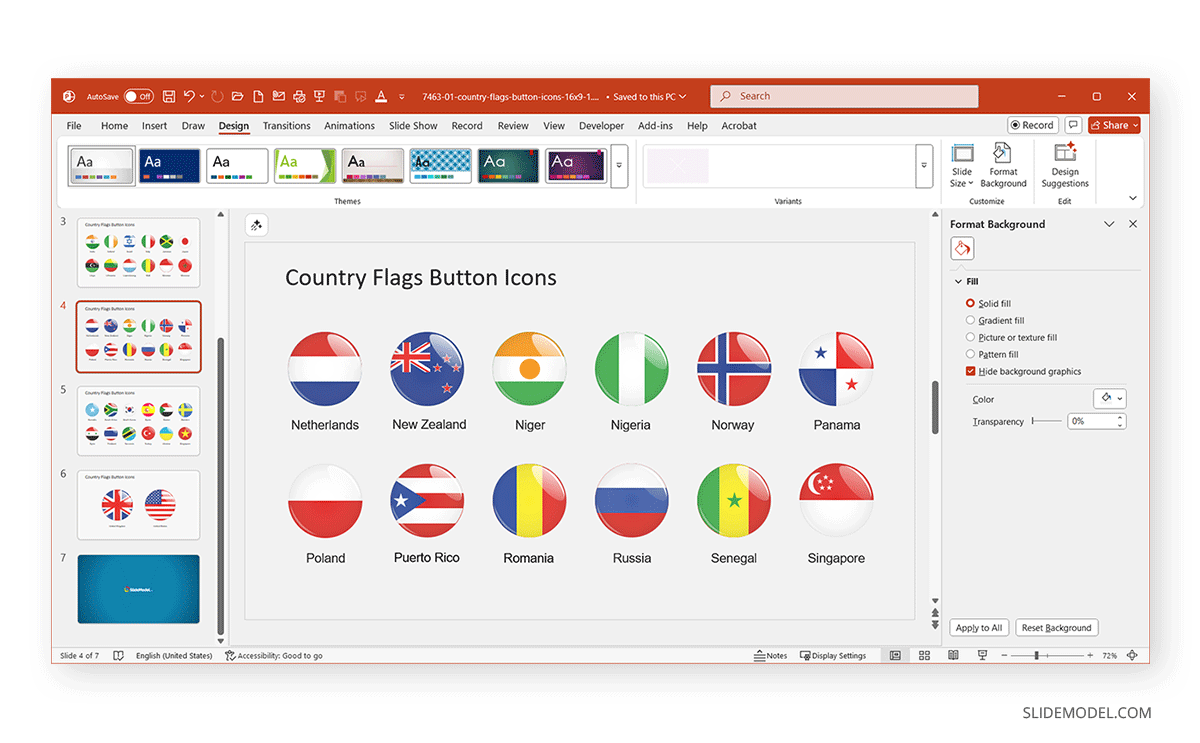
Step 1: Remove the slide background. Go to the Design tab -> Format Background and Select Solid Fill -> No Fill (or set it to 100% transparency).
Step 2: Go to File -> Save As, and select PNG (Portable Network Graphics) as the file type.
Step 3: Choose whether to export just the current slide or all slides.
Method 3: Use Selection Pane to Isolate Objects
If you have multiple graphics on a slide but only want to export one, this technique ensures the PNG export contains only the object of interest. Using this method, you can also avoid deleting other content.
Step 1: Go to Home -> Arrange -> Selection Pane.
Step 2: Hide all other objects except the one you want to export.
Step 3: Use File -> Save As -> PNG to export the current slide.
Method 4: Export PPT Graphics with Higher Resolution
By default, PowerPoint exports PNGs at 96 Dots Per Inch (DPI), which may look blurry if scaled. You can improve this by exporting it at a higher resolution.
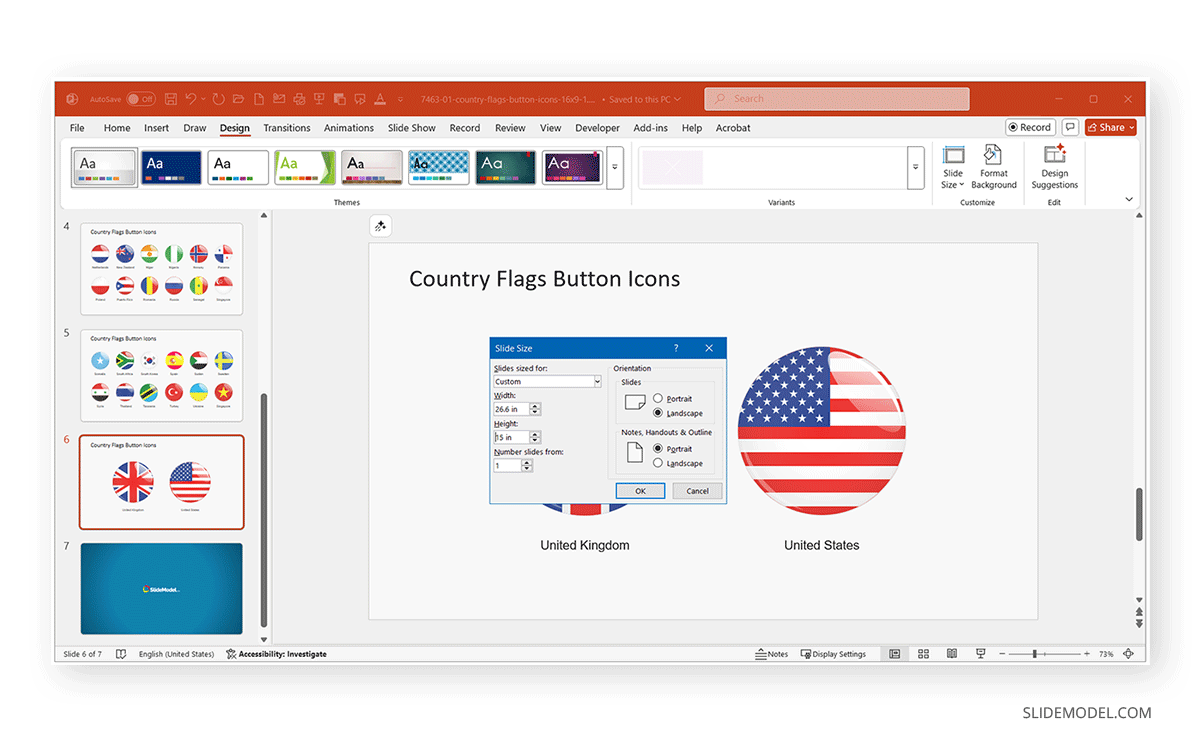
- Windows: Go to Design -> Slide Size -> Custom Slide Size, then increase the size to improve resolution (e.g., 300 DPI for print).
Example of High Resolution Slide Sizes:
- Default slide (13.33 × 7.5 in) = 1280 × 720 px.
- Double size (26.67 × 15 in) = 2560 × 1440 px.
- Quadruple size (53.33 × 30 in) = 5120 × 2880 px.
Once the file is exported to PNG at high resolution, it will have a high DPI. You can further edit or review the DPI using graphic design or image editing applications such as Photoshop or the Photos app in Windows.
- Mac: PowerPoint for Mac automatically exports at higher DPI, but you can refine slide size via Design -> Slide Size -> Custom Slide Size.
Note: For professional outputs (logos, posters, and print reports), always use at least 300 DPI.
Common Mistakes to Avoid with Exporting PowerPoint to PNG
While exporting seems straightforward, there are a few traps that professionals often run into:
- Accidentally keeping the background: Always double-check your slide’s background is set to ‘No Fill’.
- Low resolution: If your PNG looks blurry, increase the export DPI.
- Forgetting to group: If elements aren’t grouped, parts of your graphic may shift or get misaligned after export.
- Wrong color mode: Sometimes exported PNGs appear darker; test them on different devices to ensure brand consistency.
- Cropping issues: PowerPoint sometimes adds extra padding around objects. You can fix this by tightly cropping in the export process.
Alternative Methods to Create a Transparent PNG from a PowerPoint
Sometimes the built-in PowerPoint options aren’t enough, especially if you need advanced transparency or editing. Here are alternatives for converting PowerPoint graphics to PNG.
1. Microsoft 365 Enhanced Export
The latest versions of Microsoft 365 allow exporting SVGs (Scalable Vector Graphics). You can export your PowerPoint shape as SVG, then convert to PNG with transparency using tools like Photoshop or Inkscape.
2. Image Editing Software
If your export accidentally includes a background, you can open it in an image editing software such as Photoshop, Corel PhotoPaint, or another application and use the ‘Remove Background’ feature to restore transparency.
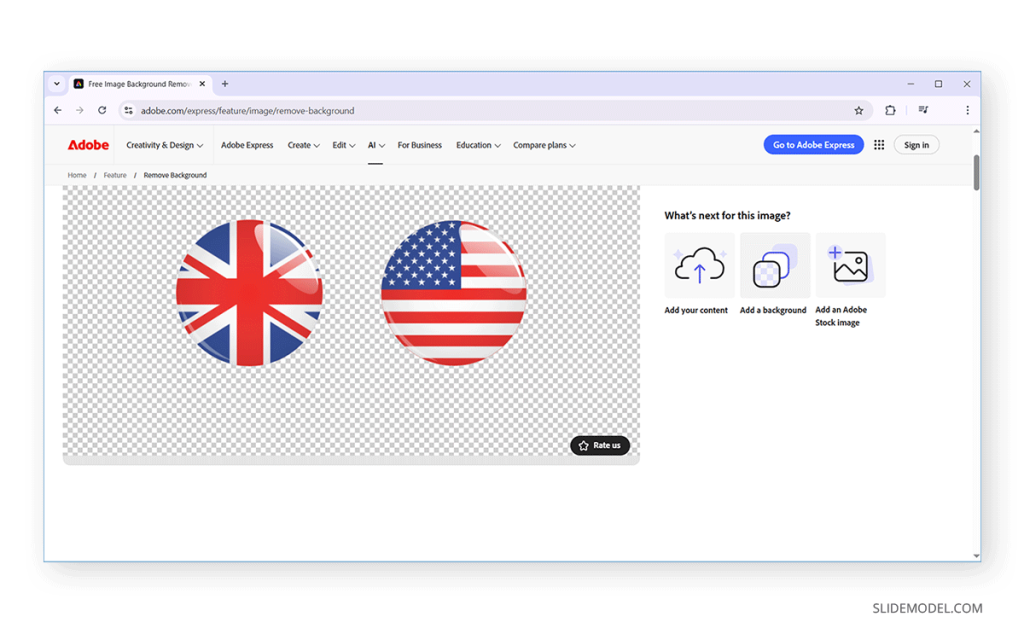
3. Online Tools
Upload your PowerPoint-exported image to Canva, Adobe Express, or another online editor, remove the background, and download as PNG. This is especially useful for quick social media graphics or to export PowerPoint icons with transparency.
Final Words
When exporting a logo for branding, an icon for a web app, a graphic for social media, or a diagram for a report, create a clean PNG version to reuse as needed. Exporting PowerPoint graphics as transparent PNGs is more than just a neat trick; it’s a way to maximize the value of work you’ve already done. Instead of rebuilding designs in expensive software, you can create professional, reusable assets right from your PowerPoint slides by using it as a lightweight design tool.