One often overlooked feature of PowerPoint is the ability to apply photo filters. Using PowerPoint photo filters, users can adjust images for professional and creative effects, making their slides more engaging and visually appealing. In this tutorial, we will guide you through editing photos in PowerPoint using built-in filters such as Artistic Effects and Color filters, with guidance on recoloring and tonal changes. These adjustments can help maintain a professional look while enhancing the visual impact of a presentation.
Why Use PowerPoint Photo Filters?
Before discussing the various PowerPoint photography filters, let’s look at their key benefits. Applying filters in PowerPoint can enable you to maintain consistency, emphasize key points, improve visual clarity, create professional-looking designs, and aid in storytelling. PowerPoint Photo filters can allow presenters to to:
- Maintain a consistent color scheme throughout your slides, ensuring a polished and professional look.
- Emphasize key points without relying on external graphic design software, saving time and effort.
- Improve visual clarity and contrast in corporate presentations, making data and content more accessible to the audience.
- Create professional designs without the need for third-party editing tools, streamlining the workflow for business professionals.
- Enhance storytelling by setting the right mood and tone through subtle recoloring or dramatic black-and-white effects.
- Keep presentations visually engaging without overwhelming the audience with unnecessary distractions.
- Ensure branding consistency by aligning image adjustments with company colors and presentation themes.
- Highlight important elements in images, highlighting critical details while maintaining a cohesive presentation structure.
Step-by-Step Guide to Applying Filters in PowerPoint
Step 1: Insert an Image in PowerPoint
To begin editing photos in PowerPoint, open PowerPoint and go to the slide where you want to add an image. Click Insert -> Pictures and select your image from This Device, Stock Images, or Online Pictures.
For this post, we added an image to the title slide of the Philanthropy PowerPoint Template by replacing the sample image.
Step 2: Use Artistic Effects for a Professional Look
PowerPoint’s Artistic Effects can enhance your images without making them look exaggerated. To apply an effect, select the image, go to the Picture Format tab, click the Artistic Effects menu, and choose from subtle effects like Pencil Sketch, Line Drawing, Blur, Film Grain, etc.
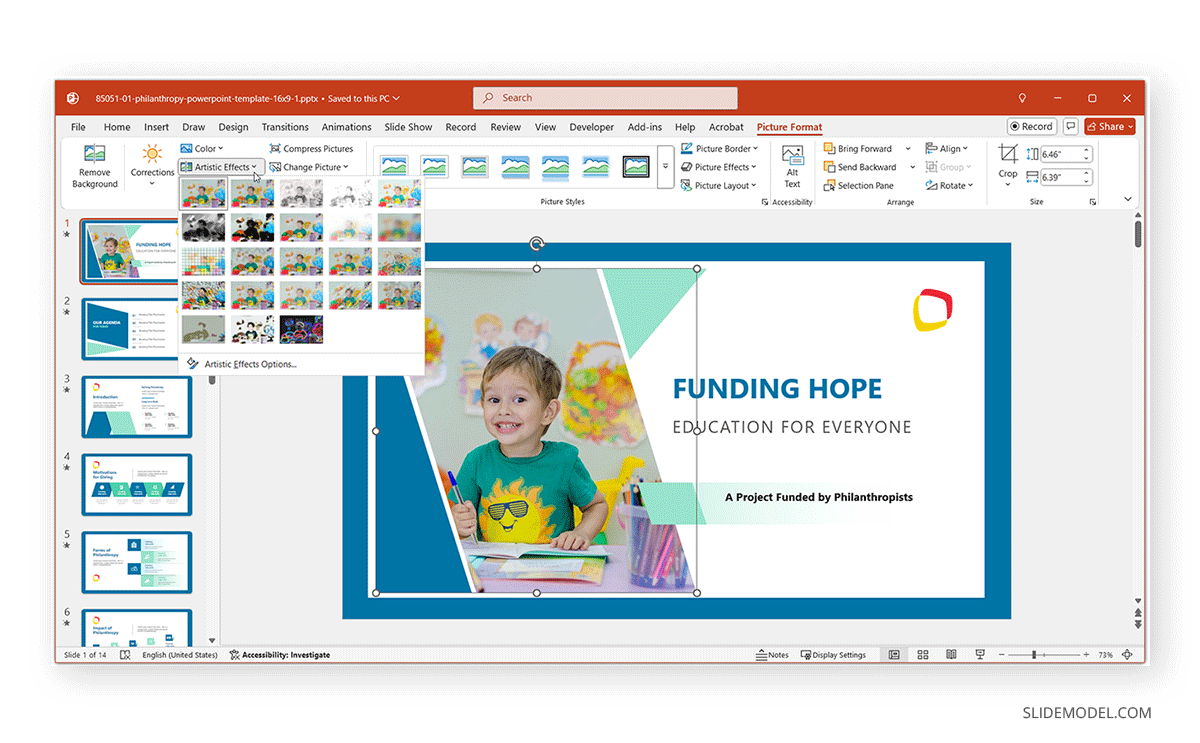
In the example below, we added the Cross Etching effect to the image in the title slide. Compared to the original image, this gave the photo a soft look, allowing it to blend with the slide design subtly.
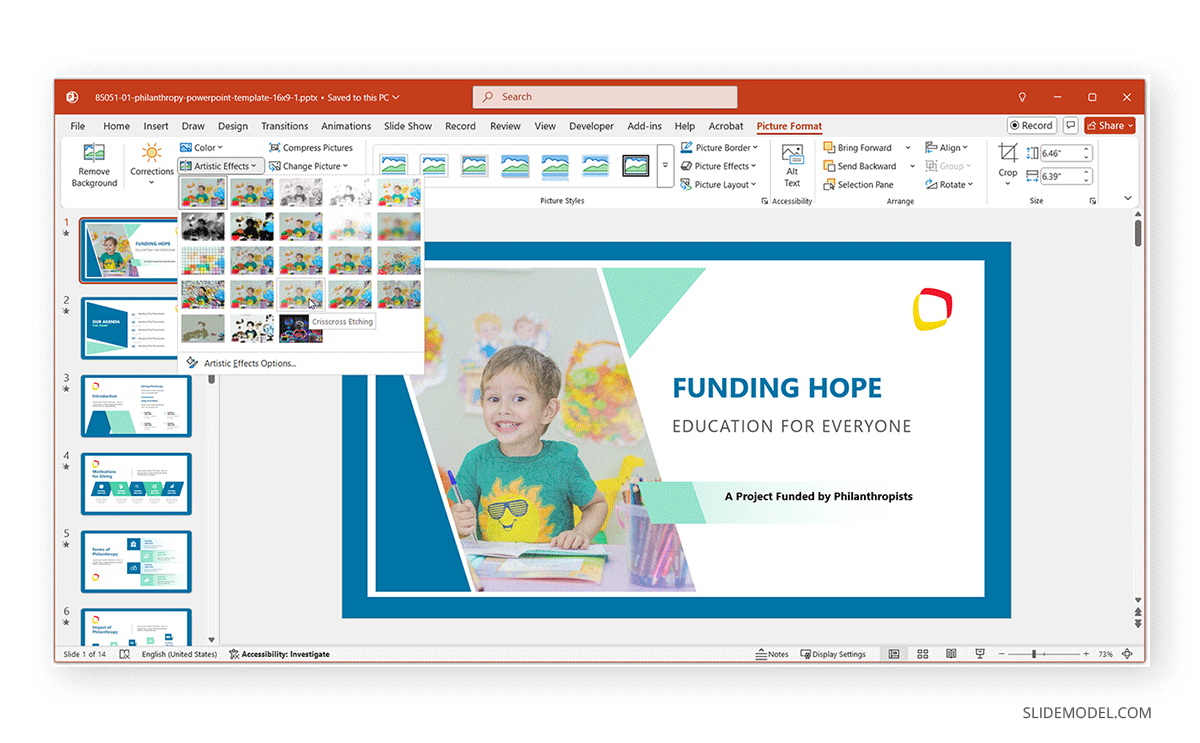
Similarly, you can add other effects, like the Film Grain effect shown below, to make the image more attention-grabbing by giving it a grainy look.

Step 3: Refine the Image by Adjusting Picture Settings
Once an effect has been added to an image, you can refine it further by going to Format Picture via the right-click context menu. This will open a sidebar with various handy options to refine the image. The various sections in the sidebar will enable you to make subtle to major adjustments.
Picture Tab
The Picture tab in the sidebar provides options for Picture Corrections, Picture Color, Picture Transparency, and Crop options.
- Picture Corrections: Once you apply an Artistic Effect, you can check the various presets to give your image a soft or sharp look and adjust brightness and contrast via this menu.
- Picture Color: The Picture Color menu provides picture saturation, color tone, and recoloring options.
- Picture Transparency: As the name suggests, this menu allows you to adjust the transparency of your image. For example, you can reduce transparency to make the image blend with the background design.
- Crop: This menu enables picture and position crop options, which align the image according to how you want to crop it.
Size and Position Tab
The Size and Properties tab contains options titled Size, Position, and Text Box for adjustment of these features.
- Size: This menu provides comprehensive options to adjust the height, width, rotation, and scale of the image according to need.
- Position: The horizontal or vertical position adjustment for an image can be managed using this menu.
- Text Box: This menu allows you to adjust the margins, alignment, and direction of text boxes around the image.
Effects Tab
The Effects tab in Format Options provides various standard effects that PowerPoint provides for object enhancement. These can be applied to a photo to make it more eye-catching.
- Shadow: This menu adds a shadow effect to the image. You can pick a color and preset for the shadow and enhance the shadow effect using transparency, size, blur effect, angle, and by defining its distance.
- Reflection: You can add a reflection to your photo and refine it using the transparency, size, blur, and distance sliders by picking a preset.
- Glow: To add a glow effect to your photo, pick a preset and adjust the color, size, and transparency from this menu.
- Soft Edges: This menu offers presets for adding a soft edge to your photo and a slider for adjusting the size of the added preset.
- 3-D Format: The 3-D Format menu contains presets and options to add Bevel, Depth, Contour, Material, and Lighting effects to the image.
- 3D Rotation: Using a preset and the X, Y, and Z menus, you can rotate your image in 3D and define the distance from the ground for the selected preset.
- Artistic Effects: To adjust the transparency and effect size for your added filter, use this menu by moving the Transparency and Size sliders.

Applying Color Filters to Photos in PowerPoint
Other than Artistic Effects, Color filters with Saturation, Tone, and Recolor options can transform your photo’s look. While every color filter might not be best suited for professional presentations, some very handy filters can enhance your photos or make them more suited for a certain theme.
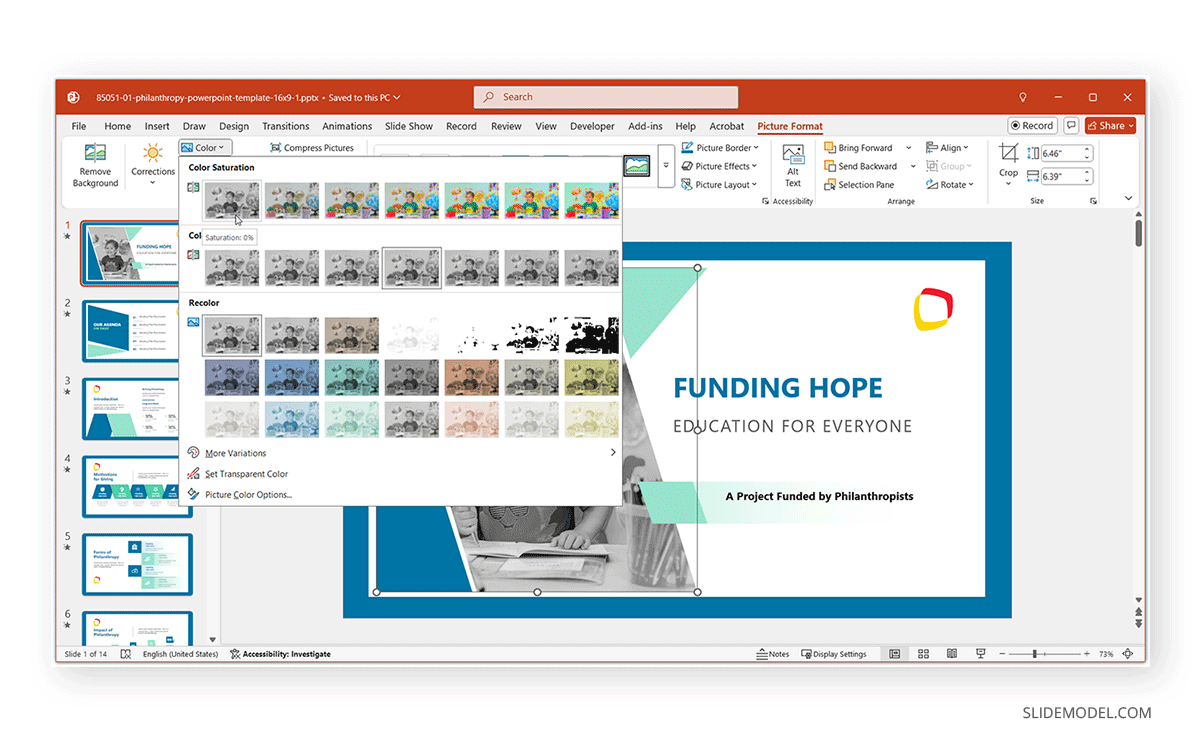
In the example below, we selected 0% color saturation for the image to give it a grayscale look. The Color menu in the Picture Format tab also provides numerous other useful options to adjust your photo color, like creating a custom color filter.
- Color Variations: In the Picture Format tab, you can make additional adjustments by going to Color -> More Variations to select a custom color for the color effect.
- Set Transparent Color: The Color menu also contains options for making a color transparent in the picture via Color -> Set Transparent Color.
- Picture Color Options: To set the tone, crop settings, picture correction, and picture color presets, go to Color -> Picture Color Options.

Best Practices for Using PowerPoint Filters in Corporate PowerPoint Presentations
While photo filters in PowerPoint can enhance the look of presentation slides, some considerations can help you avoid using them incorrectly. Below are some recommendations for using photo filters in corporate PowerPoint presentations.
- Keep it subtle: While using a photo filter for an image or two might be a good idea, overuse of filters can make slides look unprofessional.
- Match your brand: Look for colors and effects that align with your corporate brand identity to avoid deviating from your corporate colors.
- Ensure readability: Avoid using filters that reduce contrast between text and background images.
- Use consistent styles: For visual uniformity, apply the same or similar filters across multiple slides. You can also experiment with different filter types to see which best matches your presentation topic.
- Avoid excessive artistic effects: Stick to clean, simple adjustments that enhance rather than distract. Many photo filters can give images an unprofessional look and might appear too fancy or funny. Look for filters that can make your image look professional.
- Use filters to support the message: Ensure that any visual adjustments help reinforce key points rather than overpowering the content.
- Test your slides on different screens: Ensure the filters you apply appear clear and professional on different display sizes and resolutions.
- Use filters to highlight data: Adjust image brightness and contrast to make charts, graphs, and infographics stand out without overpowering other slide elements.
- Combine filters with other PowerPoint tools: Use layering, transparency, and shapes to enhance the effect without cluttering the slide.
- Keep accessibility in mind: Filtered images should not reduce visibility for viewers with color blindness or other visual impairments.
Final Words
Presenters can use PowerPoint photography filters to enhance their slides professionally without needing external editing tools. Whether it’s a simple recolor, a subtle black-and-white effect, or an artistic touch, these features make it easy to create visually appealing slides within PowerPoint.
Mastering these tools will help you easily edit PowerPoint photos and elevate your corporate presentations to a more professional level. However, it is worth considering how to best utilize color variations and filters to avoid overusing effects and comply with your brand guidelines. To make the image stand out, it is best to use subtle color filters and adjust their appearance according to your presentation theme.