Introduction
At SlideModel.com we are commited to give the best support for our users in every step of the presentation experience. We receive questions of different nature and we provide targeted information to help our users succeed in their presentation goals. In this post we will explain how to configure the proofing language (the language used by PowerPoint grammar engine to check spelling across the text boxes) of PowerPoint 2013 (Windows Version) and PowerPoint 2011 (Mac Version). We decided to explain both version due to the slightly difference in the configuration steps.
Configuring The Check Spelling Language in PowerPoint 2013
This configuration will allow the user to check spelling and grammar (also for autocorrect) with different languages across the same presentation. Microsoft Office includes proofing tools, such as dictionaries or grammar rules, for different languages.
Step 1
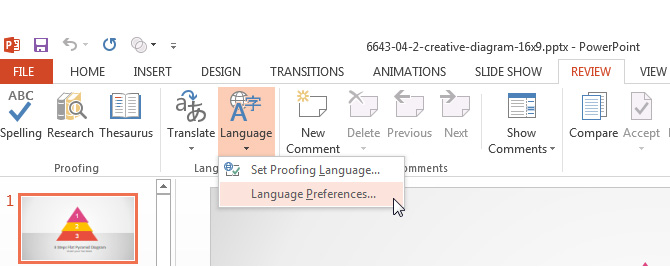
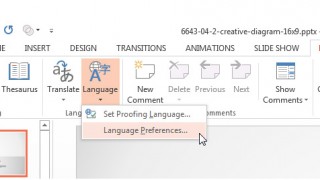
Navigate to the “Review” Ribbon on top of the menu bar and navigate to the Language Tab. In the language Tab select the “Language” sub-menu. Two Options will popup, “Set Proofing Language” which is the option that will configure the check spelling language for the selected text boxes or slides, and “Language Preferences” that will allow more complex language configuration as priorities, dictionaries, etc. Lets move into the “Set Proofing Language” Option clicking over:
Step 2
The next step is selecting the language you want to use for the check spelling functionality. The menu shows the “Default” language in the top, and the list of available language bellow.
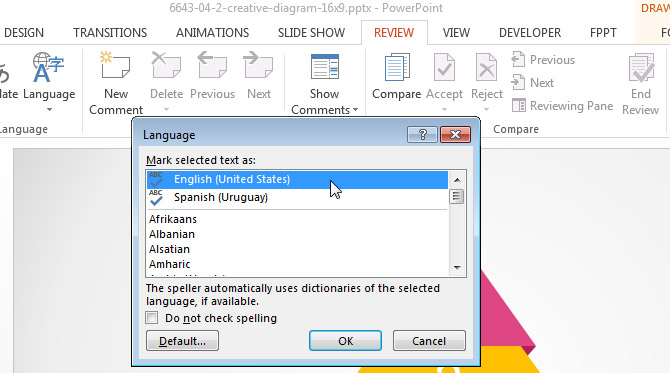
If you execute Step 2 only selecting some “Text Boxes” in your presentation. The Proofing language will only be set to those TextBoxes. If you don’t select any, the proofing language will be set for the slides selected. If no selection is done at all, the proofing language will apply to the whole presentation. This is an interesting feature to understand, as it allows the user to select specific proofing language depending the Slide and Slide content.
In this step you have the option to check the “Do not check spelling” feature. This will not trigger the spell checker after you select the language.
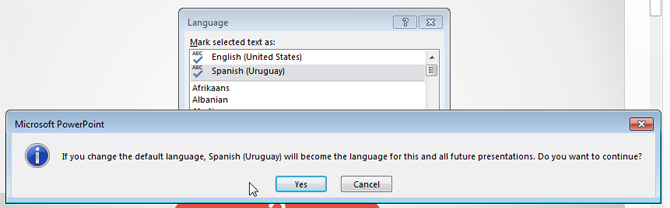
Finally, you have the option of selecting a default language. PowerPoint will trigger the following warning, as this setting will alter not only the behaviour of your presentation but also the proceeding ones:
Step 3
The next step describes what happens when selecting the option “Language Preference” during Step 1. PowerPoint opens a complete menu that allows the user to customize PowerPoint use of languages and dictionaries.
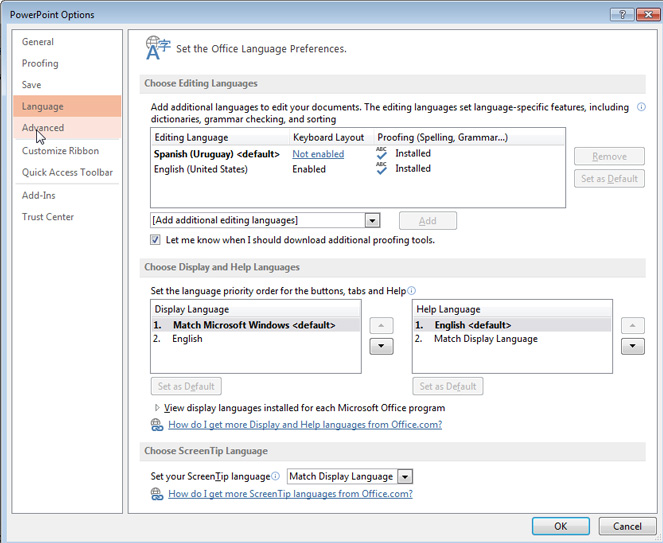
The “Choose Display and Help Languages” and “Choose ScreenTip Languages” are out of scope of this Tutorial. The “Choose Editing Language” section of the Menu is the one in scope, and allows the user to add additional proofing languages. This menu has the same effect as the one described in Step 2 with the difference that also allows configuration of keyboard layout and default language, all in the same window. In case you arrive to Step 2 and your proofing language is not installed in your office version, you will need to open Step 3 menu and install your prefered language. The user is able to configure language priorities through the preference order in the list.
Step 4
Once you have selected your proofing language, you can trigger the spell checking tool through the Review Ribbon > Proofing Tab > Spelling Button.

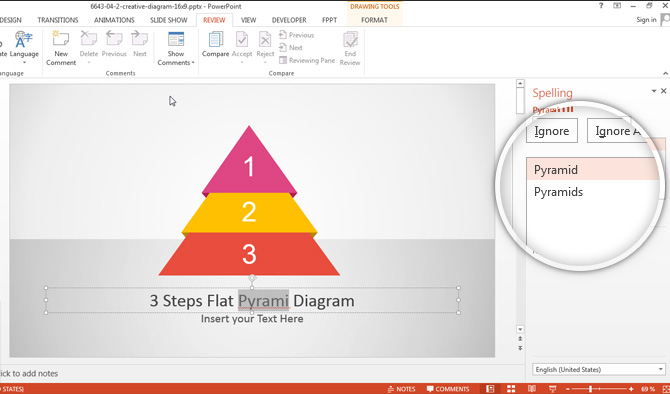
Step 5
Once the Spell Checker is triggered, the engine will review the Presentation Text Boxes, looking for grammar or spelling mistakes in the configured language. Once it finds a spelling mistake, it will open a right sidebar with the correction suggestions and the action buttons for the user to select the next steps.
The user can repeat this steps for all the language configurations needed to proof.
Configuring The Check Spelling Language in PowerPoint 2011 (Mac)
In the Apple Mac PowerPoint (version 2011) the language configuration is slightly different, mainly because the dictionary setting of Mac OS is not so tightly integrated as the one of Windows and Office 2013.
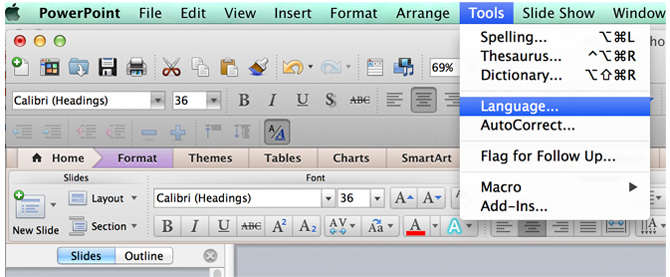
Step 1
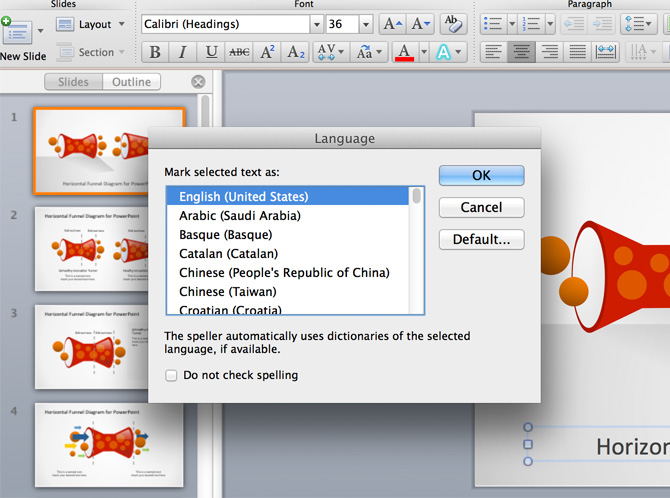
To configure the proofing language in PowerPoint 2011 (Mac) you need to navigate to the “Tool” menu, in the top menu bar of your Mac OS PowerPoint and select the “Language” option. A Popup will appear with the list of available proofing languages installed. As in the Windows version, this proofing language will apply for the selections you made previously (Text boxes, Slides or whole presentation).
Once the language is selected the user can trigger the Spell Check Through the tools Menu. The actions are almost the same in both PowerPoint versions, but not having the option in the Review Ribbon has proven to be confusing for some users, and that why we prefer to make the clarification.
Conclusion
Configuring the Proofing Language in PowerPoint 2013 r 2011 (Mac) is a simple process of 3 steps. The tools is so powerful that allows several proofing languages in the same presentation. Make sure to have the required proofing dictionaries installed.


Good post. I absolutely love this site. Thanks!